@vrn-deco/cli is an automated command line tool whose core feature is to help you quickly build an engineered project via boilerplate. It supports multiple creation modes, you can get boilerplate from the sources we provide, or you can specify a third party or your own source.
⚠️ Please make sure your Node.js version >=14.13.1
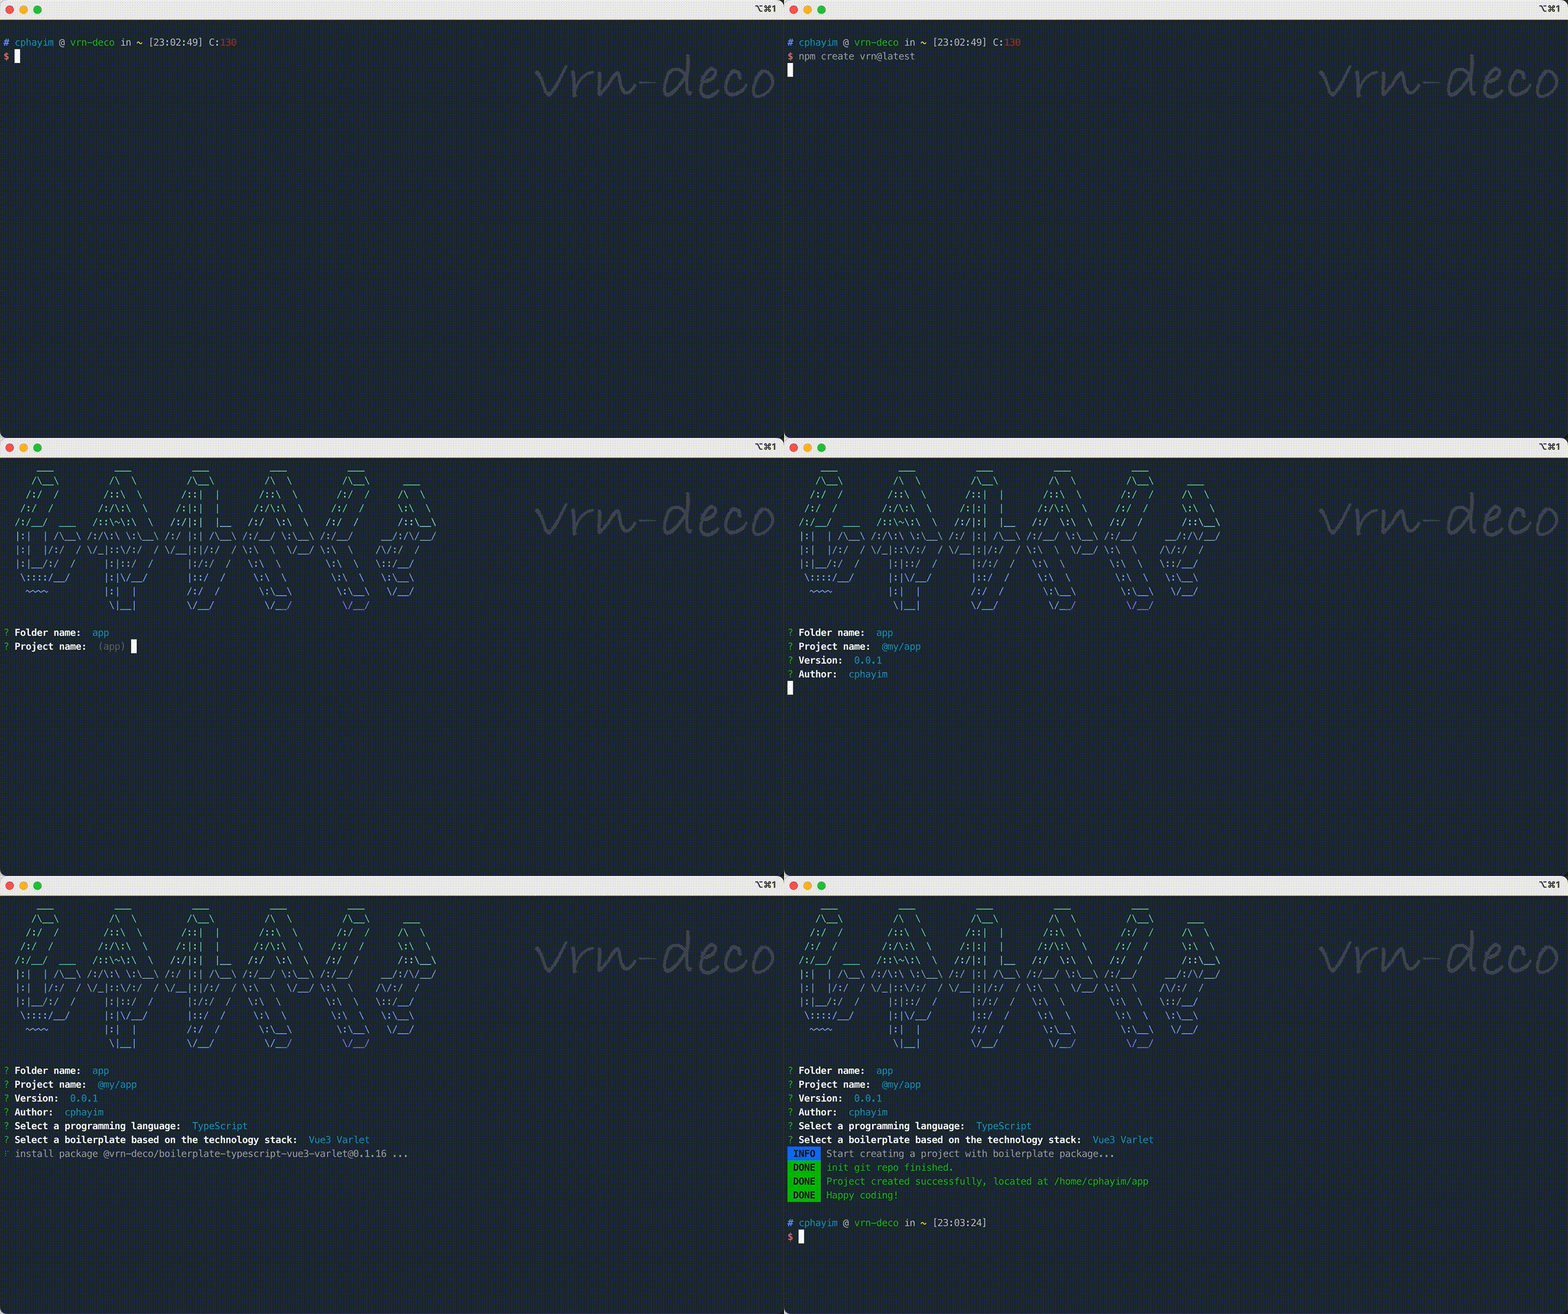
If you are using it for the first time, we recommend npm create to quickly create it without installing the CLI globally
# npm
npm create vrn@latest
# yarn
yarn create vrn
# pnpm
pnpm create vrn
Then follow the prompts, you can create a project with the preset boilerplate-package!
If you need to use it frequently, or plan to learn the follow-up advanced guide, then please install @vrn-deco/cli globally
# npm
npm install -g @vrn-deco/cli
# yarn
yarn add --global @vrn-deco/cli
# pnpm
pnpm install -g @vrn-deco/cli
Let's create another project, this time by executing vrn create command
vrn create my-appFollow the prompts to complete the project creation
Since the dependencies of services other than the ontology are dynamically managed, checks and incremental installations are performed during use
Here is the advanced content, you will know the following:
- Global configuration
vrn configcommand- Turn on or off update check
- Toggle NPM registry
- Toggle package manager
- Boilerplate service
vrn boicommand- Package Mode creation
- Interactive and non-interactive
- Custom
manifest-package
- HTTP Mode creation
- Interactive and non-interactive
- Custom
api-url
- Git Mode creation
post-gitPost-processing
- List of available packages
- Package Mode creation
config is the command used to manage the global configuration of the CLI, which is entered into interactive mode with the following command:
# Interactively view configuration items or modify them
vrn config
The CLI will show all the configurations that can be changed and their current values in a list, and you can modify it by selecting one of the configurations
checkUpdateEnabled: boolean (default: true)
Execute update check before command scheduling. If there is a new version, a tip log will be output in the terminal, which will not affect subsequent program execution. The default check period is 1 day
You can set checkUpdateEnabled: false to disable update check
npmRegistry: string (default: 'https://registry.npmmirror.com')
The CLI used npm registry, from which version update checks and subsequent incremental dependency installations are fetched
Provide two preset values:
NPM:https://registry.npmjs.orgTAOBAO:https://registry.npmmirror.com
Since it is difficult for Chinese users to access NPM registry, the default is TAOBAO registry, you can change it to NPM registry or custom registry (ensure accessibility by yourself)
It is important to note that this item only affects the npm registry used by the CLI and does not modify the global config of npm
packageManager: 'npm' | 'yarn' | 'pnpm' (default: 'npm')
The CLI used package manager, subsequent incremental dependencies will be operated using the specified package manager
Support three mainstream package managers: npm, yarn, pnpm, you can specify it as your usual package manager (except npm, you need to install it globally)
Due to the different dependency directory structures and generated lock files installed by different package managers, do not switch this configuration frequently
This command provides boilerplate related services whose implementation follows the @vrn-deco/boilerplate-protocol specification. Since boilrplate is really long, we define a shorter alias boi for it, see the help with the -h option:
vrn boi -h
# Equivalent to
vrn boilerplate -h
The core feature is the boi create subcommand, which can also be viewed through the -h option:
vrn boi create -hMaybe you remembered the example from the "Quick Start". yes, create is a shortened alias for boi create
vrn create my-app
# Equivalent to
vrn boi create my-app
The above command will perform an interactive build using package mode! What is package mode? Get to know it now!
According to the @vrn-deco/boilerplate-protocol specification, we provide the creation of the package mode, additionally two modes : http and git
Modes mean how boilerplate is provided. Here are the characteristics of the three modes:
package: Provide boilerplate through npm package, which we callboi-package- Publish all available
boi-packagevia amanifest-package manifest-packageandboi-packageare dynamic dependencies and are incrementally installedboilerplateitself is stored inboi-packageboi-packageis responsible for describing and installing its ownboilerplate- Support custom script hooks, more flexible and powerful
- Publish all available
http:Pack and compress theboilerplate(usually.tgz), we call itpacked-boi, and distribute it through the Server interface or CDN- Describe all available
packed-boivia an interface ormanifest.jsonfile - Unpack installation by CLI, only support specific compression formats
- Fastest, but doesn't support extra operations on the inside of
boilerplate
- Describe all available
git:git clonean existing repository- Supports arbitrary origin and post-processing
package mode supports interactive and non-interactive creation
The CLI will ask for various required parameters and show you all available boi-package, choose one to complete the creation
# By default, you only need to pass in one parameter <folder_name>
vrn boi create my-app

# If you are in a Monorepo, you can pass in the second parameter [base_directory]
vrn boi create my-app ./packages
By default all optional boi-package are provided through @vrn-deco/boilerplate-manifest package, if you want to use your own manifest-package to provide boi-package, you can use - -manifest-package option specified
# Get `boi-package` available via @your-scope/your-manifest-package
vrn boi create my-app --manifest-package @your-scope/your-manifest-packageMaybe you want to create via script, or make the "create" part of an automated task, then you should use a non-interactive create, it will directly complete the creation or fail
The command can be called in a shell script or Node.js child_process
vrn boi create my-app --yes \
   --name=my-app --version=1.0.0 --author=cphayim \
   --target @vrn-deco/boilerplate-javascript-vue # For example only, the package may not exist
These options are all required:
--yes:Non-interactive--name: Project name--version:Version--author:Author--target, --target-boilerplate:Specifyboi-package- Must be full package name
- Must conform to the definition of
boi-packagein @vrn-deco/boilerplate-protocol - Does not verify that
targetis inmanifest
Node.js call example:
await execaCommand(
  `
  vrn create ${PROJECT_NAME} --yes \
    --name=${PROJECT_NAME} --version=${PROJECT_VERSION} \
    --author=${execaCommandSync('git config --global user.name').stdout}
    --target @vrn-deco/boilerplate-typescript-vue3-varlet-h5plus
`,
  {
    stdio: 'inherit',
    cwd: process.cwd(),
  },
)The
httpmode exists to complement specific scenarios, we still recommend that you use thepackagemode.
http mode also support interactive and non-interactive creation
# You need to pass `--mode=http` to enable it, as 'package' mode is default
vrn boi create my-app --mode=http

# If you are in a Monorepo, you can pass in the second parameter [base_directory]
vrn boi create my-app ./packages --mode=http
By default all optional packed-boi are provided through https://vrndeco.cn/boilerplate, if you want to use your own interface to provide packed-boi, you can use --api-url ` option specifies the BaseURL of the request
vrn boi create my-app --mode=http --api-url=https://yoursite.com/boilerplatevrn boi create my-app --mode=http --yes \
--name=my-app --version=1.0.0 --author=cphayim \
--target boilerplate-typescript-vue3-varlet.tgz
# There is no `--api-url` passed here, take the default value,
# it will download https://vrndeco.cn/boilerplate/boilerplate-typescript-vue3-varlet.tgz
vrn boi create my-app --mode=http --yes \
--name=my-app --version=1.0.0 --author=cphayim \
--target https://yoursite.com/boilerplate/boilerplate-typescript-vue3-varlet.tgz
# Equivalent to
vrn boi create myapp --mode=http --yes \
--name=myapp --version=1.0.0 --author=cphayim \
--api-url= https://yoursite.com/boilerplate \
--target boilerplate-typescript-vue3-varlet.tgzExcept for the value of the target option, it is the same as the package mode:
--target, --target-boilerplate: Specify thepacked-boifilename- Can be a filename or a full URL path
- Does not verify that
targetis in themanifestreturned by the interface
Do not use git mode in Monorepo!
git mode is created by clone a repository to the local
# You need to pass `--mode=git` to enable it, as 'package' mode is default
# `--target` is repository url, support `HTTPS` and `SSH`
vrn boi create my-app --mode=git --target=https://github.com/vrn-deco/xxx.git
vrn boi create my-app --mode=git [email protected]:vrn-deco/xxx.git
You can also use --post-git to tell the CLI what to do with the original commit after cloning
--post-git: (default:'retain')retain: Keep the original recordremove: Remove the local repositoryrebuild: Rebuild the local repository
# keep origin record
vrn boi create my-app --mode=git --post-git=retain [email protected]:vrn-deco/xxx.git
# rm -rf .git
vrn boi create my-app --mode=git --post-git=remove [email protected]:vrn-deco/xxx.git
# rm -rf .git && git init && git add . && git commit -m "chore: init repository"
vrn boi create my-app --mode=git --post-git=rebuild [email protected]:vrn-deco/xxx.gitUse the boi list command to list all available boi-package, alias boi ls:
vrn boi ls
vrn boi ls --json # output json
vrn boi ls --json --out-file ./boilerplate.json # output json and write file
vrn boi ls --yaml	# output yaml
vrn boi ls --yaml --out-file ./boilerplate.yaml # output yaml and write file

# List all `boi-package` in @your-scope/your-manifest-package
vrn boi ls --manifest-package @your-scope/your-manifest-package
Note that the
listcommand can only list the packages available inpackagemode, it does not supporthttpandgitmodes
You or your team may be using the v0.x version and have deployed the corresponding boilerplate interface
If you want to migrate to v1.x or keep the v0.x version, see Migration Guide


