| title | description |
|---|---|
Quickstart |
Create your first React Circuit in less than 5 minutes |
Install tscircuit using npm
npm install -g tscircuit tsxYou will now have the tsci command available. Try running tsci --help to see
some of what's available! We've also installed the typescript runner tsx
{/*
During the onboarding process, we created a repository on your Github with
your docs content. You can find this repository on our
dashboard. To clone the repository
locally, follow these
instructions
in your terminal.
Previewing helps you make sure your changes look as intended. We built a
command line interface to render these changes locally. 1. Install the
Mintlify CLI to preview the
documentation changes locally with this command: npm i -g mintlify
2. Run the following command at the root of your documentation (where
mint.json is): mintlify dev
*/}
- Create a new directory for your circuit then navigate to it in your terminal
- Now run
tsci init, this will bootstrap the directory into a usable project
Your bootstrapped project will look like this:
├── README.md
├── examples
│   └── MyExample.tsx
├── index.ts
├── lib
│   └── MyCircuit.tsx
├── node_modules
├── package.json
└── tsconfig.json
The most important files are MyCircuit.tsx and MyExample.tsx.
In tscircuit, every file in the examples directory is accessible from your preview window and
will be shown on the registry. You can add variations of your circuit to
MyExample.tsx add other files in the examples directory and they will be
shown in the preview window.
In the lib directory, the MyCircuit.tsx file defines a boilerplate circuit.
You can rename and modify this file to test out different circuits.
export const MyCircuit = () => (
  <resistor
    resistance="10kohm"
    name="R1"
    footprint="0805"
  />
)
import { MyCircuit } from "lib/MyCircuit"
export const MyExample = () => (
<MyCircuit />
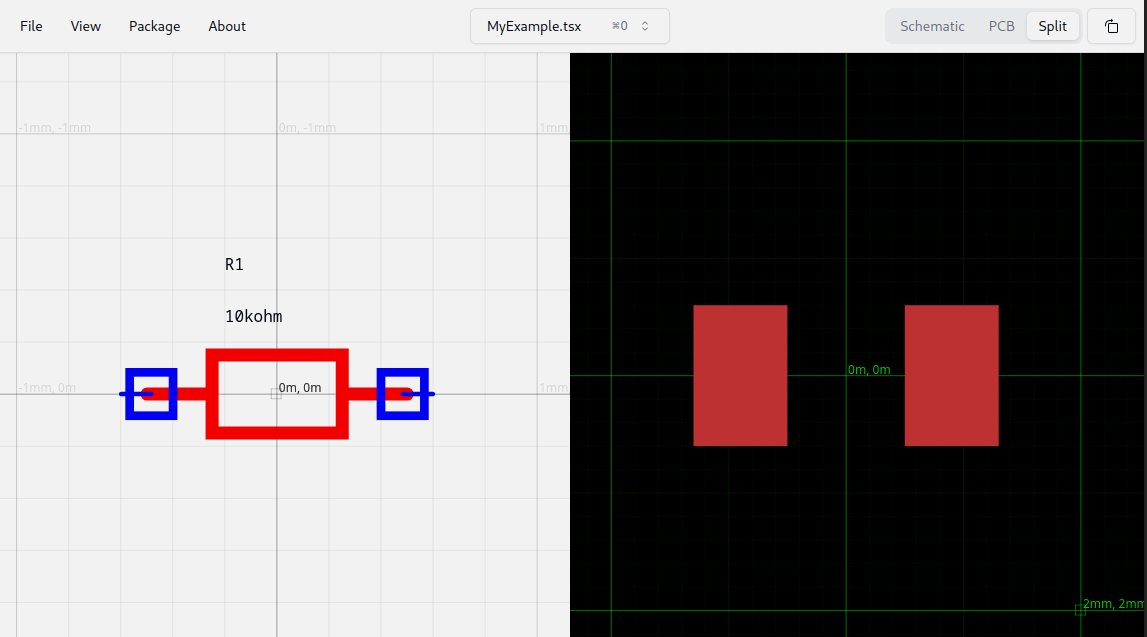
)To start the development server, run tsci dev in your terminal. This will open
a new browser window at localhost:3020 with a Schematic and PCB preview of a circuit in your
examples directory.
{/*
Our Github app automatically deploys your changes to your docs site, so you don't need to manage deployments yourself. You can find the link to install on your [dashboard](https://dashboard.mintlify.com). Once the bot has been successfully installed, there should be a check mark next to the commit hash of the repo. [Commit and push your changes to Git](https://docs.github.com/en/get-started/using-git/pushing-commits-to-a-remote-repository#about-git-push) for your changes to update in your docs site. If you push and don't see that the Github app successfully deployed your changes, you can also manually update your docs through our [dashboard](https://dashboard.mintlify.com).*/}
VS Code has Typescript and React support out
of the box, and the tsconfig.json file is set up to load types from tscircuit,
so there's nothing to configure!
Now that you know the basics, you can get started building circuits!
Learn to install packages, build and schematic and auto-route a PCB, and publish circuits.<Card title="Playground" icon="code" href="https://tscircuit.com/playground"
Use tscircuit in your browser
