Photo by Raphael Lovaski on Unsplash
Difficulty: Beginner | Easy | Normal | Challenging
This article has been developed using Xcode 12.4, and Swift 5.3.2
This article has a supporting video at the following link:
- You will be expected to be aware how to make a Single View Application
- Setting up Charles is covered here, but for more detail take a look at my Charles article
- I've imported
SDWebImageusing Pods, you may need to install CocoaPods withsudo gem install cocoapodsand then perform apod installfrom inside the downloaded directory from the repo, if you decide to download my version of this code (I didn't include the Pods in the upload).
Charles: A HTTP proxy for development
At work we might be expected to demo either internally or to a specific client. What if you don't yet have a backend to support your shiny new feature? Mocking your responses in this case isn't enough as you need to live demonstrate your project feature.
Now this has already been covered in this article, but I'm going to show how this might actually be used with project code given to you.
Create the local mapping
Charles will use a local mapping, and this can be any particular file on your disk. Now I recommend using output.json and this code is pretty much taken from Max Chuquimia's article. This is written in Swift, and is named mock-swapper.swift as the filename.
let mappings = [
    "output.json": [
        "0.json",
        "1.json",
        "2.json",
        "3.json",
        "4.json",
        "5.json",
        "6.json",
        "7.json",
        "8.json",
        "9.json",
        "10.json",
        "11.json",
        "12.json",
        "13.json"
    ]
]

extension String {
    var path: String {
        return FileManager.default.currentDirectoryPath + "/\(self)"
    }
}

func readInt() -> Int {
    return Int(readLine()!)!
}

func menu(options: [String]) -> String {
    options.enumerated().forEach { idx, option in
        print("\(idx) - \(option)")
    }

    print("> ", terminator: "")
    let option = readInt()
    return options[option]
}

let source = menu(options: Array(mappings.keys))
let options = mappings[source]!

print("Output to: \(source.path)")

while true {
    let file = menu(options: options)
    try! FileManager.default.removeItem(atPath: source.path)
    try! FileManager.default.copyItem(atPath: file.path, toPath: source.path)
    print("\nCopied \(file) to \(source)\n")
}
There are 13 files, and these contain album information for 13 different albums. To keep this short, here is the json for two albums which is creatively named as 2.json:
{"favourites": [
    {"identifier": "AAA", "name": "TayTay Folklore", "image": "https://upload.wikimedia.org/wikipedia/en/f/f8/Taylor_Swift_-_Folklore.png"},
    {"identifier": "BBB", "name": "TayTay Lover", "image": "https://upload.wikimedia.org/wikipedia/en/c/cd/Taylor_Swift_-_Lover.png"}
    }
}
the overall code can then be run from your target directory by running swift mock-swapper.swift from the comand line. We would choose for the output.json to be the output file, and then 2 to deliver two albums to output.json.
Of course, Charles needs to know where that file actually is, so let us do just that now
Setup Charles to point to the local mapping Charles needs to be setup to point to this file, and this is covered in the Swift Project section below.
You can download Charles and install to your machine. From within the program, you need to go to Help>SSL Proxying>Install Charles Root Certificate in iOS Simulators
Then from within your simuator traverse to Setting>General>About>Certificate Trust Settings and click the toggle to enable the proxy.
Within Charles you need to go to Proxy>macOS Proxy and make sure it is ticked.
We are going to mock www.backend.com, so within the menu system go to Proxy>SSL Proxy Settings... and add - the host will be www.backend.com and the port 443.
We then need to map local, so select Tools>Map Local... and you will need to select the protocol as https, the host as www.backend.com and the local path to the file you created with the script above

and of course make sure that the Enable Map Local checkbox is ticked in the map local settings.
As you remove a favourite from your Application, you can make sure that the backend that you have created returns the correct JSON String. For example, if you remove one of the favourites I would return the JSON String of favourites - with precisely one less favourite returned.
I think the answer is quite clear. When you are demonstrating your work, perhaps an internal demo or to a client you want to have a working App. How might you do this if the backend has not yet been produced? You are expected to provide a live demo, and mocking is simply not enough. This is where this article has stepped in, and I hope, helped you out.
That's it! You are now ready for some mocking of live data! Where can I use this data?
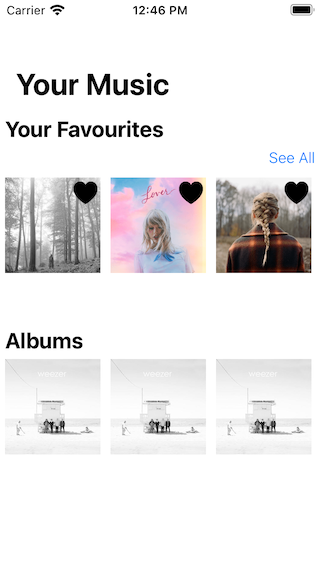
I've covered it in my YouTube video, right HERE. During that video I create a favourites section like the following:
Which then moves onto a screen that covers all of the favourites
If you've any questions, comments or suggestions please hit me up on Twitter


