For comprehensive design details, checkout the documentation:
This project was undertaken as part of the EN2160 Electronic Design Realization module". The objectives of this module were,
- Identify a suitable design model for a given problem.
- Design testable PCBs complying with industry standards.
- Explain testing methodologies used in electronic manufacturing.
- Design product enclosures complying with industry standards.
- Prepare proper documentation for electronic design.
- Apply the knowledge gained to a commercial design project resulting in a working prototype.
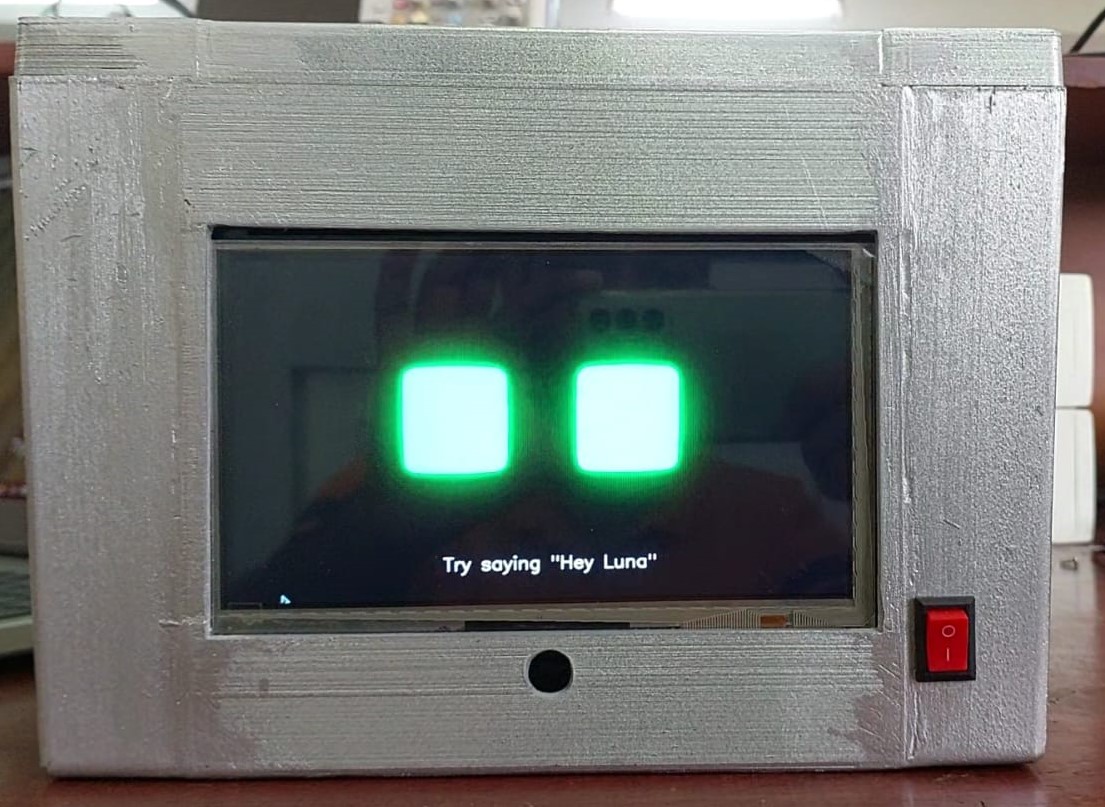
- This is the user interface for a restaurant waitress robot that enhances customer interaction through voice, touch and facial expressions.
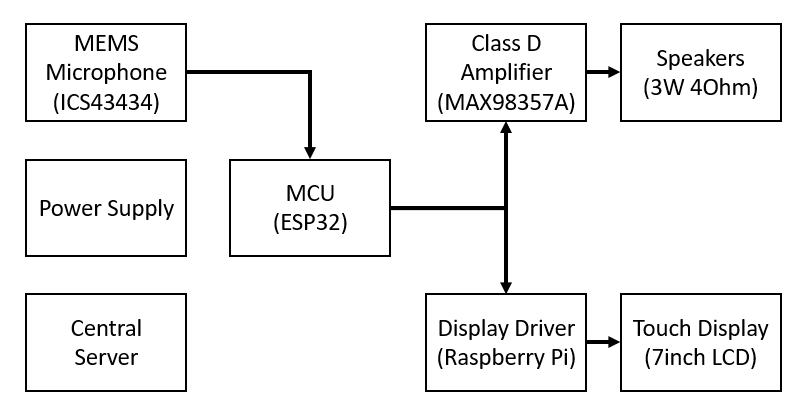
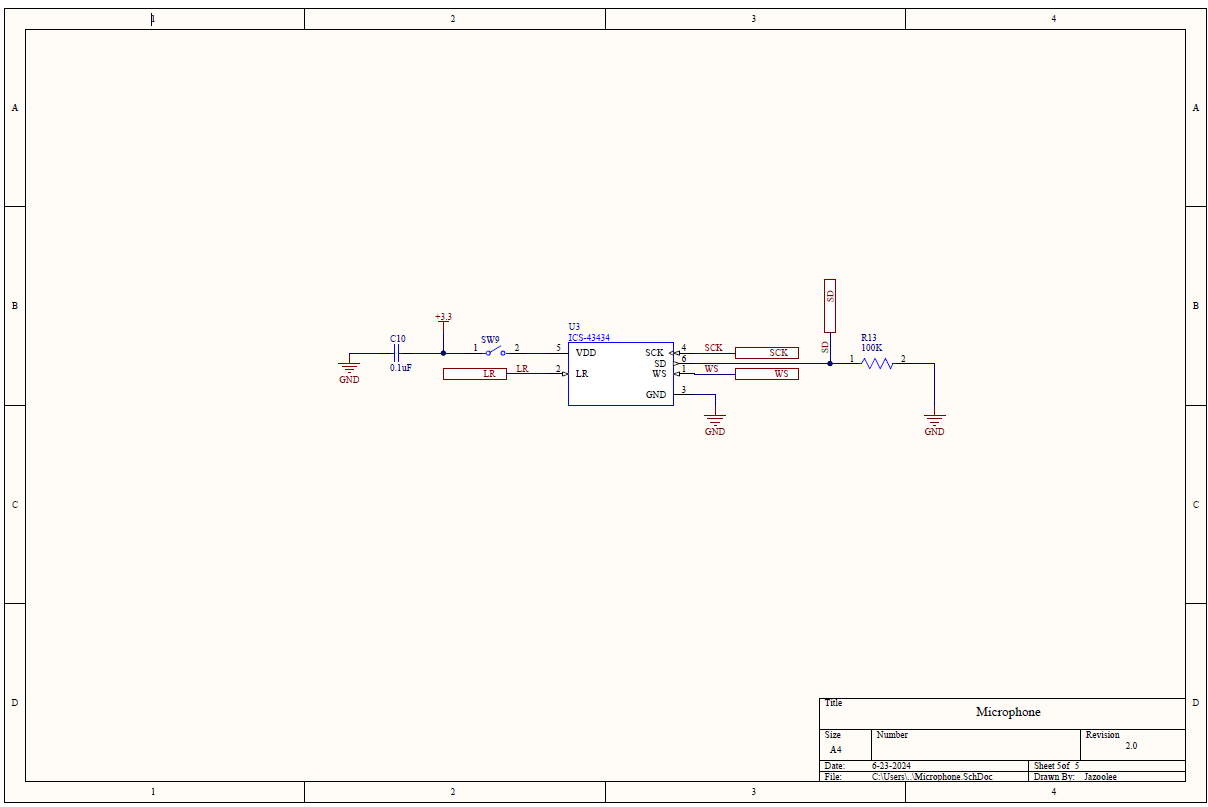
- Utilizing the ICS43434 microphone IC, the robot captures customer voice commands, which are recorded by the ESP32 microcontroller and sent to the restaurant’s main computer for processing.
- This computer leverages a speech recognition API to interpret the commands and generate appropriate voice responses. These responses are then transmitted back to the ESP32, which amplifies the voice signals and plays them through speakers for the customer.
- Additionally, a Raspberry Pi touch screen serves as an interactive menu, allowing customers to easily order food through touch. The display also showcases the robot’s reactions, such as facial expressions, to create an engaging and dynamic dining experience
- Designed to work on 5v and fit into a 10cm x 6cm x 0.16cm enclosure. Easy and Customizable setup with Low power consumption.
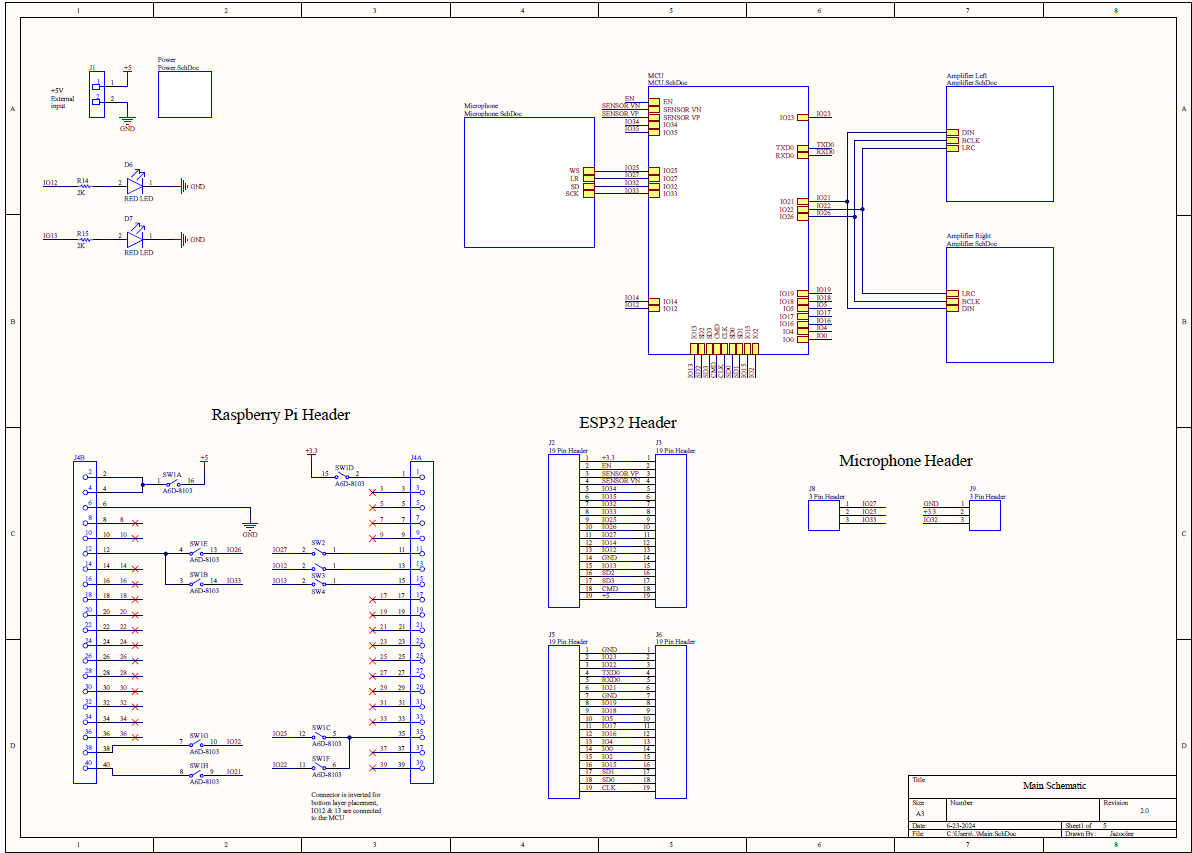
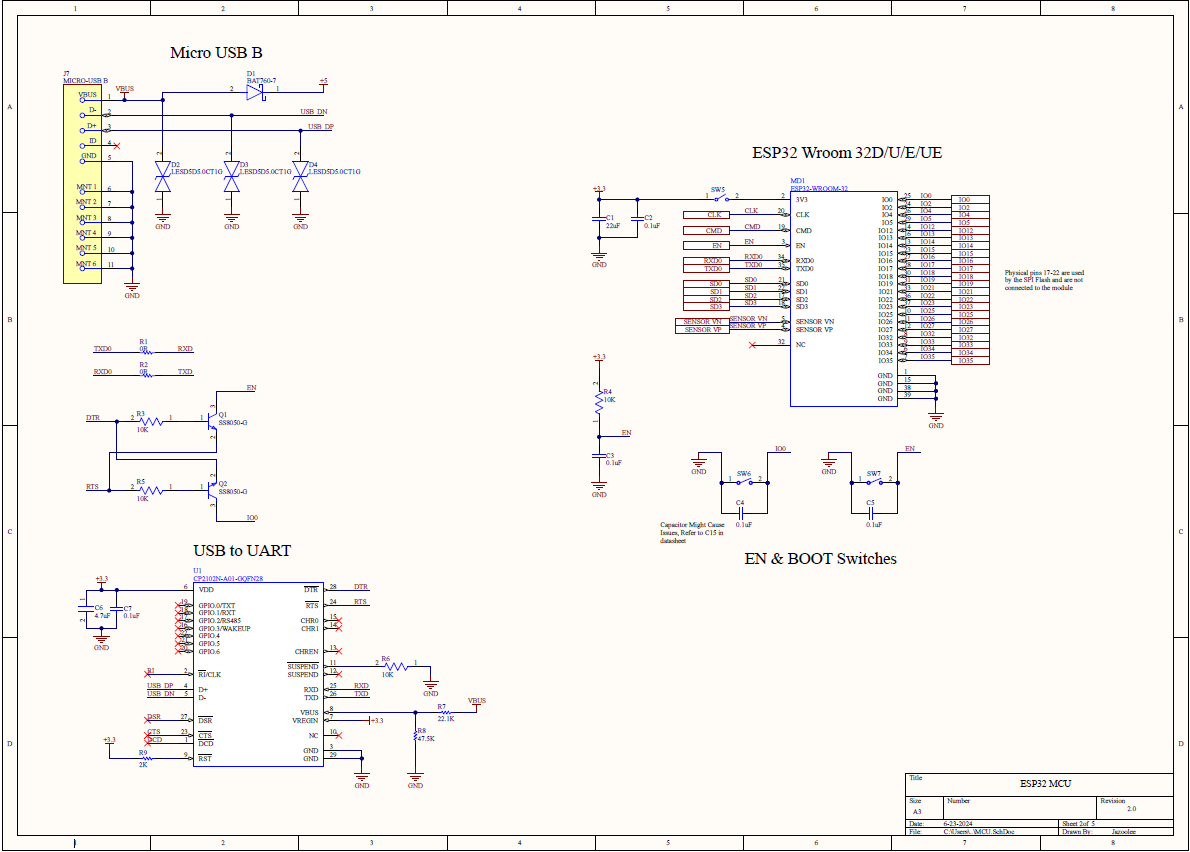
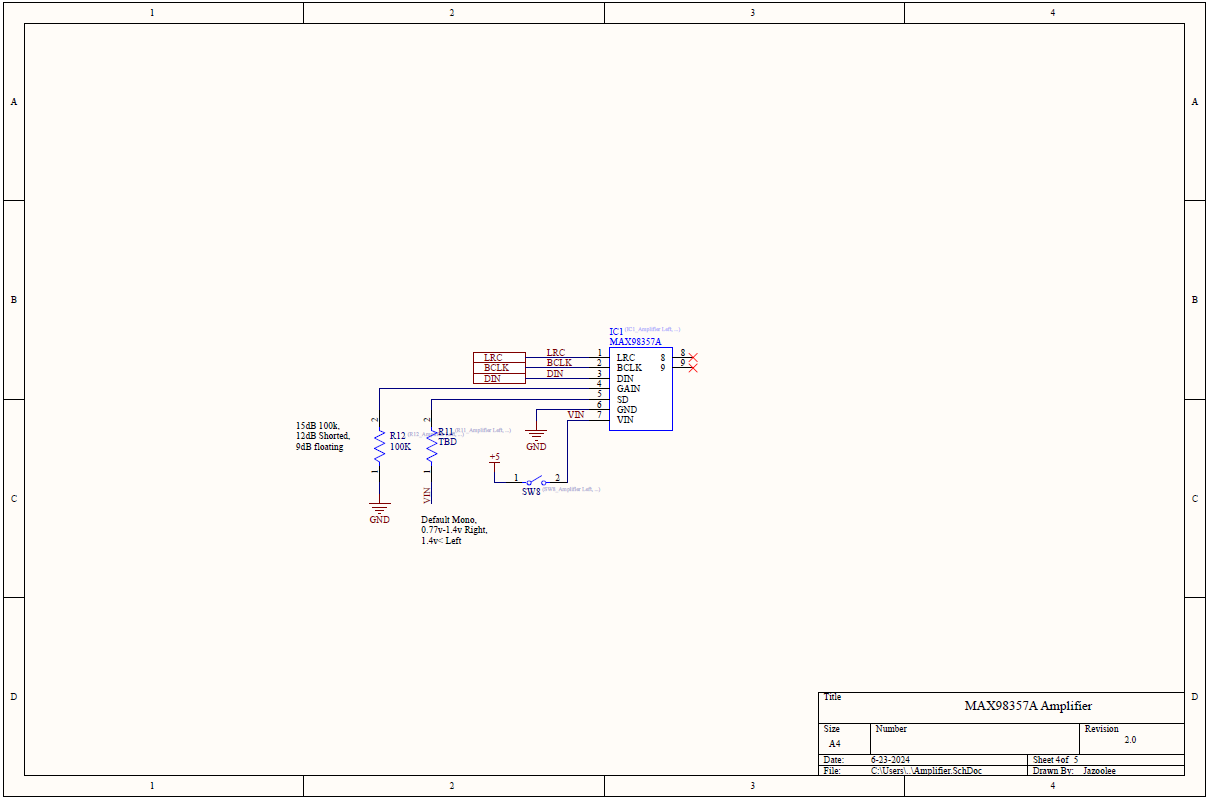
We have opted for a hierarchical schematic design due to the complex nature of the overall PCB. In addition to the main sheet there are four sub sheets, Which are Micro-controller unit, Power System, Amplifier and Microphone. The main sheet interconnects the Micro-controller unit (ESP32-WROOM-32E) with the microphone (ICS43434) and the amplifier (MAX98357a). In addition to this, it also contains all the necessary headers and connectors used to mount a Raspberry pi 4B and get 5v power.
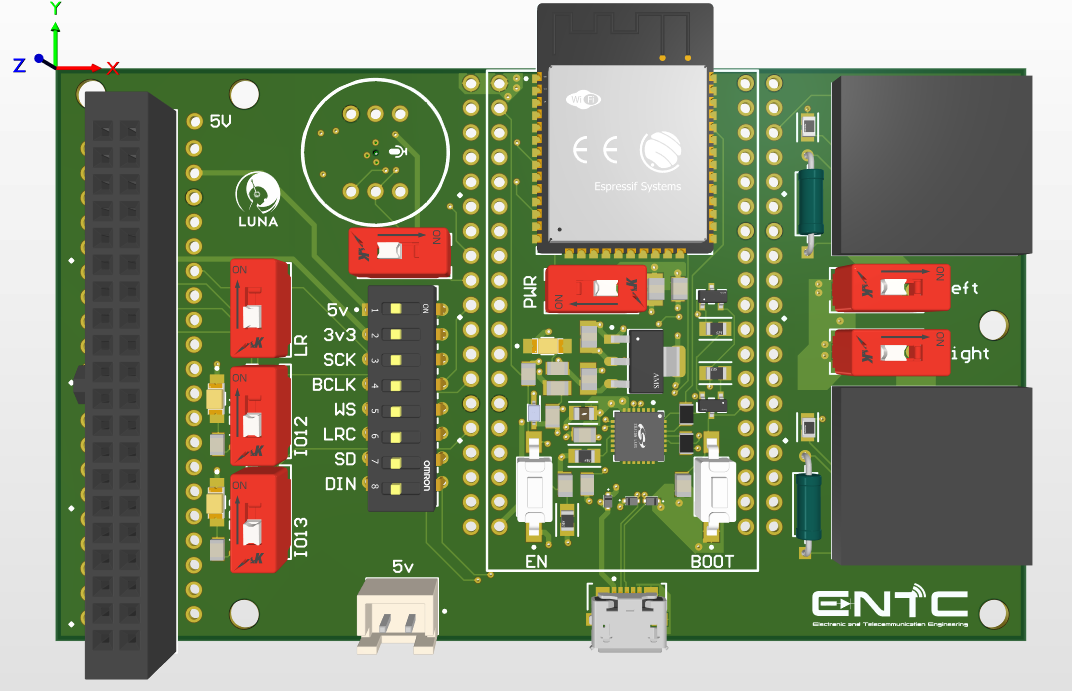
We have added headers for most the major modules in the main sheet, so that we can test the board before soldering, using off the shelf modules and solder those modules directly to the board in case of a component failure. The raspberry pi headers are also connected with the MCU, Microphone and the Amplifier so that we can have a highly integrated system. We have also placed DIP switches in order to have different configurations of connections in the same board.Two Class D amplifier modules have been connected with the MCU in order to achieve stereo sound output. Two LEDs have been added for debugging purposes.
- Components were sourced from reputed manufacturers and the pcb was printed abroad.
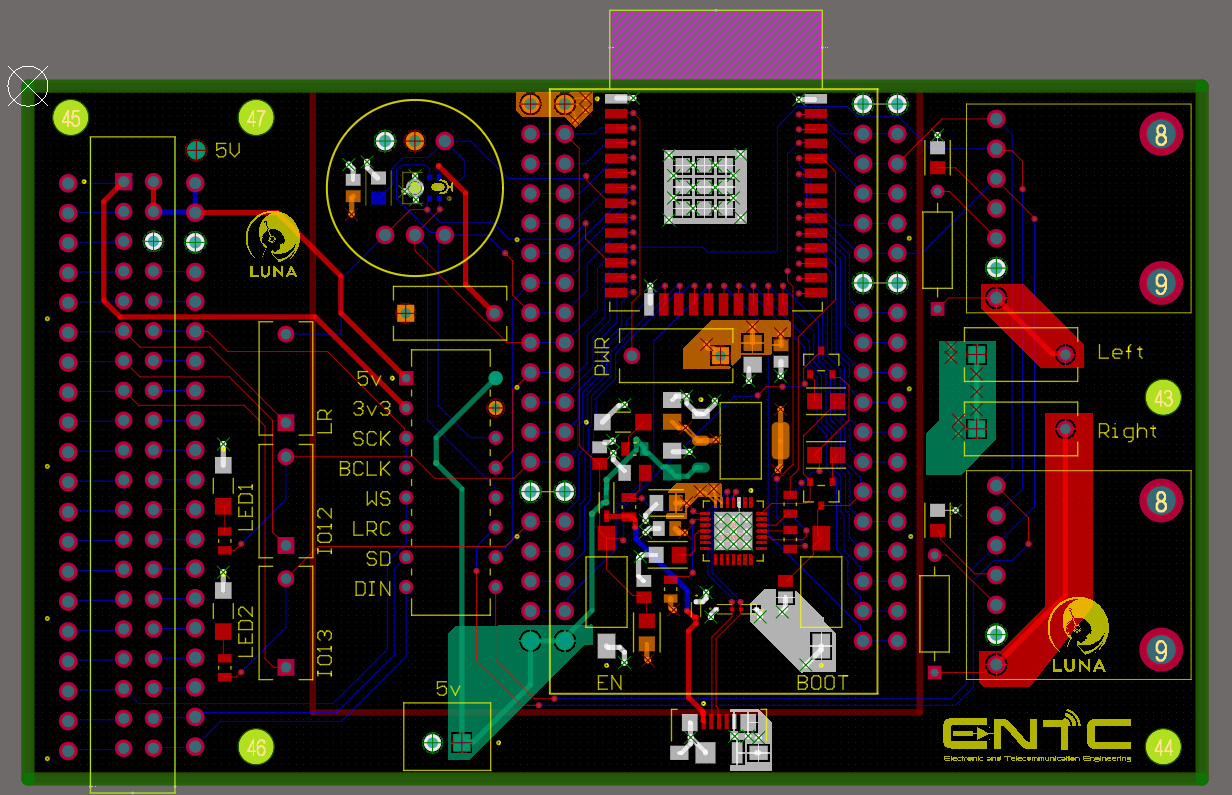
This is a four layer design. There is a top and a bottom signal layer. In between these there is a ground and a power plane. The physical dimensions are 100mm60mm1.6mm. Five 3mm diameter holes have been placed to help with mounting the PCB inside the enclosure. The power plane has been split into two section with a 25mil gap between them. They are connected to 5v and 3.3v. Components have been grouped together in such a way that they are directly above their required power planes. The use of copper polygons have been minimized and used only for creating low resistance path between power lines. The MCU is placed in the middle and all the other components have been spread around it strategically. Female headers for the Raspberry pi is placed on the left edge of the board so that it can fit with our board without bringing any interference. Extra pad holes have been placed on either side of headers for easy debugging and access to MCU pins.
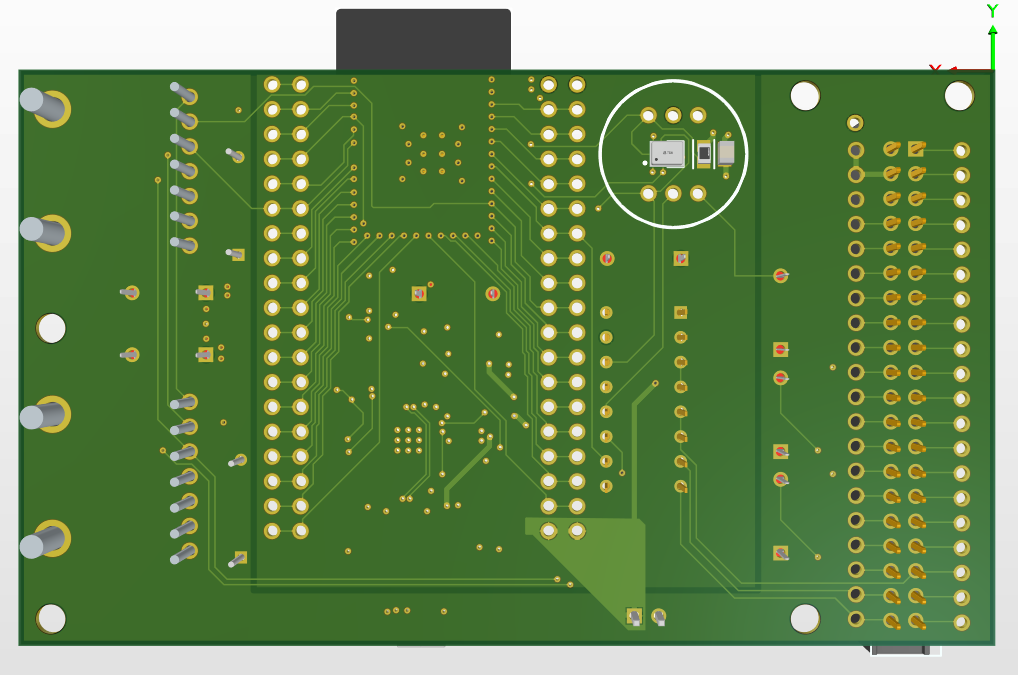
The amplifier modules are placed on the right edge of the board to facilitate easy connections with the speakers. USB connector and the power connector is placed on the bottom edge of the board so that they be easily connected with our PCB.MCU and related component placement have been done according to manufacturer’s recommendations. PCB antenna part of the MCU module is placed outside of the board for better connectivity and less noise interference. Since the MEMS microphone is a PCB SMD component it is placed on the bottom side of the pcb and a hole is drilled for the microphone opening.
20 mil traces have been used for power lines and 6 mil for the rest. Appropriate trace width and clearance rules have been used for differential pair routing and impedance matching. 0805 size SMD components are mostly used across this pcb to facilitate easy hand soldering and space minimization. Ample amount of vias and pads are placed for testing points, heat transfer and better low impedance connectivity.
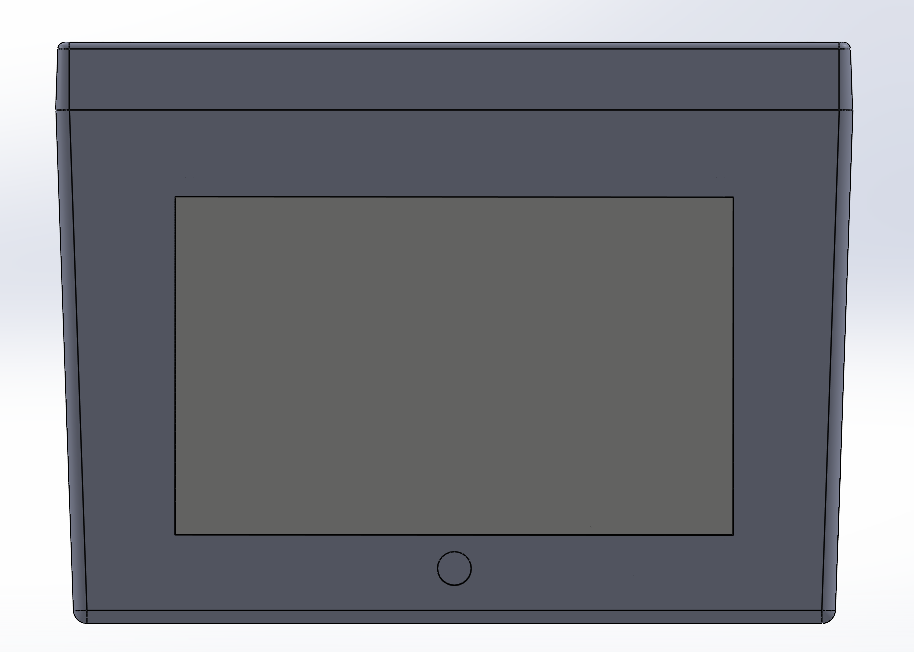
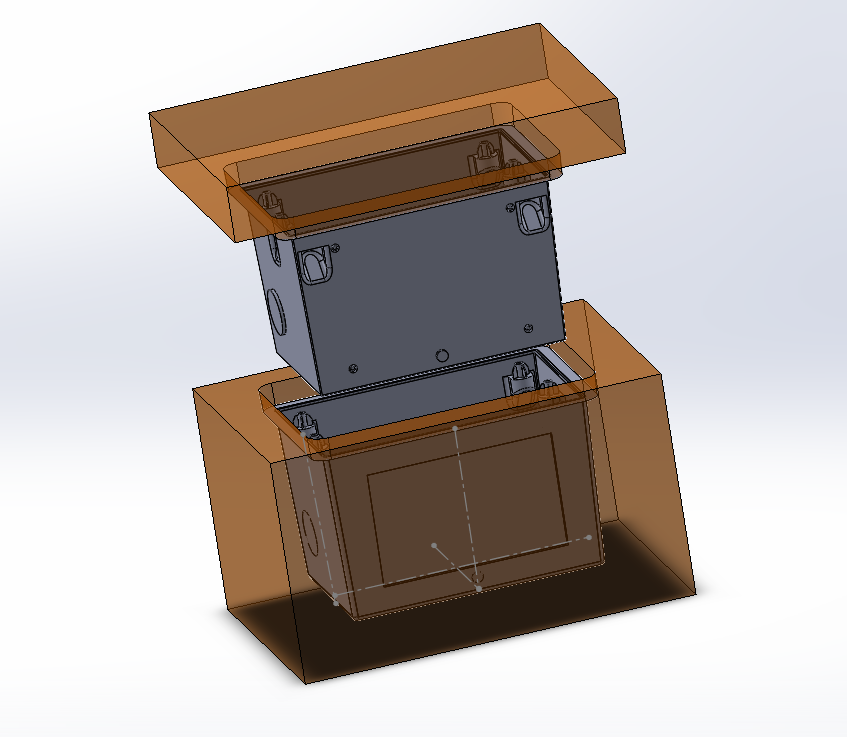
The enclosure for this project is designed to resemble the head of our restaurant robot, ensuring an engaging and functional appearance. Below are the detailed points about the enclosure design and the importance of component placement:
-
Front Placement of Raspberry Pi Screen:
- Explanation: The Raspberry Pi touch screen is positioned at the front of the enclosure.
- Importance: This placement provides an optimal view for customers, making it easy to interact with the menu and see visual feedback from the robot.
-
Kinect Camera Under the Screen:
- Explanation: A Kinect camera is mounted below the Raspberry Pi screen.
- Importance: The Kinect camera captures the surroundings, allowing the robot to detect and respond to customer presence and movements. Its placement ensures a clear field of view.
-
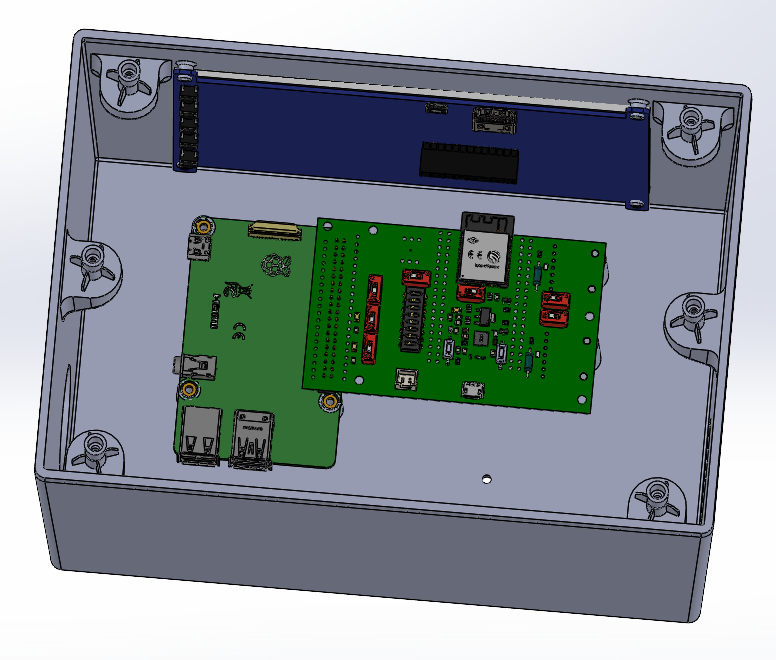
Internal PCB and Raspberry Pi Housing:
- Explanation: Inside the enclosure, there is space allocated for the PCB and the Raspberry Pi.
- Importance: Housing these components internally protects them from damage and reduces clutter, maintaining a clean and professional appearance.
-
Space for Two Speakers:
- Explanation: The enclosure design includes dedicated spaces for two speakers.
- Importance: Proper placement of the speakers ensures that the audio output is clear and evenly distributed, enhancing the customer’s auditory experience.
-
INMP441 Microphone IC Placement:
- Explanation: A specific location within the enclosure is designed for the INMP441 microphone IC, ensuring it is not covered.
- Importance: This placement is crucial for efficiently capturing voice commands without obstructions, ensuring clear and accurate voice input from customers.
You can watch the video demonstration here.
