| title | intro | allowTitleToDifferFromFilename | redirect_from | versions | |||||
|---|---|---|---|---|---|---|---|---|---|
Quickstart for GitHub Actions |
Add a {% data variables.product.prodname_actions %} workflow to an existing repository in 5 minutes or less. |
true |
|
|
{% data reusables.actions.enterprise-beta %} {% data reusables.actions.enterprise-github-hosted-runners %}
You only need an existing {% data variables.product.prodname_dotcom %} repository to create and run a {% data variables.product.prodname_actions %} workflow. In this guide, you'll add a workflow that lints multiple coding languages using the {% data variables.product.prodname_dotcom %} Super-Linter action. The workflow uses Super-Linter to validate your source code every time a new commit is pushed to your repository.
- From your repository on {% data variables.product.prodname_dotcom %}, create a new file in the
.github/workflowsdirectory namedsuperlinter.yml. For more information, see "Creating new files." - Copy the following YAML contents into the
superlinter.ymlfile. Note: If your default branch is notmain, update the value ofDEFAULT_BRANCHto match your repository's default branch name. {% raw %}{% endraw %}name: Super-Linter # Run this workflow every time a new commit pushed to your repository on: push jobs: # Set the job key. The key is displayed as the job name # when a job name is not provided super-lint: # Name the Job name: Lint code base # Set the type of machine to run on runs-on: ubuntu-latest steps: # Checks out a copy of your repository on the ubuntu-latest machine - name: Checkout code uses: actions/checkout@v2 # Runs the Super-Linter action - name: Run Super-Linter uses: github/super-linter@v3 env: DEFAULT_BRANCH: main GITHUB_TOKEN: ${{ secrets.GITHUB_TOKEN }}
- To run your workflow, scroll to the bottom of the page and select Create a new branch for this commit and start a pull request. Then, to create a pull request, click Propose new file.
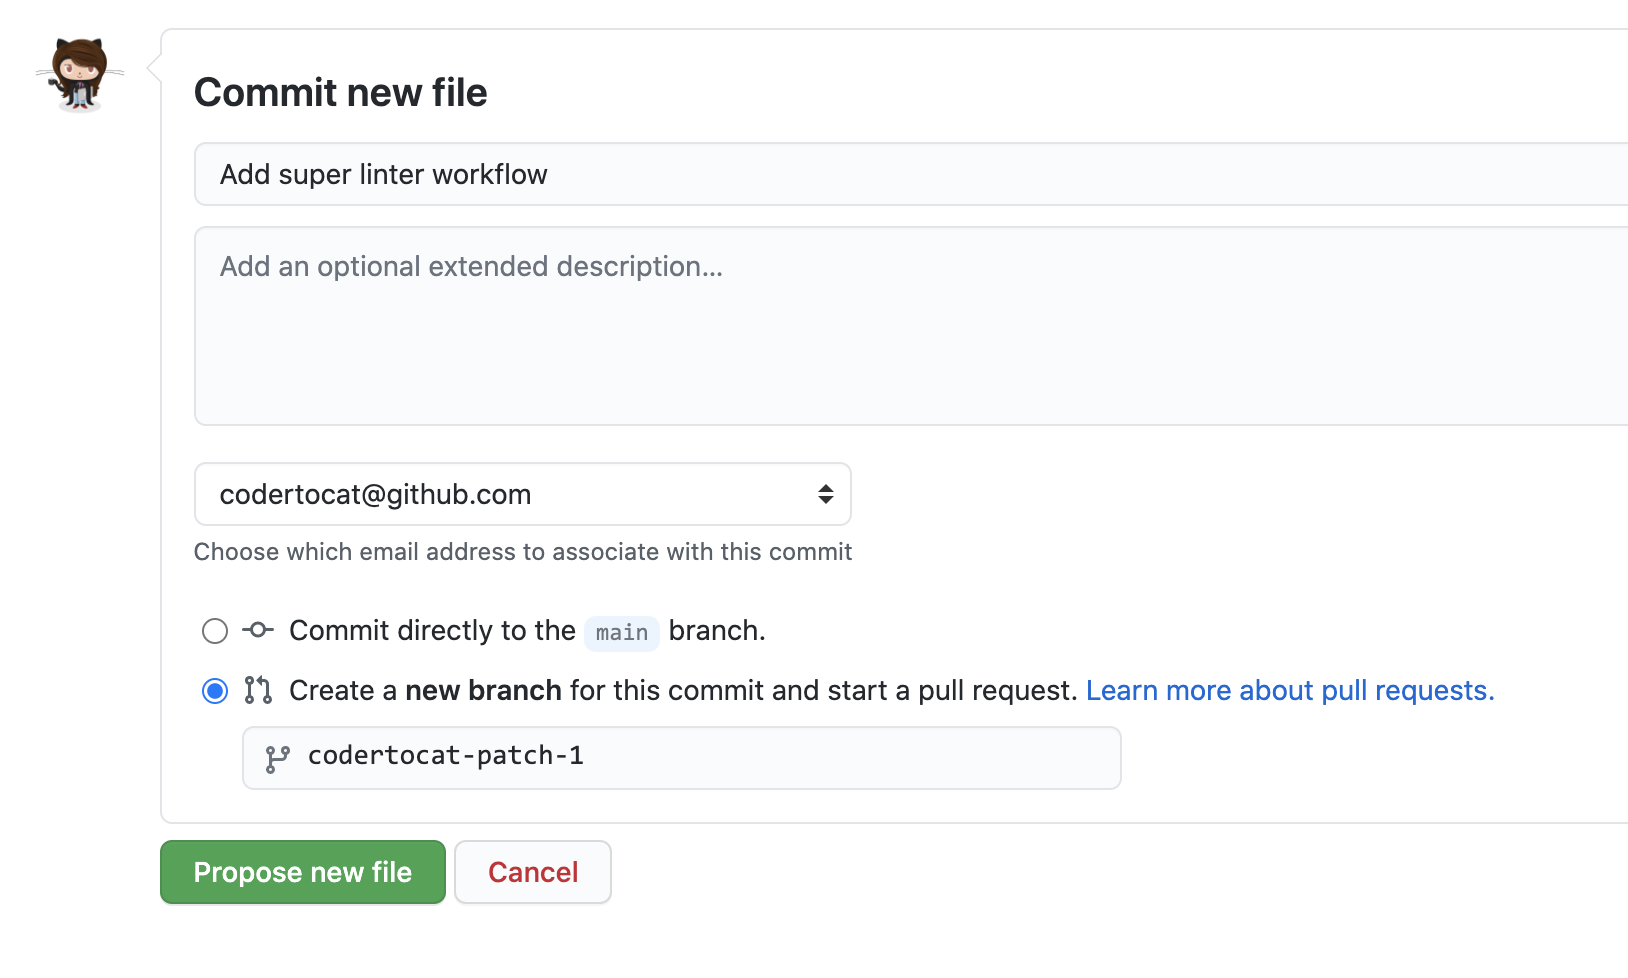

Committing the workflow file in your repository triggers the push event and runs your workflow.
{% data reusables.repositories.actions-tab %}
- In the left sidebar, click the workflow you want to see.

- From the list of workflow runs, click the name of the run you want to see.

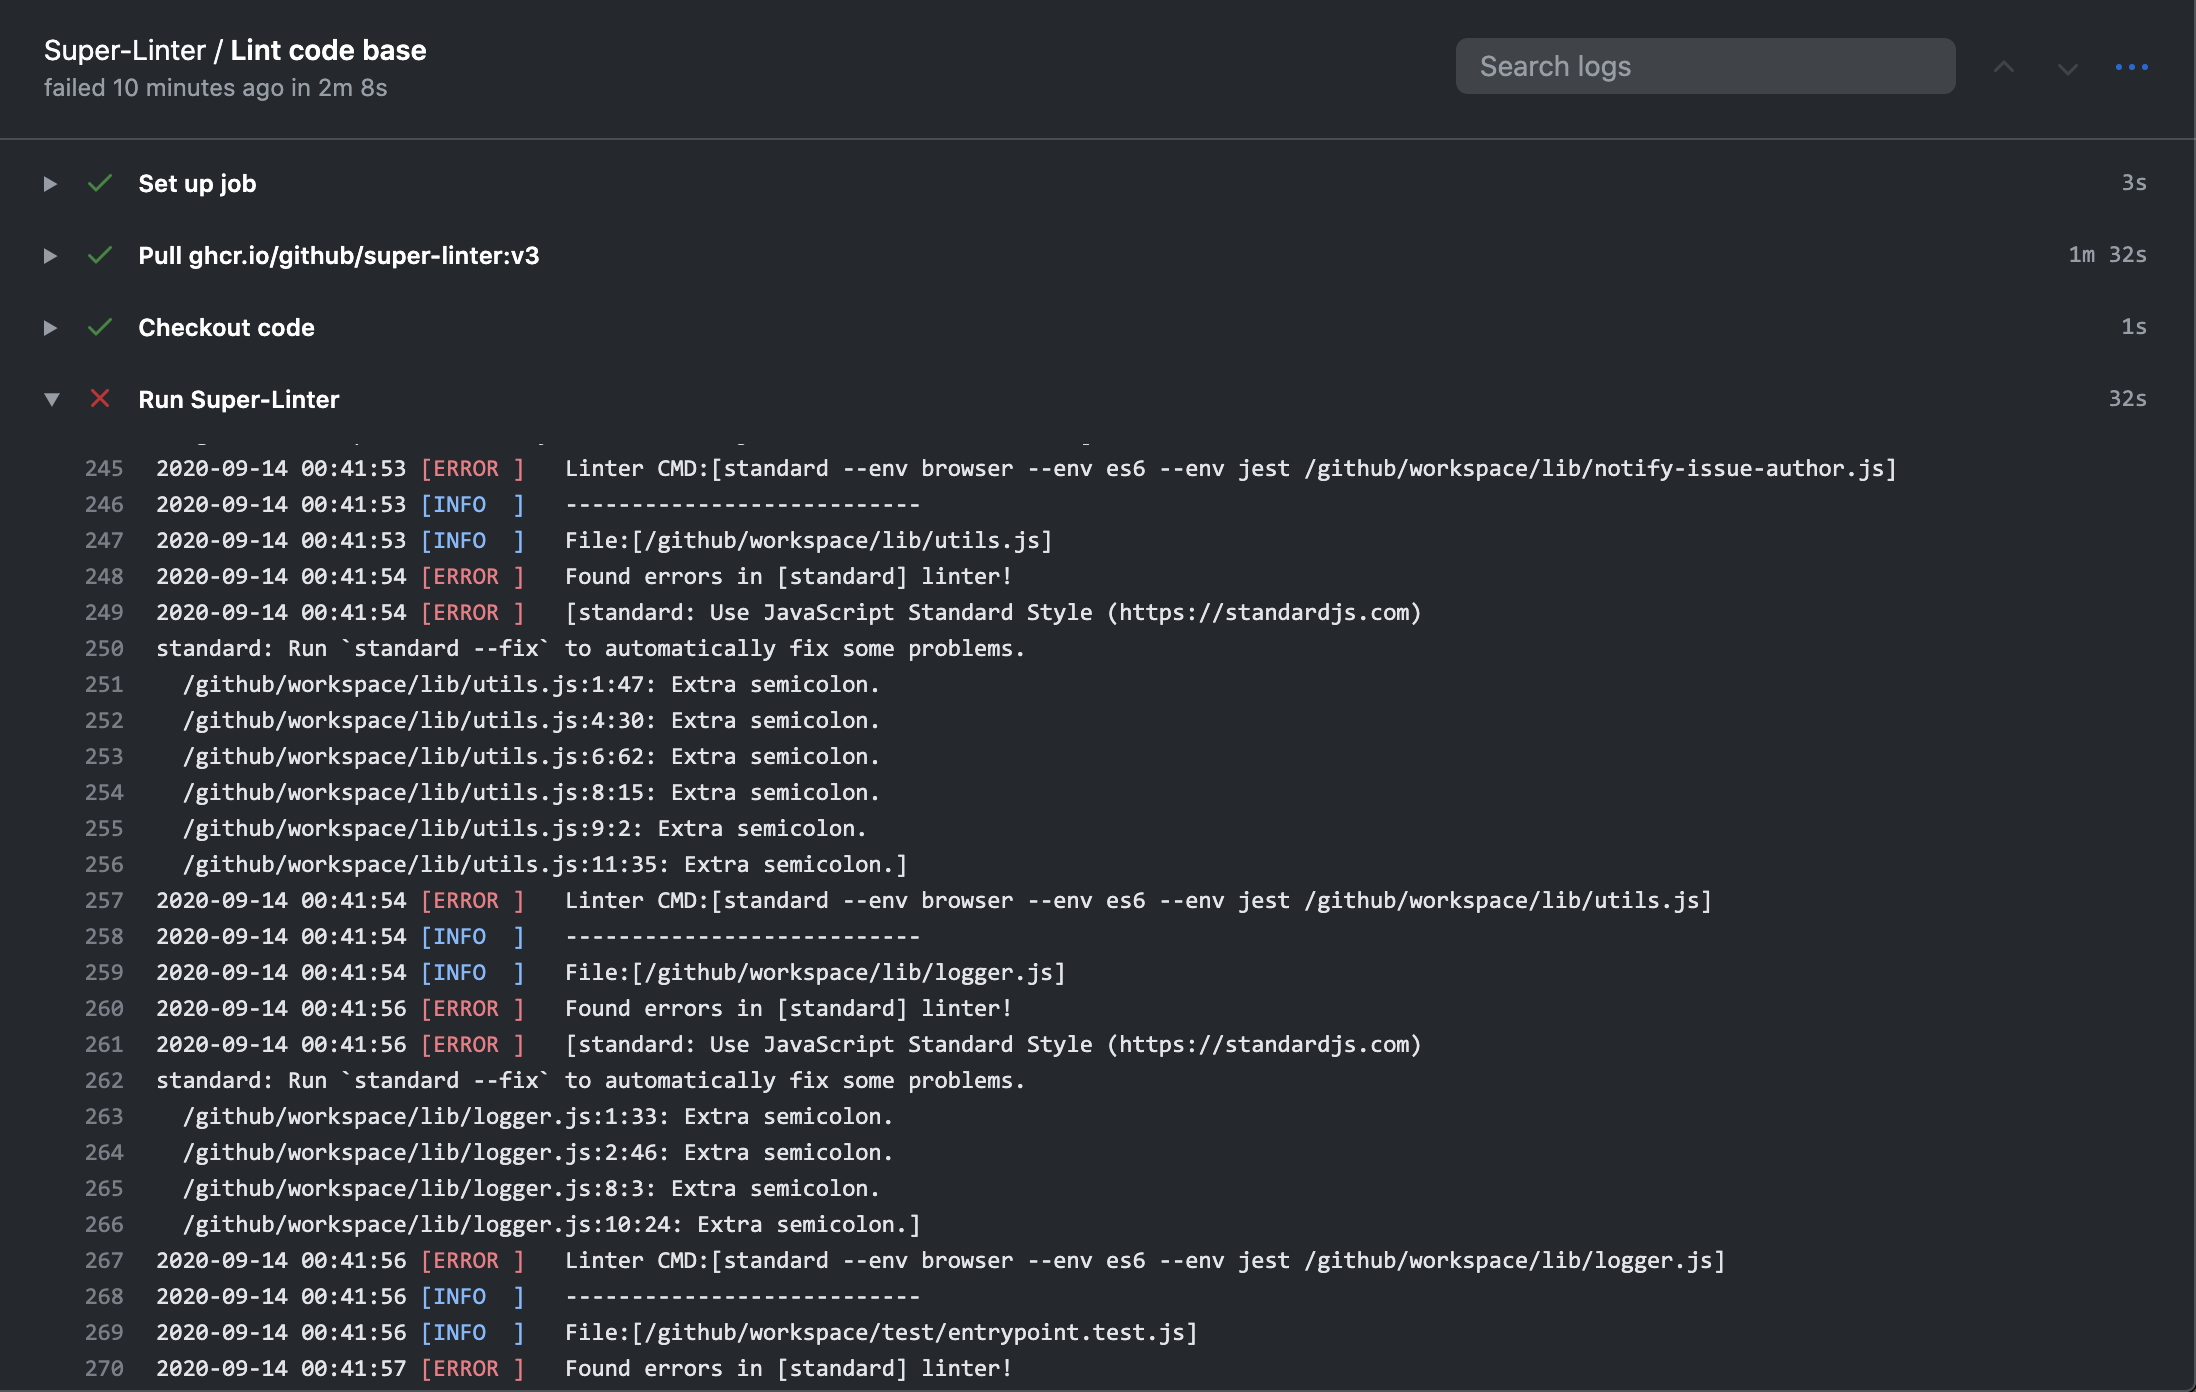
- In the left sidebar, click the Lint code base job.

- Expand the Run Super-Linter step to view the results.


{% data variables.product.prodname_dotcom %} provides preconfigured workflow templates that you can start from to automate or create a continuous integration workflows. You can browse the full list of workflow templates in the {% if currentVersion == "free-pro-team@latest" %}actions/starter-workflows repository{% else %} actions/starter-workflows repository on {% data variables.product.product_location %}{% endif %}.
The super-linter workflow you just added runs any time code is pushed to your repository to help you spot errors and inconsistencies in your code. But, this is only the beginning of what you can do with {% data variables.product.prodname_actions %}. Your repository can contain multiple workflows that trigger different jobs based on different events. {% data variables.product.prodname_actions %} can help you automate nearly every aspect of your application development processes. Ready to get started? Here are some helpful resources for taking your next steps with {% data variables.product.prodname_actions %}:
- "Learn {% data variables.product.prodname_actions %}" for an in-depth tutorial
- "Guides" for specific uses cases and examples
- github/super-linter for more details about configuring the Super-Linter action