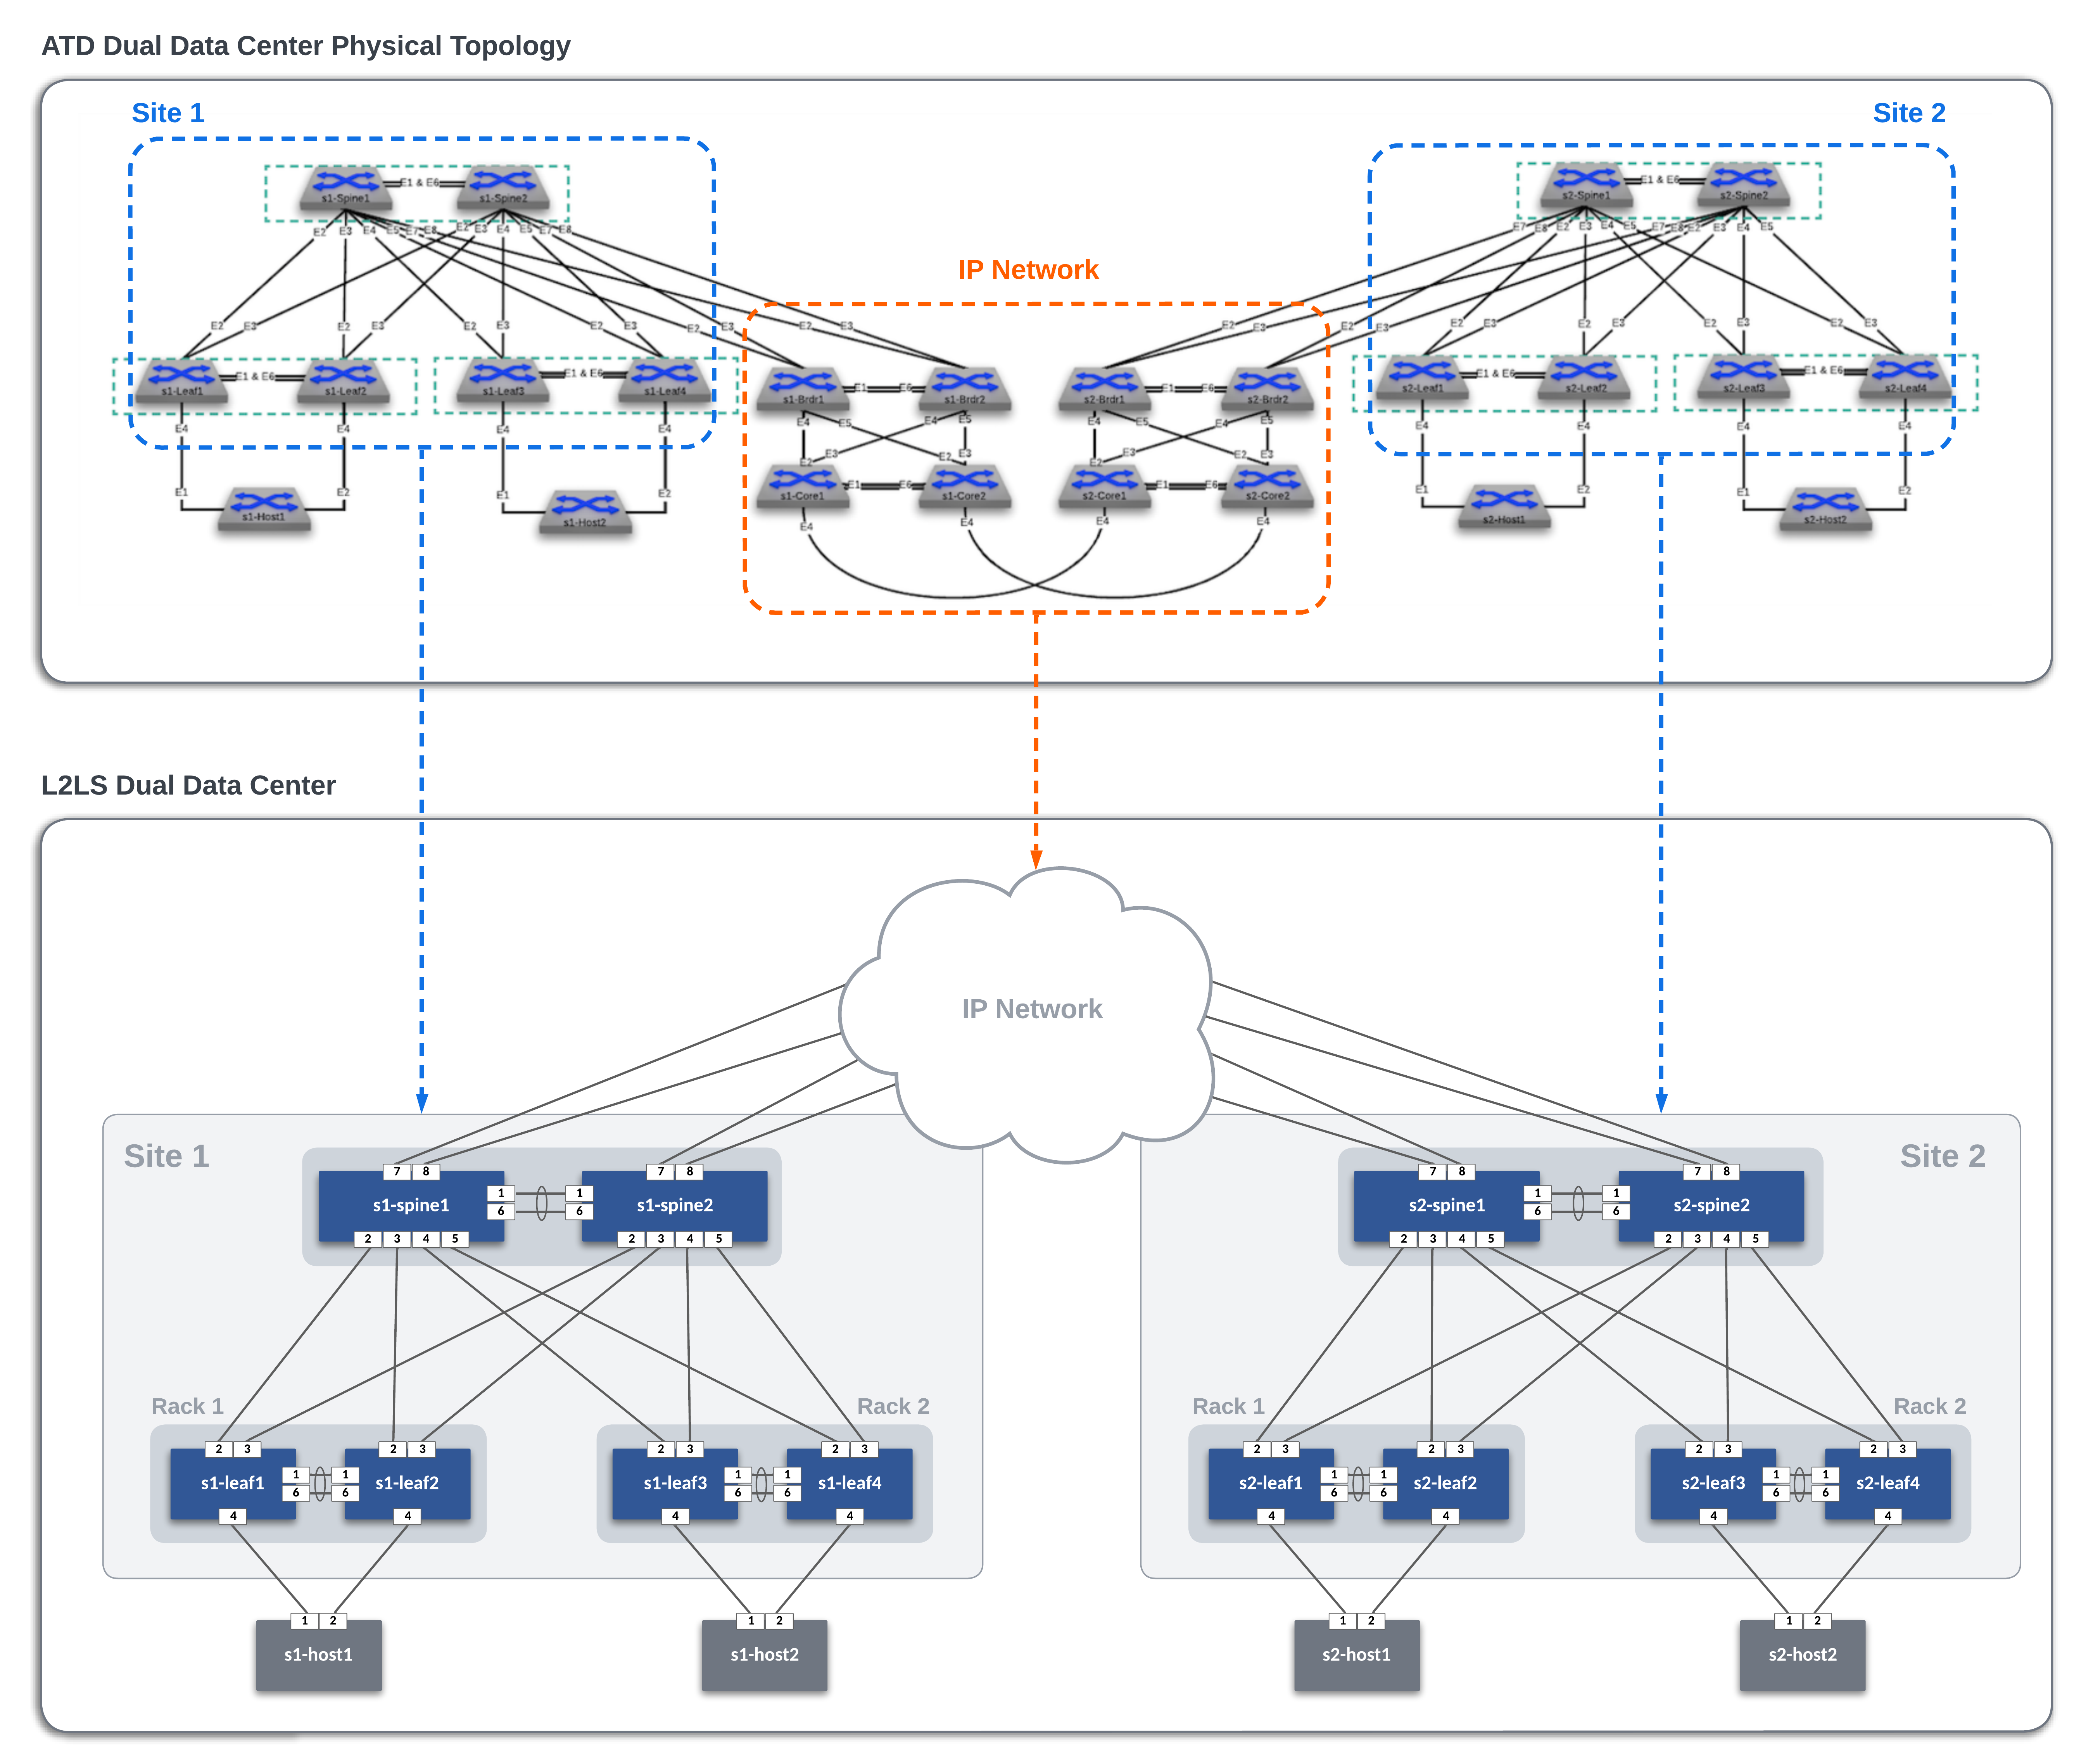
In this example, the ATD lab is used to create the L2LS Dual Data Center topology below. The IP Network cloud (orange area) is pre-provisioned and is comprised of the border and core nodes in the ATD topology. Our focus will be creating the L2LS AVD data models to build and deploy configurations for Site 1 and Site 2 (blue areas) and connect them to the IP Network.
| Site | Rack | Vlan | Subnet |
|---|---|---|---|
| 1 | 1 | 10 | 10.10.10.0/24 |
| 1 | 2 | 20 | 10.20.20.0/24 |
| 2 | 1 | 30 | 10.30.30.0/24 |
| 2 | 2 | 40 | 10.40.40.0/24 |
| Site | Rack | Hostname | IP Address. |
|---|---|---|---|
| 1 | 1 | s1-host1 | 10.10.10.100/24 |
| 1 | 2 | s1-host2 | 10.20.20.100/24 |
| 2 | 1 | s2-host1 | 10.30.30.100/24 |
| 2 | 2 | s2-host2 | 10.40.40.100/24 |
Note: Host nodes are pre-configured with the addresses above. AVD will configure the leaf ports for the hosts.
The WAN IP Network runs OSPF in Area 0.0.0.0 using /31's in the 10.0.0.0/24 address block. The Spines in each DC will peer to nodes in the cloud.
Create a new ATD Dual Center Lab and follow along. Ask your local account team for assistance.
From GitHub, fork this repo (https://github.dev/PacketAnglers/workshops-avd) to your personal GitHub account and use the Programmability IDE to clone your fork to your lab instance.
cd /home/coder/project/labfiles
git clone <your copied URL>
cd workshops-avdUpdate AVD and requirements to the latest version
ansible-galaxy collection install arista.avd arista.cvp --force
export ARISTA_AVD_DIR=$(ansible-galaxy collection list arista.avd --format yaml | head -1 | cut -d: -f1)
pip3 config set global.disable-pip-version-check true
pip3 install -r ${ARISTA_AVD_DIR}/arista/avd/requirements.txt
Note: This must be done each time you start your ATD Lab.
The following command sets the environment variable LABPASSPHRASE which is used later for connecting to your lab switches and creating local user password.
export LABPASSPHRASE=`cat /home/coder/.config/code-server/config.yaml| grep "password:" | awk '{print $2}'`Note: This must also be done each time you start your ATD Lab.
This step pushes pre-defined configs for IP Network Cloud & Host Nodes
make preplabOnce you have adjusted your data model per site, you can build the configs with the following commands. We discuss the data models in the workshop. You can review the data model in the Workshop Guide.
# Build Site 1 Configs
make build-site-1

# Build Site 2 Configs
make build-site-2The following will push your configurations to the switches per site.
# Build Site 1 Configs
make deploy-site-1

# Build Site 2 Configs
make deploy-site-2Log on to a spine to verify OSPF neighbors and ip routes.
From s1-spine1
show ip ospf neighbors
show ip route
ping 10.30.30.1
Log on to a host and ping to a remote host.
From s1-host1 ping s2-host2.
ping 10.40.40.100