NNI (Neural Network Intelligence) is a lightweight but powerful toolkit to help users automate Feature Engineering, Neural Architecture Search, Hyperparameter Tuning and Model Compression.
The tool manages automated machine learning (AutoML) experiments, dispatches and runs experiments' trial jobs generated by tuning algorithms to search the best neural architecture and/or hyper-parameters in different training environments like Local Machine, Remote Servers, OpenPAI, Kubeflow, FrameworkController on K8S (AKS etc.), DLWorkspace (aka. DLTS) and other cloud options.
- Those who want to try different AutoML algorithms in their training code/model.
- Those who want to run AutoML trial jobs in different environments to speed up search.
- Researchers and data scientists who want to easily implement and experiment new AutoML algorithms, may it be: hyperparameter tuning algorithm, neural architect search algorithm or model compression algorithm.
- ML Platform owners who want to support AutoML in their platform.
NNI provides CommandLine Tool as well as an user friendly WebUI to manage training experiments. With the extensible API, you can customize your own AutoML algorithms and training services. To make it easy for new users, NNI also provides a set of build-in state-of-the-art AutoML algorithms and out of box support for popular training platforms.
Within the following table, we summarized the current NNI capabilities, we are gradually adding new capabilities and we'd love to have your contribution.
Frameworks & Libraries

|
Algorithms

|
Training Services

|
|
| Built-in |
|
Hyperparameter Tuning
|
|
| References |
NNI supports and is tested on Ubuntu >= 16.04, macOS >= 10.14.1, and Windows 10 >= 1809. Simply run the following pip install in an environment that has python 64-bit >= 3.5.
Linux or macOS
python3 -m pip install --upgrade nniWindows
python -m pip install --upgrade nniIf you want to try latest code, please install NNI from source code.
For detail system requirements of NNI, please refer to here for Linux & macOS, and here for Windows.
Note:
- If there is any privilege issue, add
--userto install NNI in the user directory. - Currently NNI on Windows supports local, remote and pai mode. Anaconda or Miniconda is highly recommended to install NNI on Windows.
- If there is any error like
Segmentation fault, please refer to FAQ. For FAQ on Windows, please refer to NNI on Windows.
The following example is built on TensorFlow 1.x. Make sure TensorFlow 1.x is used when running it.
-
Download the examples via clone the source code.
git clone -b v1.6 https://github.com/Microsoft/nni.git
-
Run the MNIST example.
Linux or macOS
nnictl create --config nni/examples/trials/mnist-tfv1/config.yml
Windows
nnictl create --config nni\examples\trials\mnist-tfv1\config_windows.yml
-
Wait for the message
INFO: Successfully started experiment!in the command line. This message indicates that your experiment has been successfully started. You can explore the experiment using theWeb UI url.
INFO: Starting restful server...
INFO: Successfully started Restful server!
INFO: Setting local config...
INFO: Successfully set local config!
INFO: Starting experiment...
INFO: Successfully started experiment!
-----------------------------------------------------------------------
The experiment id is egchD4qy
The Web UI urls are: http://223.255.255.1:8080   http://127.0.0.1:8080
-----------------------------------------------------------------------

You can use these commands to get more information about the experiment
-----------------------------------------------------------------------
         commands                       description
1. nnictl experiment show        show the information of experiments
2. nnictl trial ls               list all of trial jobs
3. nnictl top                    monitor the status of running experiments
4. nnictl log stderr             show stderr log content
5. nnictl log stdout             show stdout log content
6. nnictl stop                   stop an experiment
7. nnictl trial kill             kill a trial job by id
8. nnictl --help                 get help information about nnictl
-----------------------------------------------------------------------
- Open the
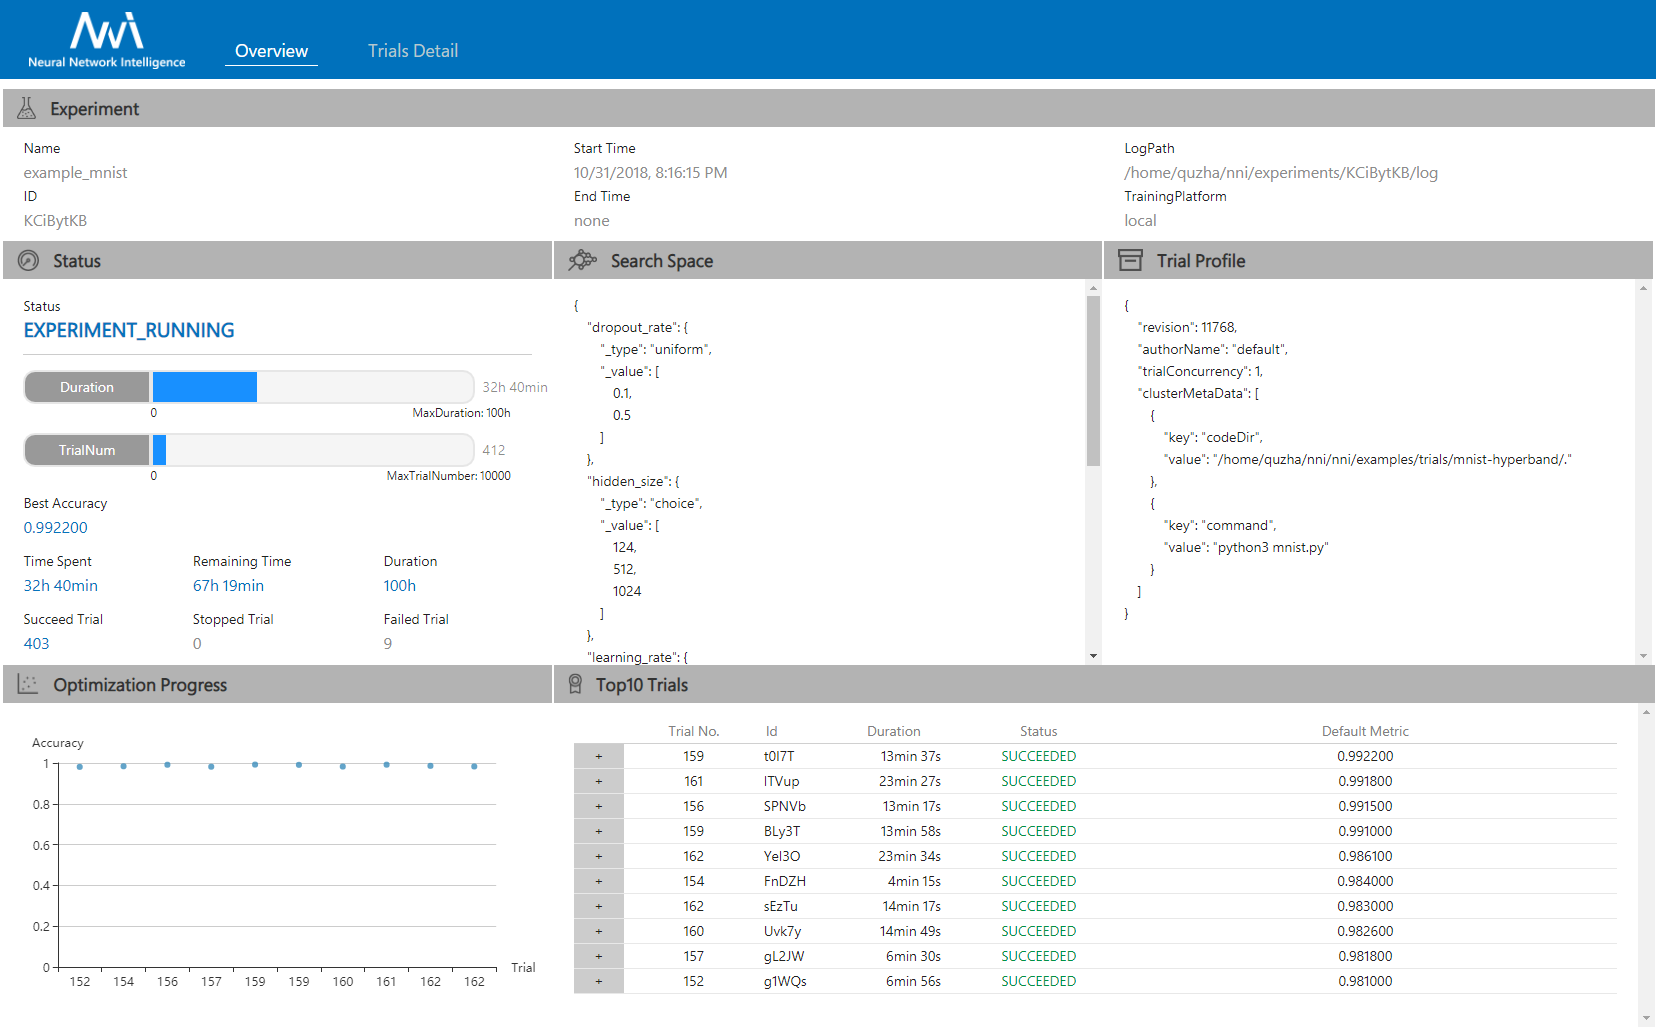
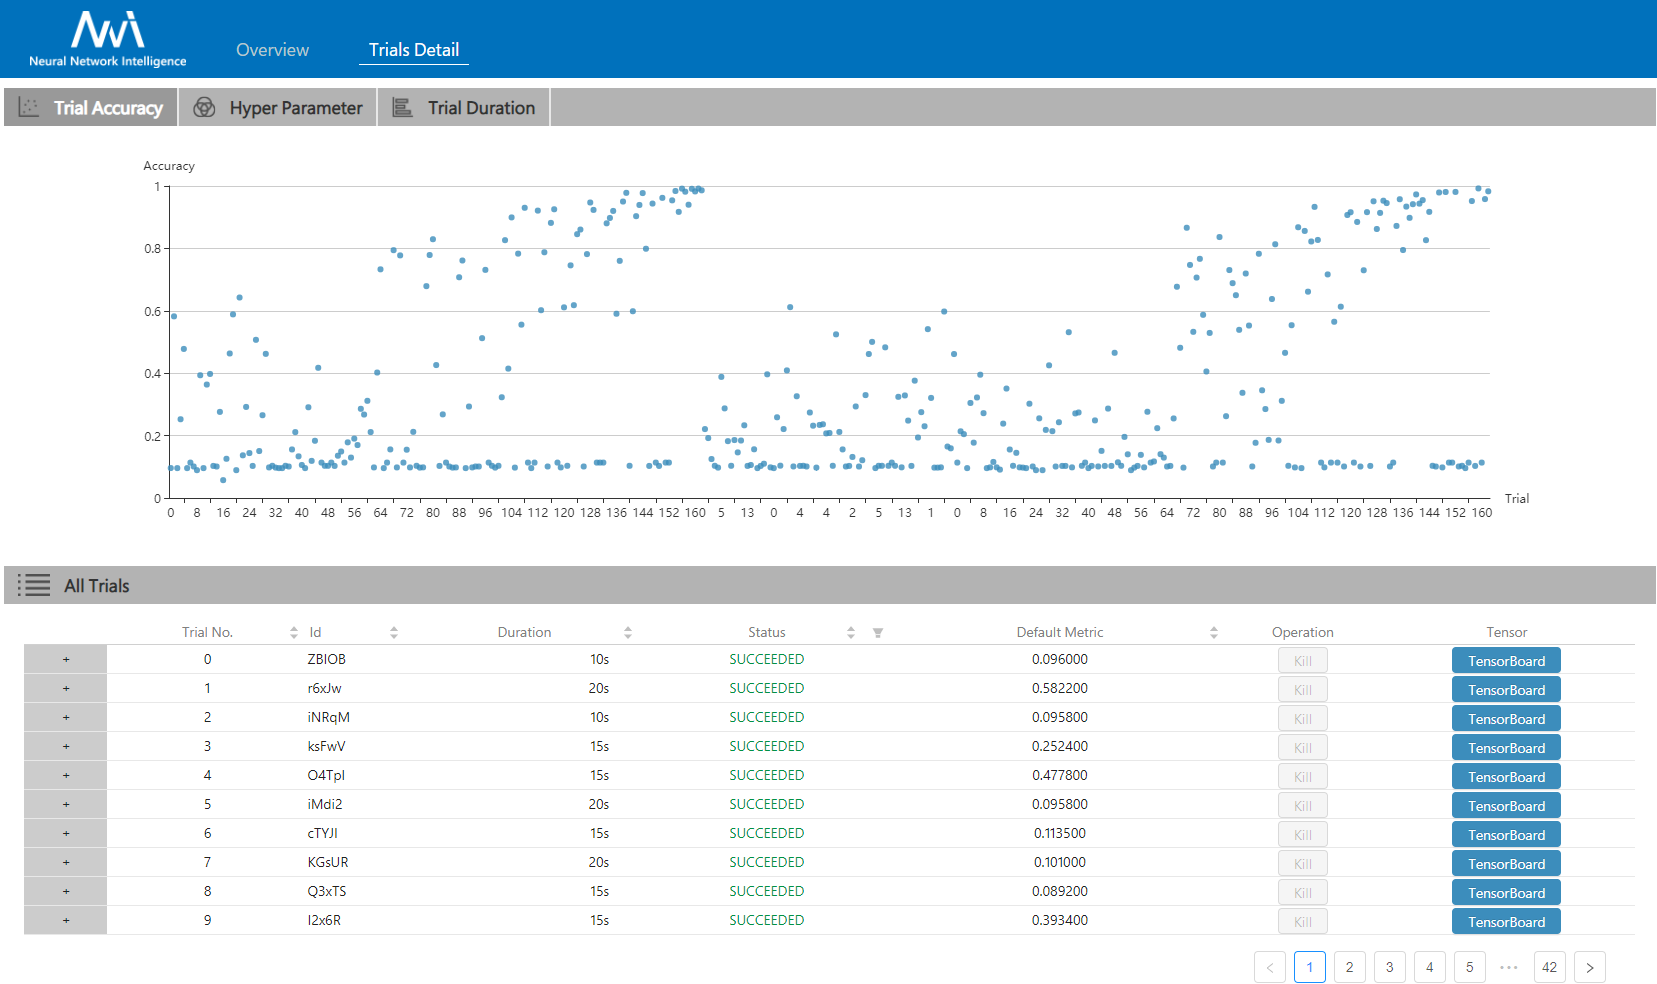
Web UI urlin your browser, you can view detail information of the experiment and all the submitted trial jobs as shown below. Here are more Web UI pages.
 |
 |
|---|
- To learn about what's NNI, read the NNI Overview.
- To get yourself familiar with how to use NNI, read the documentation.
- To get started and install NNI on your system, please refer to Install NNI.
This project welcomes contributions and suggestions. Most contributions require you to agree to a Contributor License Agreement (CLA) declaring that you have the right to, and actually do, grant us the rights to use your contribution. For details, visit https://cla.microsoft.com.
When you submit a pull request, a CLA-bot will automatically determine whether you need to provide a CLA and decorate the PR appropriately (e.g., label, comment). Simply follow the instructions provided by the bot. You will only need to do this once across all repos using our CLA.
This project has adopted the Microsoft Open Source Code of Conduct. For more information see the Code of Conduct FAQ or contact [email protected] with any additional questions or comments.
After getting familiar with contribution agreements, you are ready to create your first PR =), follow the NNI developer tutorials to get start:
- We recommend new contributors to start with simple issues: 'good first issue' or 'help-wanted'.
- NNI developer environment installation tutorial
- How to debug
- If you have any questions on usage, review FAQ first, if there are no relevant issues and answers to your question, try contact NNI dev team and users in Gitter or File an issue on GitHub.
- Customize your own Tuner
- Implement customized TrainingService
- Implement a new NAS trainer on NNI
- Customize your own Advisor
With authors' permission, we listed a set of NNI usage examples and relevant articles.
-
- Run ENAS with NNI
- Automatic Feature Engineering with NNI
- Hyperparameter Tuning for Matrix Factorization with NNI
- scikit-nni Hyper-parameter search for scikit-learn pipelines using NNI
-
- Hyper Parameter Optimization Comparison
- Neural Architecture Search Comparison
- Parallelizing a Sequential Algorithm TPE
- Automatically tuning SVD with NNI
- Automatically tuning SPTAG with NNI
- Find thy hyper-parameters for scikit-learn pipelines using Microsoft NNI
- Blog (in Chinese) - AutoML tools (Advisor, NNI and Google Vizier) comparison by @gaocegege - 总结与分析 section of design and implementation of kubeflow/katib
- Blog (in Chinese) - A summary of NNI new capabilities in 2019 by @squirrelsc
- File an issue on GitHub.
- Ask a question with NNI tags on Stack Overflow.
- Discuss on the NNI Gitter in NNI.
Join IM discussion groups:
| Gitter | ||
|---|---|---|
 |
OR |  |
Targeting at openness and advancing state-of-art technology, Microsoft Research (MSR) had also released few other open source projects.
- OpenPAI : an open source platform that provides complete AI model training and resource management capabilities, it is easy to extend and supports on-premise, cloud and hybrid environments in various scale.
- FrameworkController : an open source general-purpose Kubernetes Pod Controller that orchestrate all kinds of applications on Kubernetes by a single controller.
- MMdnn : A comprehensive, cross-framework solution to convert, visualize and diagnose deep neural network models. The "MM" in MMdnn stands for model management and "dnn" is an acronym for deep neural network.
- SPTAG : Space Partition Tree And Graph (SPTAG) is an open source library for large scale vector approximate nearest neighbor search scenario.
We encourage researchers and students leverage these projects to accelerate the AI development and research.
The entire codebase is under MIT license


