!!!IMPORTANT!!! This repository is being discontinued. All the development is being moved to https://github.com/itohio/ESPWeather.
ESP-1S or ESP-12 weather station that publishes telemetry to a configured MQTT broker. The station will try to connect to configured multiple Wifi networks and if no such were found, will try open networks. Then it will connect to MQTT broker and announce telemetry data until 30 seconds elapses. In that case it will go to deep sleep for 30 minutes and the process starts over.
There are three station variants: OLED, E-Paper and Headless. Also there is Web UI (TODO) that can be used for initial configuration or telemetry readings in AP mode if no networks are present. Note, that after each UI query sleep timer will be reset, meaning that if one does not dwell for too long(30s) will be able to use the station until the battery dies. Websockets are used for telemetry transfer to the UI.
- mDNS
- OTA
- WebUI
- Connect to free wifi or one of configured networks
- MQTT Pub/Sub
- Report temperature
- Report relative humidity
- Report air pressure
- Report battery voltage
- Report light intensity (photoresistor) (non Pro version)
- Variety of I2C and OneWire sensors (Pro version)
- Two ADC channels (Pro version)
- Event counter e.g. for rain bucket gauge (Pro version)
- Support for OpenLog board (Pro version)
- Monitor and display several other station telemetry
- Headless
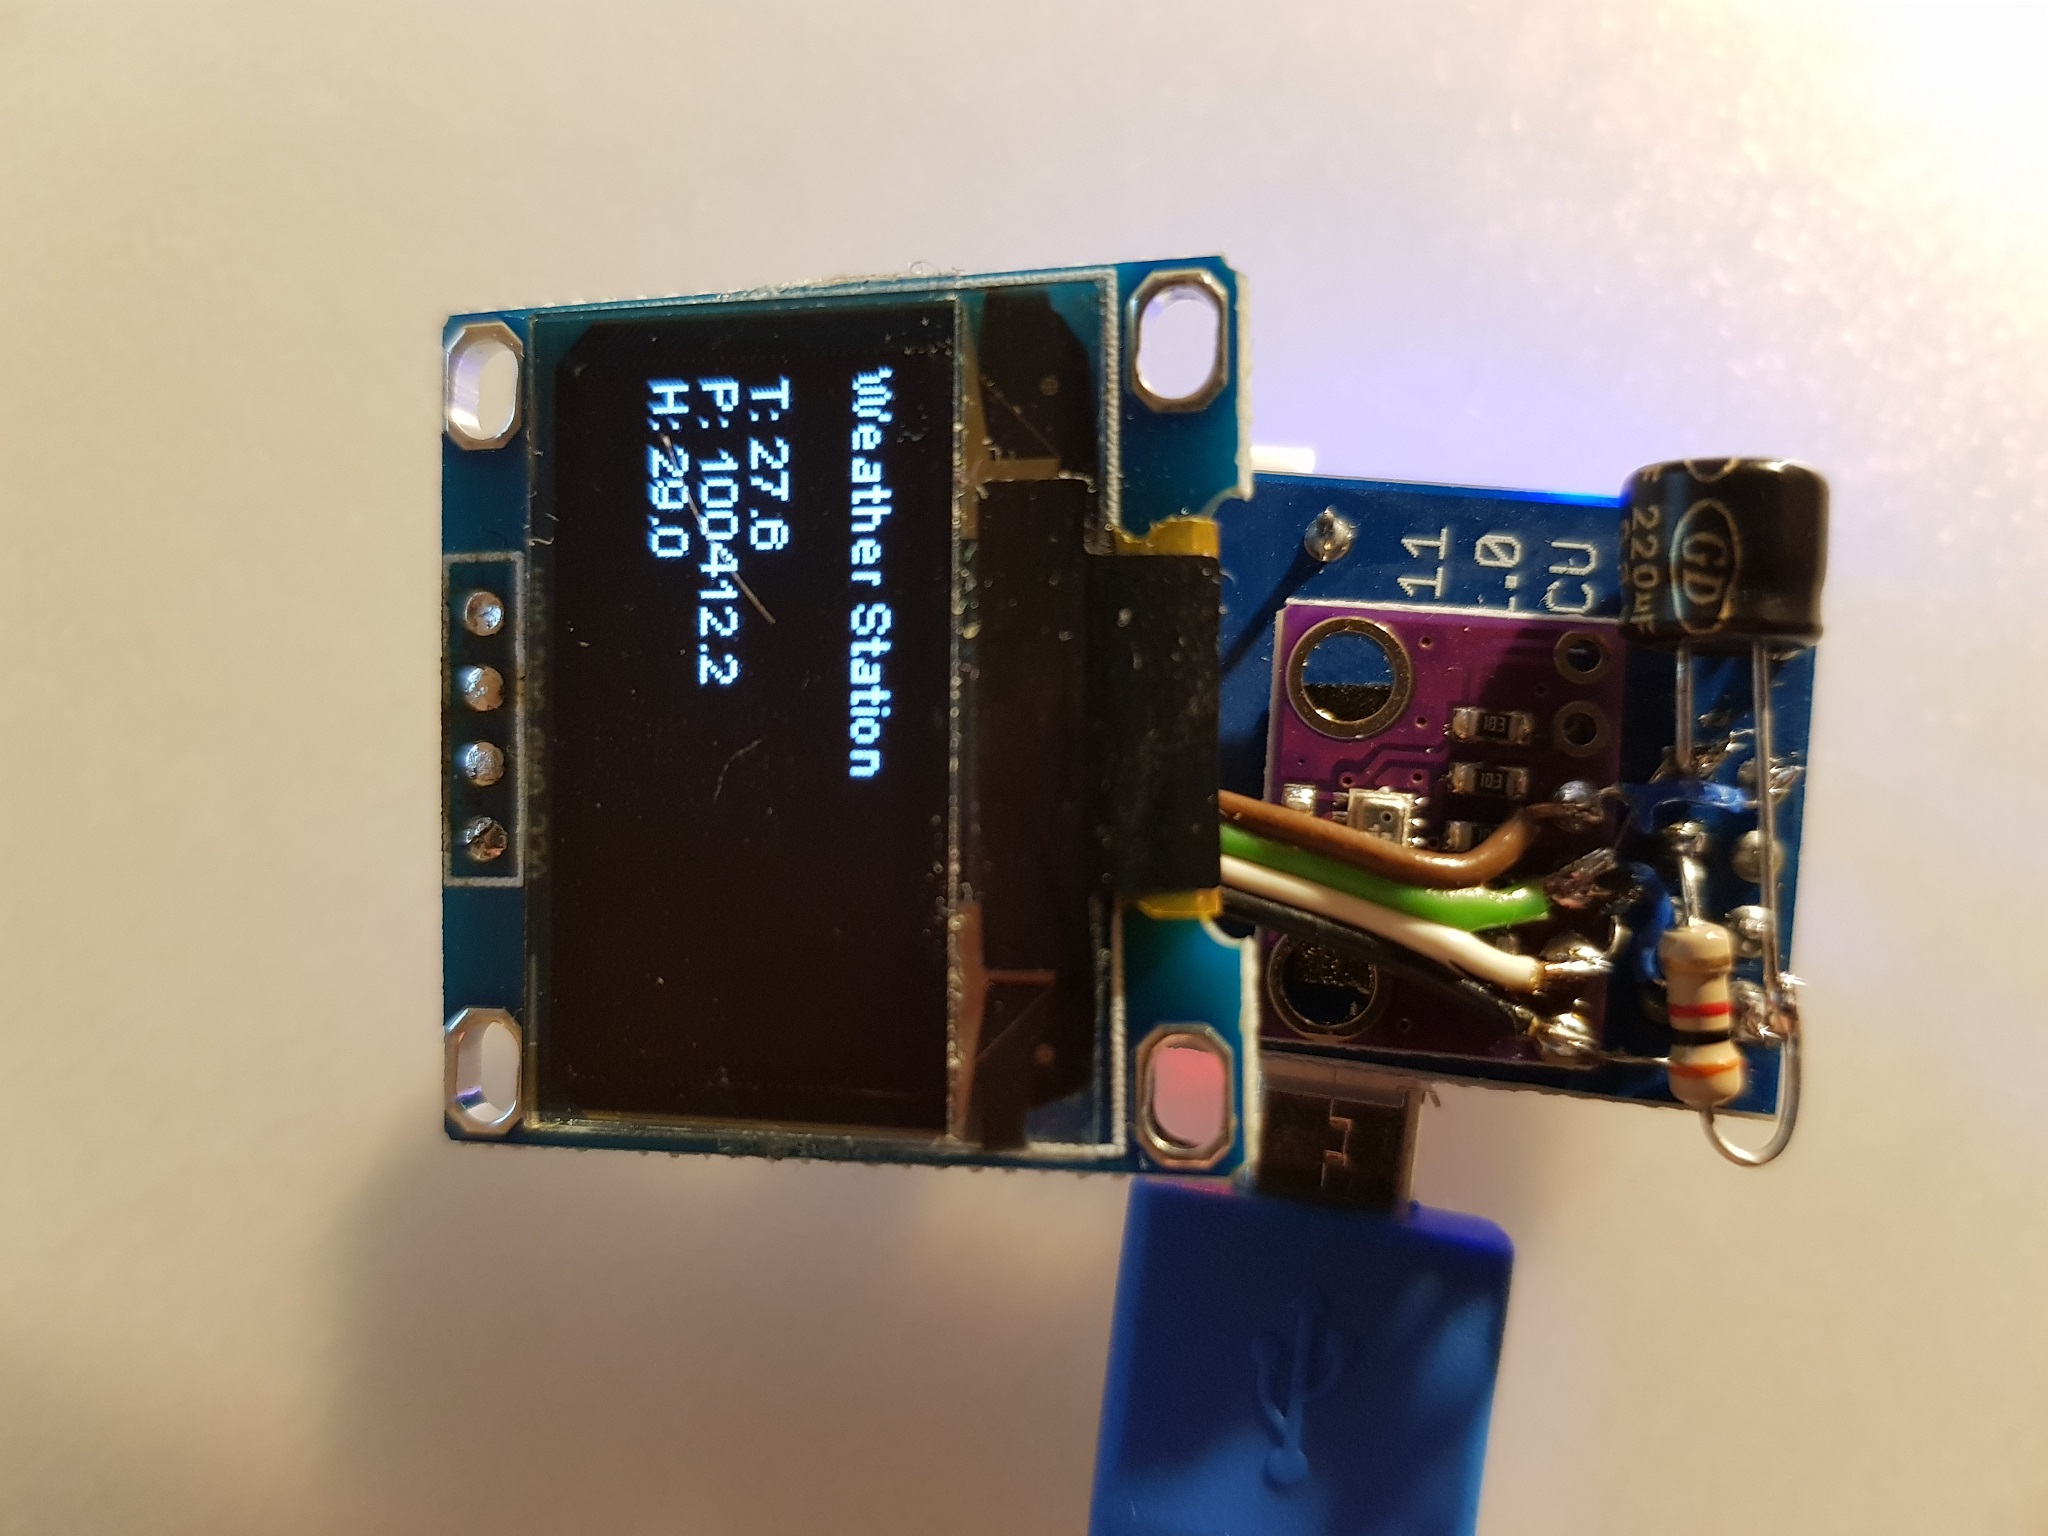
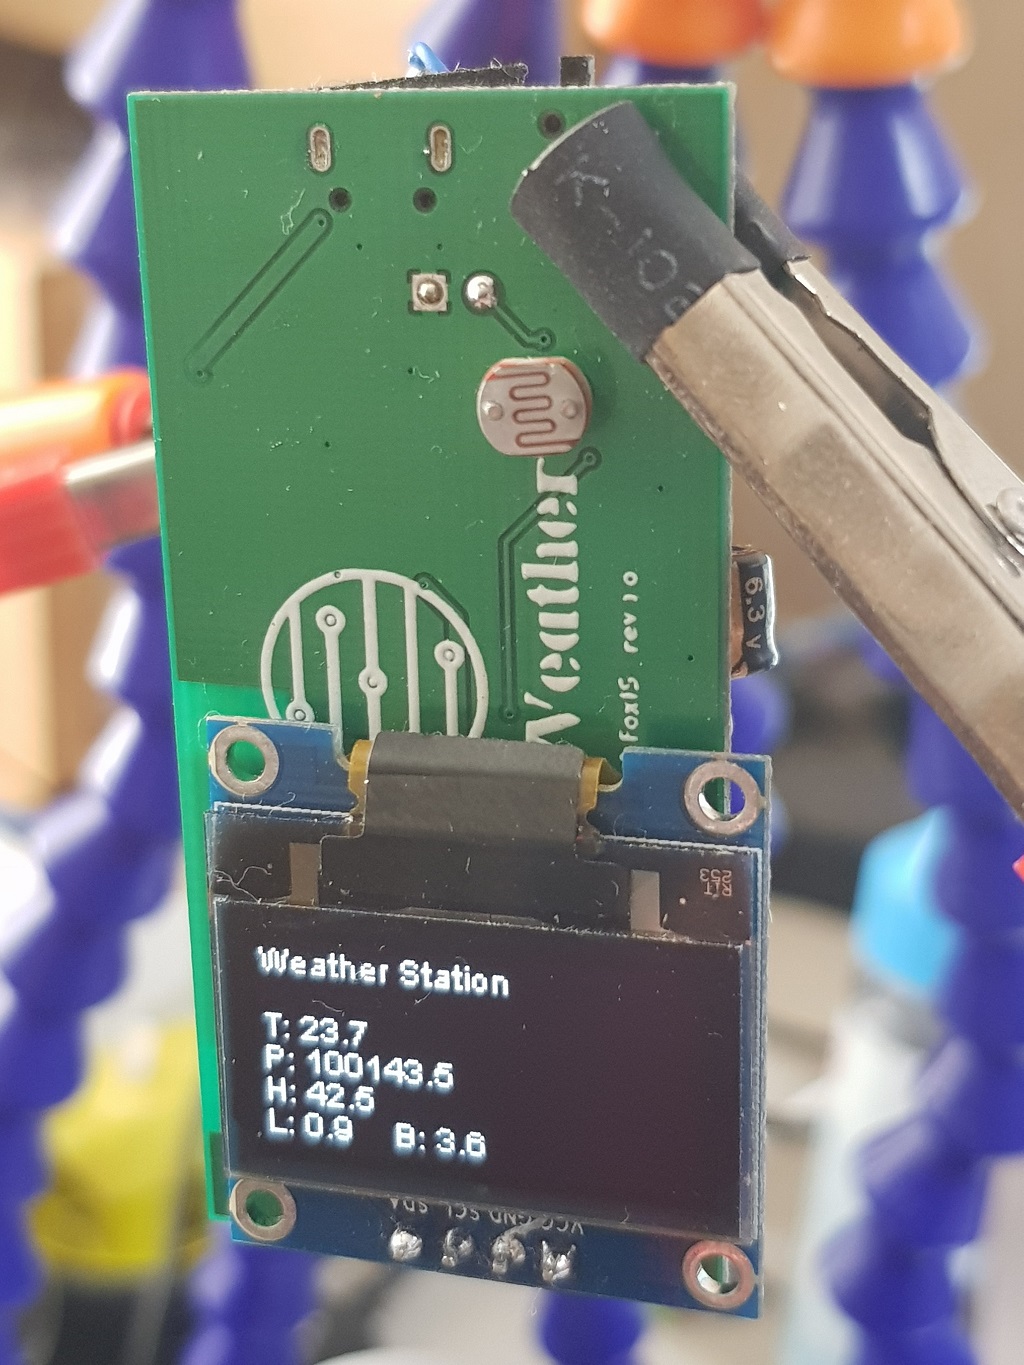
- OLED display
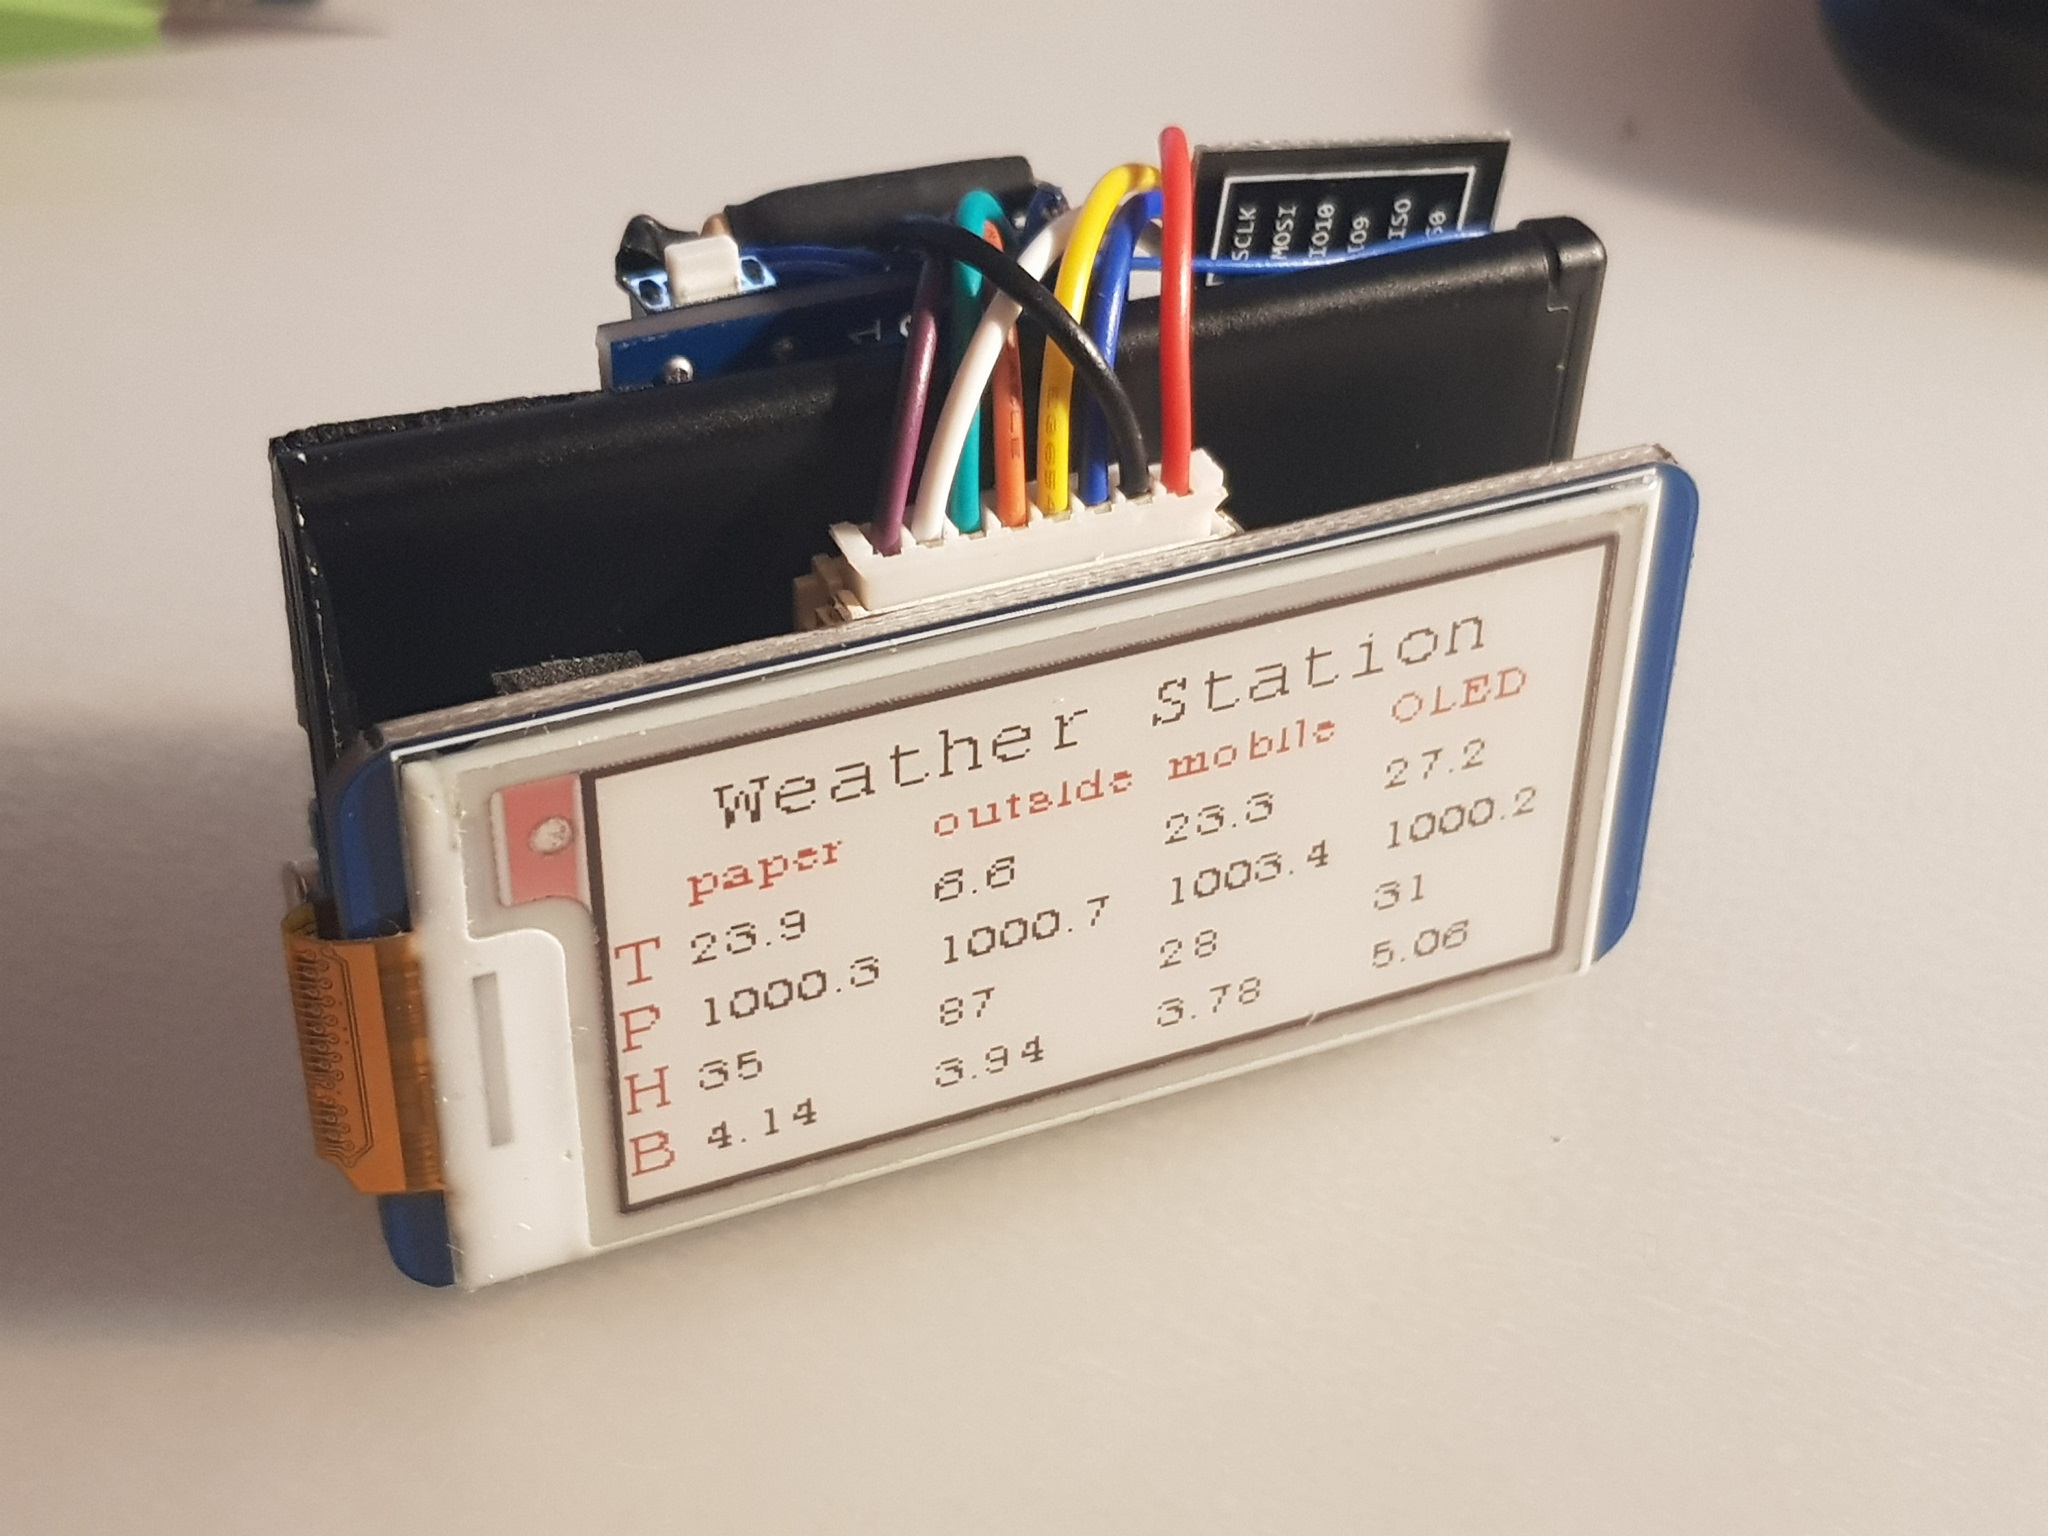
- E-Paper display
- Configure Wifi networks via MQTT
- Configure station name via MQTT
- Configure station names to be monitored via MQTT
- Persistent telemetry MQTT messages
Each station variant tries to connect to either open wifi or one of configured wifi networks giving priority to configured networks. After that it tries to connect to a configured MQTT broker. Once initial telemetry data is available, starts to publish telemetry data to MQTT broker every 1s. After 30s of bootup will go to deep sleep. After 30 minutes will wake up and repeats the cycle. OLED/E-Paper variants also display gathered telemetry data. Calculated power demand is around 1mAh and can be lowered by reducing time spend awaken and removing LEDs from ESP module. Also higher resistor value for voltage divider could be used.
These have no user interface and are intended to be placed into various strange places. Like the balcony or the room. One of mine currently sits in the biology museum.
ESP_WEATHER_VARIANT_OLED must be defined for that option before building. It will use a SSD1306 128x64 .96" OLED display and will display current telemetry info except for battery.
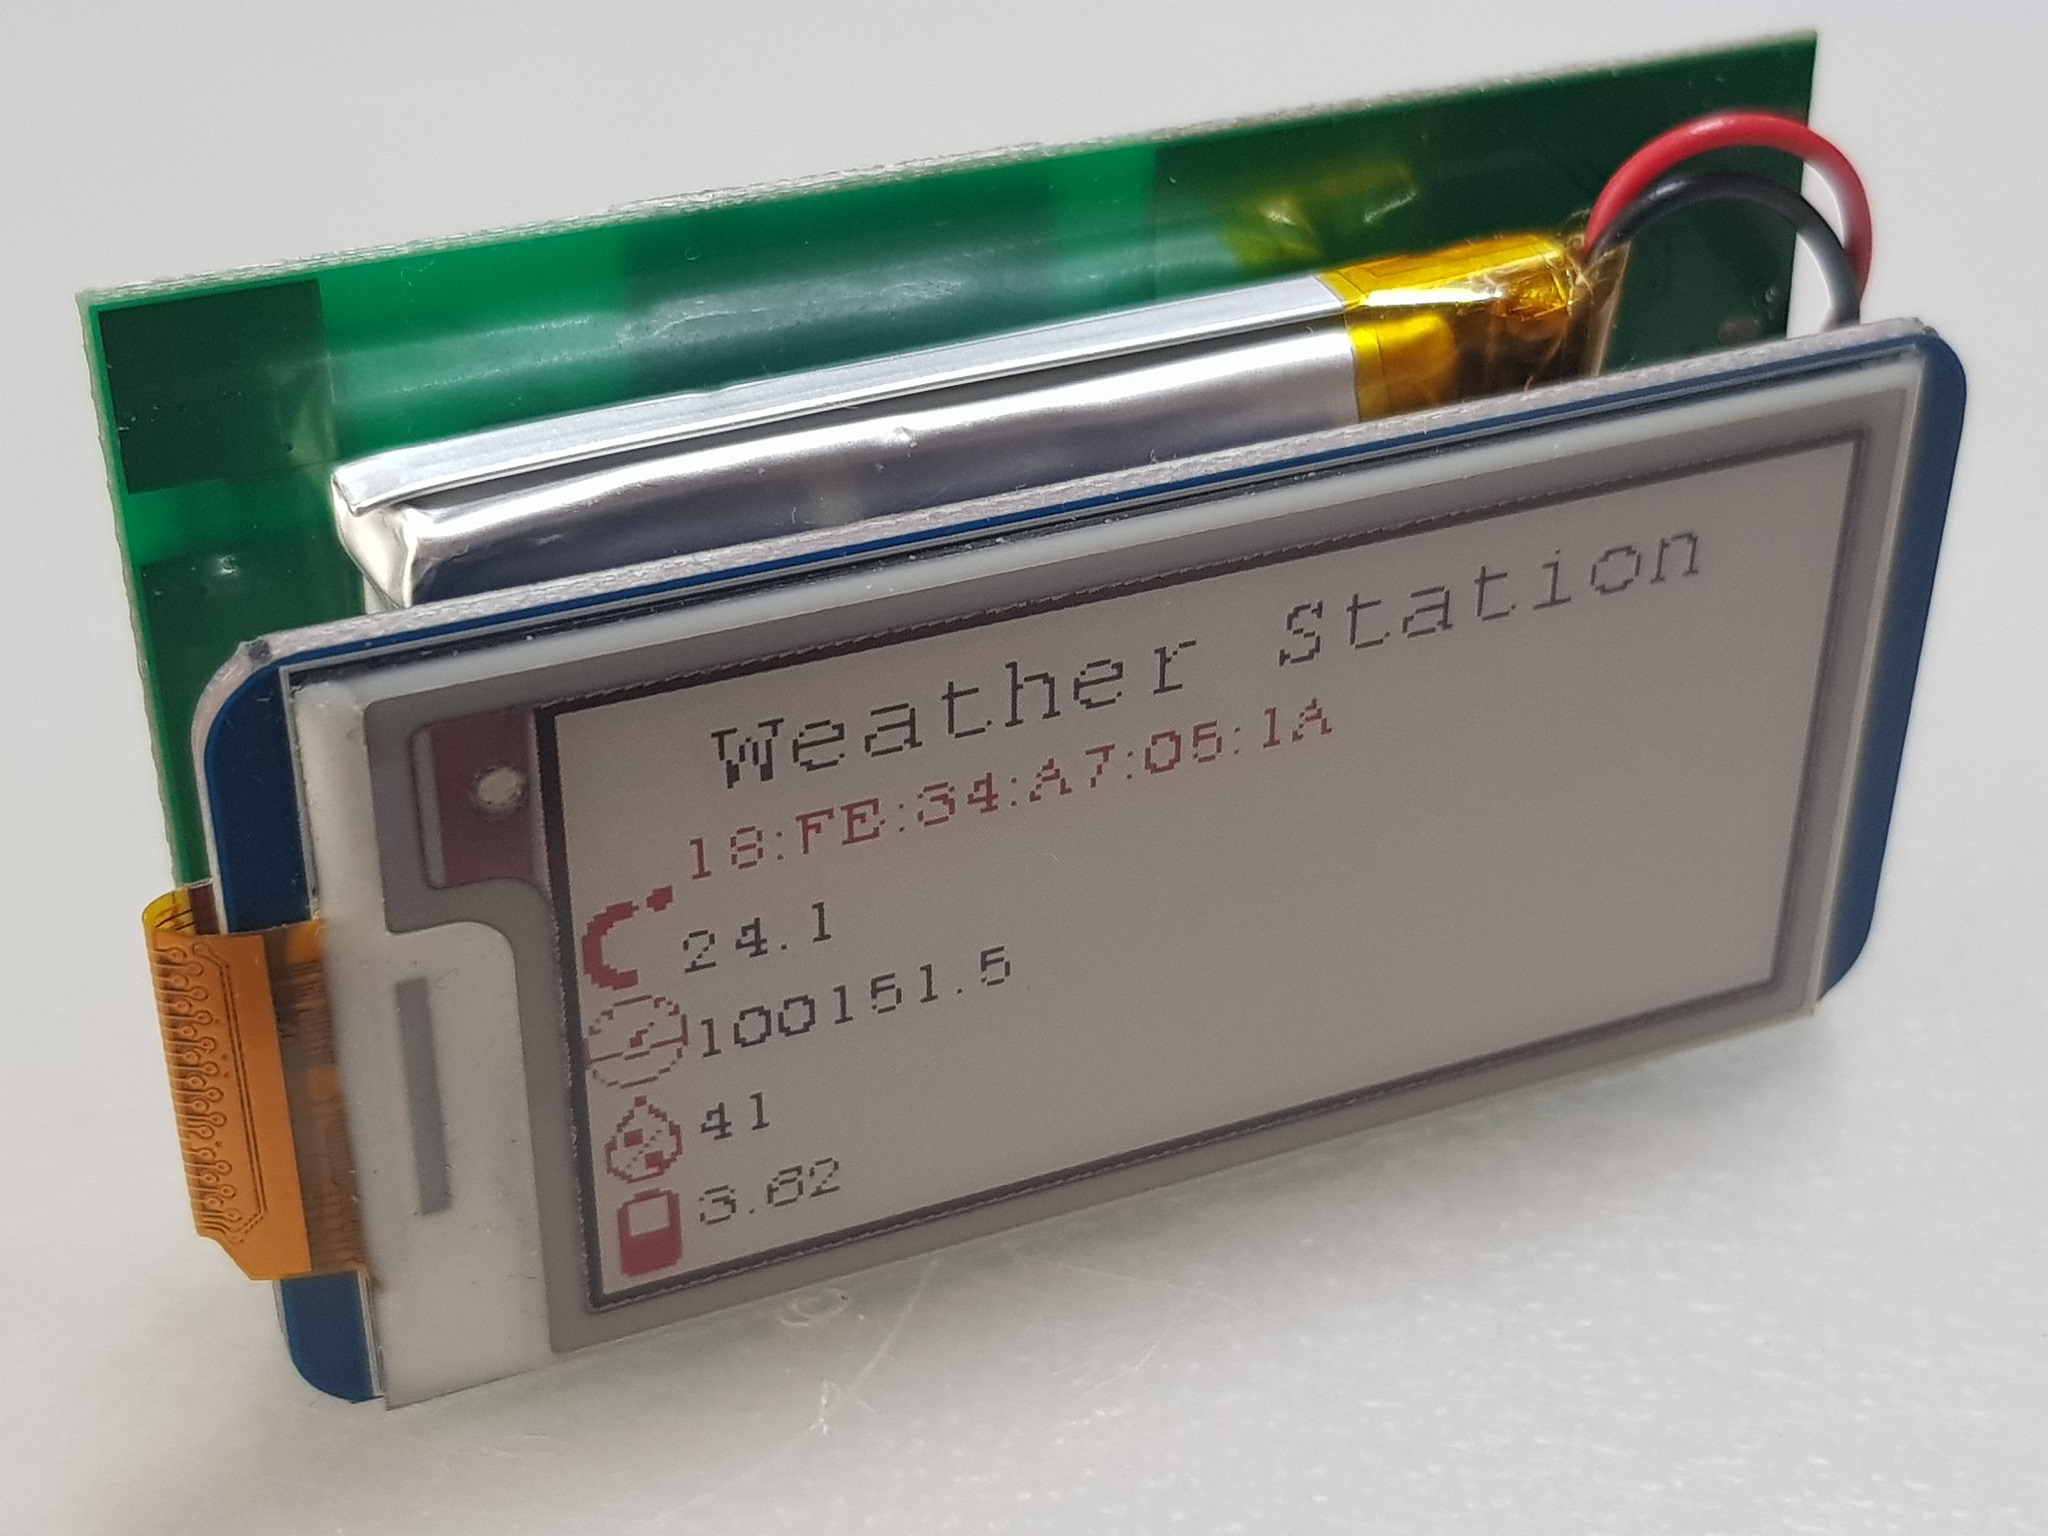
ESP_WEATHER_VARIANT_EPAPER must be defined for that option. ESP_WEATHER_VARIANT_OLED and ESP_WEATHER_VARIANT_EPAPER are mutually exclusive and the latter is only available when using ESP-12 module as SPI interface is required for it's operation. ESP-1 does not have enough pins for this feature.
Please note, that for other variants esp01_1m board is used. E-Paper variant uses d1_mini board. I had some random issues flashing ESP-12 using esp01_1m board either via serial upload or OTA. Also, since RX and TX pins are used for I2C communication to the BMP280 sensor, once it is soldered OTA programming might be the only option.
The most desirable feature of this variant is that the display is so wide it can fit four readings. Station names that this variant can display are configured using {station name}/name MQTT message as described in relevant section below. First column is always the current station and three other are configurable.
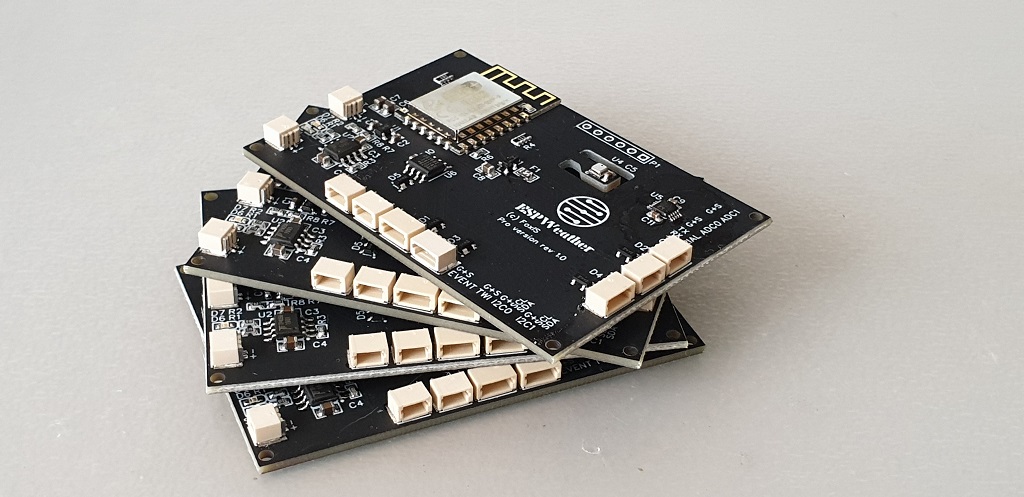
ESP_WEATHER_VARIANT_PRO must be defined for that option. The main advantage of that mode is that there are many more sensors supported. The board itself
contains various busses (i2c, one wire, event counter, adc, serial) so that different sensors can be connected to it.
For example you can build a complete weather station using this mode and connect soil moisture sensor(on one of ADC channels), UV/light sensor(SI1145), OneWire Dallas temperature sensor, rain bucket gauge to event counter, OpenLog serial logger(on I2C second channel which functions as Software Serial port).
Apart from builtin BME280 sensor the following are supported on I2C0 bus:
- SI1145 UV/Ambient Light
- DS18B20 Dallas temperature sensor
- RTC clock
- OpenLog module (connected to I2C1 BUS that acts as a SoftwareSerial bus)
TODO
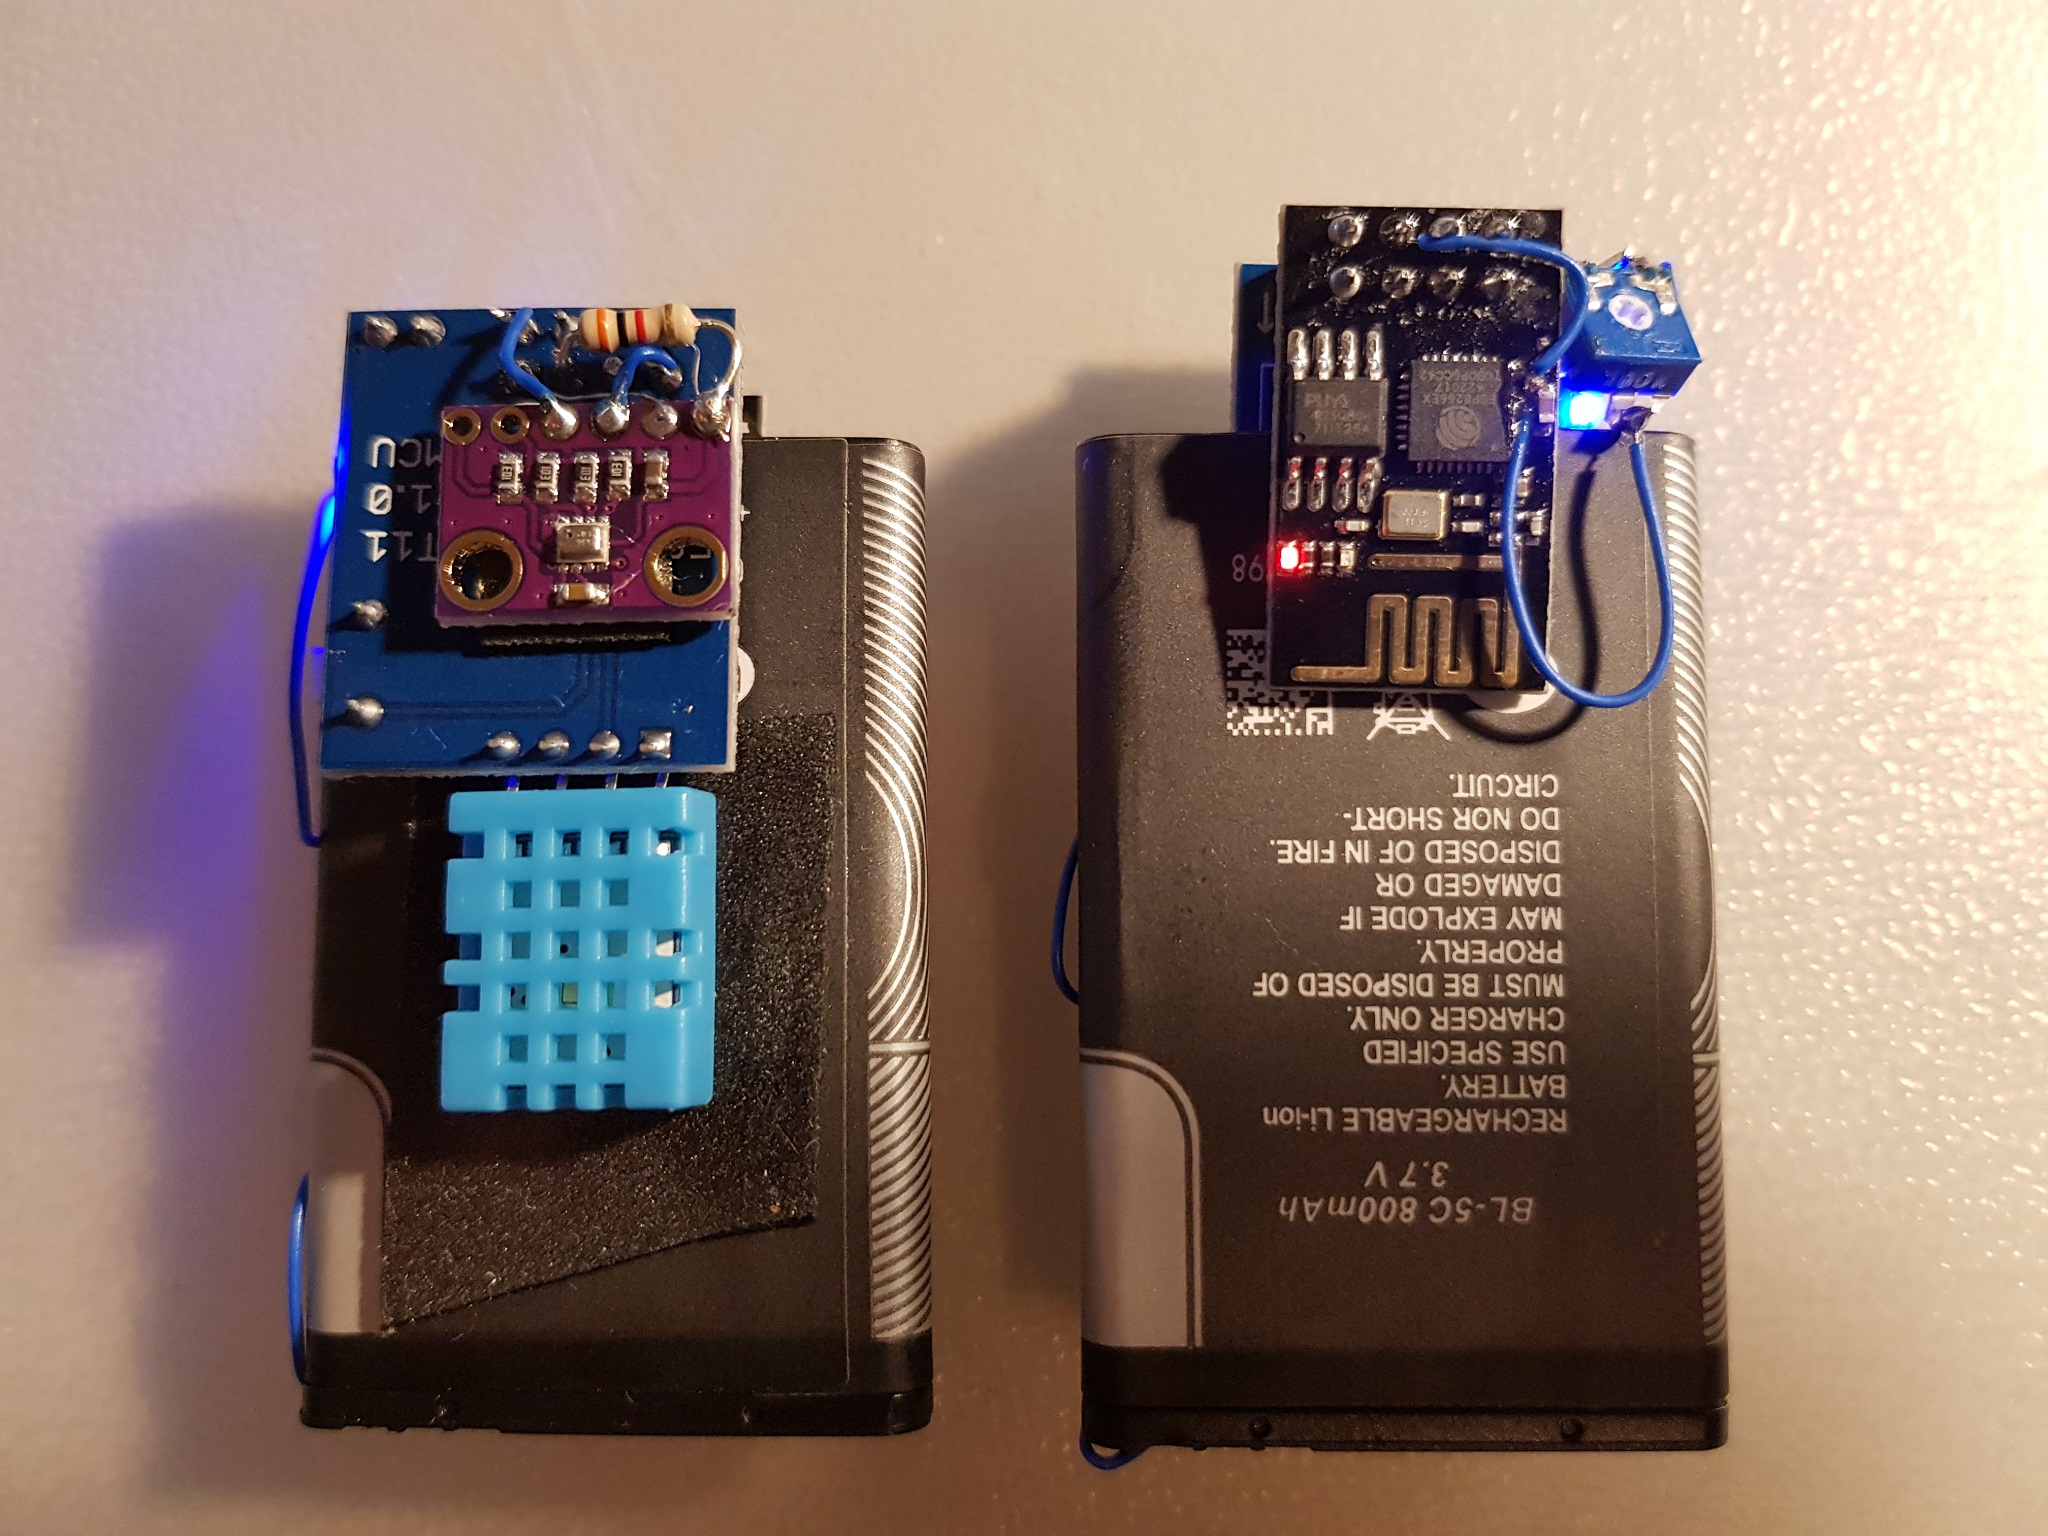
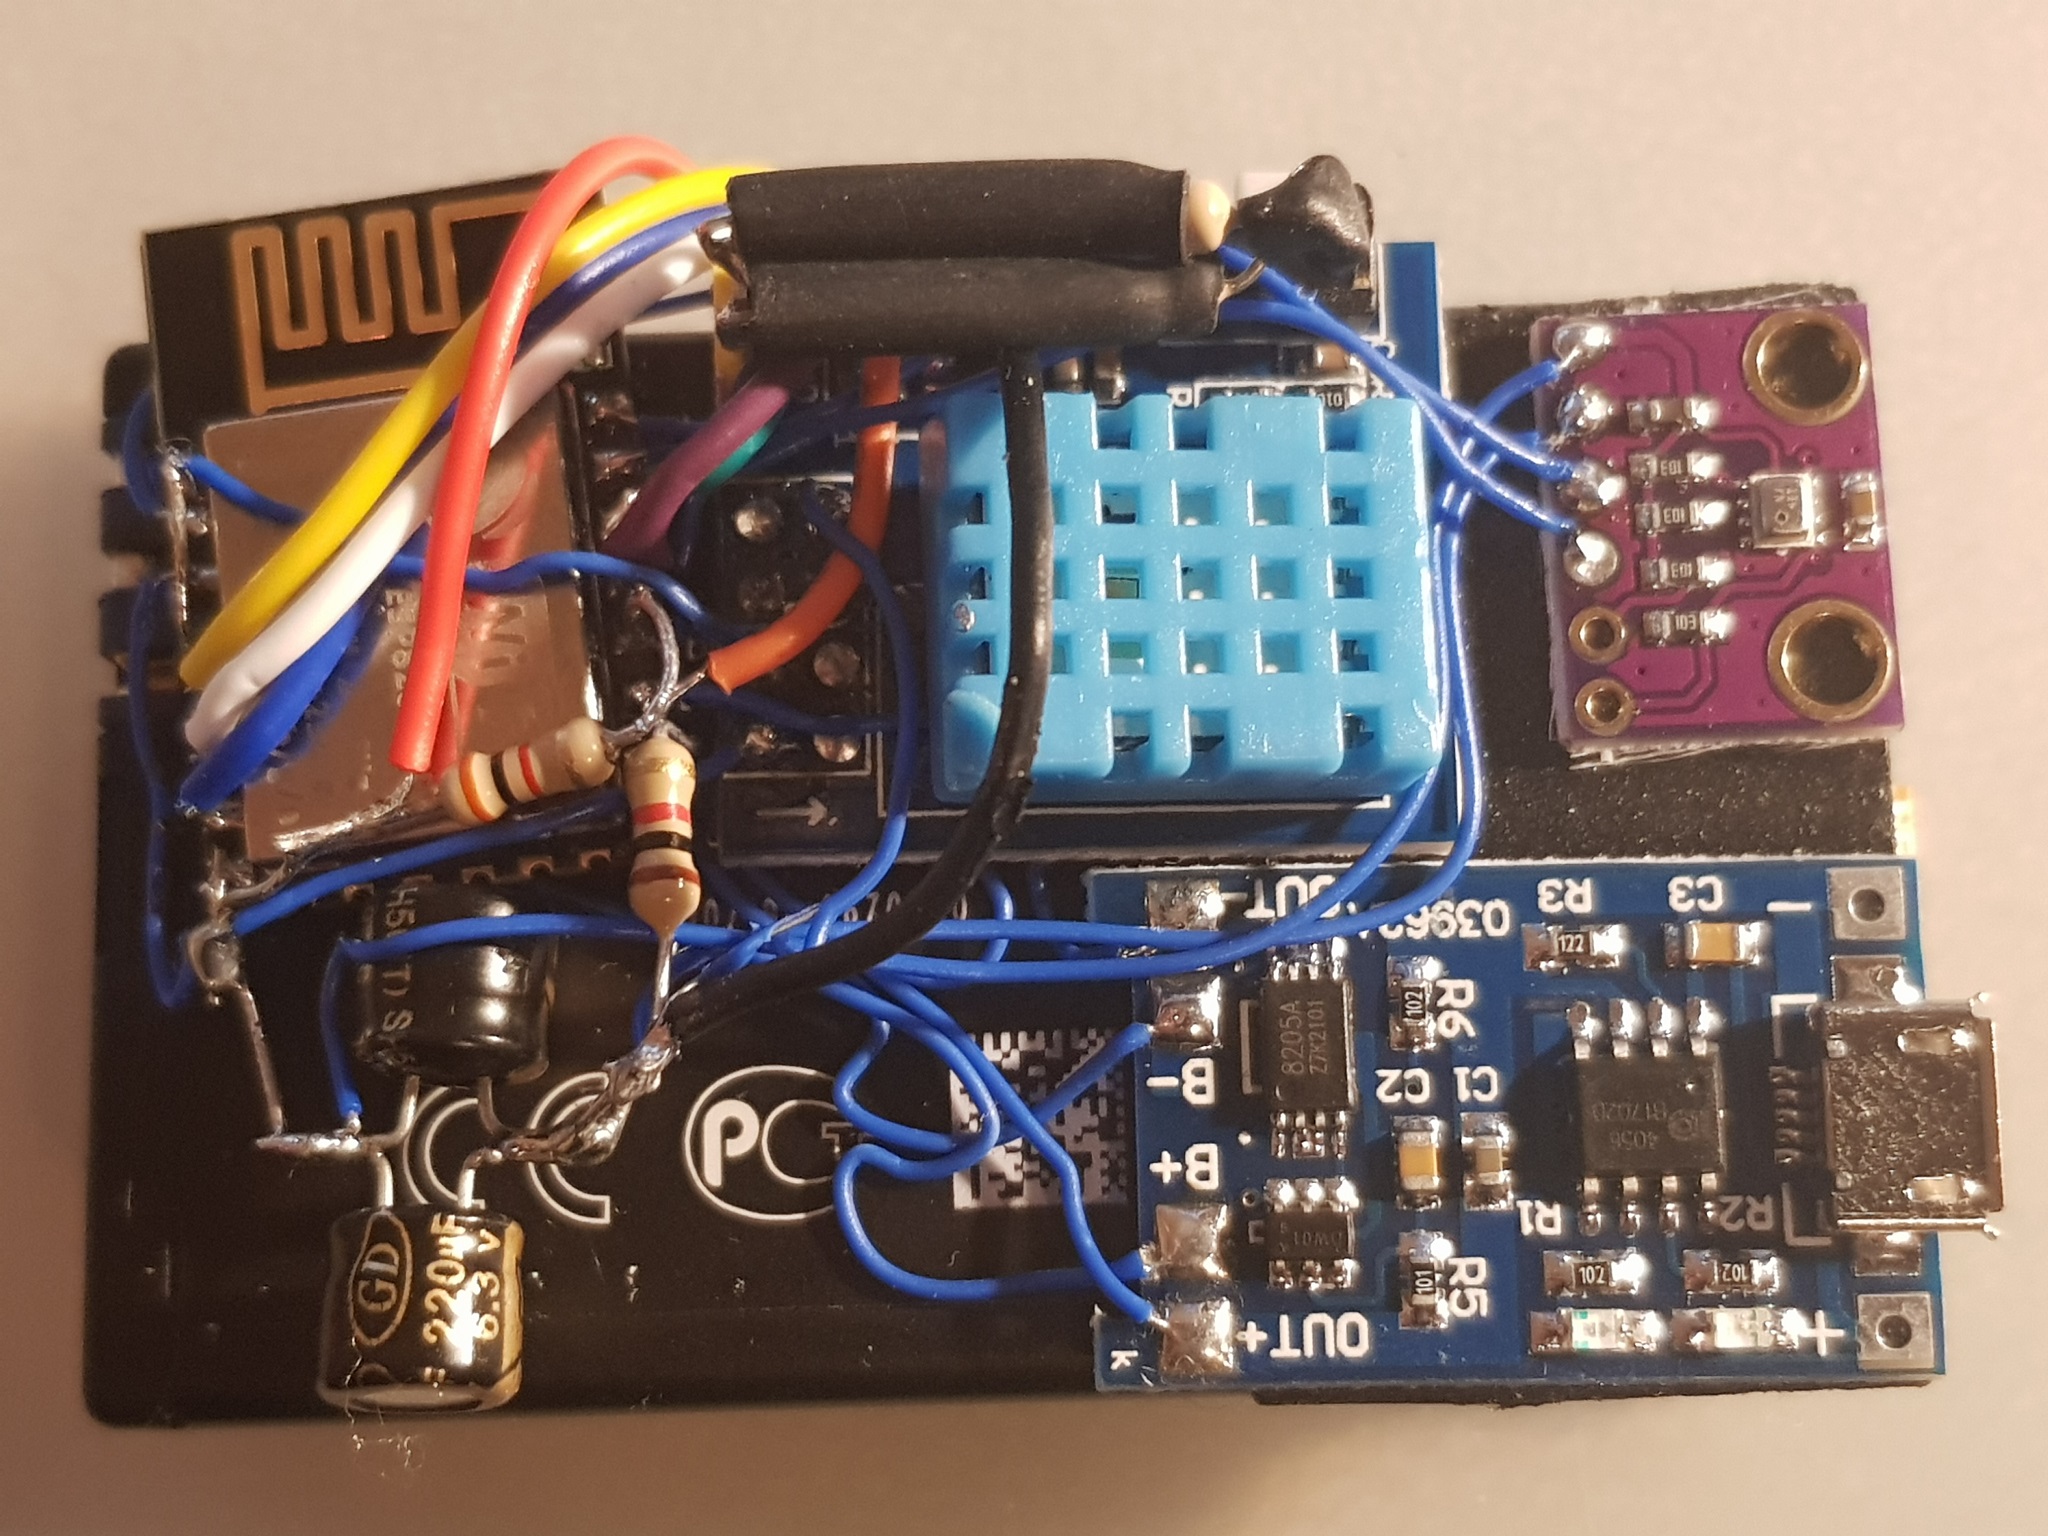
Prototypes mainly use breakout boards and wires to connect stuff together. Additionally prototypes use DHT11 and BMP280 for
humidity and temperature/pressure respectively. They also use a divider across battery input to read battery voltage.
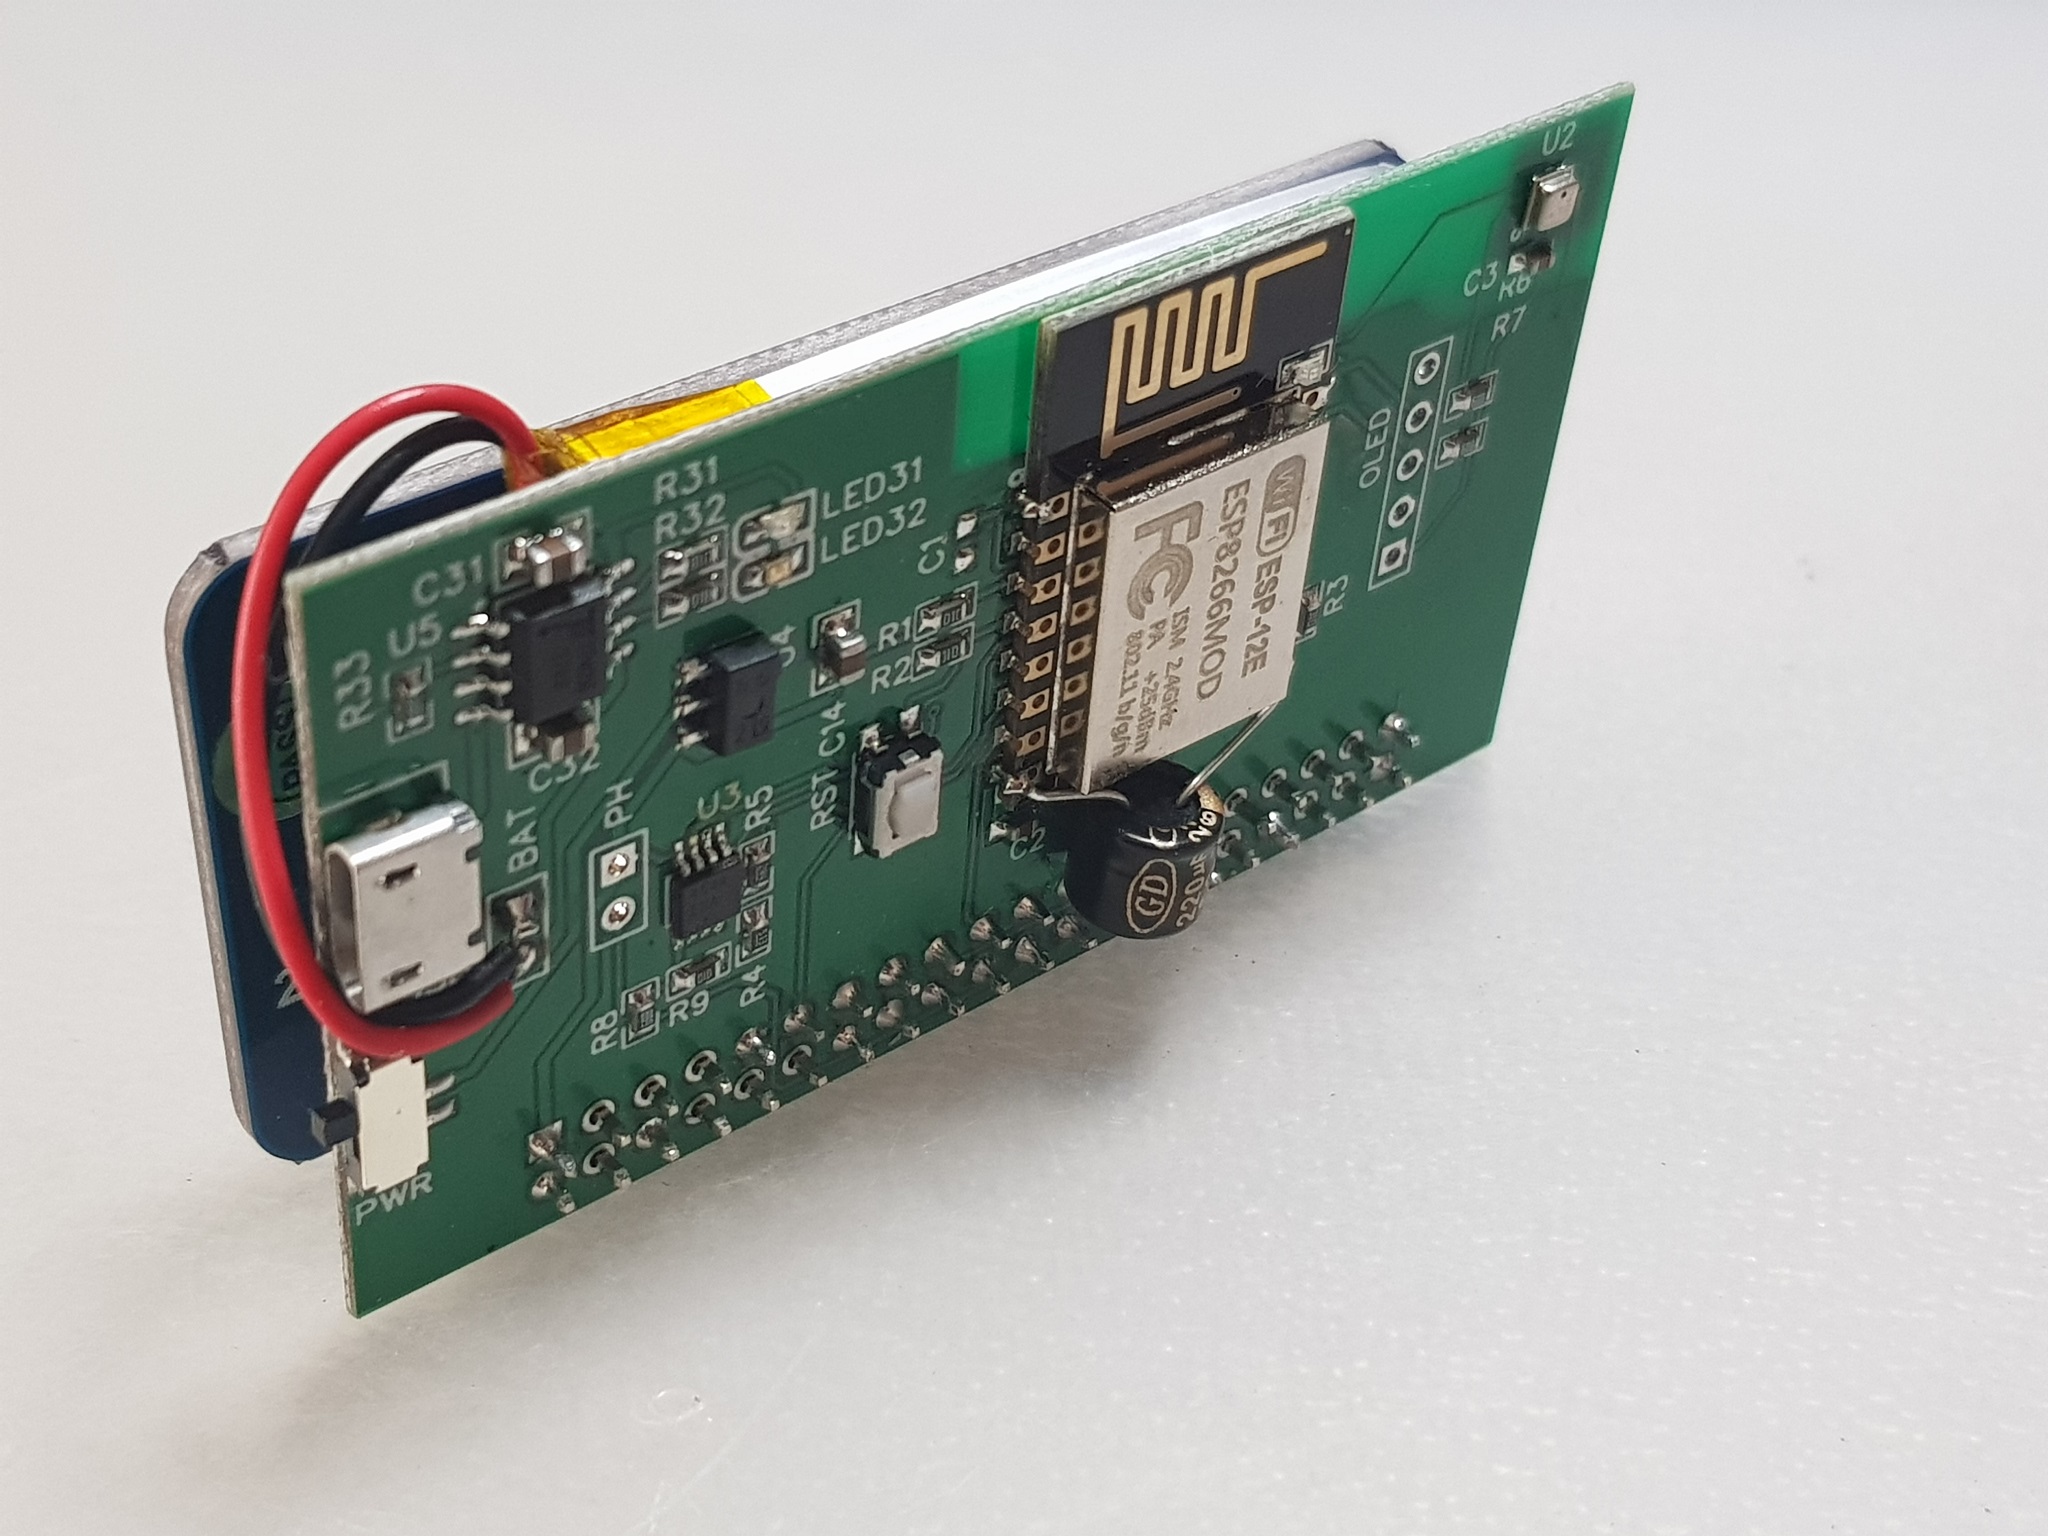
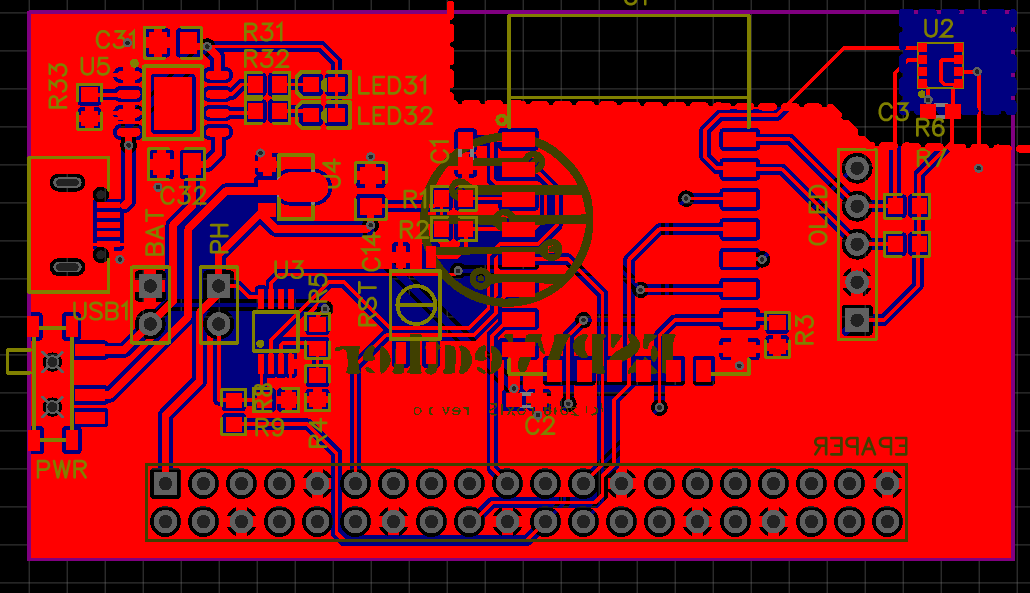
This revision is the first version of the boards. Changes are - an analog switch to read battery voltage and photoresistor value.
Additionally boards use BME280 for humidity/temperature/pressure readings. Boards were designed with 200mA 3.3 regulator which proved to be insufficient even with beefier capacitors.
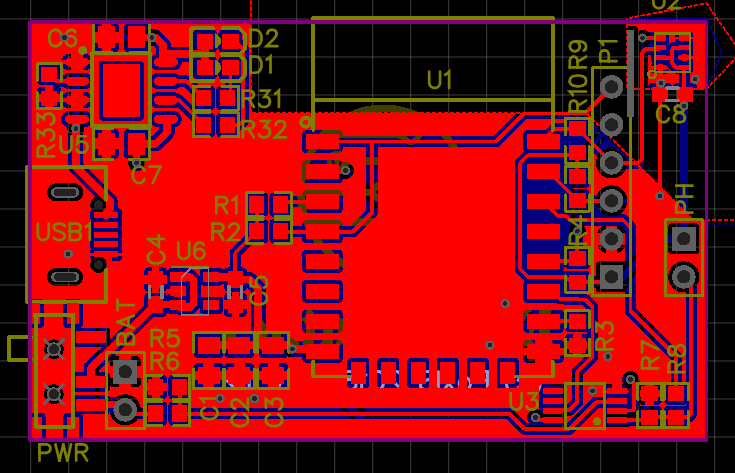
This revision removes reset button, rearranges location of analog switch, adds GPIO0 pin to the OLED header for easier programming, more capable voltage regulator and more capacitors. Also there is a pullup for GPIO0.
Additionally the BME280 sensor ir better isolated from the main board by a cutout. The board itself is smaller.
PlatformIO is used for this project. Just clone the project, import it into platformio, select board info and build. Flashing is also done this way. platformio.ini file contains some example upload_port values for OTA flashing. One can always use hostnames instead of ips. It's just that my bonjour service is confused because of different stations occupying the same hostname.
Since I use git submodules (for EasyOTA), cloning must be done using --recurse-submodules option:
git clone --recurse-submodules https://github.com/foxis/ESPWeather.git
DHT11 and BMP280 modules are used in this station for prototypes. BME280 or even BME680 will be used in production. SSD1306 and 3 colour 2.13" E-Paper HAT are used for OLED and E-Paper variants respectively. For E-Paper prototype Wemos D1 mini was used and later replaced with standalone ESP-12F module.
For battery management I used a TP4050 micro-usb module with protection circuitry. If one has Lipo/LiIon batteries with protection in possession, then protection-less charging boards can be used. Mine boards have USB mini soldered which I personally do not like.
I plan adding a 6V solar panel so I could start measuring outside temperature without worrying about the battery.
OLED variant in the above picture does not use any charging circuitry as it is meant for always-connected (or battery-pack) usage. However please note, that most battery packs will disconnect the battery from the station once it goes into deep sleep mode.
Cases for these can be 3D printed. TODO.
- Rx is SCL
- Tx is SDA
- GPIO 2 is 1-Wire interface for DHT11 (for prototypes) and an input to analog switch (for boards)
- GPIO 13, 14, 15, 5, 12, 4 are for EPD signals: DIN, CLK, CS, DC, RST, BUSY respectively
- TOUT or ADC is for battery monitoring and connected to battery input via 1/10 voltage divider (ADC can measure up to 1.0V, so this scale factor is quite convenient)
- sourced on Ebay: DHT11 for ESP-1S module, BMP280 board, TP4050 lipo micro-usb charger board, SSD1306 and 2.13" RPI-Zero E-Paper HAT (Waveshare)
- LiIon Batteries from various dead cell phones and cheap Chinese video registrators
EasyEDA project page: https://easyeda.com/andrius.mikonis/ESPWeather-7eab5122a6f84e15a6e2534b3213e768
I use 100k trim pot directly across battery connector to the DH11 board, trim it to 1/10th of the battery voltage and solder the center tap to a TOUT pin right to the ESP8266 chip. I suggest flashing the ESP-1 module before soldering, so that the wire wouldn't be stressed to much. Discrete resistors for voltage divider can be seen in some the photos - this is because I ran out of trim pots:) And the dividing factor is not really precise, since I did not have 90k resistors and opted out for 2x51k + 10kx1k resistors. For the prototypes I am only interested in monitoring approximate voltage drop for the batteries and approximate point when DHT11 fails to provide meaningful readings.
At about 2.80V of battery voltage DHT11 library returns nan. This voltage is even too low for ESP, but surprisingly it survives until 2.65(minus voltage drop across ldo).
For waking up from Deep sleep GPIO 16 must be connected to RST. So more fine soldering skills are required in case of ESP-1. ESP-12 is more forgiving in that regard.
I've measured 1.8ma current in deep sleep. That means that the station sleeps for 30 minutes with 1.8mA current consuming 1.8mAh(I assume it never goes away). During all the communication and measurements somewhere around 70-90 mA are flowing to the ESP. So let's say it's 75mA for 30s. That translates to 0.625mAh. Therefore 800mAh battery would last a long time (about 13 days). Sadly, the batteries I am using in the photos are pretty much dead and charge up to around 75-120mAh. Which lasted for about 40 hours which confirms current consumption measurements and rough calculations to a degree.
That was with two LEDs being constantly lit and an onboard regulator. Which I am surprised by, by the way. One can always remove those buggers, but I figured that with solar panel the station would run almost indefinitely and would have plenty of run time for home usage with a 800mAh battery. By removing the blue LED current drops to ~400uA during deep sleep and the dead'est battery still runs for 4 days already at 3.75V.
When you power up the board for the first time(given that it was flashed with firmware and SPIFFS) it will enter AP mode with the name e.g. ESPWeather-oled. You may connect to that AP
and enter 192.168.4.1 in your browser. After the page loads, you will be able to see current readings of telemetry data.
In the menu you can select Setup and License items. In the Setup page you will be presented with various settings: Wifi, MQTT, General timeout settings.
After you are done configuring your Weather Station, you can save the config and reboot the device.
Next time it will boot into normal operation and the WebUI will not be available.
WebUI and AP mode is activated each time after power up or hard reset(including a soft reset after OTA update) and is active for 5 minutes unless a connection to the web page is made.
NOTE: WebUI is a preferred way to configure the Weather Station as opposed to configuring via MQTT persistent messages.
Station will publish it's name to this topic once it connects to MQTT broker. Initially it will be a MAC address of the ESP.
One can configure a different name by publishing to {station name}/name a new name which will be saved on the station.
Temperature of the surroundings in deg. centigrade.
Air pressure of the surroundings in milli Bar.
Air relative humidity in percentage.
Battery voltage in volts.
ADC reading channel 0
ADC reading channel 1
Relative light reading using photoresistor or light reading if SI1145 is connected.
This reading is available in Pro version when SI1145 is connected.
Total number of events recorded for Pro version.
Publishing to this topic will change station name. Station name must not contain neither commas nor spaces as these symbols are reserved for E-Paper variant. One can specify a list of station names separated by a space or comma, so that measurement from those stations can be monitored. E.g. "paper OLED outside mobile" was used in the E-Paper variant shown in the photo. That means, that E-Paper variant's name was set to "paper" and three other stations were monitored: OLED, outside and mobile. Since each station published persistent telemetry messages, the latest data is being monitored and subsequently displayed on the E-Paper display.
Publishing to this topic will add another Wifi Network.
One must supply a space delimited ssid and password, e.g. ssid password.
This will be saved to the station and it will try to connect to this and other saved APs on boot.
Publishing to this topic will remove the ap. One must publish ssid of the network that one wishes to remove.
This topic accepts following publishes:
Forces the station to sleep for preset time (around 30 minutes).
Disables sleeping of the stations. This does not percist after restart. Useful for OTA development/etc.
Forces restart of the station.
Forces to announce it's name on announce topic.
Useful for station status monitoring.
Due to pin count limitation on ESP-1 RX and TX pins are used for I2C bus. I2C stations seem to survive initial burst of boot info that is fed during bootup, but programming via serial while these pins are still connected to OLED/BMP280 is not advised. I've tried it, but ESP-12 module does not boot.
Until now (20180216) ESP-01 with PUYA flash chips are not supported by the SPIFFS library (it can read uploaded, but not properly write files.). As a workaround one can publish config topics with persistent messages. E.g. setting name of the station. Setting up Wifi in this fashion isn't really useful for obvious reasons though.
For some reason very first measurement is way too high (both temperature and pressure). I've tried several libraries with no luck. In fact Adafruit_BMP280 library gives way too high readings all the time. The one I'm using currently (BMP280) is simplistic and allows to set different oversampling values and gives the most accurate readings except for the very first. To remediate that I skip several first readings.
Sometimes DHT11 will not read any data. And most of the time when the battery is almost depleted (<2.8V) there are no readings.
Icons made by https://www.flaticon.com/authors/pixel-perfect Pixel perfect from www.flaticon.com is licensed by http://creativecommons.org/licenses/by/3.0/ Creative Commons BY 3.0
Copyright (C) 2018 foxis (Andrius Mikonis [email protected])
This program is free software: you can redistribute it and/or modify it under the terms of the GNU General Public License as published by the Free Software Foundation, either version 3 of the License, or (at your option) any later version.
This program is distributed in the hope that it will be useful, but WITHOUT ANY WARRANTY; without even the implied warranty of MERCHANTABILITY or FITNESS FOR A PARTICULAR PURPOSE. See the GNU General Public License for more details.
You should have received a copy of the GNU General Public License along with this program. If not, see http://www.gnu.org/licenses/.

