This is a tutorial that shows how to setup a development environment for ESP32 series. Following this tutorial, finally you can develop and debug your first project on ESP32 boards.
Particially, for this case we choose:
- OS: Windows 10 with MSYS2-32bit
- Code Editor: VSCode
- Development Board: ESP32-DevKitC(ESP32-WROOM-32)
- JTAG Debugger: FT232HL
To develop and debug our first project on ESP32 boards, we need to finish several configuration procedures, step by step.
- Toolchain, that is used to compile applications for ESP32
- ESP-IDF, that includes all of necessary APIs for ESP32
- OpenOCD, that could provide on-chip debugging support via JTAG interface
- VSCode, that is a code editor which could develop and debug your code.
To obtain the toolchain of ESP32 chips, we can directly download an pre-packaged MSYS2 environment from here. If you are curious about setting up a toolchain manually, here is a tutorial from the official site could be useful.
Download the zip file and unzip it to C:\ (or other directory which you prefer), then we will get an msys32 directory under C:\.
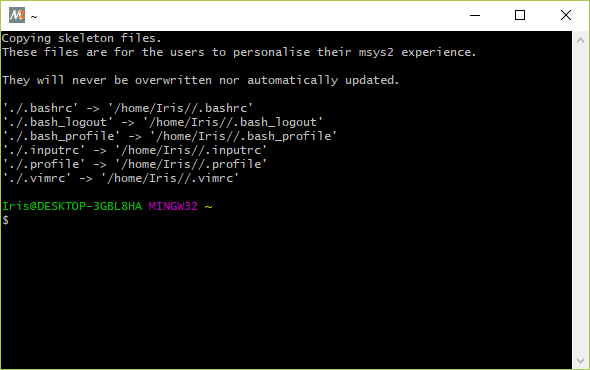
Click and run C:\msys32\mingw32.exe to check whether the environment has been configured.
Note: Before you start
mingw32.exe, it might need to runautorebase.batfirst to make yourMSYS2work normally.
To get the ESP-IDF, we will use git command to clone it from ESP-IDF repository provided by Espressif.
cd ~
mkdir esp
cd ~/esp
git clone --recursive https://github.com/espressif/esp-idf.gitTo make the API work well, we need to set the system variable of IDF_PATH.
An official tutorial is supplied.
Here, we already prepared a export_idf_path.sh.
However, you need to modify the directory based on your own case.
Note that, you should use forward-slashes to replace back-slashes, e.g.:
export IDF_PATH="C:/msys32/home/yourusername/esp/esp-idf"
Copy hello_world example from ESP-IDF to ~/esp directory:
cd ~/esp
cp -r $IDF_PATH/examples/get-started/hello_world .
$
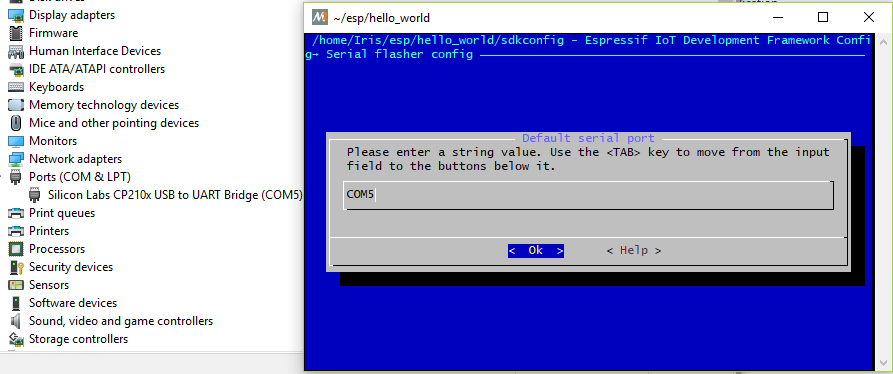
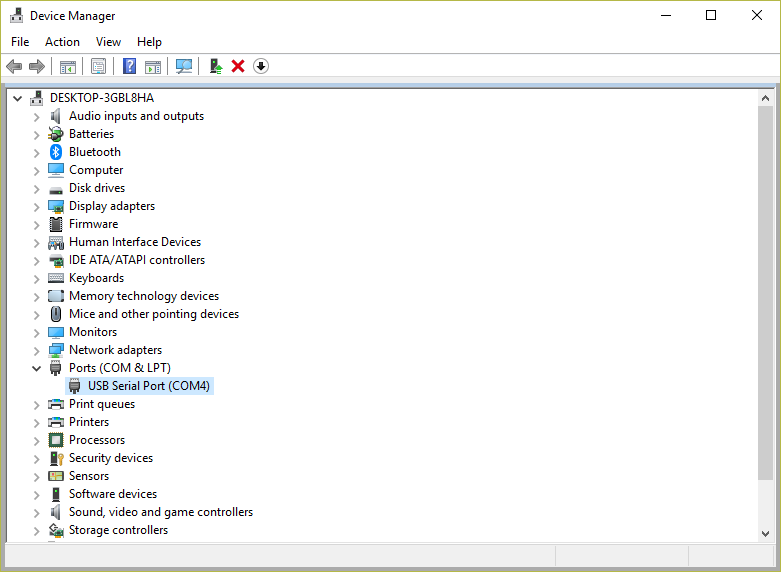
Connect your ESP board to PC, and check the port number of COM device in device manager.
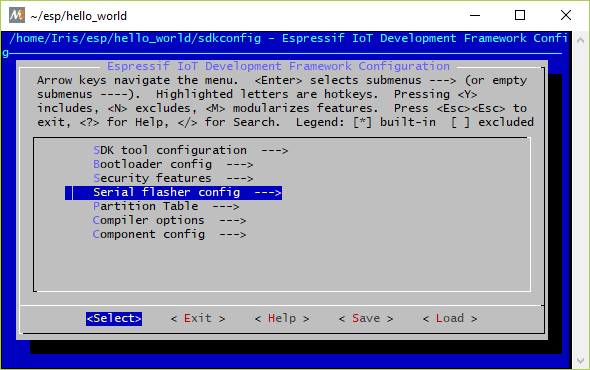
Go to directory of hello_world project, then configure the project by menuconfig.
cd ~/esp/hello_world
make menuconfig
After finished the configuration of serial port, save and exit by selecting < Save > and < Exit >.
Now, you can build hello_world project and flash it into the chip, then use make monitor command to read messages.
make flash
make monitor
Note:
Ctrl + ]can exit the monitor.
If you got correct ouput, the compling and flashing parts now are working well.
Here, we supply a pre-compiled OpenOCD-ESP32, and you can directly download openocd-0.10.0-dev-gcdaf22fd and use it.
Copy OpenOCD to C:\msys32\home\yourusername\, and unzip it.
cd ~
tar -xzvf openocd-0.10.0-dev-gcdaf22fd.tar.gz .
Note: if your MSYS2 environment doesn't have
tartool, please usepacman -S tarto install it.
After unzipped files, enter below commands to configure OpenOCD.
cd ~/openocd-0.10.0-dev-gcdaf22fd
cp -r ./share/ /mingw32/share/openocd
cp ./bin/openocd.exe /mingw32/bin/
Before we run openocd, a dependancy of libusb is needed.
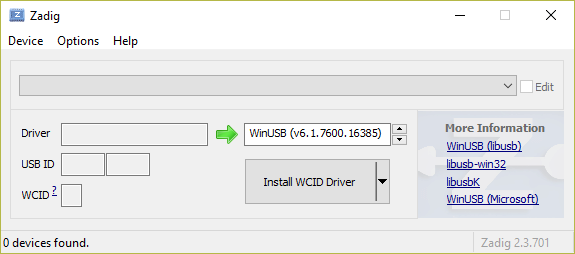
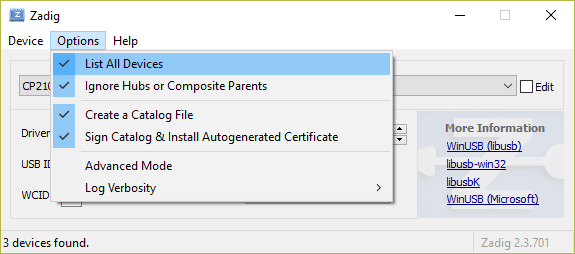
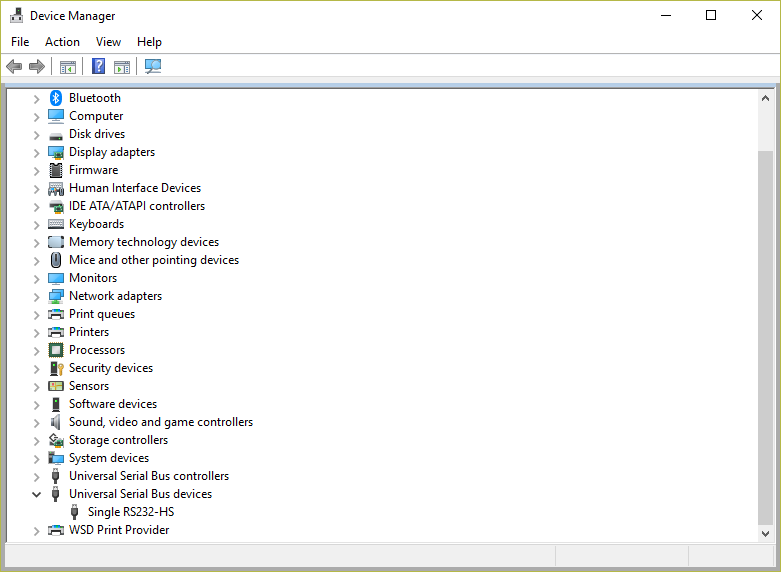
pacman -S mingw-w64-i686-libusbAs a default, Windows does not have a libusb driver, hence FT232HL will be recognized as a virtual serial port.
Here, we can use Zadig and easily change the default driver to libusb driver.
Follow below precedures, finally FT232HL could work as a JTAG debugger.
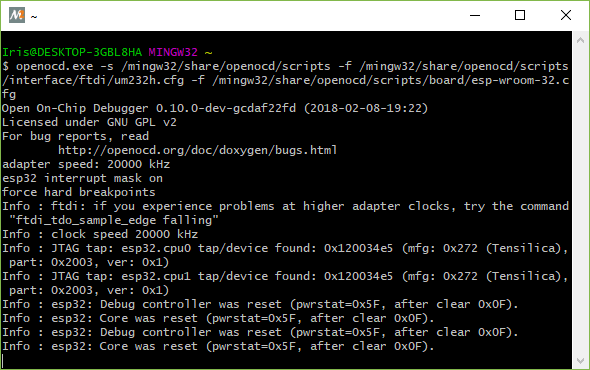
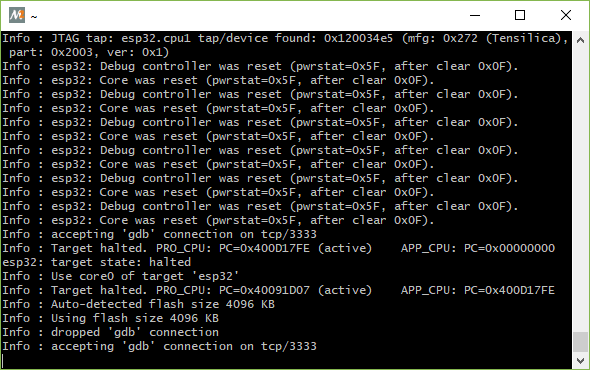
Enter below command to start OpenOCD.
If you get output as above, OpenOCD now is working well.
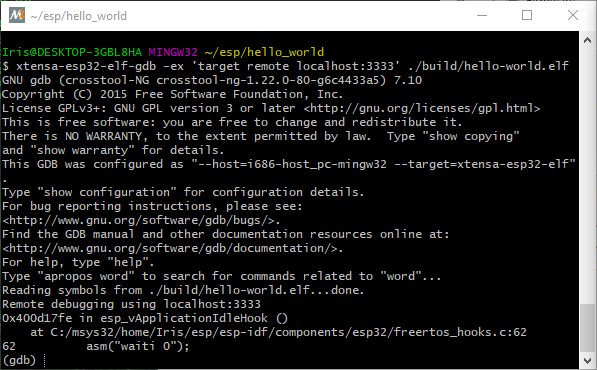
Open a new MSYS2 terminal window, and start gdb.
cd ~/esp/hello_world/
xtensa-esp32-elf-gdb -ex 'target remote localhost:3333' ./build/hello-world.elf
If you got output as above, OpenOCD and GDB now is connected.
VS Code is a light-weight, open source code editor published by Microsoft. Download it from official site, and install it.
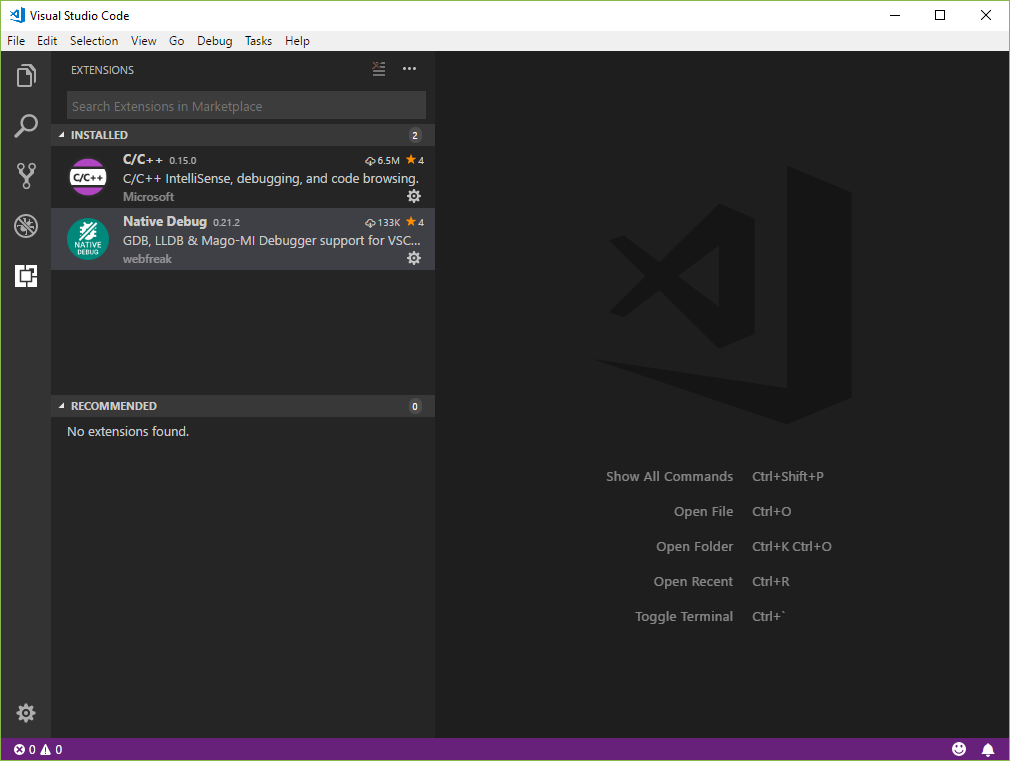
After installation, launch VS Code and install essential extensions.
- C/C++ for Visual Studio Code
- Native Debug
First, we create a new project in VS Code, using esp-idf\examples\get-started\blink.
Put blink project into anywhere you want, and open this folder in VS Code.
To enable code completion and navigation, we need to generate a c_cpp_properties.json file first.
Enter Ctrl+Shift+P to open Command Palette, then choose C/Cpp: Edit Configurations to generate a new c_cpp_properties.json file.
The modified c_cpp_properties.json file has shown as below.
Please change includePath to adapt your own case.
{
    "configurations": [
        {
            "name": "ESP32-Win",
            "includePath": [
                "${workspaceRoot}",
                "C:/msys32/opt/xtensa-esp32-elf/lib/gcc/xtensa-esp32-elf/5.2.0/include",
                "C:/msys32/opt/xtensa-esp32-elf/lib/gcc/xtensa-esp32-elf/5.2.0/include-fixed",
                "C:/msys32/opt/xtensa-esp32-elf/xtensa-esp32-elf/include",
                "C:/msys32/opt/xtensa-esp32-elf/xtensa-esp32-elf/sysroot/usr/include",
                "C:/msys32/home/Iris/esp/esp-idf/components"
            ],
            "intelliSenseMode": "clang-x64",
            "browse": {
                "path": [
                    "${workspaceRoot}",
                    "C:/msys32/opt/xtensa-esp32-elf/lib/gcc/xtensa-esp32-elf/5.2.0/include",
                    "C:/msys32/opt/xtensa-esp32-elf/lib/gcc/xtensa-esp32-elf/5.2.0/include-fixed",
                    "C:/msys32/opt/xtensa-esp32-elf/xtensa-esp32-elf/include",
                    "C:/msys32/opt/xtensa-esp32-elf/xtensa-esp32-elf/sysroot/usr/include",
                    "C:/msys32/home/Iris/esp/esp-idf/components"
                ],
                "limitSymbolsToIncludedHeaders": true,
                "databaseFilename": "${workspaceRoot}/.vscode/browse.vc.db"
            }
        }
    ],
    "version": 3
}
Note: The IntelliSense of VS Code does not treat
includePathrecursively, which means you might need to fill all of subfolder's path manually. Here is one convenient trick to help you. Open any cpp file, and find any green squiggle. Click the lightbulk, you will be able to addincludePathsetting automatically.
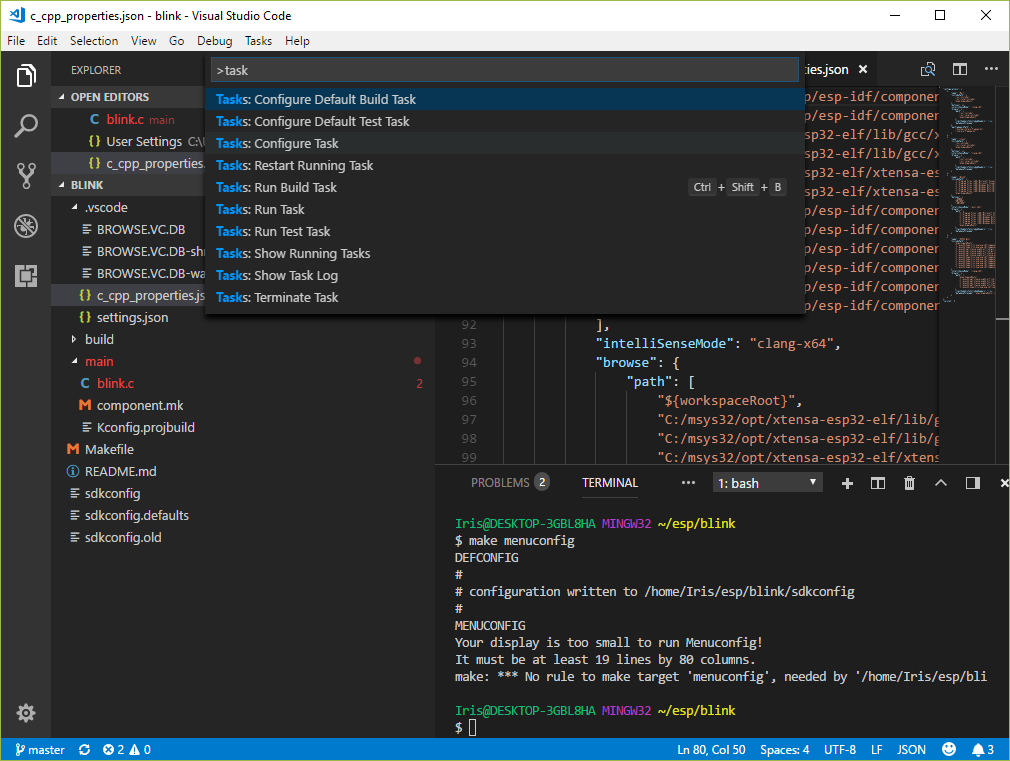
To handle build, clean, and flash tasks in VS Code, we need to configure tasks.json file.
Enter Ctrl+Shift+P to open Command Palette, then choose Tasks: Configuration Task to generate a new tasks.json file.
Modify the file as below, then you can use customized tasks in VS Code toolbar.
{
    // See https://go.microsoft.com/fwlink/?LinkId=733558
    // for the documentation about the tasks.json format
    "version": "2.0.0",
    "tasks": [
        {
            "label": "build app",
            "group": "build",
            "command": "make",
            "type": "shell",
            "args": [
                "app"
            ],
            "presentation": {
                "reveal": "always",
            },
            "problemMatcher": {
                "owner": "cpp",
                "fileLocation": "absolute",
                "pattern": {
                    "regexp": "^(.*):(\\d+):(\\d+):\\s+(warning|error):\\s+(.*)$",
                    "file": 1,
                    "line": 2,
                    "column": 3,
                    "severity": 4,
                    "message": 5
                }
            }
        },
        {
            "label": "clean app",
            "command": "make",
            "type": "shell",
            "args": [
                "app-clean"
            ],
            "presentation": {
                "reveal": "always",
            },
        },
        {
            "label": "flash app",
            "command": "make",
            "type": "shell",
            "args": [
                "app-flash"
            ],
            "presentation": {
                "reveal": "always",
            },
        },
        {
            "label": "monitor",
            "type":"process",
            "windows": {
                "command": "c:/msys32/mingw32.exe",
                "args": [
                    "make",
                    "monitor"
                ],
            },
            "presentation": {
                "reveal": "always",
            },
            "problemMatcher": []
        },
        {
            "label": "menuconfig",
            "type":"process",
            "windows": {
                "command": "C:/msys32/mingw32.exe",
                "args": [
                    "make",
                    "menuconfig"
                ]
            },
            "presentation": {
                "reveal": "always",
            },
            "problemMatcher": []
        }
    ]
}
Note: Please modify
commandproperty to match with your own case.
To set the default integrated terminal as MSYS2, we need to configure User Settings.
Clike File - Preferences - Settings to open Setting window.
In User Settings panel, write below lines to setup.
{
    "terminal.integrated.shell.windows": "C:/msys32/usr/bin/bash.exe",
    "terminal.integrated.shellArgs.windows": [
        "--login",
    ],
    "terminal.integrated.env.windows": {
        "CHERE_INVOKING": "1",
        "MSYSTEM": "MINGW32",
    },
}