Our application will be deployed to AWS environment. The application will run on a remote EC2 instance.
- Install ansible on your host machine using any package manager.
Recommended to use ubuntu and useapt-get install -y ansiblefor installation. - Login to AWS and obtain an EC2 machine.
- The EC2 should have IAM role access for DynamoDb.
- Remote login to the EC2 instance using AWS credentials.
Alternatively, Run ec2-launch.yml playbook to provision an ec2 machine. - Run
git clone https://github.ncsu.edu/csc510-fall2019/CSC510-7.giton your host machine. - Place
.envfile atCSC510-7/src/CI-CDcontainingNOTE: Obtain the USER_SLACK_TOKEN from here. You will find a legacy-token in your slack user account.USER_SLACK_TOKEN= BOT_ID=<@UNTLFGFB8> ADMIN_TOKEN= - Obtain the
hostname,ipandssh keyof EC2 machine we created at step 4 and add it toCSC510-7/src/CI-CD/hosts.ymlfile. - Run the ansible-playbook
ansible-playbook CSC510/src/CI-CD/deploy.yml -i CSC510/src/CI-CD/hosts.yml - Wait for the Ansible to finish setup.
-
Navigate to CSC510-7/src
-
Run:
npm install -
Run:
node index.js -
Now, go to the following link (Slack channel URL):
https://app.slack.com/client/TNTGTLN5U/CNK1N4V5F -
Once inside the channel, start typing the following commands to verify the use cases by typing the commands in text box. As shown in the screen shot below, enter commands in the textbox at the bottom to start interacting with bot.
USE CASE 1: Storage
-
Set a new storage limit.
@fileninja --setStorageSize 3.5Bot Reply:
New Alert Limit has been set to 3.5 GBEnter text/command as shown:

-
Get current storage limit.
@fileninja --getStorageSizeBot Reply:
Current alert limit is 3.5 GB -
Trying to set storage grater than 5.0 GB will give an error as Slack doesn't allow storage more than 5.0 GB.
@fileninja --setStorageSize 6Bot Reply:
Error. Size limit cannot be more than 5.0 -
Trying to set a storage without numerical value will give an error.
@fileninja --setStorageSize fiveBot Reply:
Please enter a number for storage size(in GB).
USE CASE 2: Category
-
Register a category called 'ncsu1'. A category will hold files in it.
@fileninja --registerCategory ncsu1Bot Reply:
Category registered. -
Trying to register a category again will give an error.
@fileninja --registerCategory ncsu1Bot Reply:
Category with name ncsu1 already exists in this channel -
Register a category called 'ncsu2'.
@fileninja --registerCategory ncsu2Bot Reply:
Category registered. -
Fetch all categories in the channel.
@fileninja --getCategoriesBot Reply:
Categories for this channel are: ncsu1,ncsu2 -
Add files to a category
Click on upload button to upload files, add one or more files with names such as file1.png, file2.png In the upload message box, add the below command to add the files to category ncsu1.@fileninja --addToCategory ncsu1Bot Reply:
File added to category.Adding multiple files to category:

-
Repeat the above for ncsu2. Click upload button and upload the two files as above.
@fileninja --addToCategory ncsu2 -
To see the files uploaded to ncsu1:
@fileninja --showFiles ncsu1Bot Reply:
file1.png: https://files.slack.com/files-pri/TNTGTLN5U-FR4EWH01J/file1.png file2.png: https://files.slack.com/files-pri/TNTGTLN5U-FR751GCSJ/file2.png -
To see files in a category which doesn't exist.
@fileninja --showFiles ncsu3Bot Reply:
Error: No category with the name ncsu3 exists -
Delete a category in the channel. This will delete all files in that category too.
@fileninja --deleteCategory ncsu1Bot Reply:
Files of category ncsu1 have been deleted -
Register a Google drive to use export functionality. (or you can directly move to export functionality and use the commands we have given, as those projects are already created)
/registerdrive
A pop up comes, giving you the instructions to follow to Register Google Drive. Here are the instructions in a more elaborate form:-
Go to Google Developers Console.
Here simply click on link given to you. -
Select your project or create a new one (and then select it)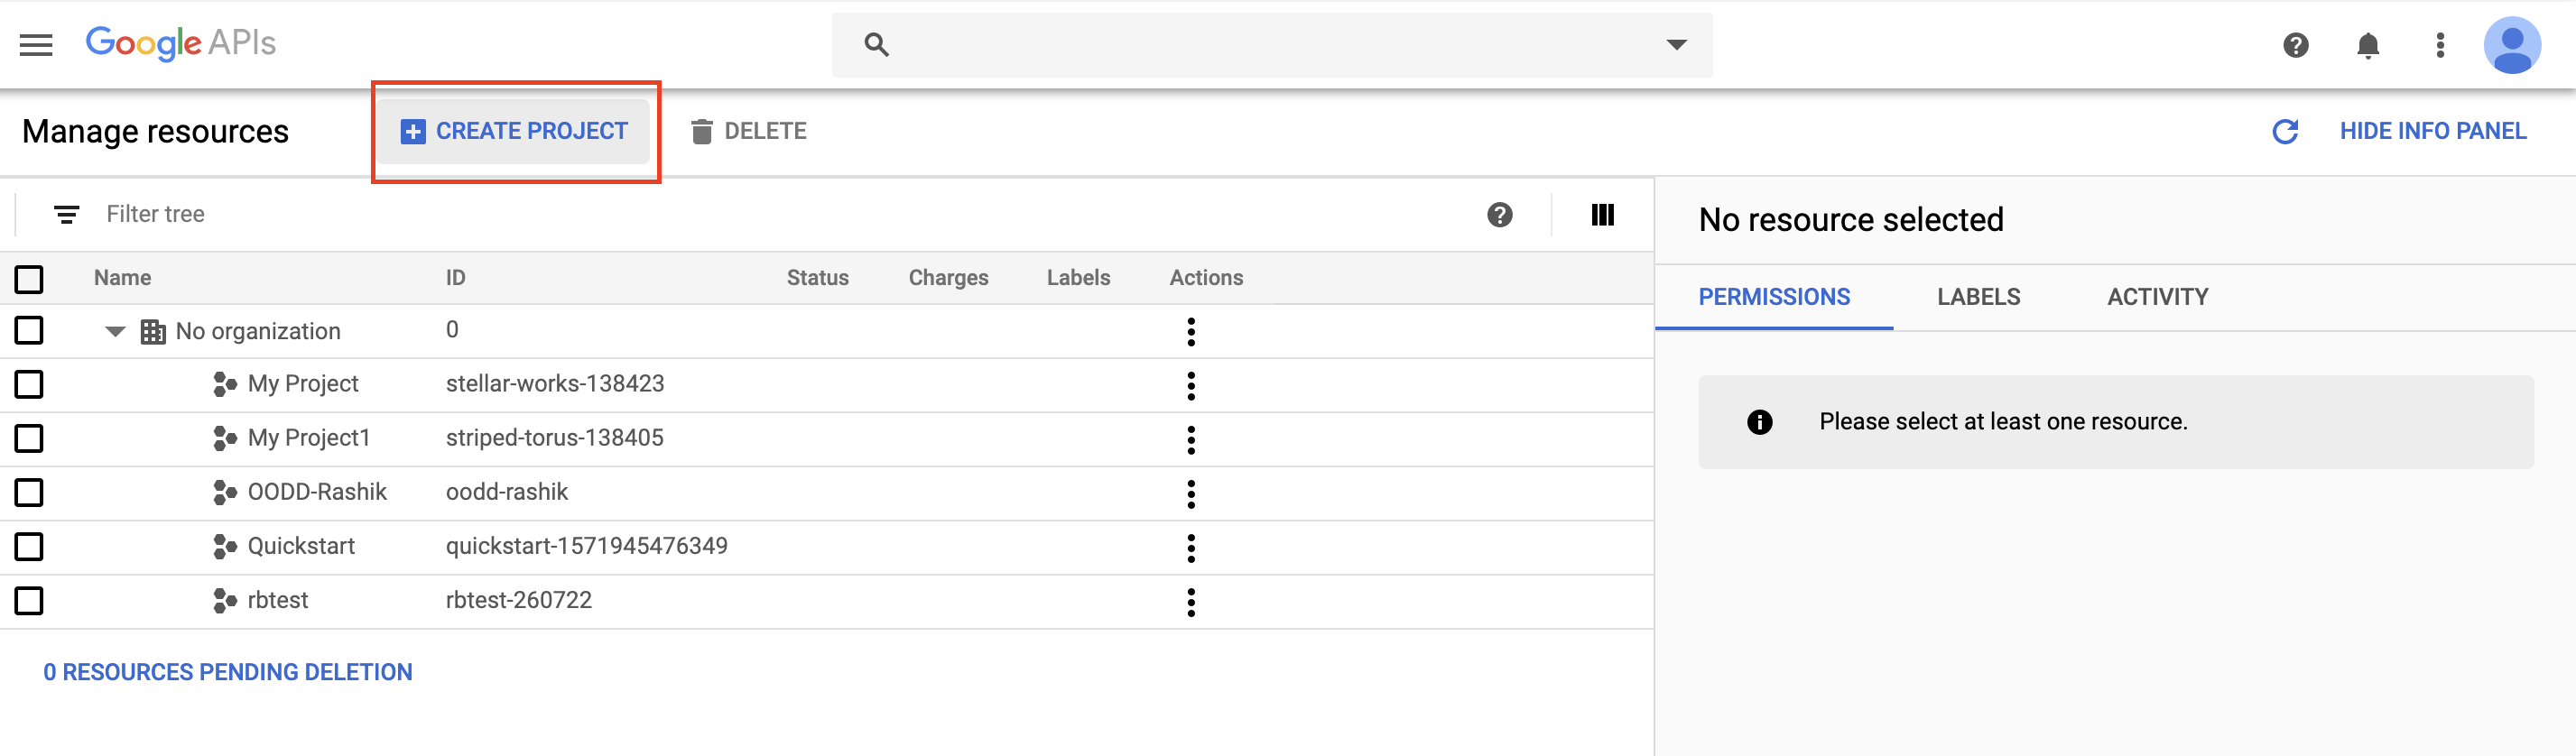
-
In the sidebar on the left, expand APIs & Services > Library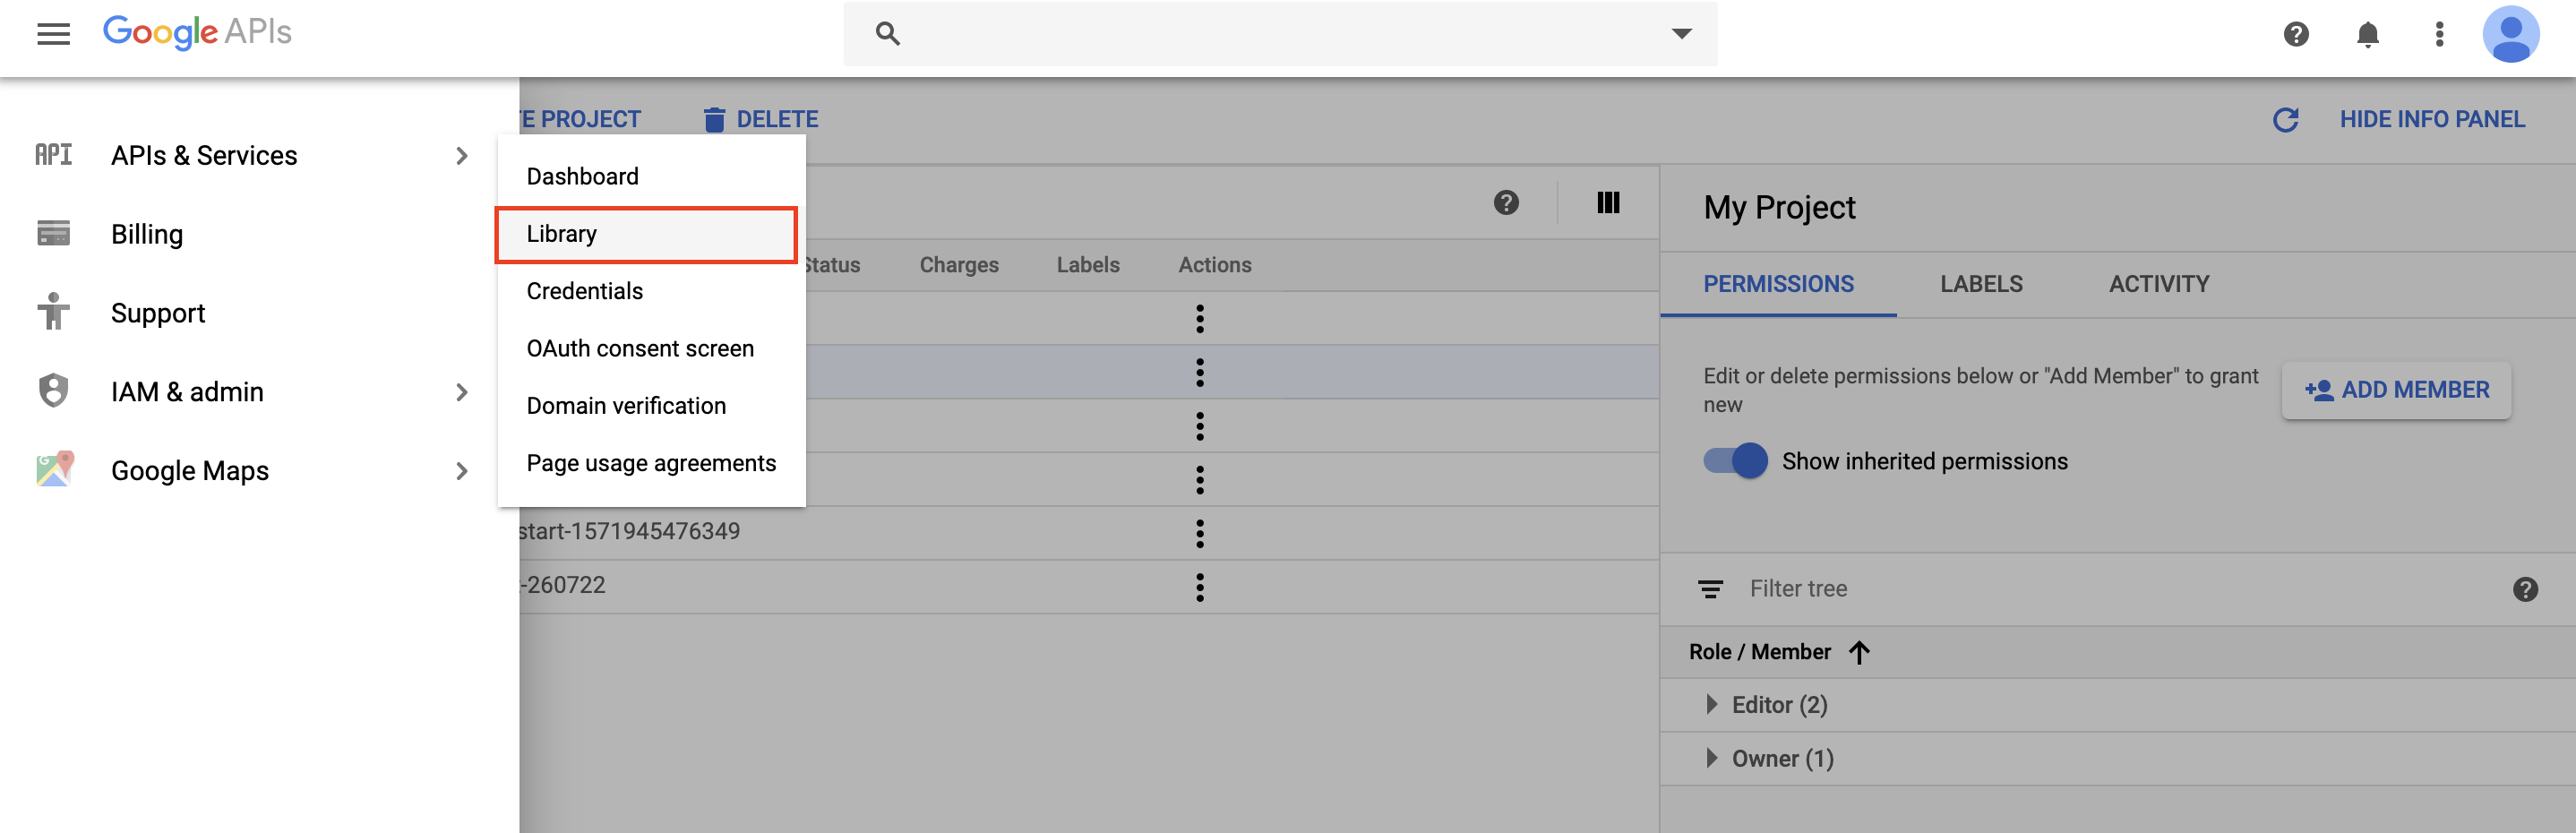
-
Find 'Google Drive API' and enable it for your selected project .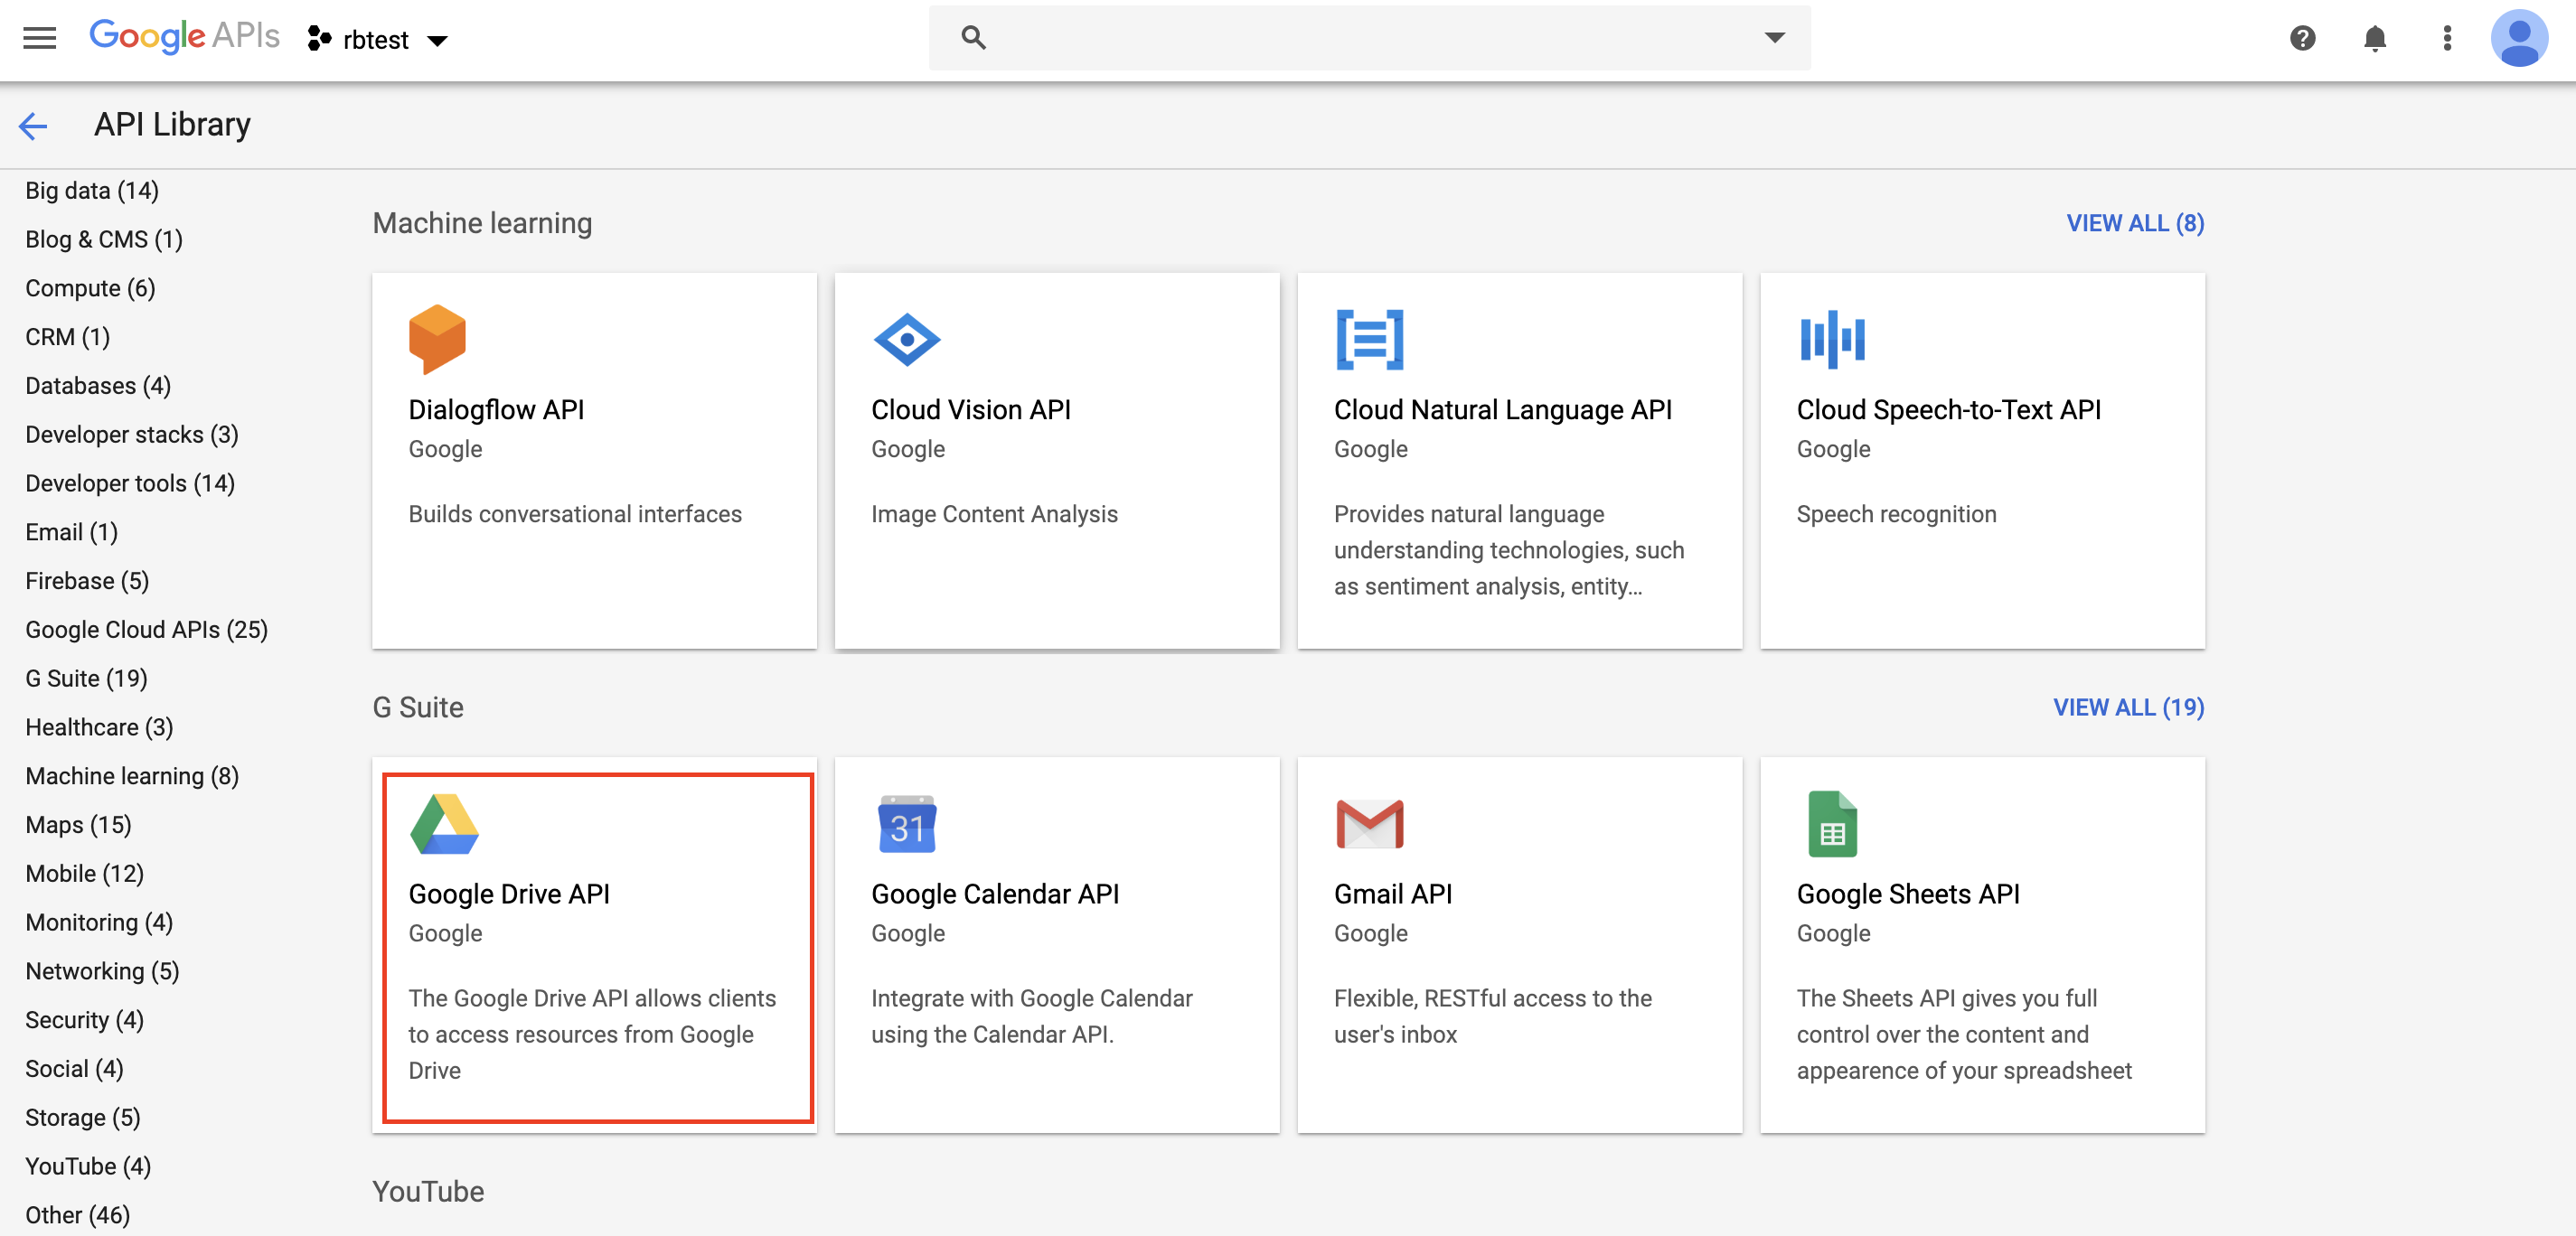
-
In the sidebar on the left, expand APIs & Services > Credentials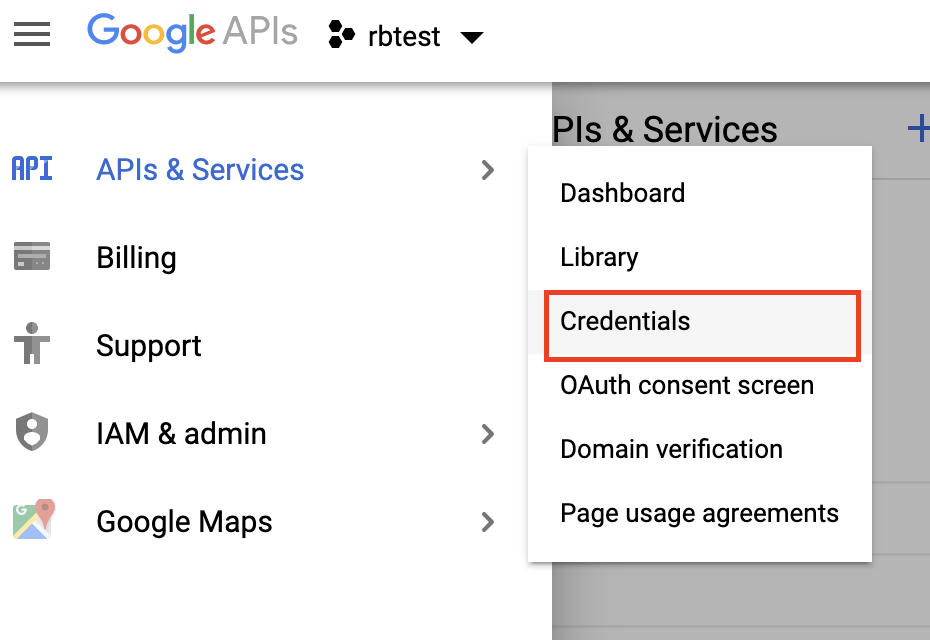
-
Click blue "Create credentials" drop down and select "Service account key".
-
Select a existing service account or create a new one.
If you select to create a new service account, under 'Role', select 'Project'>'Owner'.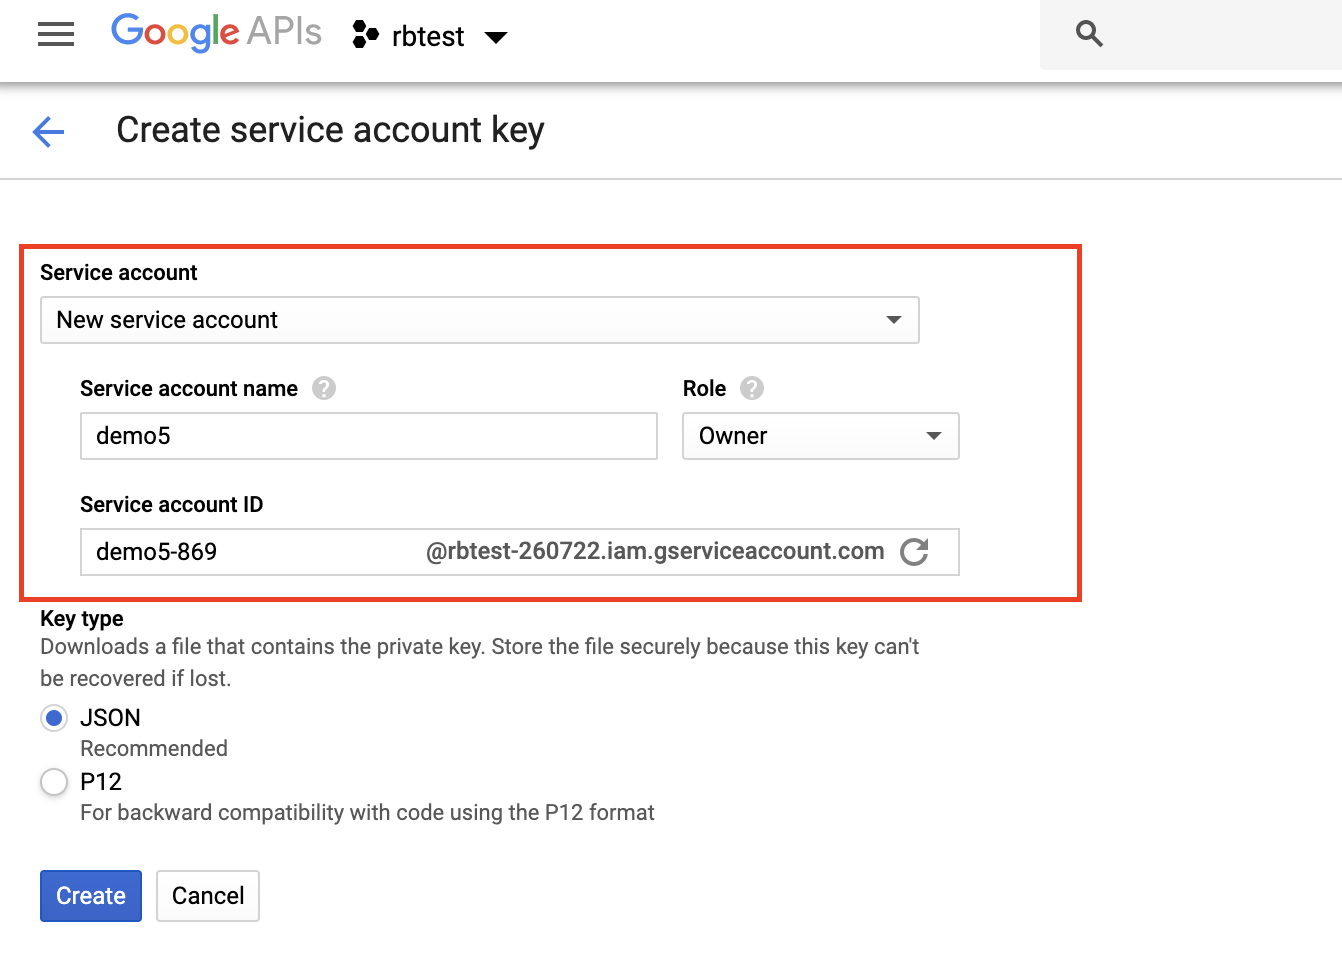
-
Select the 'JSON' key type radio button and click create. A JSON file will be downloaded. -
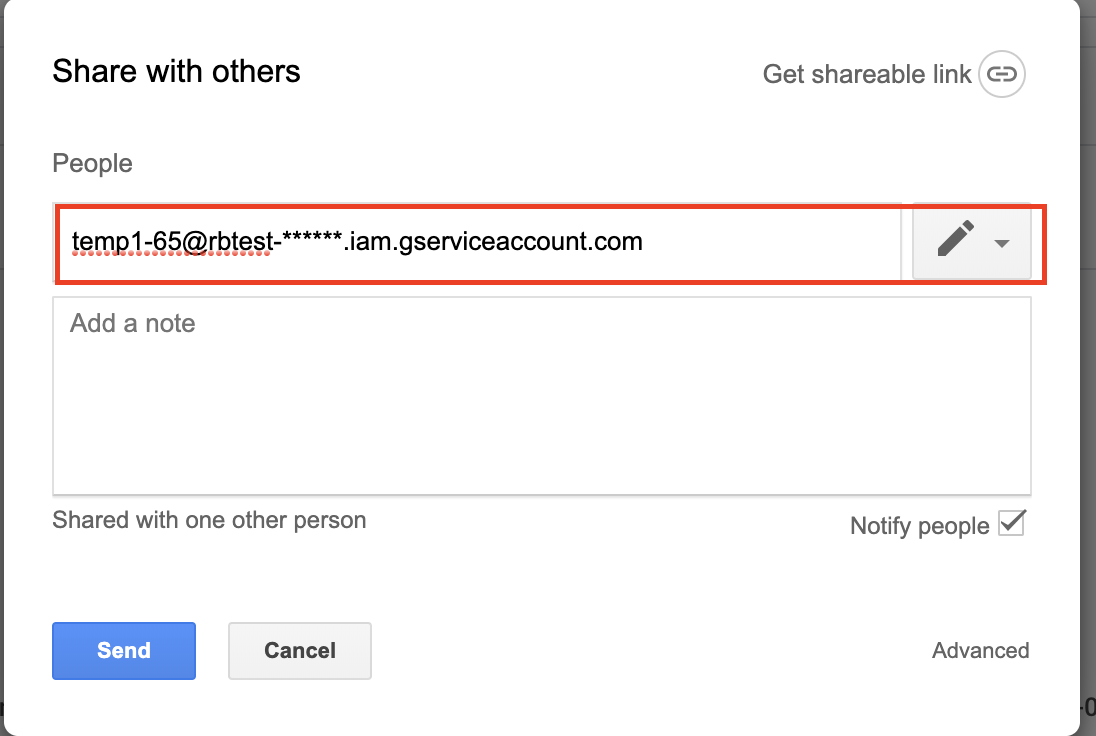
Now go to your google drive and create a new folder. Share this folder with "client_email". Open the folder and copy the folder-id from the URL to the 'Folder-Id' field below.
Right click on the folder and click on Share. Then paste the 'client_email' given in double quotes in the JSON file you downloaded in step 8.
Now open the folder and copy the folder-id from the URL to the 'Folder-Id' field provided in the modal. As can be seen below, the last part of the url is the folder-id.
-
Open the JSON file and copy the "private_key" and "client_email" attributes in the following respective fields below
Now copy the "client_email" and "private_key" from the JSON file to the fields provided in the modal. Also give a name to the drive. You'll use this name to export files. For example, in the
 @fileninja --exportCategory ncsu2 test, 'test' is the name of the drive.
-
-
Export files in ncsu2 to google drive named 'test'
@fileninja --exportCategory ncsu2 testBot Reply:
Files of category 'ncsu2' have been exported.
Files get exported to external google drive. Note: We have already registered two drives with the names 'test' and 'rb_try' and have mailed the credentials for the respective google accounts to the TAs. Feel free to use these accounts to use our export features.
USE CASE 3: Watermark
-
Register a watermark
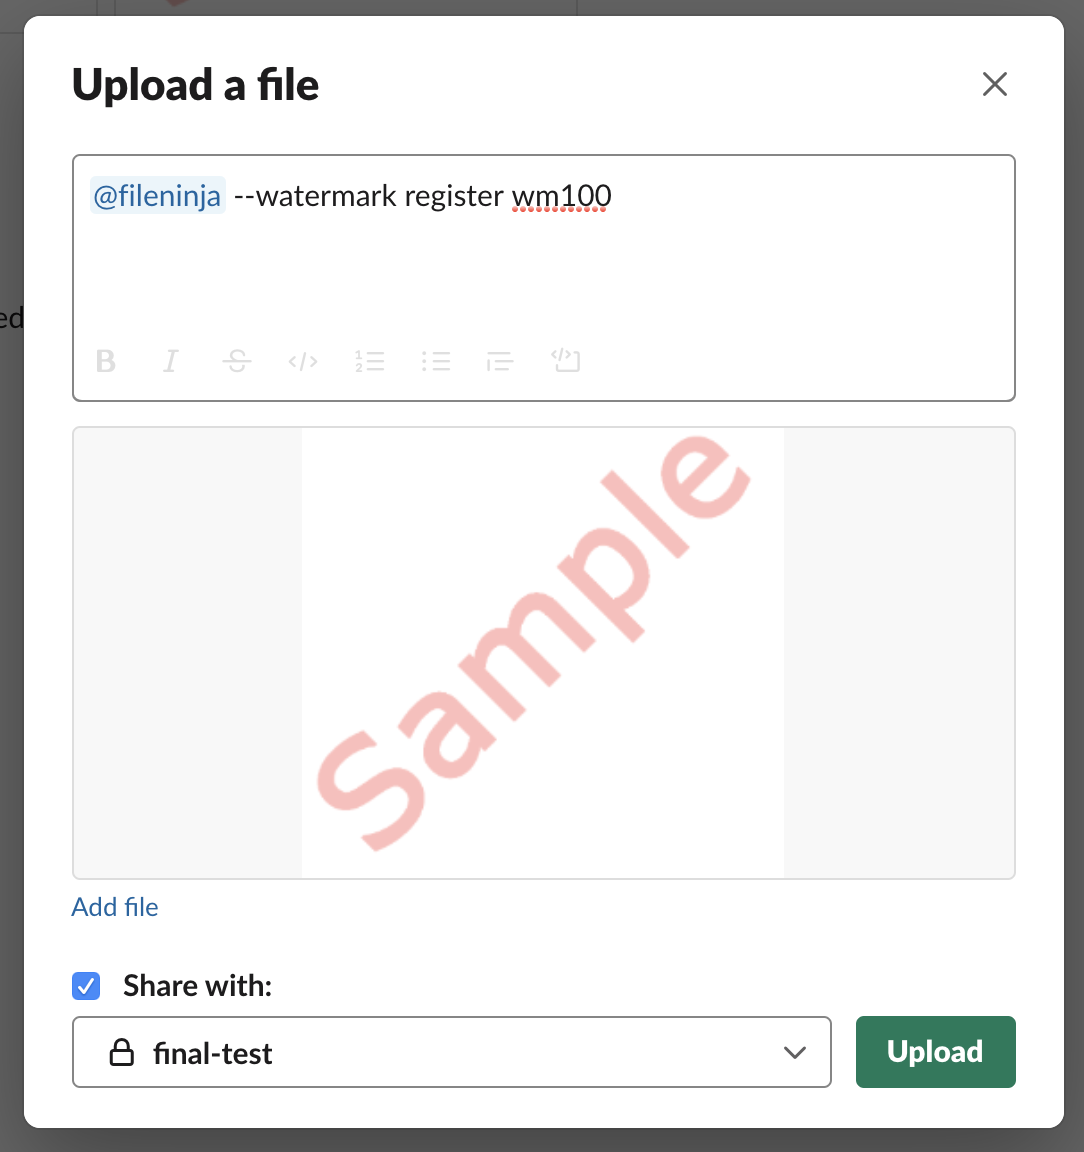
Upload a suitable .png image to be used as watermark. Select only one image to register as watermark. In the upload message box write the message to register this image as watermark.
@fileninja --watermark register wm100Bot Reply:
Watermark created successfully.Registering a watermark:
-
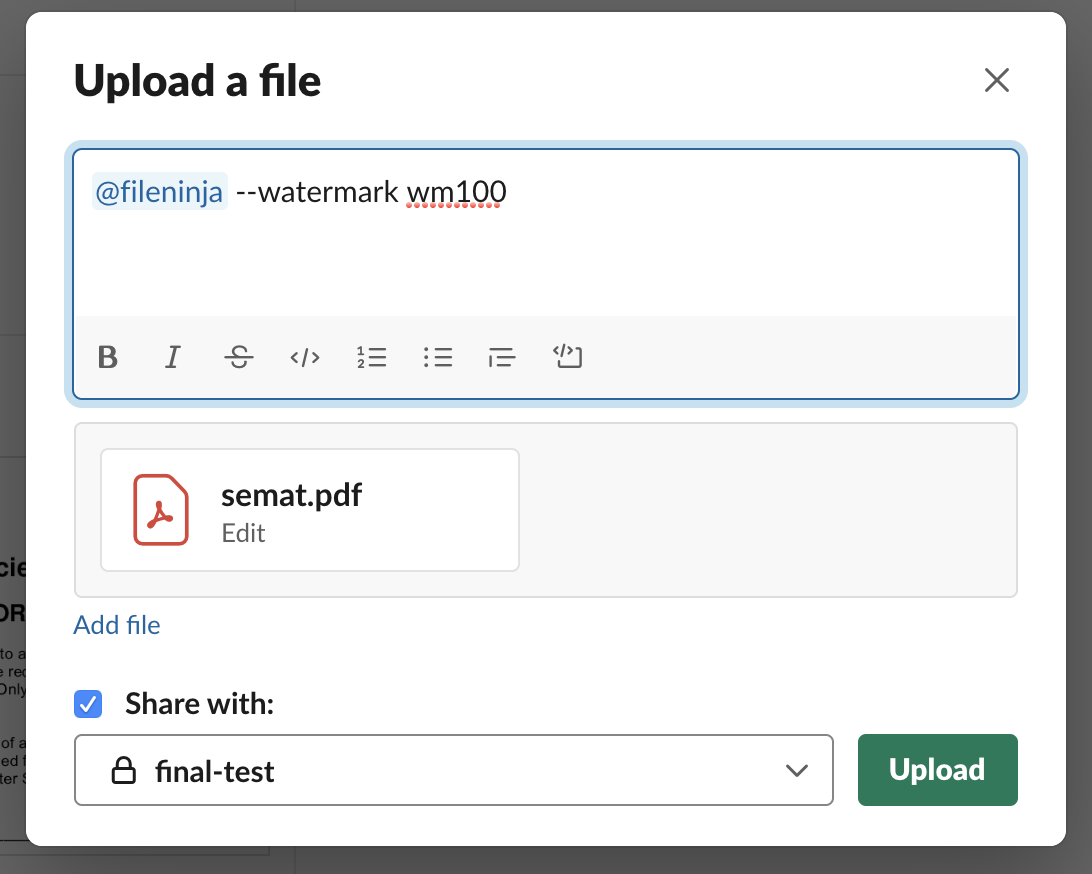
Watermark a file with image.
This image is a watermark image registered in previous step. Upload a suitable pdf file to be watermarked. In the upload message box write the message to add watermark to pdf.@fileninja --watermark wm100Bot Reply: Returns the pdf file with watermarked image.
File watermarked successfully.Adding a watermark image to a file:
-
Watermark a file with a text.
As shown in the previous step, upload a suitable pdf file to be watermarked. In the upload message box write the message to add text watermark (Script) to pdf.@fileninja --watermark text ScriptBot Reply: Returns the pdf file with watermarked text.
File watermarked successfully.Adding a watermark text to a file:

-
Fetch all watermarks in the channel.
@fileninja --watermark listBot Reply:
Watermarks for this channel are: wm100 -
Register a watermark without a file.
@fileninja --watermark register wm99Bot Reply:
No file associated with command. Upload a PNG file with command to create watermark. -
Upload a jpg file to register as watermark. It will fail as only .png files are accepted.
@fileninja --watermark register wm99Bot Reply:
Wrong format for file . Watermark only accepts .png files -
Without uploading any file, watermark command fails.
@fileninja --watermark wm100Bot Reply:
No file associated with command. Upload a PDF file with command watermark the file.
-


We have setup a Jenkins server on EC2 host. A Jenkins job is configured for File Ninja. Every 1 minutes, it polls the repo: https://github.ncsu.edu/csc510-fall2019/CSC510-7. When it detects new changes, it triggers a build that runs all the tests against the latest changes. If build passes, it starts the ansible-playbook that automates the deployment of latest changes to server.
