![]()
Zeitkatze is time cat -- literally
=(^.^)= =(ˇ.ˇ)= =(o.o)m =(*.*)= =(^.^)= =(ˇ.ˇ)= =(o.o)m =(*.*)= =(^.^)= =(ˇ.ˇ)= =(o.o)m =(*.*)=
What's the simplest stopwatch in a linux console?
Well, just type time cat to start, and push ctrl-c to stop.
Zeitkatze is the same thing, with just a little extra.
It continuously updates the total elapsed time display, you can hit ctrl-c once to display a split time, and if you quit (hitting ctrl-d, or ctrl-c twice in succession, or q), zeitkatze prints the total time and exits. You can measure a new split time (or "lap time") by pressing ctrl-c once or by hitting Enter.
If you run an Arch-based distro (Arch, Manjaro, Artix, etc.), you can install it
from the AUR, e.g. via the yay package wrapper:
yay -S zeitkatze
Make sure you're in the root directory (same level as the Makefile). Then you
can install it directly with one command. It will compile the project for you
and install it at $PREFIX/bin, where PREFIX is defined in the Makefile --
typically /usr. Execute sudo make install to install it if you've cloned the
repo and you're at the root level. Alternatively, open up and terminal and paste
the following to install it:
cd `mktemp -d`
wget https://github.com/leonmavr/zeitkatze/archive/refs/heads/master.zip
unzip master.zip
cd zeitkatze-master
sudo make install
To uninstall it manually you can execute the following from any terminal:
sudo rm `which zeitkatze`
Or from the root level of the repository:
sudo make uninstall
To execute any of the following steps, it's assumed that you're in the root
directory (same directory as the Makefile).
To compile:
make
To clean:
make clean
You can use it by simply running the executable. It accepts certain command line options described in section 4 -- Usage.
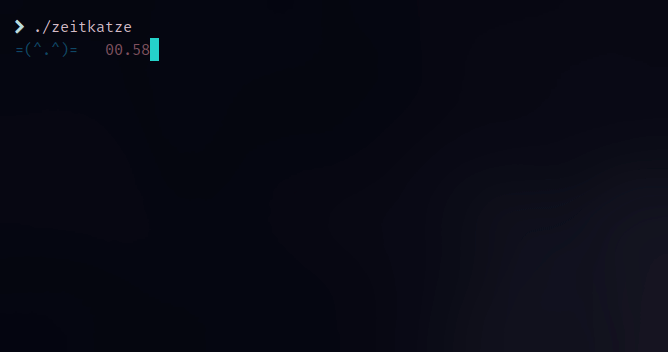
./zeitkatze
Don't forget that the naming coding coding conventions follow the C++ Google
standard (example) and the spacing and indentation convention the clang format.
You can execute the script scripts/clang_format.sh to format all source files.
| Short specifier | Long specifier | Argument type | Default | Description |
|---|---|---|---|---|
| -n | --no-color | None | Off | Disables colors when formatting the times on the terminal |
| -p | --precision | integer | 2 | How many decimal places to show when measuring time |
| -o | --one-line | None | Off | Whether or not to print the output in one line - in this case only prints lap times |
| -r | --reset-emotes | None | Off | If true, re-writes (and overwrites )the default cat emotes to file ~/.config/zeitkatze/cats.txt |
| -h | --help | None | Off | Print usage instructions and exit |
Other features/tips:
- It also supports configuration via the environment variable
ZEITKATZE_COLOR. Note that the option-nor--no-coloroverrides this variable. IfZEITKATZE_COLORis set to 0 (e.g. by addingZEITKATZE_COLOR=0in your rc), then colors are disabled. - You can define custom cat emotes at
~/.config/zeitkatze/cats.txt. This file is created by default and can be overwritten. For a nicer output, make sure that all cats take the same number of characters (you can pad with spaces if necessary). - If you mess up your config file that contains the cat emotes (
~/.config/zeitkatze/cats.txt), you can reset it by calling the methodResetEmotes()on yourZeitkatzeinstance.

- Measure seconds with custom precision
- Read cat emoticons from file
- Write times to file in a compact format
- Add a command line specifier that calls ResetMethod() on Zeitkatze
- Option for one-line output
- Animated cats with multithreading?
- Unicode support
- Fancier output with ncurses
- Unit test it by sending signals/keystrokes to the app
- None at the moment
- After running zeitkatze in a terminal, it changes its properties.
A side-effect of this is that if you try to enter a user password in
same terminal, it will not work:
sudo: no password was provided sudo: a password is required