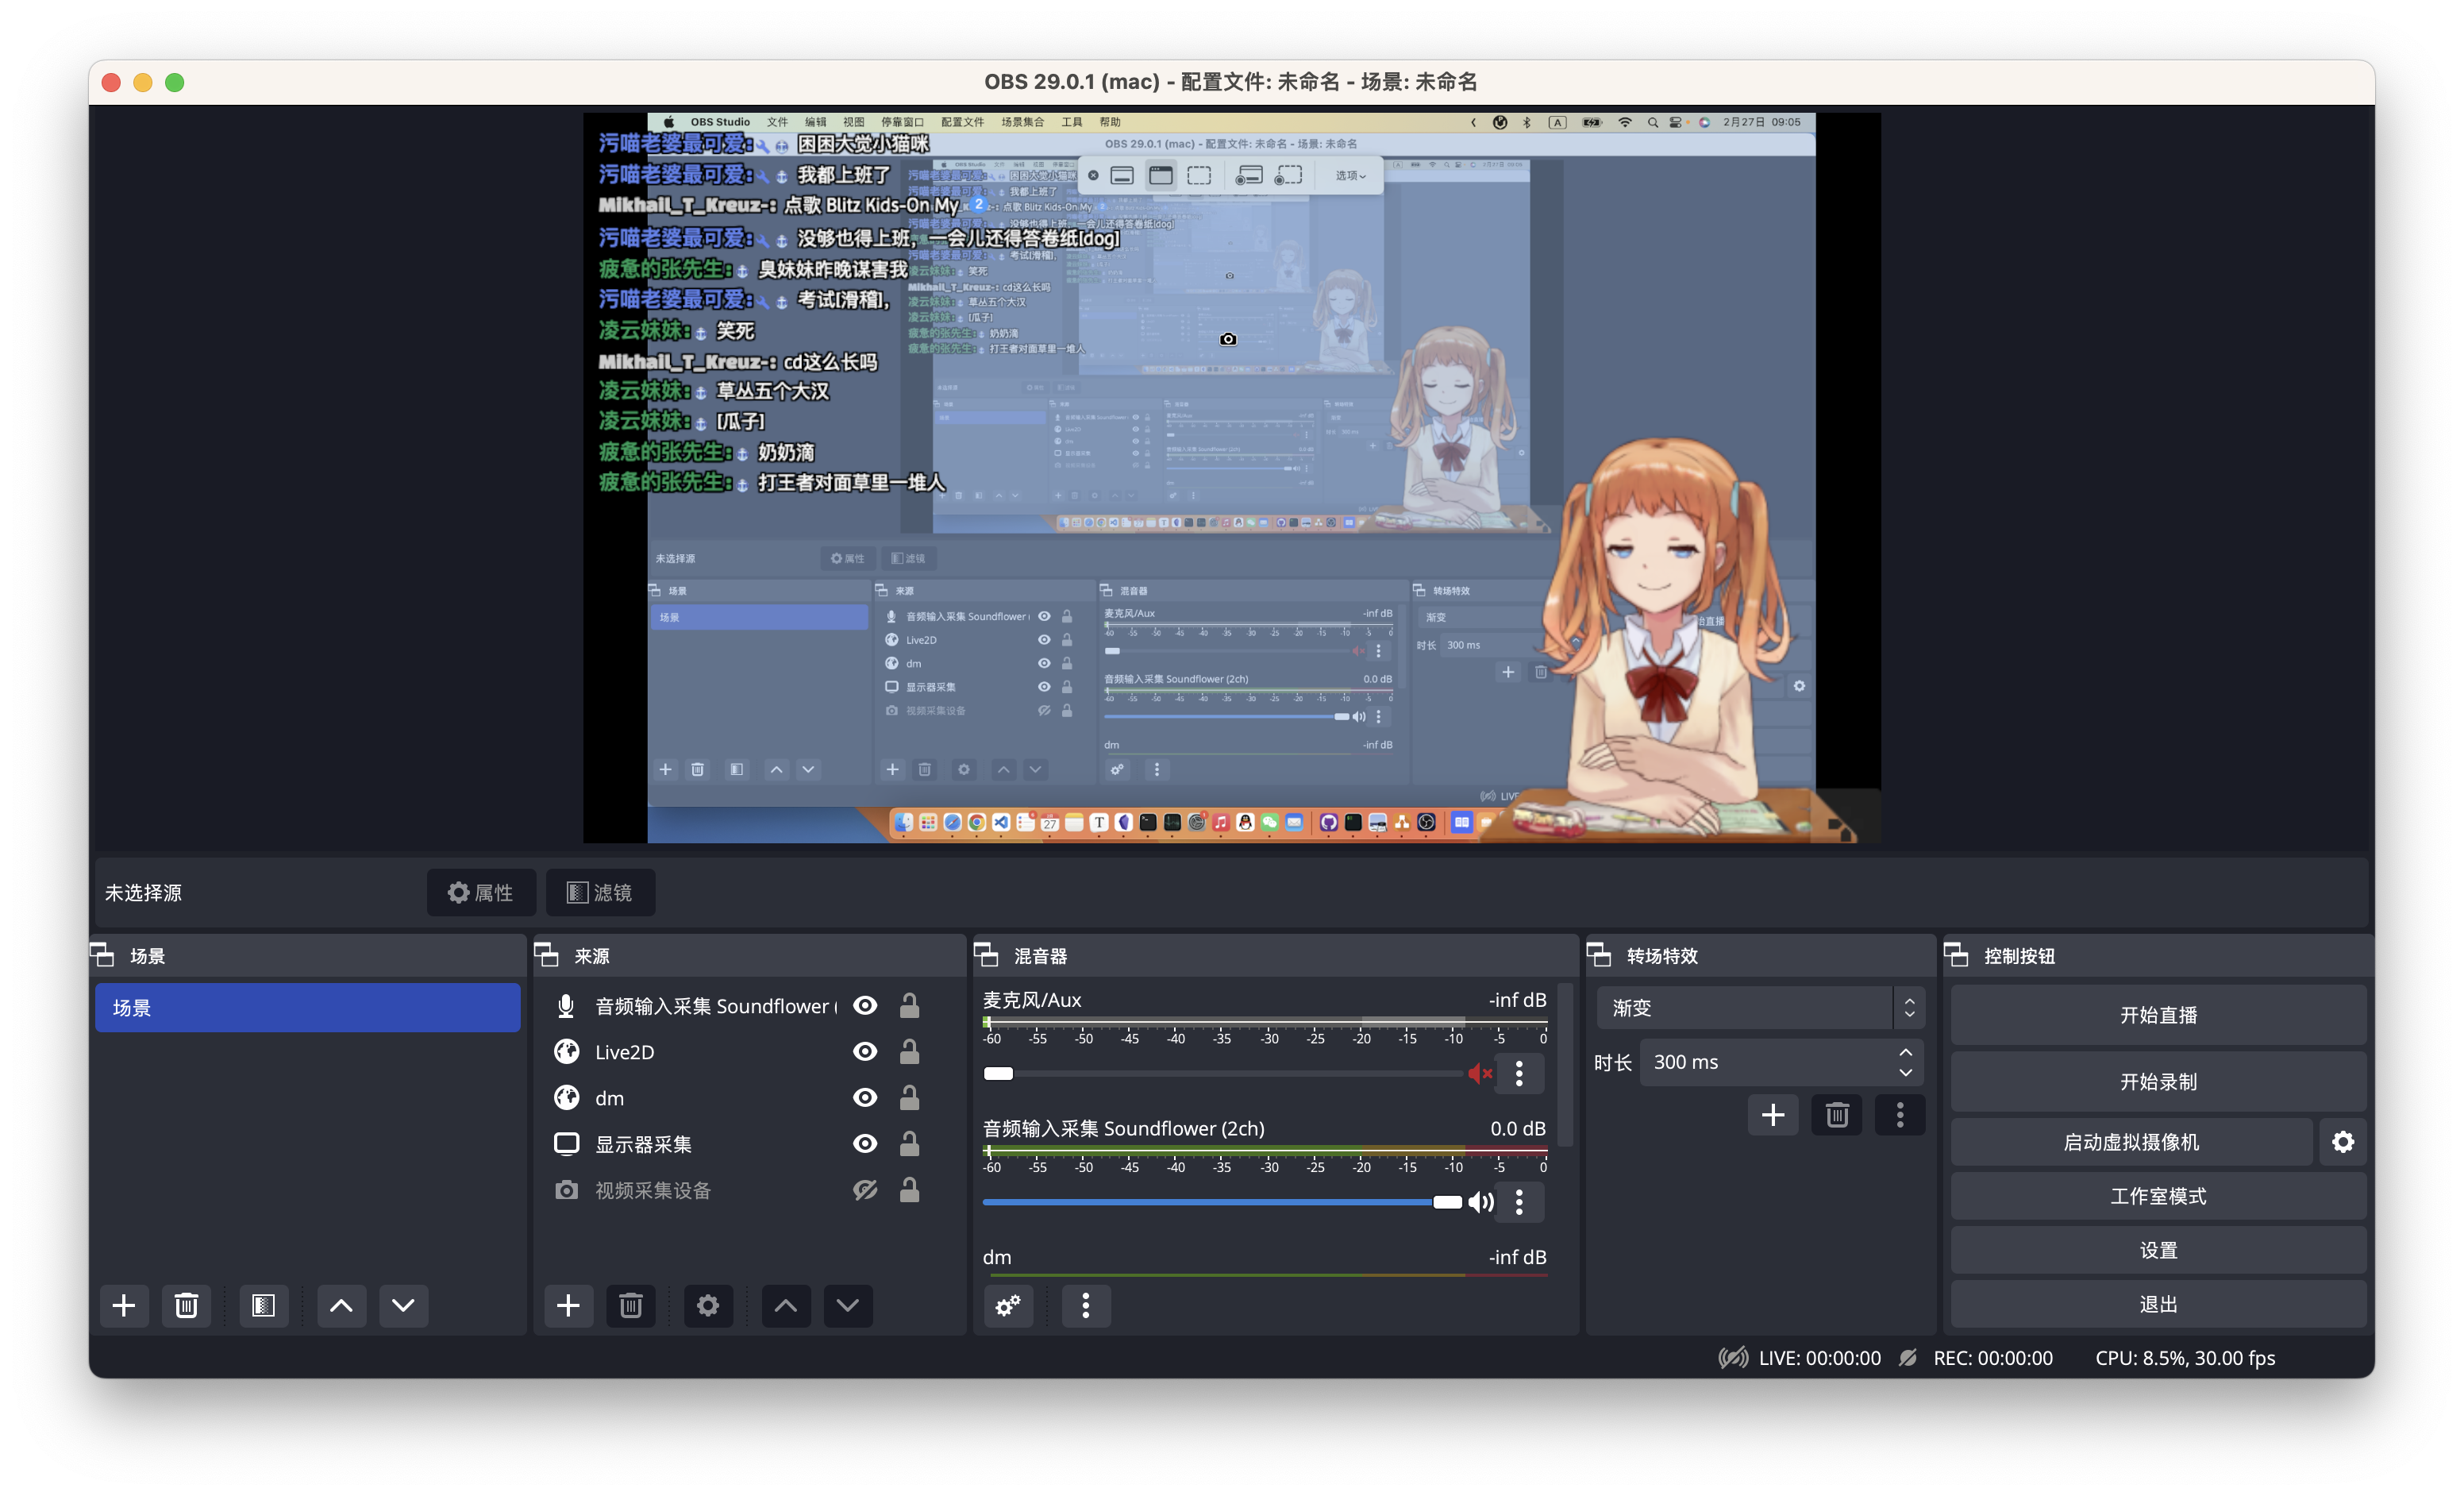
Makes your AI vtuber.
让 AI 成为虚拟主播:看懂弹幕,妙语连珠,悲欢形于色,以一种简单的实现
- 不定期的测试直播:http://live.bilibili.com/26949229
- QQ 交流群:569686683
- 介绍文章:知乎 - 写个AI虚拟主播:看懂弹幕,妙语连珠,悲欢形于色,以一种简单的实现
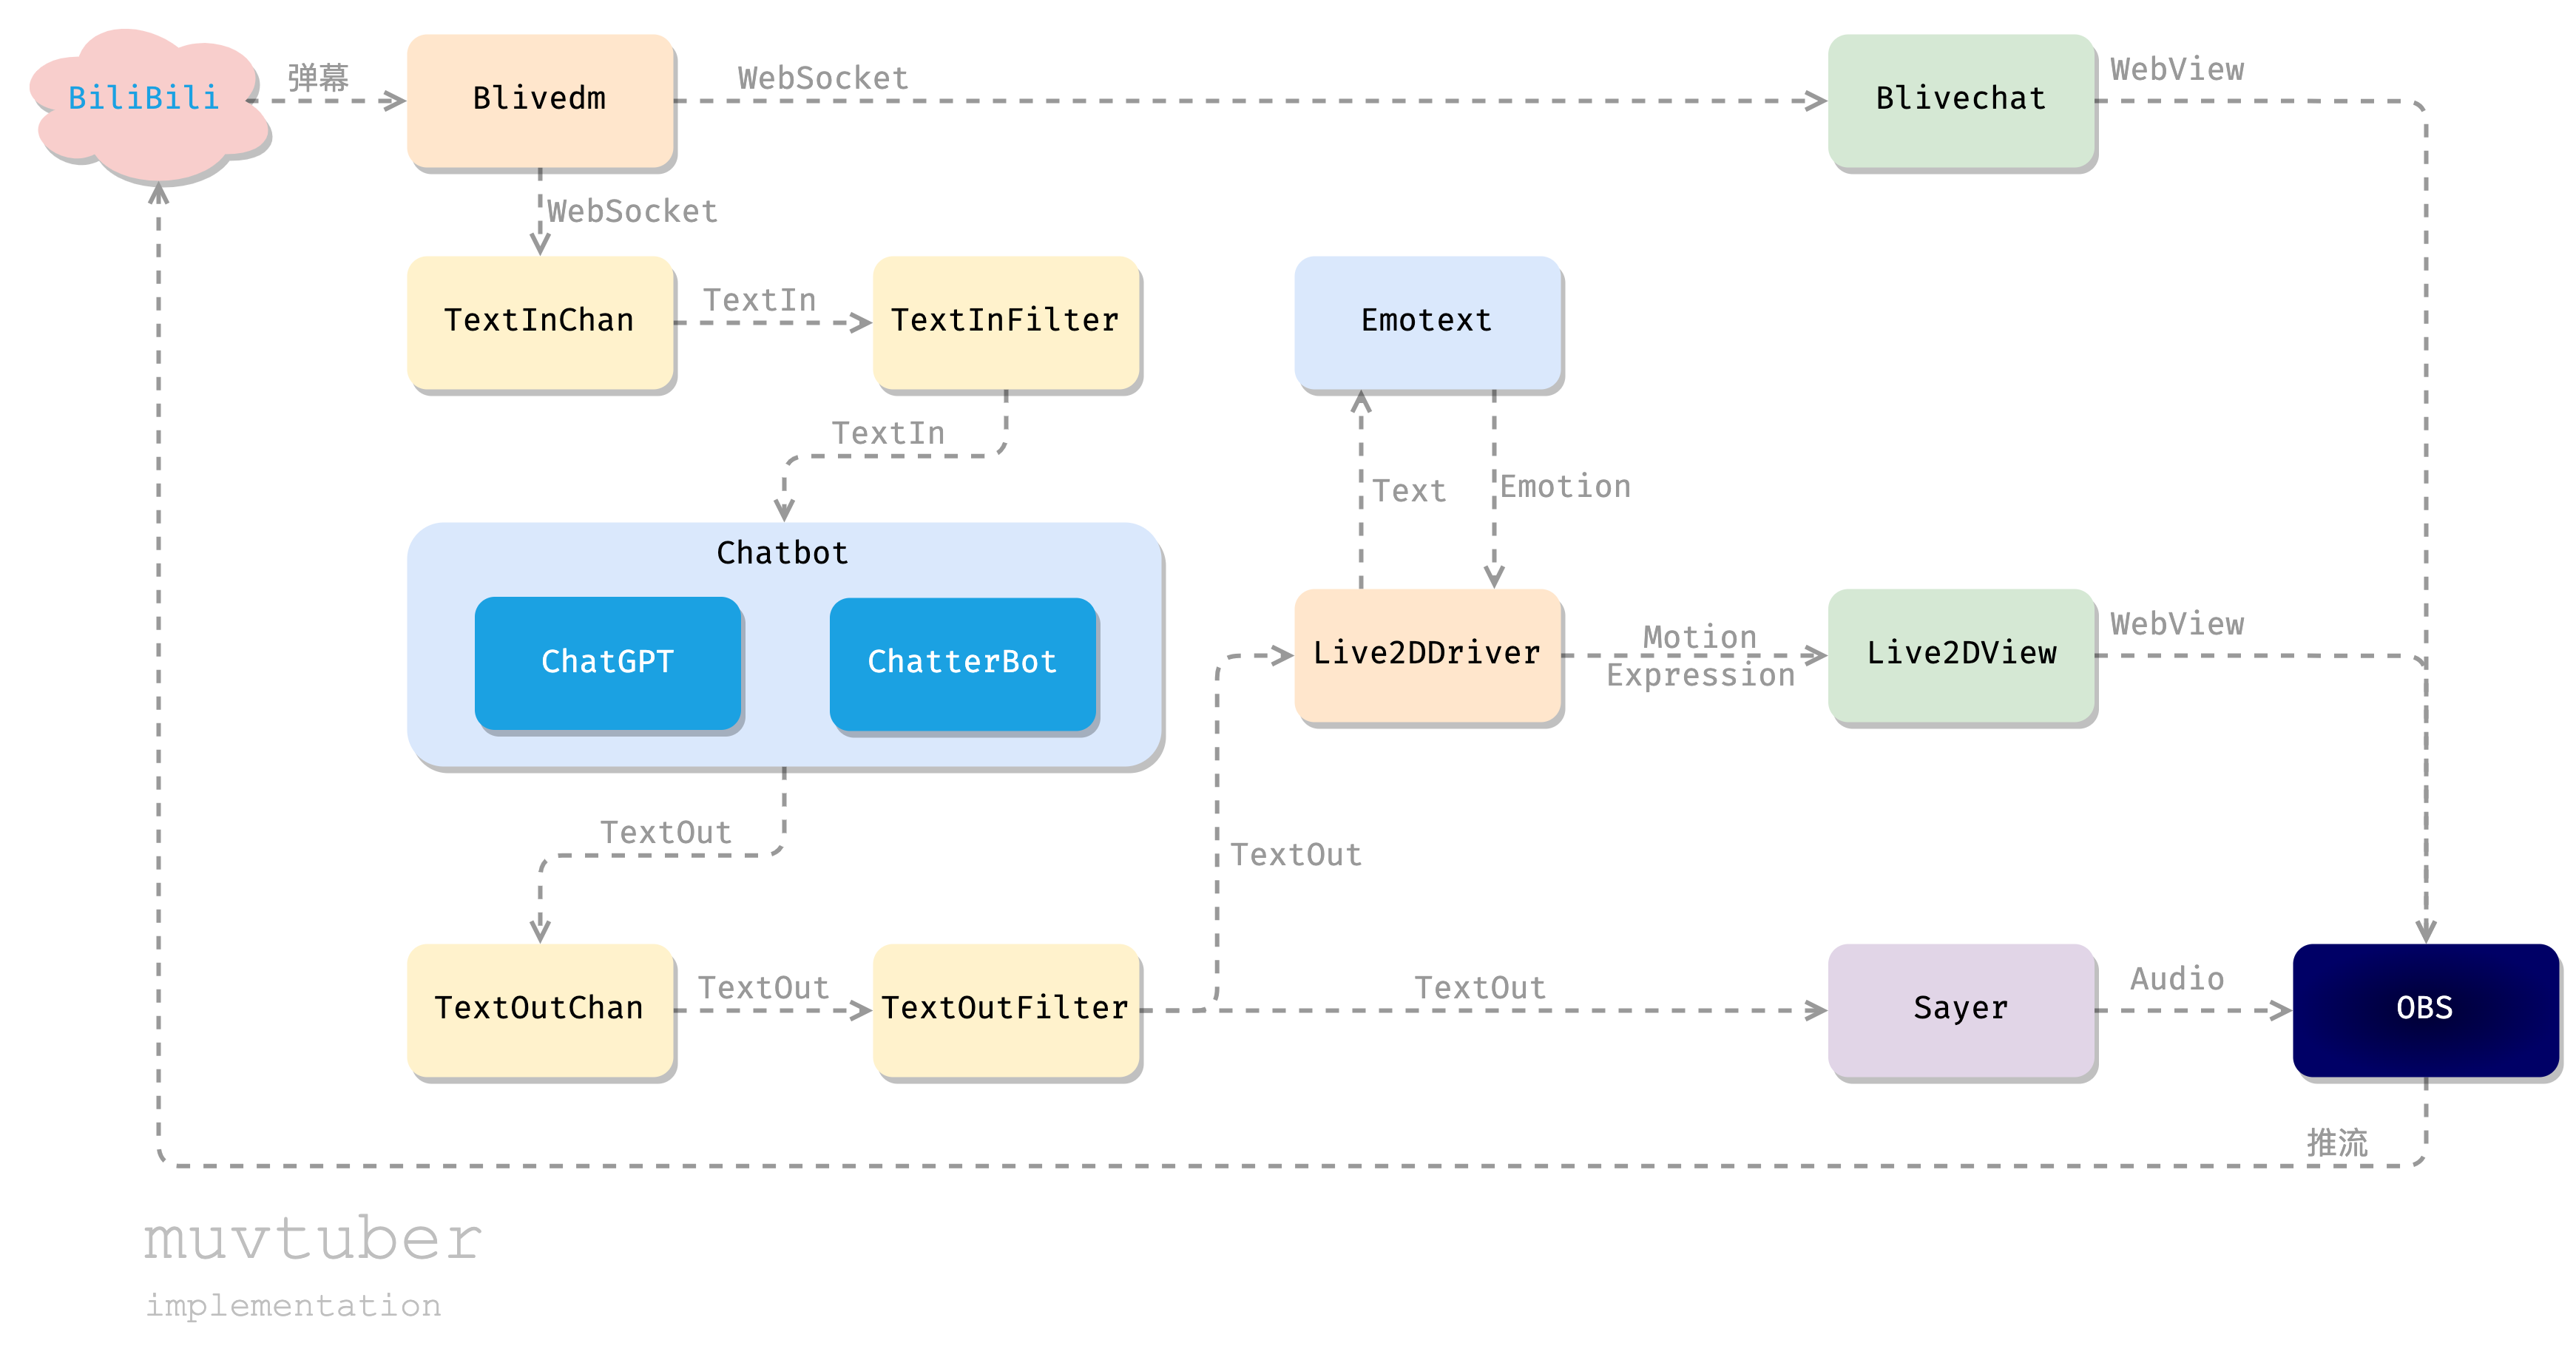
| 服务 | 说明 | 基于 |
|---|---|---|
| blivechat | 获取直播间弹幕消息。 | xfgryujk/blivechat 做的非常好,直接用了,没有额外封装。 |
| Live2dView | 前端:显示 Live2D 模型 | guansss/pixi-live2d-display |
| Live2dDriver | 驱动前端 Live2D 模型动作表情 | - |
| ChatGPTChatbot | 基于 ChatGPT 的优质聊天机器人 | acheong08/ChatGPT |
| MusharingChatbot | 基于 ChatterBot 的简单聊天机 | RaSan147/ChatterBot_update musharing-team/chatbot_api |
| Emotext | 中文文本情感分析 | cdfmlr/murecom-verse-1 |
| muvtuberdriver | 组装各模块,驱动整个流程 | - |
| muvtuber-proto | proto 定义 |
Docker 化终于有进展了!
目前绝大多数模块都可以在 Docker 中运行,只剩 muvtuberdriver ,因为耦合了依赖于 macOS 的 Sayer,所以必须在 macOS 本机运行。
总之现在只需要几个命令即可启动整个项目:
# 拉取代码
git clone --recursive https://github.com/cdfmlr/muvtuber.git
cd muvtuber

# 修改配置(请用你喜欢的任意编辑器)
vim docker-compose.yml
# 按照你的实际情况修改 HTTP_PROXY、HTTPS_PROXY 的值
# 如果不需要,直接删掉就行。

# 启动各种服务
# 首次运行需要 build 各种镜像,耗时较长,并且请确保网络能够访问 Docker Hub、GitHub
# 之后我可能会把打包好的镜像上传,到时候直接 pull 就行了。
docker compose up -d
# docker compose logs -f  # 查看日志

# 启动 muvtuberdriver
cd muvtuberdriver
COOLDOWN_INTERVAL='5s' nohup go run . \
    -textinhttp=':51080' \
    -live2d_msg_fwd='http://localhost:51072/live2d' \
    -roomid 26949229 \
    -reduce_duration=5s \
    -blivedm='ws://localhost:51060/api/chat' \
    -mchatbot='localhost:51051' \
    -chatgpt='localhost:51052' \
    -live2ddrv='http://localhost:51074/driver' \
    -chatgpt_config='[{"version": 3, "api_key": "sk-xxx", "initial_prompt": "You are Shizuku, a cute vtuber live streaming"}]' >> ../run-muvtuber-docker.log 2>&1 &
# tail -f ../run-muvtuber-docker.log  # 查看日志
然后就可以 OBS 接入各个界面,然后推流了。下面有详细帮助,但注意端口不一样:
- Live2DView: 9000 -> 51070
- Blivechat: 12450 -> 51060
(首次使用,毋必按照如下步骤走一边,不能直接看后面的部署一节)
-1. 开发环境:
$ uname -mrs
Darwin 22.3.0 arm64
# 目前 TTS 模块还依赖于 macOS,其他系统可能不行。
$ go version
go version go1.20.1 darwin/arm64
$ python3 --version
Python 3.9.16  # blivechat
Python 3.10.10 # others
$ poetry --version
Poetry (version 1.4.0)
$ node --version
v18.14.2
$ pyenv --version
pyenv 2.3.14
$ pnpm --version
7.29.0
Node.js 和 Python 的包管理配置:
# 前端统一使用 pnpm (珍爱硬盘,远离 npm)
pnpm config set auto-install-peers true -g
# python统一使用 pyenv + poetry
poetry config virtualenvs.prefer-active-python true
poetry config virtualenvs.in-project true # 只是个人的保守偏好- 现在可用 git submodule 一次性拉取整个项目,无需手动 clone 各个模块了:
git clone --recursive https://github.com/cdfmlr/muvtuber.git接下来编译运行各个模块,可以预先开 7 个终端页,然后:
cd blivechat

# 编译前端
cd frontend
pnpm install
pnpm run build
cd ..

# 运行服务
pyenv local 3.9.16
poetry install
poetry run python main.py
# 服务运行在 http://localhost:12450,会自动在默认浏览器打开cd emotext
pyenv local 3.10.10
poetry install
poetry run python emotext/httpapi.py --port 9003
# emotext server: http://localhost:9003cd chatgpt_chatbot
pyenv local 3.10.10
poetry install
poetry run python chatgpt
# ChatGPTChatbot gRPC server: localhost:50052cd musharing_chatbot
pyenv local 3.10.10
poetry install
poetry run python -m spacy download en_core_web_sm # 一个执行不到的依赖,但是不装跑不起来。
PYTHONPATH=$PYTHONPATH:. poetry run python musharing_chatbot
# MusharingChatbot gRPC server: localhost:50051#git clone https://github.com/cdfmlr/live2ddriver.git
cd live2ddriver
go run . -shizuku localhost:9004 -verbose
# live2d shizuku driver: localhost:9004
# websocket message forwarder: localhost:9001 # 前端会连这个
# 不开发该模块也可以 build 出来再运行#git clone https://github.com/cdfmlr/live2dview.git
cd live2dview
pnpm install
pnpm exec quasar dev
# 浏览器访问: 调试(戏)页: http://localhost:9000/#/debug
# 生产环境: OBS 添加浏览器源: http://localhost:9000/
# 如果不开发这个模块可以 build & serve:
pnpm exec quasar build
httpstatic -d dist/spa/ -l :9000 # 你的某种静态网页服务工具,如 python -m http.server,如果开发环境最好有宽松的 CROS。这里用的是 https://github.com/cdfmlr/tools/#httpstaticmuvtuberdriver 必须在前面所有服务正确启动后才能启动,否则会 panic 退出。
#git clone https://github.com/cdfmlr/muvtuberdriver.git
cd muvtuberdriver

go run . -chatgpt_config='[{"version": 3, "api_key": "sk-xxx", "initial_prompt": "请扮演一个正在直播的 vtuber,之后我的输入均为用户评论,用简短的一句话回答它们"}]' -roomid 00000000 -reduce_duration=2s
# chatgpt_access_token: 浏览器访问https://chat.openai.com/api/auth/session获取
# roomid 你的 b 站直播间 id,https://live.bilibili.com/000000?... 中的000000

# 不开发该模块也可以 build 出来再运行- OBS
brew install obs
# 或:https://obsproject.com

# 启动 OBS,设置:
# - blivechat 的弹幕框:localhost:12450/...
# - Live2DView:localhost:9000
# - 音频(say)的输出:你使用的音频设备
# 【开始直播】
给新手的 OBS 配置详解:
- Live2DView:来源 >
+> 浏览器 > 新建 > URL: http://localhost:9000/#/- 注意把「通过 OBS 控制音频」勾上哦,然后把那条声音关掉,不然有机会听到可爱捏鬼畜日语。
- blivechat:来源 >
+> 浏览器 > 新建 > URL:- 先用浏览器打开 http://localhost:12450
- 首页 > 房间号:设置为你的房间号 > 进入房间
- 弹出的窗口 -> 拷贝地址
- 粘贴到 OBS 的 URL
- 音频:来源 >
+>音频输入采集 > 新建 > 设备:BlackHole 2ch- 要先安装一个 BlackHole。(但测试了一下感觉 BlackHole 音质似乎有的怪?还是 soundflower 香啊,但太难了)
- 在开始直播前,控制中心 > 声音> 右边 AirPlay 图标 > 选 BlackHole。
- 然后电脑输出的声音就会 -> BlackHole -> OBS。
- B 站推流:设置(Preferences)> 直播 > 服务:选
Bilibili Live ...,推流码填「B 站首页 > 头像 > 推荐服务 > 直播中心 > 左侧“我的直播间”> 填好直播分类、房间标题 > 开始直播,然后会显示的串流密钥」
推荐使用前文的 docker compose 方式,本节的散装方式不推荐了。
按照上面步骤走过一次之后就可以比较方便地再启动了:
cd blivechat; nohup poetry run python main.py >> ../run-muvtuber.log 2>&1 &; cd ..
cd emotext; nohup poetry run python emotext/httpapi.py --port 9003 >> ../run-muvtuber.log 2>&1  &; cd ..
cd chatgpt_chatbot; nohup poetry run python chatgpt >> ../run-muvtuber.log 2>&1 &; cd ..
cd musharing_chatbot; PYTHONPATH=$PYTHONPATH:. nohup poetry run python musharing_chatbot >> ../run-muvtuber.log 2>&1  &; cd ..
cd live2ddriver; nohup go run . -shizuku localhost:9004 -verbose >> ../run-muvtuber.log 2>&1 &; cd ..
# alias httpstatic="~/tools/httpstatic/bin/httpstatic"
cd live2dview; nohup httpstatic -d dist/spa/ -l :9000 >> ../run-muvtuber.log 2>&1 &; cd ..
cd muvtuberdriver; nohup go run . -chatgpt_config='[{"version": 3, "api_key": "sk-xxx", "initial_prompt": "请扮演一个正在直播的 vtuber,之后我的输入均为用户评论,用简短的一句话回答它们"}]' -roomid 00000000 -reduce_duration=2s  >> ../run-muvtuber.log 2>&1 &; cd ..
# 然后就是开 OBS,推流开播了。- 文档:各项目的 README、文档
- Topic:直播话题:一起看,打游戏,互动游戏,……
- murecom for muvtuber:基于心情的 BGM
- Live2D View & Driver:焦点控制、像官方的 Viewer 那样丰富的任意动作、表情控制(离散 -> 连续)
- Chatbot:
- ChatGPT 平替
-
ChatGPT 多用户轮流访问:提高可用性换成 API 了。 -
MusharingChatbot(ChatterBot)重新训练计划用 T5 替换基础模型。
- Sayer(TTS):不依赖于 macOS 的平替
- 工程化:
- 全部内部接口 => gRPC (已部分实现)
- 散装微服务 => 容器编排 (已部分实现)
- 一个 muvtuber 出道介绍视频:匿名 m
- Filter:优先 + 排队,不要直接扔,存着,词穷的时候别冷场
- ……
所有下属项目除非特别说明,一律在 MIT 协议下开放源代码。
欢迎任何有关 Issue 问题、PR 贡献以及讨论。

