| title |
|---|
Connect to Sui Devnet |
Welcome to the Sui Devnet. We are hosting a public Devnet for the community to experiment with our tech and help to shape the future of the Sui network. It exists to gain operational experience with the Sui software in a public setting prior to our Mainnet launch.
To instead contribute to Sui itself, you may experiment with the advanced Sui CLI client at the command line.
The Sui Devnet currently consists of:
- A four-validator network with all nodes operated by Mysten Labs. Clients send transactions and read requests via this endpoint: gateway.devnet.sui.io:443 using JSON-RPC
- A public network Sui Explorer for browsing transaction history: https://explorer.devnet.sui.io
- A Discord channel for requesting test coins that can be used to pay for gas on the test network. These coins have no financial value and will disappear each time we reset the network.
Many improvements to the Sui Devnet are underway, such as the ability to run full nodes and use a browser-based wallet. See the Sui Devnet blog post announcement for full details on upcoming features. All Devnet usage is subject to our terms of service.
We provide the following tools for users to interact with the Sui Devnet:
- The Sui Wallet command line interface (CLI)
- create and manage your private keys
- submit transactions for creating example NFTs
- call and publish Move modules
- Sui Explorer - view transactions and objects
You may simply install Sui and then request test tokens as described in the install docs. To use the Sui Devnet, you will need:
- Sui test coins (tokens) requested through Discord.
- the
gitcommand line interface. - Sui binaries in your PATH environment variable, particularly
sui.
Remember, you can confirm the existence of a command in your PATH by running which followed by the command, for example:
$ which suiYou should see the path to the command. Otherwise, reinstall.
Tip: To reliably test Devnet with the latest Sui binaries, re-install them at least weekly.
In addition, to conduct advanced work such as publishing a Move module or making a Move call, also obtain the Sui source code; for simplicity, we recommend installing in ~/sui or using an environment variable.
Now set up your Sui CLI client and connect to Devnet. Note you can manually change the Gateway URL if you have already configured a Sui CLI client.
To connect the Sui client to the Devnet, run the following command:
$ sui clientThe Sui CLI will print the following line if the client is starting up for the first time:
Config file ["/Users/dir/.sui/sui_config/client.yaml"] doesn't exist, do you want to connect to a Sui RPC server [y/n]?Type y and then press Enter. You should see the following output:
Sui RPC server Url (Default to Sui Devnet if not specified) :The Sui client will prompt for the RPC server URL; press 'Enter' and it will default to Devnet. Or enter a custom URL to connect to a server hosted elsewhere.
If you have used the Sui client before with a local network, you will have an existing client.yaml configuration
file needing update. Change the configured RPC server URL to Devnet by using:
$ sui client switch --gateway https://gateway.devnet.sui.io:443Tip: If you run into issues, reset the Sui configuration by removing its directory, by default located at
~/.sui/sui_config. Then reinstall Sui binaries.
- Join Discord If you haven’t already.
- Find your address by running:
$ sui client active-address
- Request tokens in the #devnet-faucet channel per the SUI tokens install documentation.
To create a Non-Fungible Token (NFT), run:
$ sui client create-example-nftYou will see output resembling:
Successfully created an ExampleNFT:

ID: ED883F6812AF447B9B0CE220DA5EA9E0F58012FE
Version: 1
Owner: Account Address ( 9E9A9D406961E478AA80F4A6B2B167673F3DF8BA )
Type: 0x2::devnet_nft::DevNetNFT
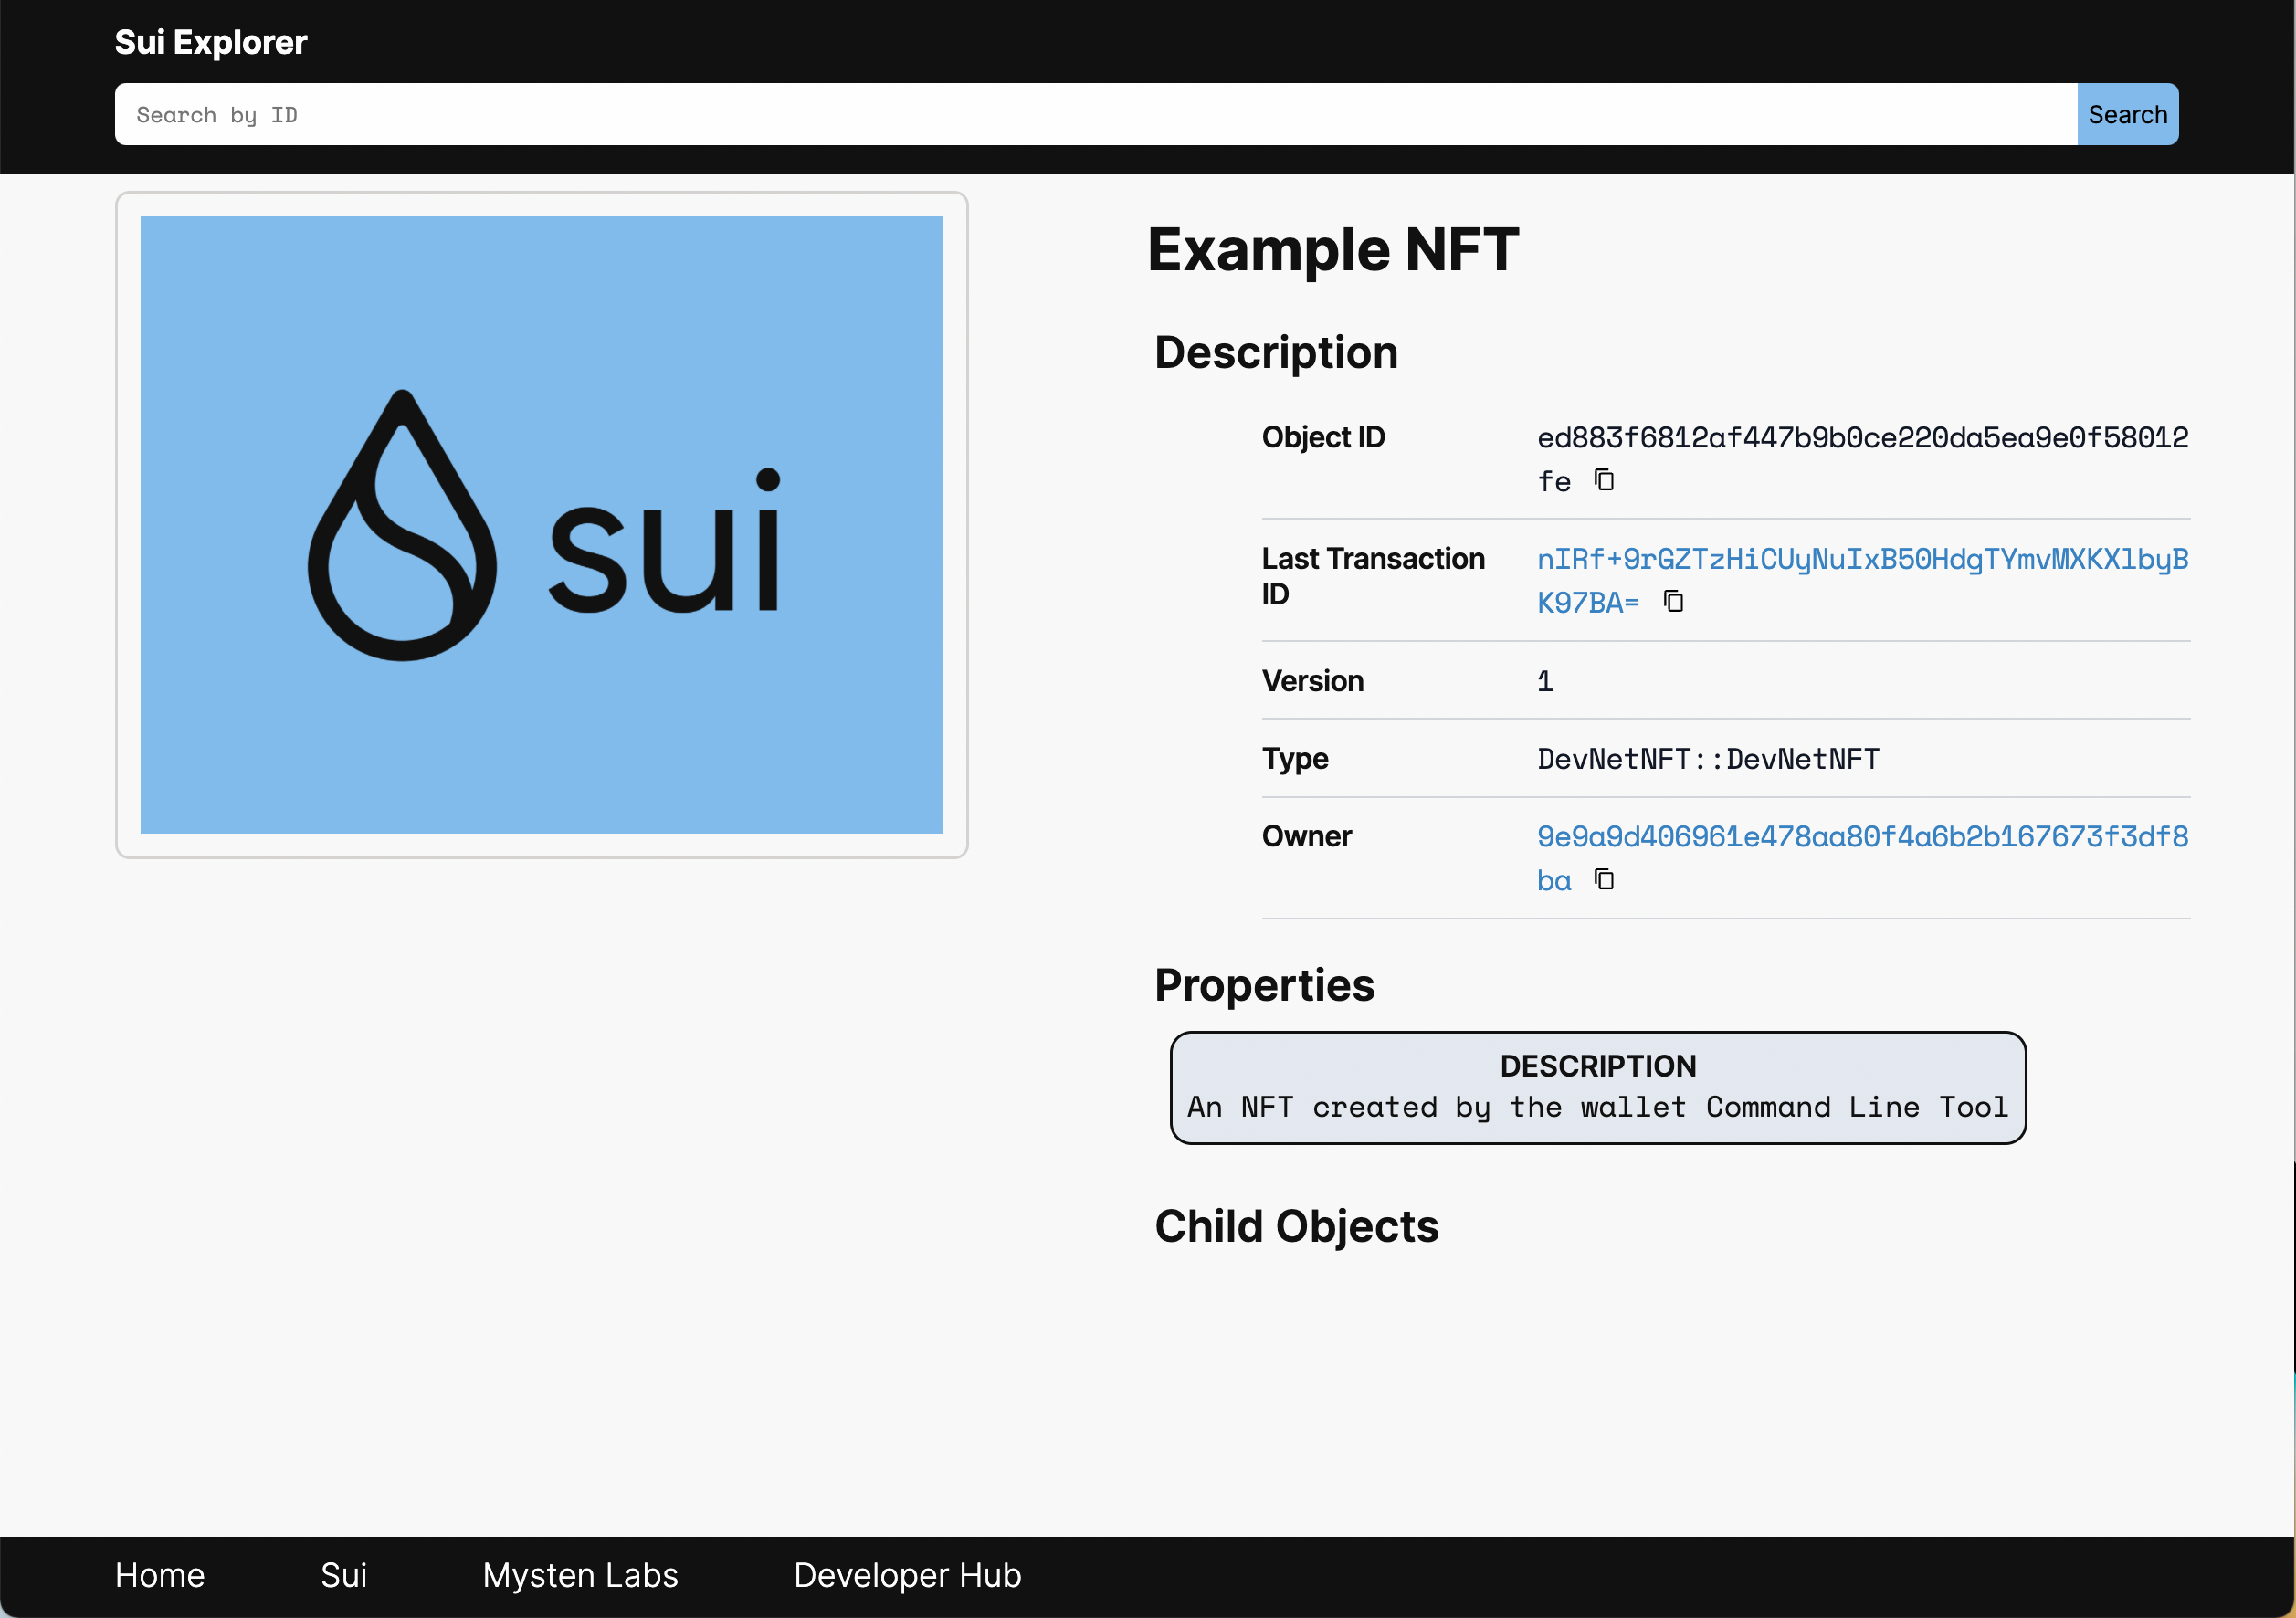
The above command created an object with ID ED883F6812AF447B9B0CE220DA5EA9E0F58012FE. Note you may use Sui CLI client to view objects owned by the address.
Now you can view the created object in the Sui Explorer by appending the object ID to: https://explorer.devnet.sui.io/objects/
Note you may easily customize the name, description, or image of the NFT upon creation, like so:
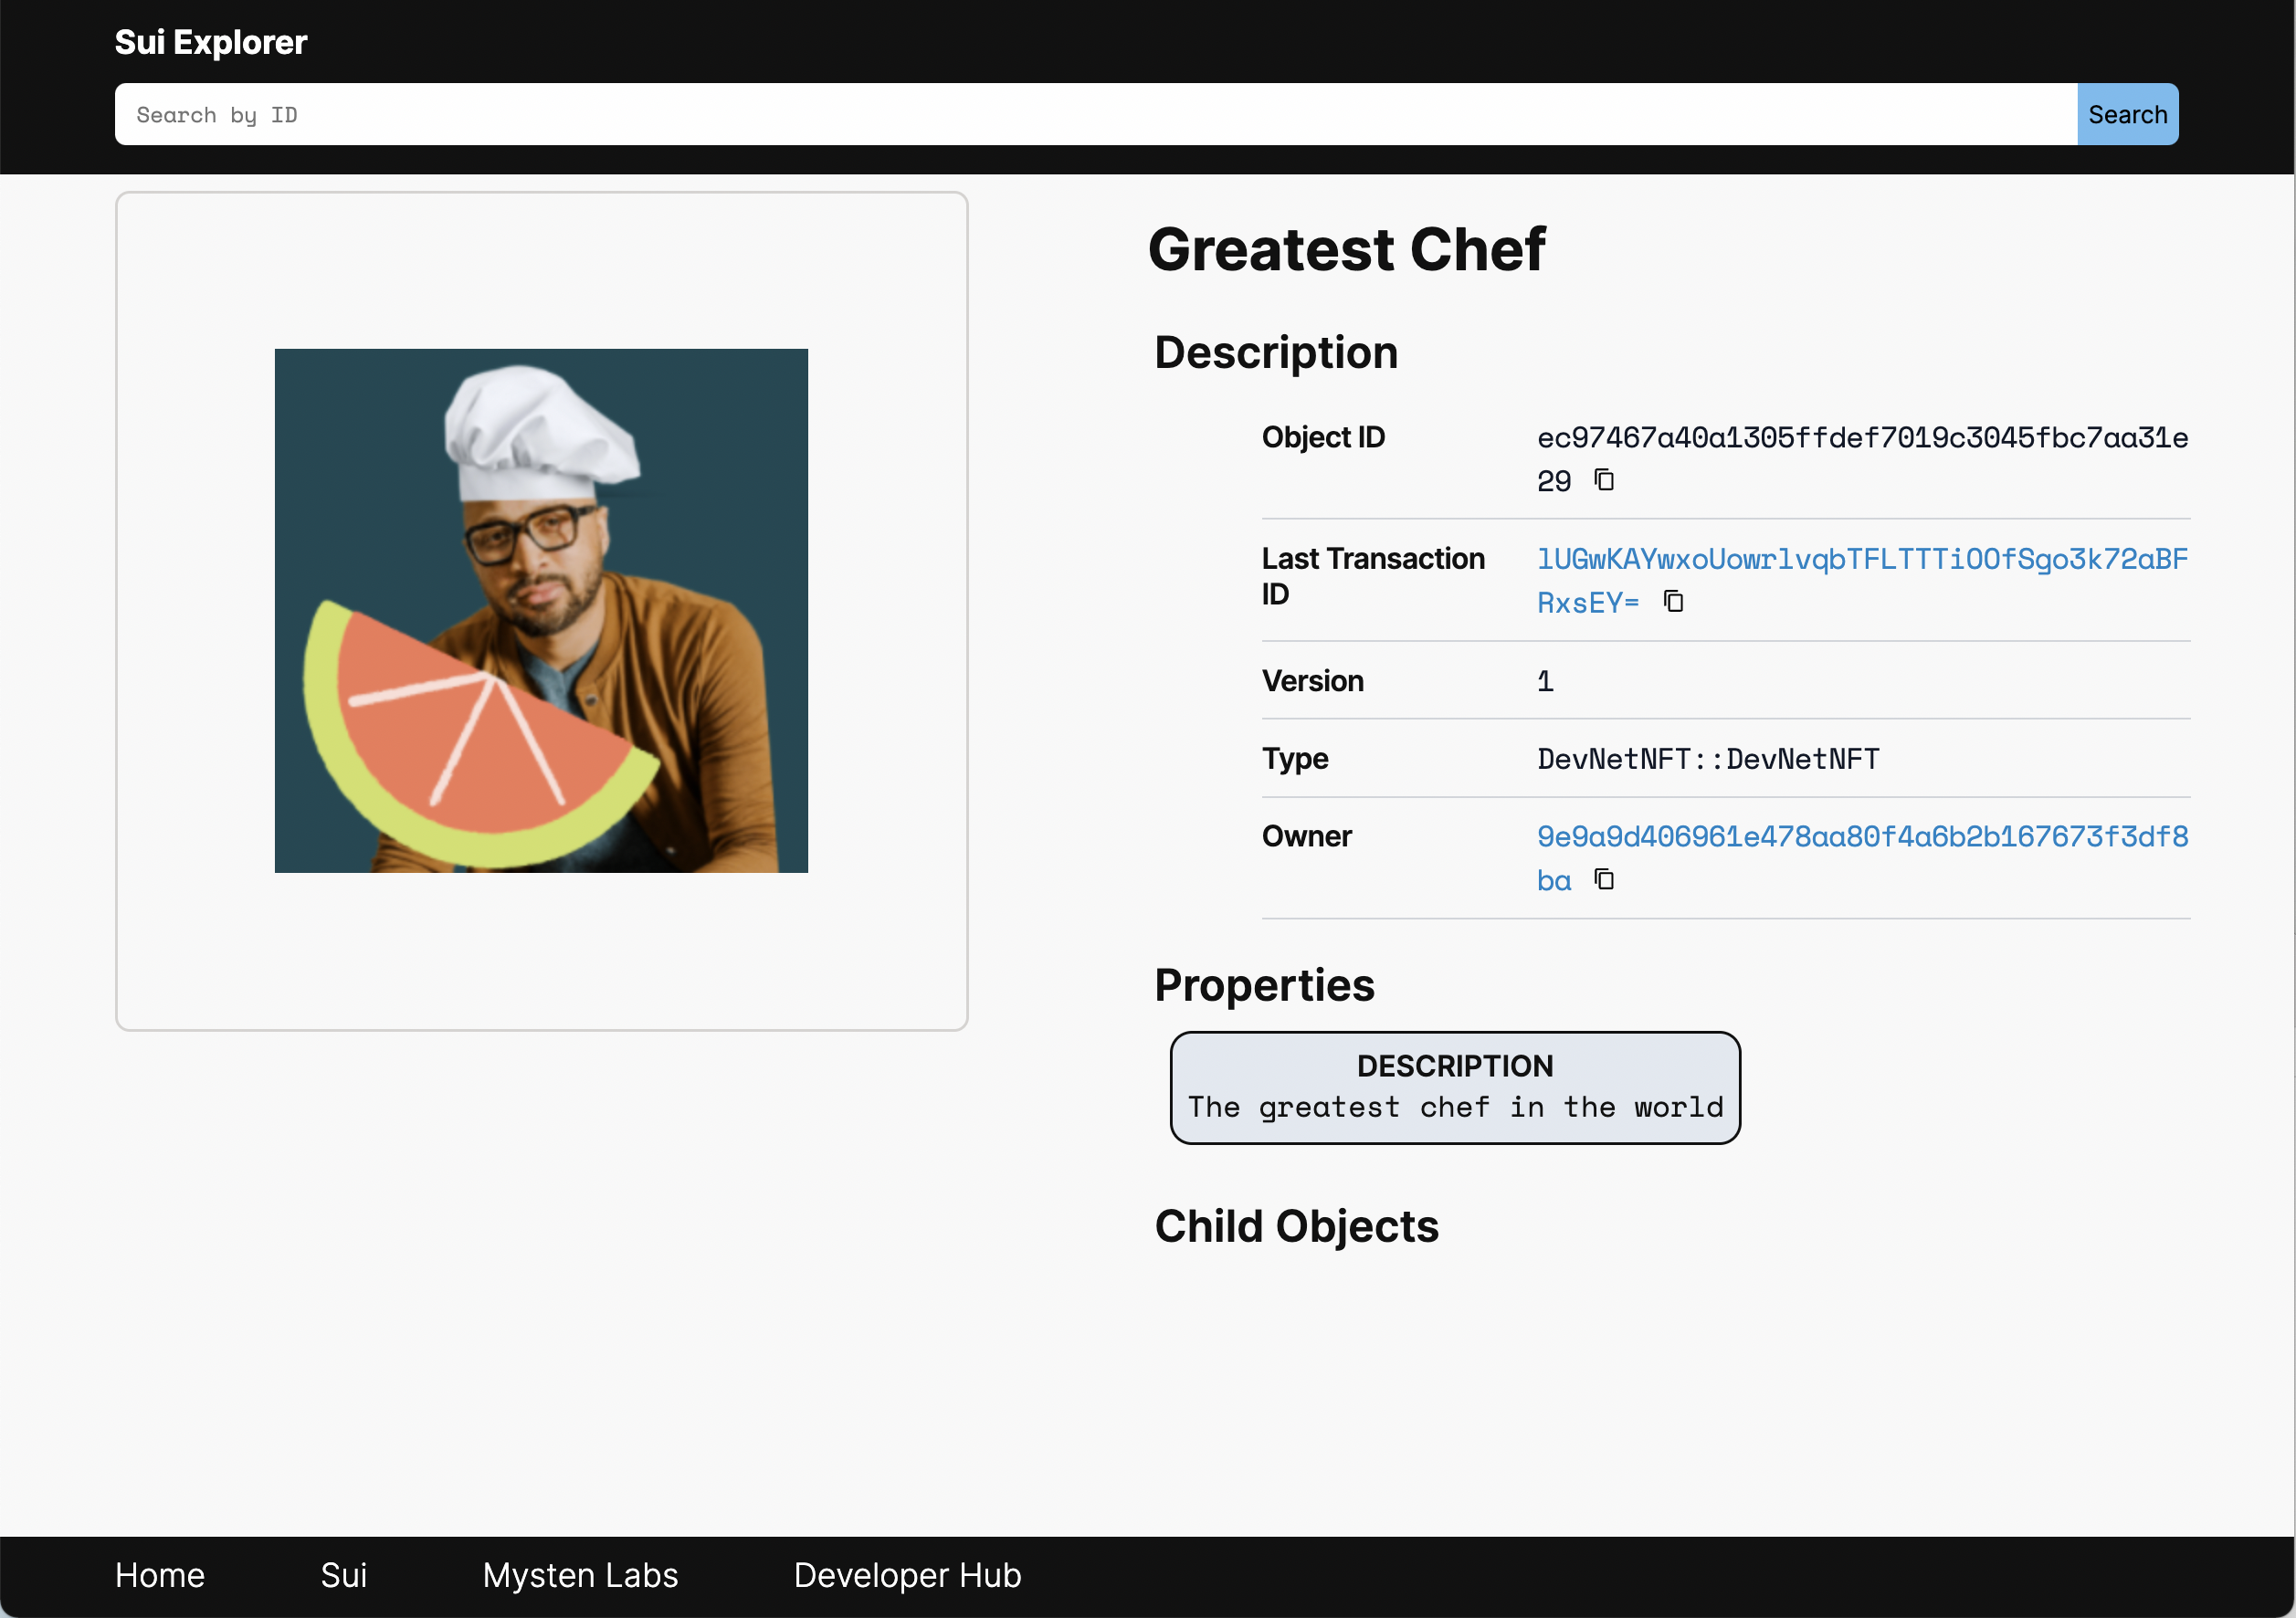
$ sui client create-example-nft --url=https://user-images.githubusercontent.com/76067158/166136286-c60fe70e-b982-4813-932a-0414d0f55cfb.png --description="The greatest chef in the world" --name="Greatest Chef"Which results in a new object ID:
Successfully created an ExampleNFT:

ID: EC97467A40A1305FFDEF7019C3045FBC7AA31E29
Version: 1
Owner: Account Address ( 9E9A9D406961E478AA80F4A6B2B167673F3DF8BA )
Type: 0x2::devnet_nft::DevNetNFT
That you can similarly view at: https://explorer.devnet.sui.io/objects/EC97467A40A1305FFDEF7019C3045FBC7AA31E29
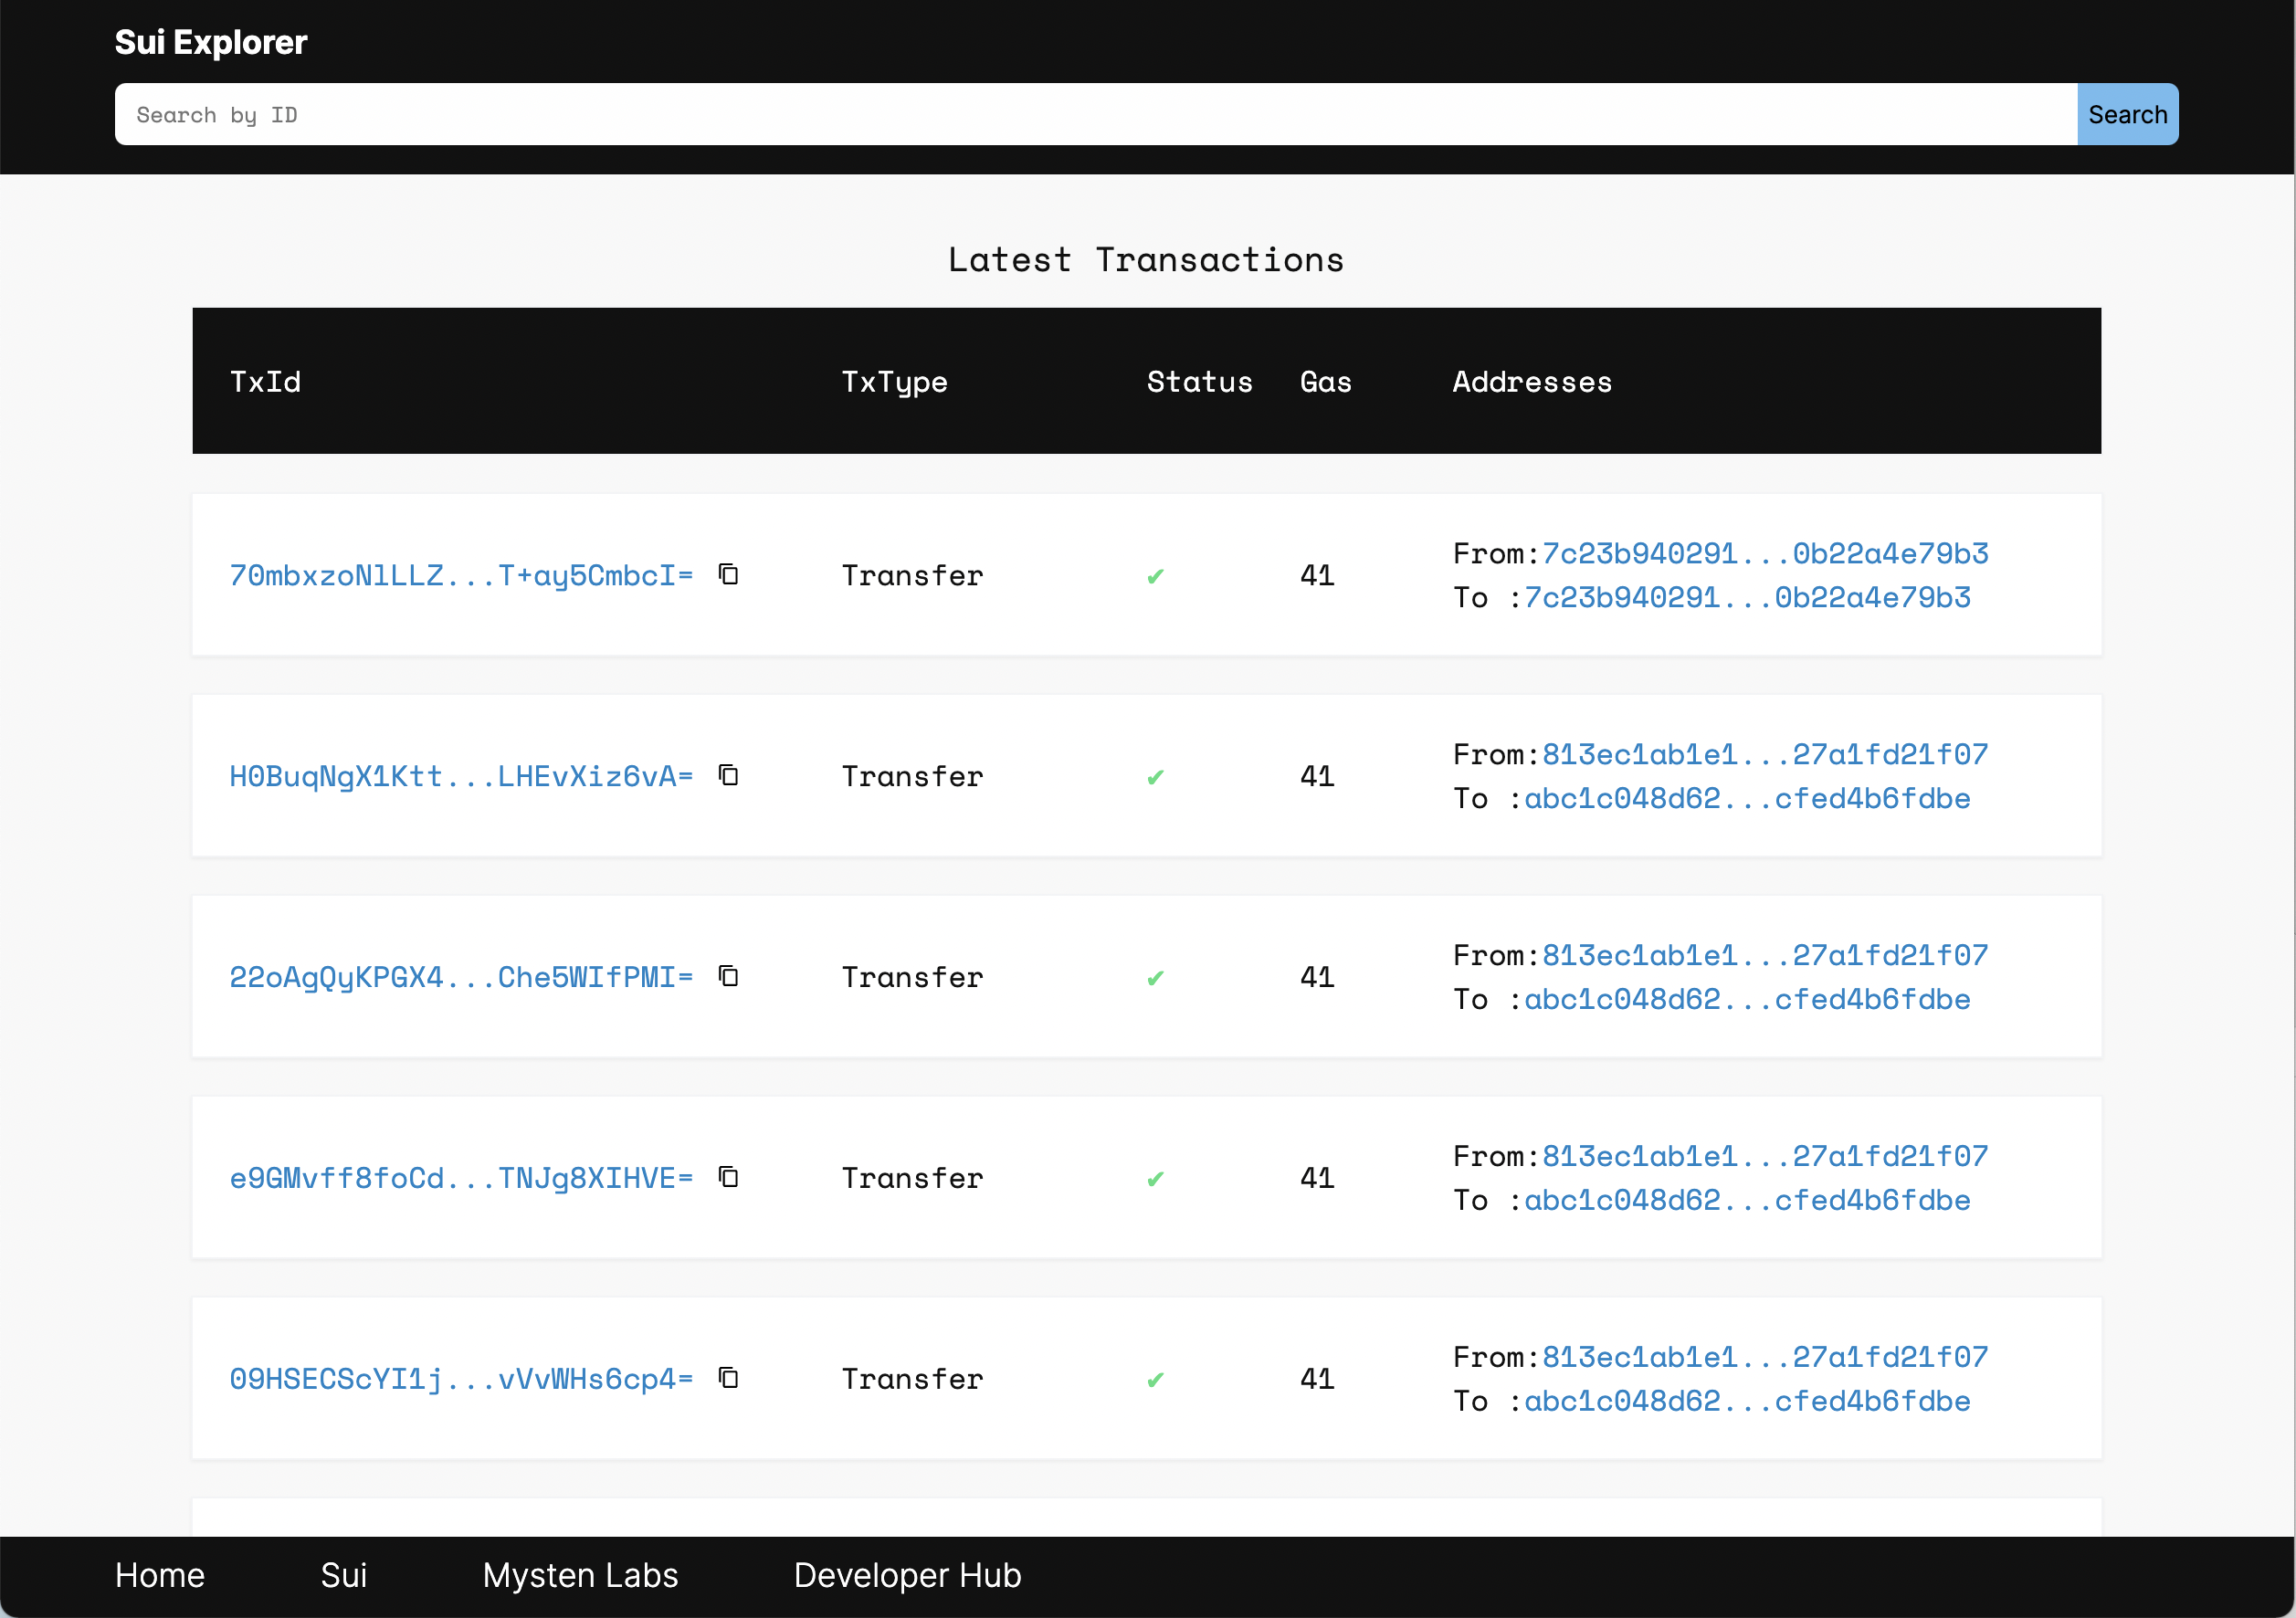
See all transactions on the home page and find the transaction hash under Latest Transactions:
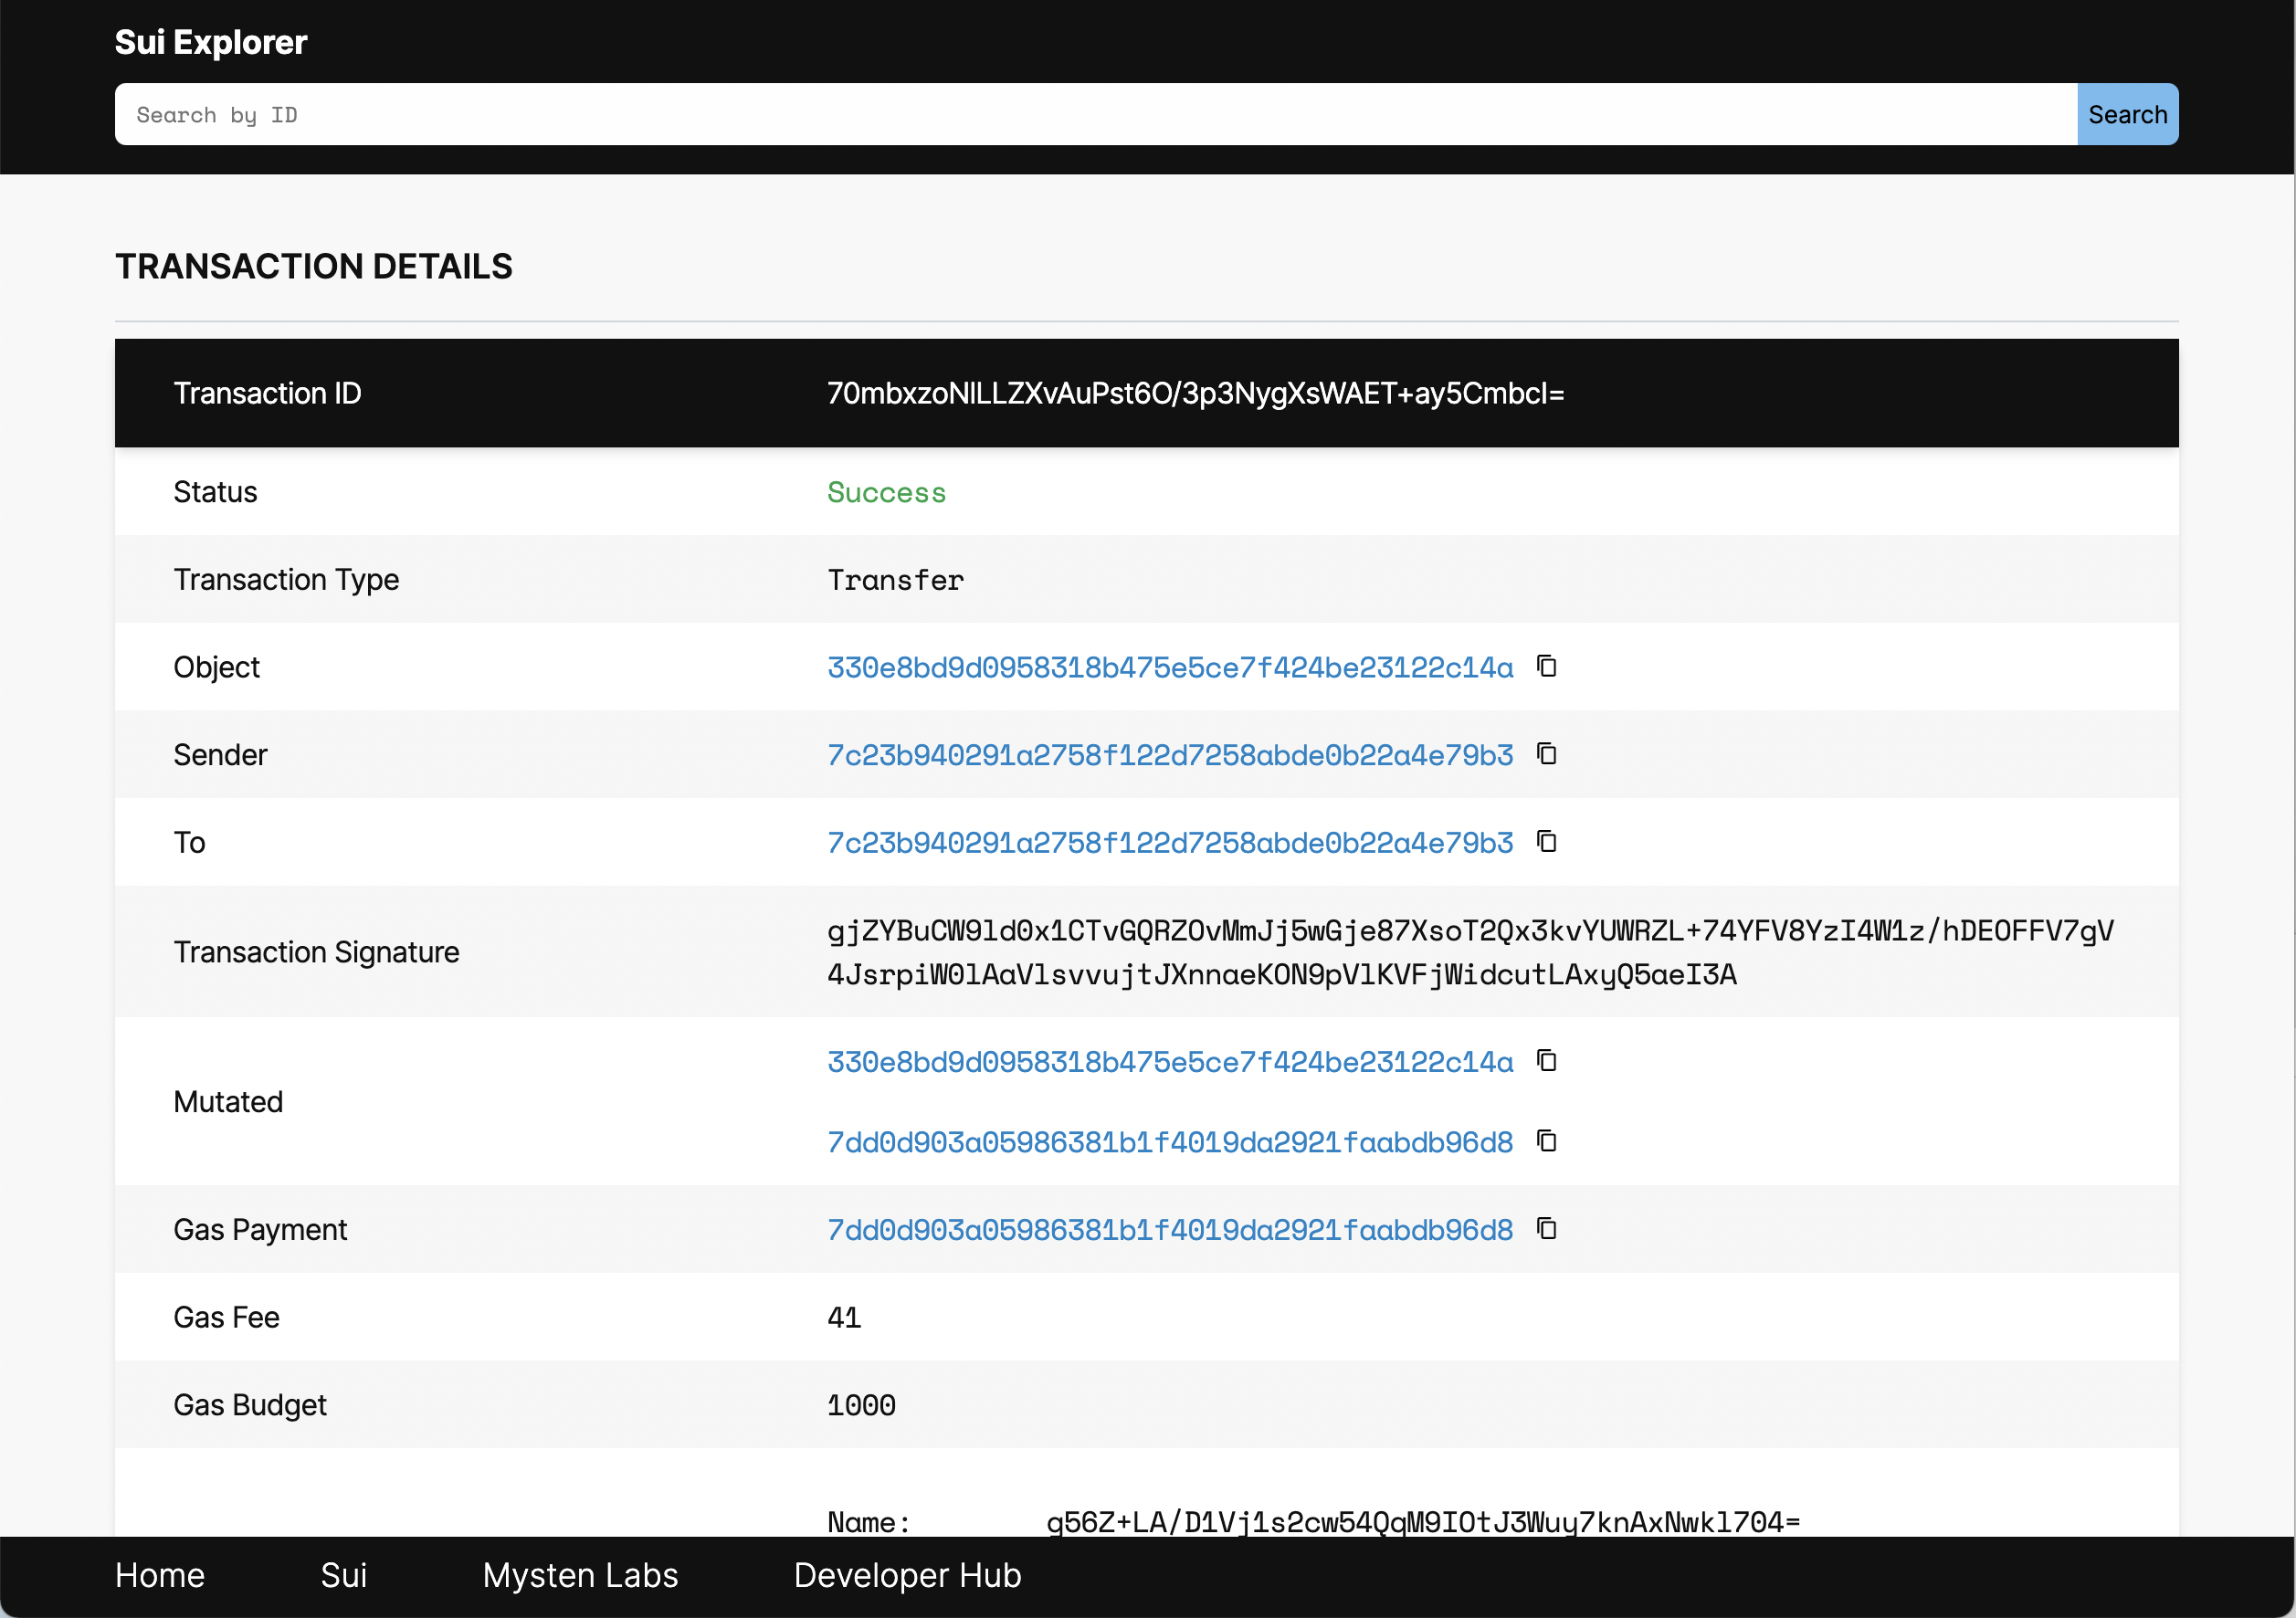
To get to the Transaction Details view in Sui Explorer after minting an NFT, click on the Last Transaction ID field in the Object View.
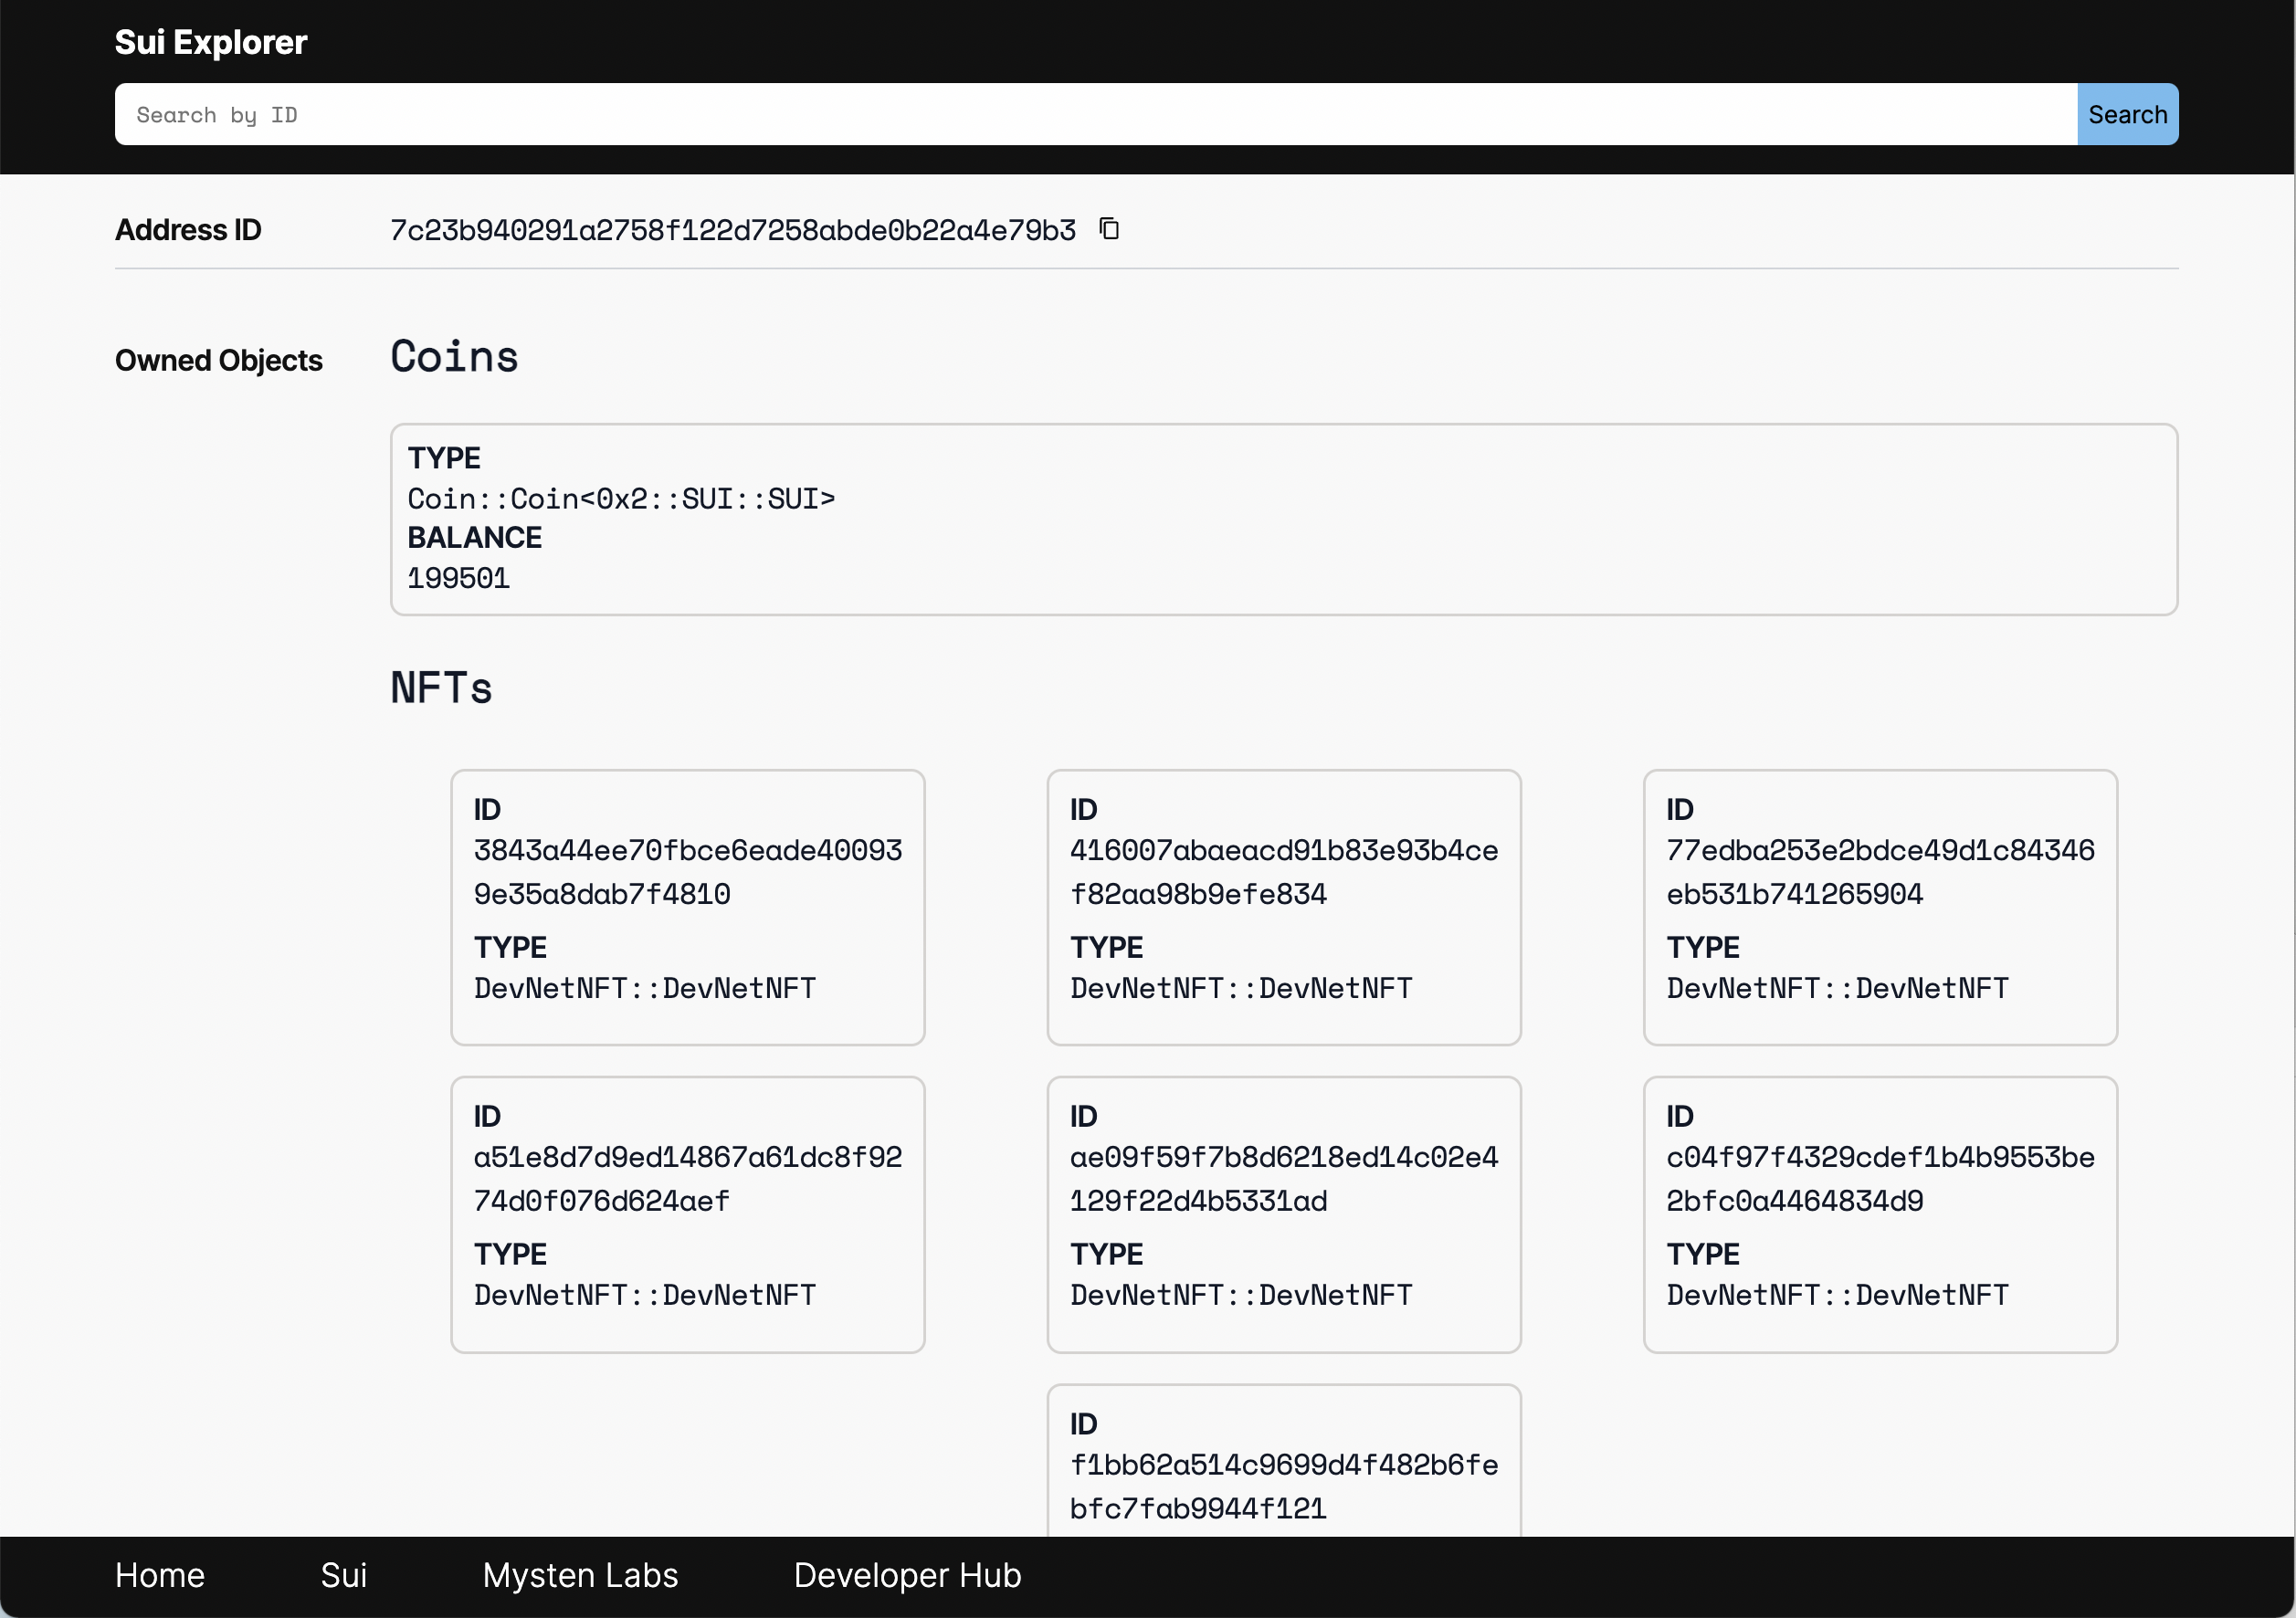
Click on any address to see the objects it owns:
See the Sui Explorer README for more details.
Publish a sample Move package containing code developed in the Sui Move tutorial as follows (assuming you installed the source code in ~sui as advised in set up):
$ sui client publish --path <your-sui-repo>/sui_programmability/examples/move_tutorial --gas-budget 30000You will see this output:
----- Certificate ----
Signed Authorities : [k#2266186afd9da10a43dd3ed73d1039c6793d2d8514db6a2407fcf835132e863b, k#1d47ad34e2bc5589882c500345c953b5837e30d6649d315c61690ba7a1e28d23, k#e9599283c0da1ac2eedeb89a56fc49cd8f3c0d8d4ddba9b0a0a5054fe7df3ffd]
Transaction Kind : Publish

----- Publish Results ----
The newly published package object ID: 0689E58788C875E9C354F359792CEC016DA0A1B0
List of objects created by running module initializers:

ID: 898922A9CABE93C6C38C55BBE047BFB0A8C864BF
Version: 1
Owner: Account Address ( F16A5AEDCDF9F2A9C2BD0F077279EC3D5FF0DFEE )
Type: 0x689e58788c875e9c354f359792cec016da0a1b0::M1::Forge

Updated Gas : Coin { id: 58C4DAA98694266F4DF47BA436CD99659B6A5342, value: 49552 }
Two important things happened as a result of publishing this package:
- a package object (with ID
0689E58788C875E9C354F359792CEC016DA0A1B0) has been created - a
Forgeobject (with ID898922A9CABE93C6C38C55BBE047BFB0A8C864BF) has been created as a result of running a module initializer for one (and the only one) module of this package
Specific object IDs displayed above may differ from one Sui installation to the other, so we will use the following placeholders for them (respectively): <PACKAGE_ID> and <FORGE_ID>. Whenever you see these used in the command line, for example when calling Move functions in the next section, replace them with actual object IDs.
In the previous section, we learned how to publish a Move package; and in this section, we will learn how to call into functions defined in this package. As a result of publishing a package, we obtained the new package object ID (<PACKAGE_ID>) and ID of the Forge object (<FORGE_ID>) that can be used to create swords and transfer them to other players.
Let’s assume that the placeholder for the address of the player to receive a sword is <PLAYER_ADDRESS>. If you don’t know any address other than your own, you can create one using the following client command and use it whenever you see the <PLAYER_ADDRESS> placeholder:
$ sui client new-address ed25519New address creation requires key scheme flag {secp256k1 | ed25519}.
Which yields output resembling:
Created new keypair for address with flag 0: [0x19de019c19fc800a6aeba4eb4133f6db91ca7c2c]In order to create a sword and transfer it to another player, we use the following command to call the sword_create function in the M1 module of the package we previously published.
Important: Note placeholders on the command line and formatting of function parameters as it is important to follow the same pattern.
Now run:
$ sui client call --function sword_create --module M1 --package 0x<PACKAGE_ID> --args \"0x<FORGE_ID>\" 42 7 \"0x<PLAYER_ADDRESS>\" --gas-budget 30000And receive output like:
----- Certificate ----
Signed Authorities : [k#2266186afd9da10a43dd3ed73d1039c6793d2d8514db6a2407fcf835132e863b, k#1d47ad34e2bc5589882c500345c953b5837e30d6649d315c61690ba7a1e28d23, k#e9599283c0da1ac2eedeb89a56fc49cd8f3c0d8d4ddba9b0a0a5054fe7df3ffd]
Transaction Kind : Call
Package ID : 0x689e58788c875e9c354f359792cec016da0a1b0
Module : M1
Function : sword_create
Arguments : [ImmOrOwnedObject((898922A9CABE93C6C38C55BBE047BFB0A8C864BF, SequenceNumber(1), o#9f12d4390e4fc8de3834c4960c6f265a78eca7c2b916ac1be66c1f00e1b47c68)), Pure([42, 0, 0, 0, 0, 0, 0, 0]), Pure([7, 0, 0, 0, 0, 0, 0, 0]), Pure([45, 50, 237, 113, 56, 27, 239, 127, 61, 140, 87, 180, 141, 248, 33, 35, 89, 54, 114, 170])]
Type Arguments : []

----- Transaction Effects ----
Status : Success { gas_cost: GasCostSummary { computation_cost: 69, storage_cost: 40, storage_rebate: 27 } }
Created Objects:
  - ID: 2E34983D59E9FC5310CFBAA953D2188E6A84FD21 , Owner: Account Address ( 2D32ED71381BEF7F3D8C57B48DF82123593672AA )
Mutated Objects:
  - ID: 58C4DAA98694266F4DF47BA436CD99659B6A5342 , Owner: Account Address ( ADE6EAD34629411F730416D6AD48F6B382BBC6FD )
  - ID: 898922A9CABE93C6C38C55BBE047BFB0A8C864BF , Owner: Account Address ( ADE6EAD34629411F730416D6AD48F6B382BBC6FD )
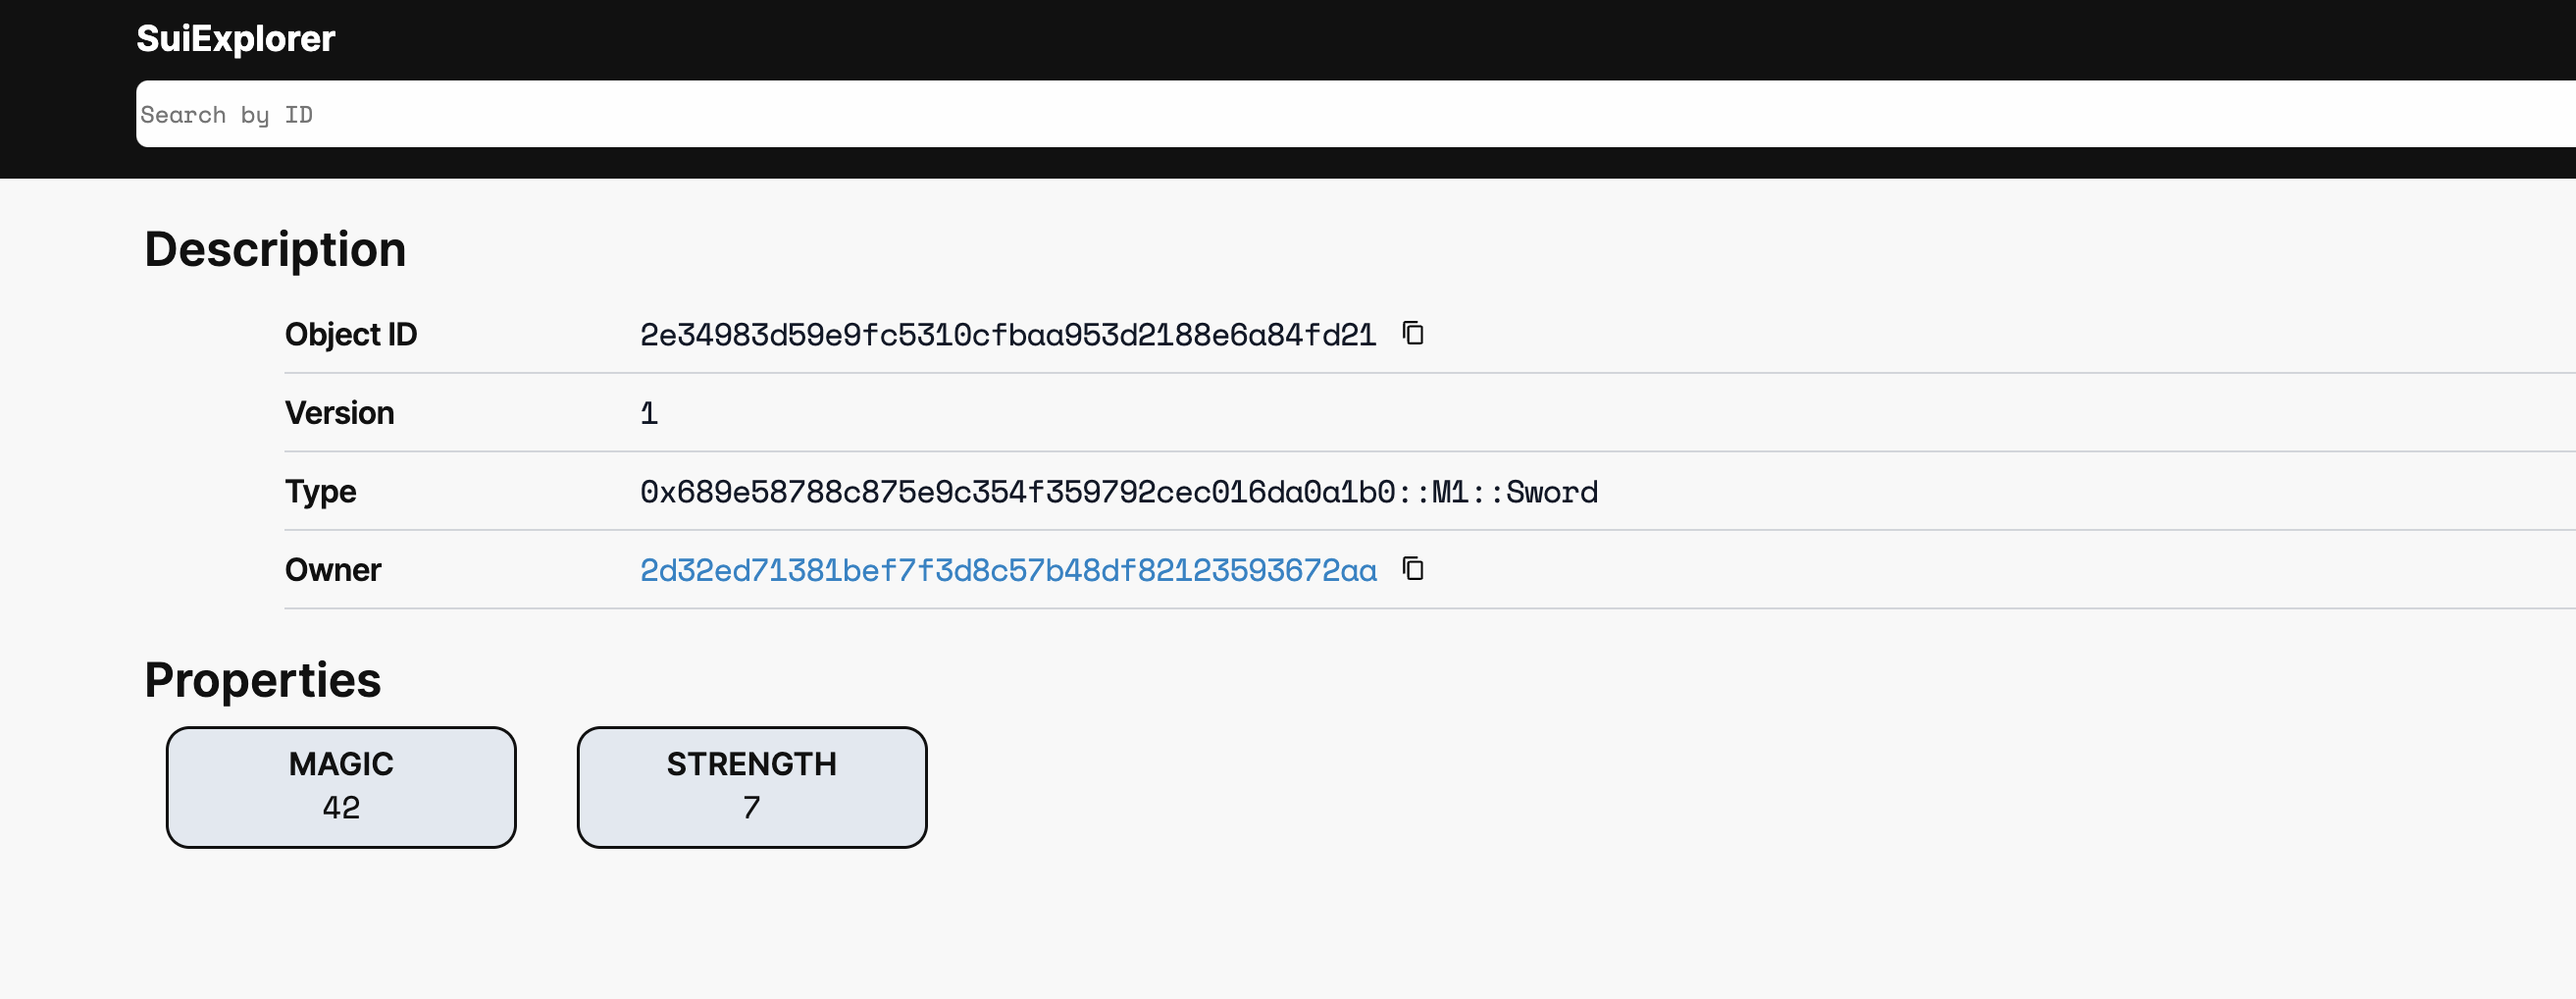
Go to the Sui Explorer to observe a newly created object (ID 2E34983D59E9FC5310CFBAA953D2188E6A84FD21, in this example). You should see a sword object created with Magic property of 42 and Strength property of 7 and transferred to the new owner.
As above, replace the object ID in the Explorer link with the object ID of the created object you observed in your own command output, appended to: https://explorer.devnet.sui.io/objects/
This concludes the Sui Devnet setup and testing instructions. Revisit this page and re-install the binaries regularly to witness and help Sui grow!
