![]()
Yatai (屋台, food cart) lets you deploy, operate and scale Machine Learning services on Kubernetes.
It supports deploying any ML models via BentoML: the unified model serving framework.
🍱 Made for BentoML, deploy at scale
- Scale BentoML to its full potential on a distributed system, optimized for cost saving and performance.
- Manage deployment lifecycle to deploy, update, or rollback via API or Web UI.
- Centralized registry providing the foundation for CI/CD via artifact management APIs, labeling, and WebHooks for custom integration.
🚅 Cloud native & DevOps friendly
- Kubernetes-native workflow via BentoDeployment CRD (Custom Resource Definition), which can easily fit into an existing GitOps workflow.
- Native integration with Grafana stack for observability.
- Support for traffic control with Istio.
- Compatible with all major cloud platforms (AWS, Azure, and GCP).
- 📖 Documentation - Overview of the Yatai docs and related resources
- ⚙️ Installation - Hands-on instruction on how to install Yatai for production use
- 👉 Join Community Slack - Get help from our community and maintainers
Let's try out Yatai locally in a minikube cluster!
- Install latest minikube: https://minikube.sigs.k8s.io/docs/start/
- Install latest Helm: https://helm.sh/docs/intro/install/
- Start a minikube Kubernetes cluster:
minikube start --cpus 4 --memory 4096 - Check that minikube cluster status is "running":
minikube status - Make sure your
kubectlis configured withminikubecontext:kubectl config current-context - Enable ingress controller:
minikube addons enable ingress
Install Yatai with the following script:
DEVEL=true bash <(curl -s "https://raw.githubusercontent.com/bentoml/yatai/main/scripts/quick-install-yatai.sh")This script will install Yatai along with its dependencies (PostgreSQL and MinIO) on your minikube cluster.
Note that this installation script is made for development and testing use only. For production deployment, check out the Installation Guide.
To access Yatai web UI, run the following command and keep the terminal open:
kubectl --namespace yatai-system port-forward svc/yatai 8080:80In a separate terminal, run:
YATAI_INITIALIZATION_TOKEN=$(kubectl get secret env --namespace yatai-system -o jsonpath="{.data.YATAI_INITIALIZATION_TOKEN}" | base64 --decode)
echo "Open in browser: http://127.0.0.1:8080/setup?token=$YATAI_INITIALIZATION_TOKEN"
Open the URL printed above from your browser to finish admin account setup.
First, get an API token and login BentoML CLI:
-
Keep the
kubectl port-forwardcommand in step above running -
Go to Yatai's API tokens page: http://127.0.0.1:8080/api_tokens
-
Create a new API token form the UI, make sure to assign "API" access under "Scopes"
-
Copy login command upon token creation and run as shell command, e.g.:
bentoml yatai login --api-token {YOUR_TOKEN} --endpoint http://127.0.0.1:8080
If you don't already have a Bento built, run the following commands from the BentoML Quickstart Project to build a sample Bento:
git clone https://github.com/bentoml/bentoml.git && cd ./examples/quickstart
pip install -r ./requirements.txt
python train.py
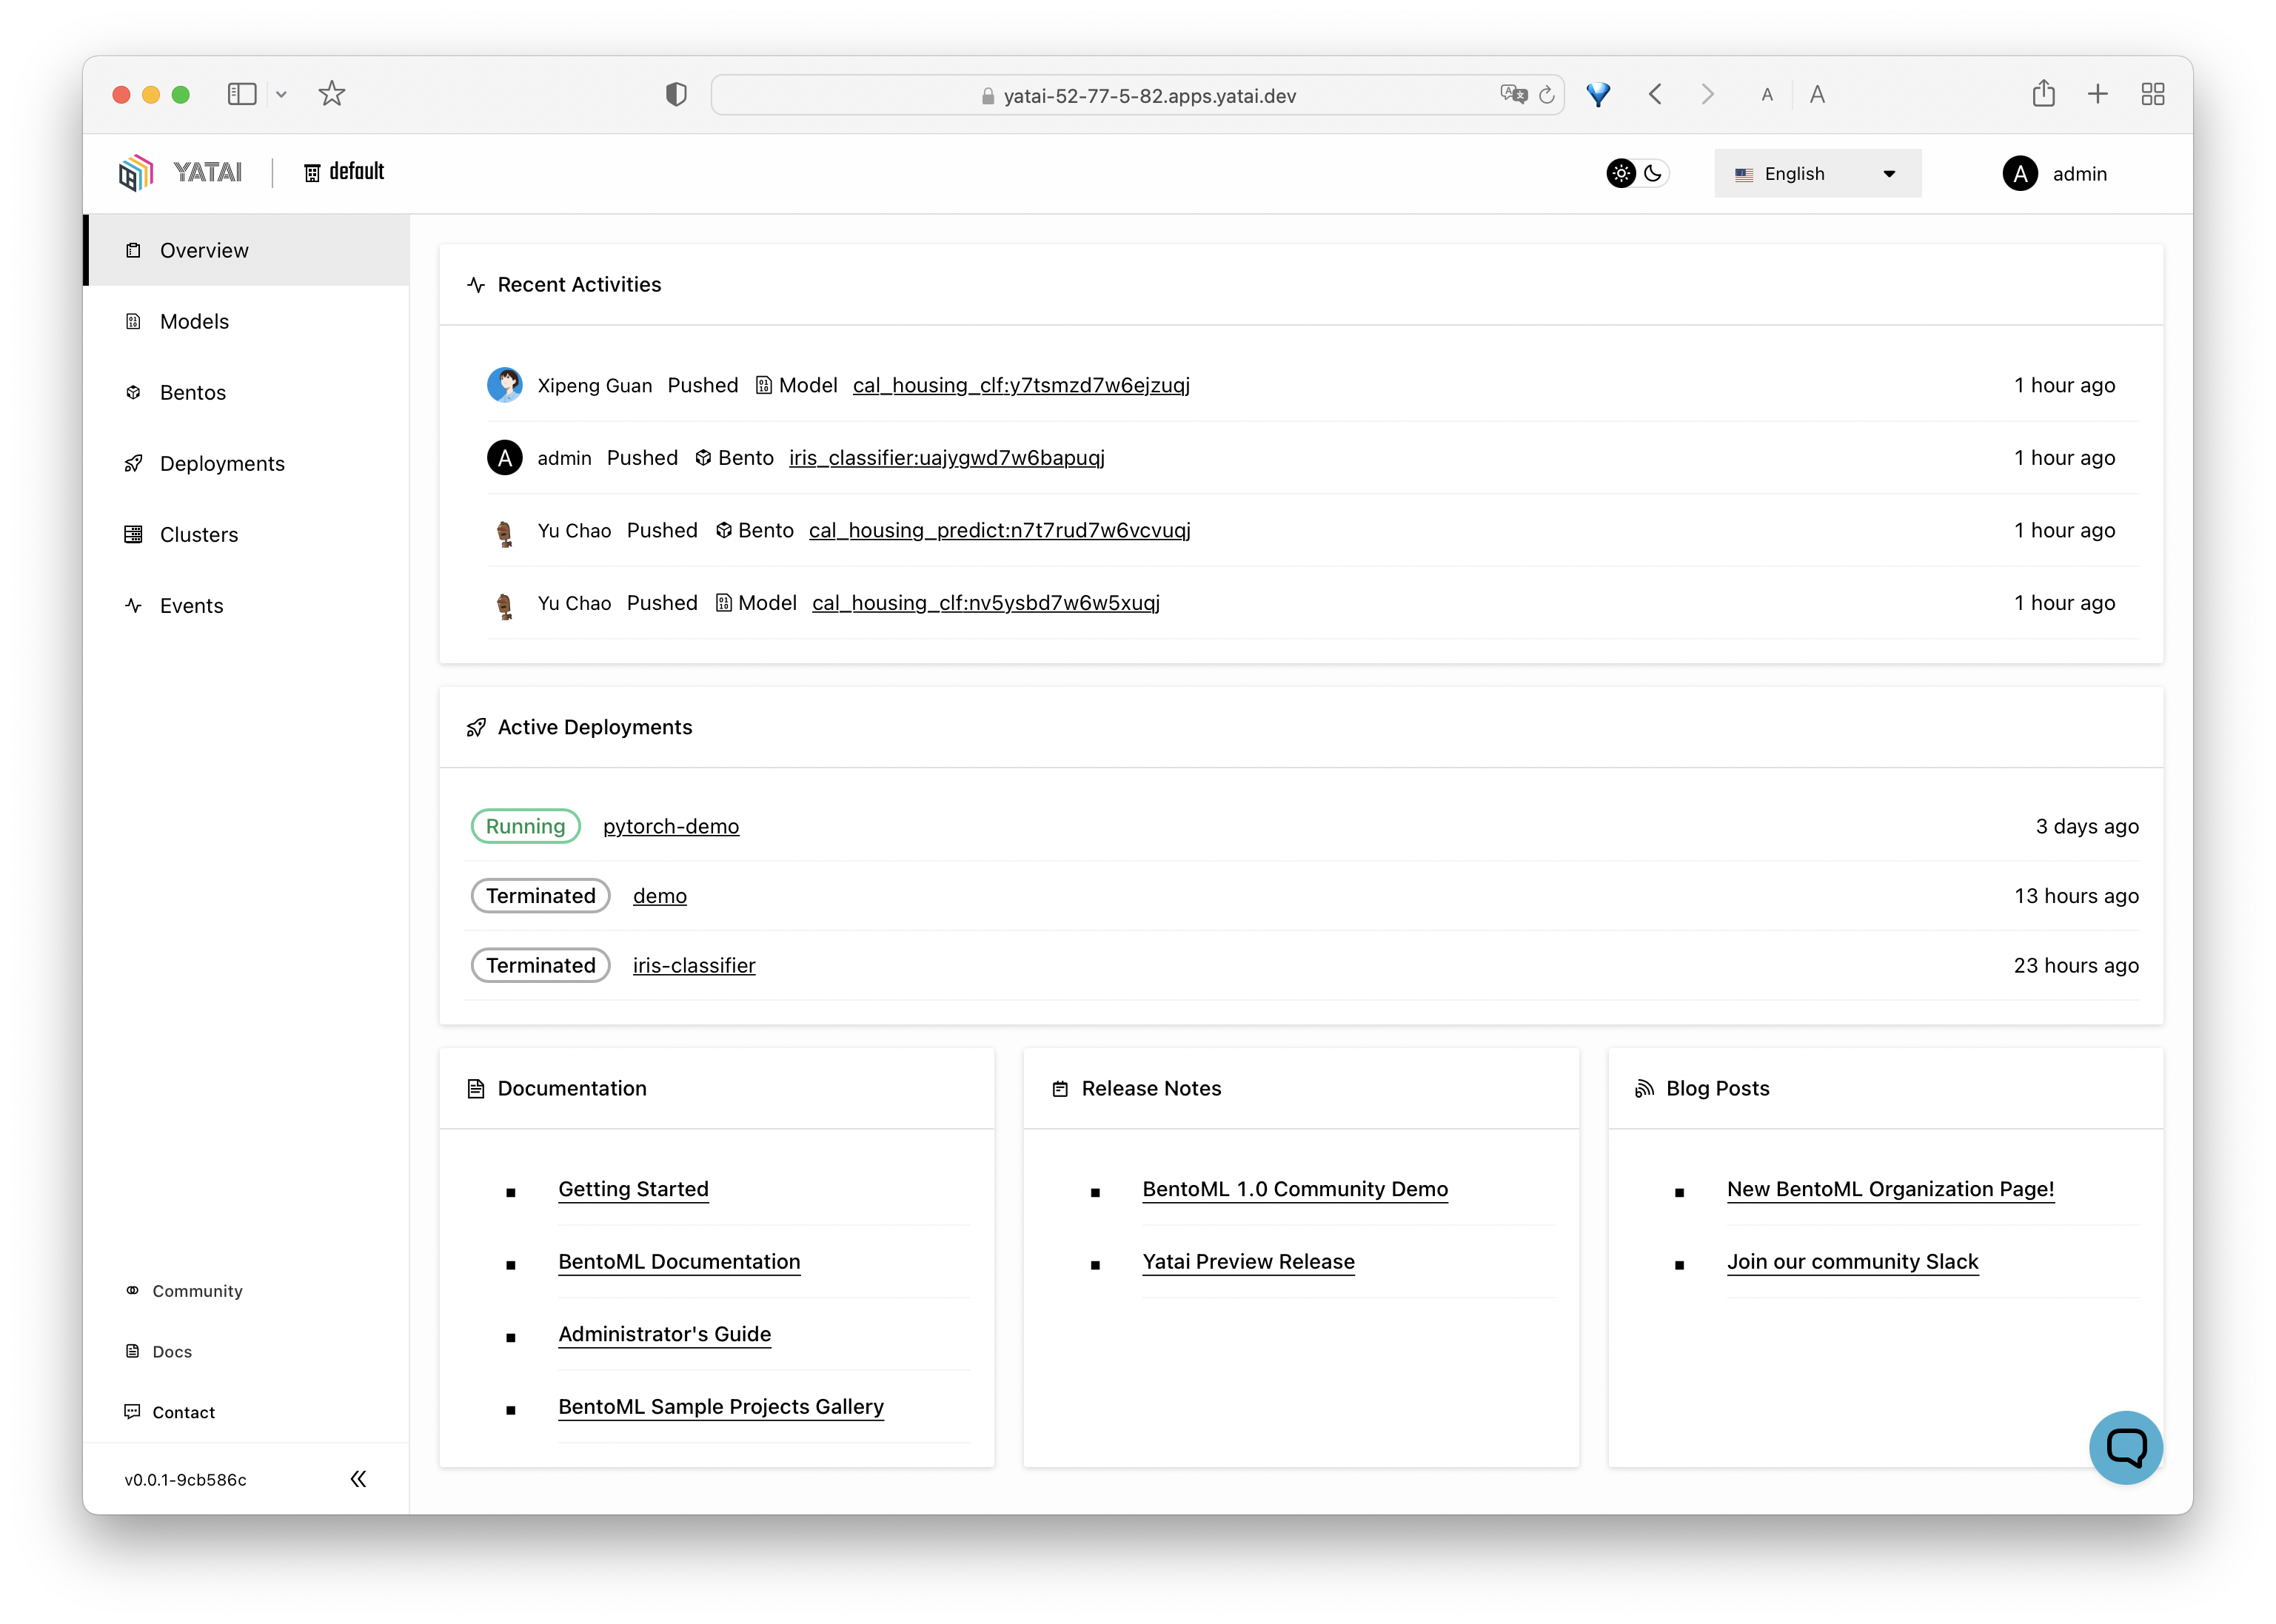
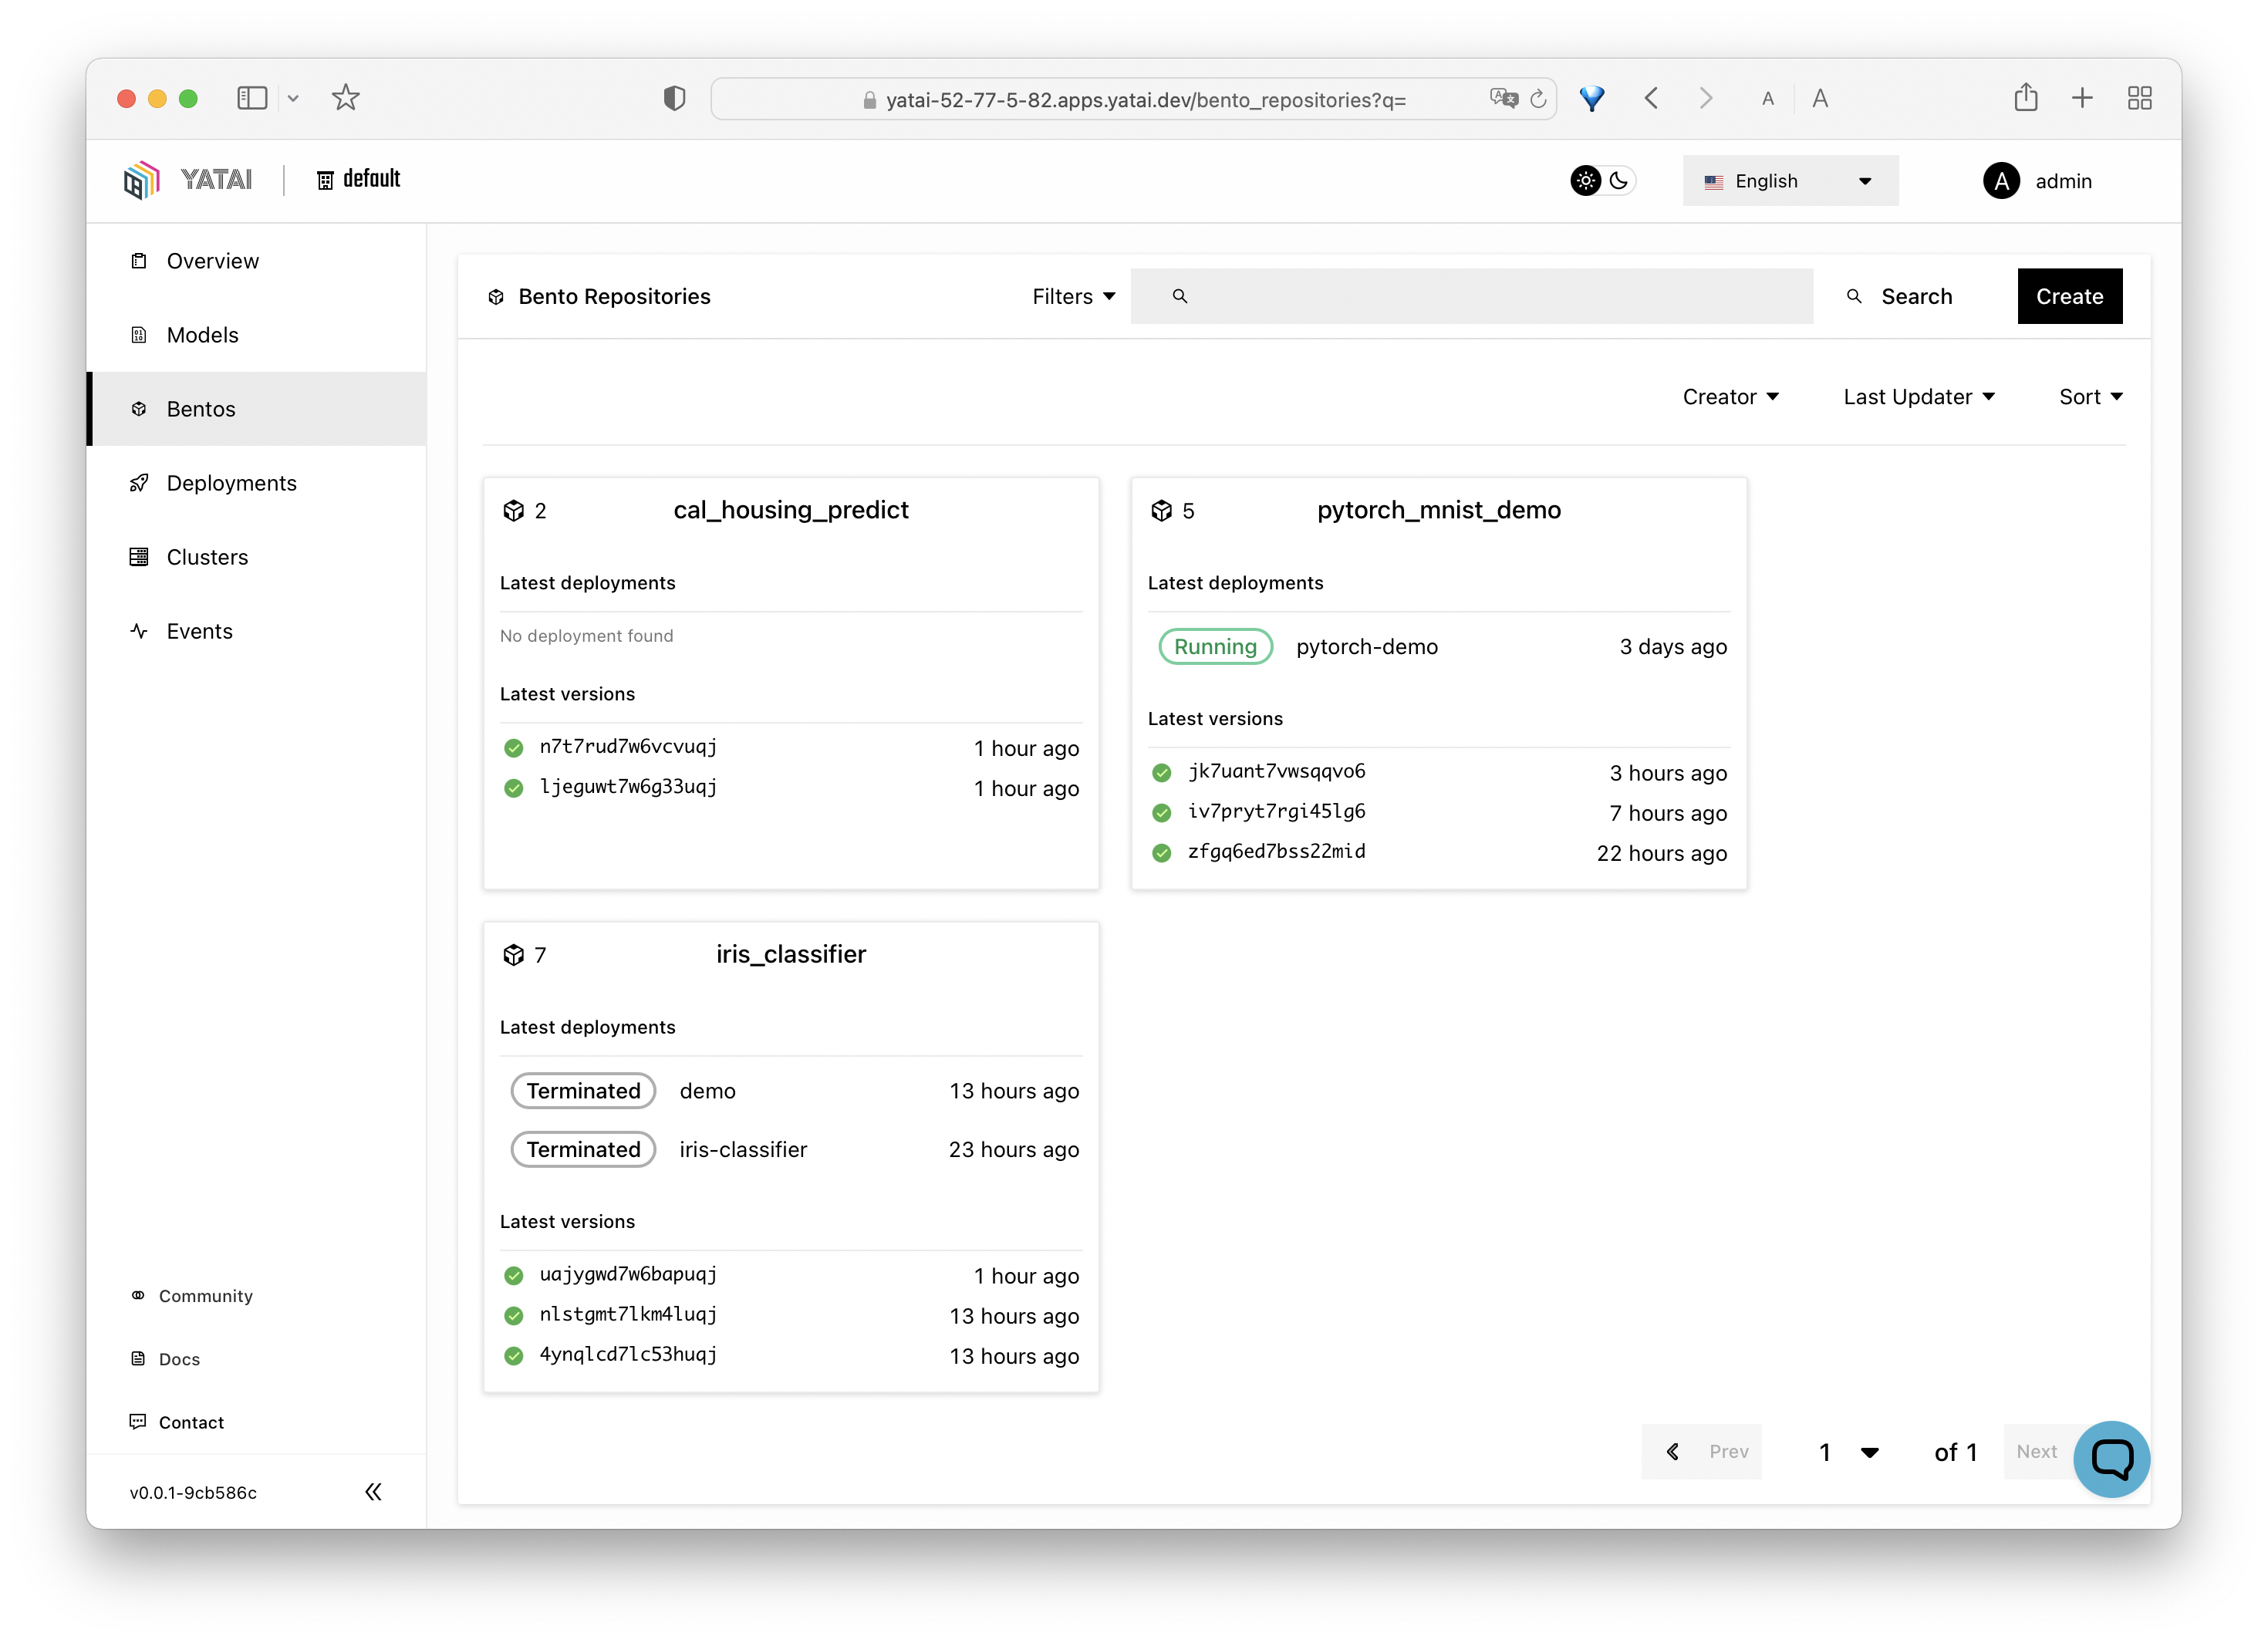
bentoml buildPush your newly built Bento to Yatai:
bentoml push iris_classifier:latestNow you can view and manage models and bentos from the web UI:

Yatai's Deployment feature comes as a separate component, you can install it via the following script:
DEVEL=true bash <(curl -s "https://raw.githubusercontent.com/bentoml/yatai-deployment/main/scripts/quick-install-yatai-deployment.sh")This will install the BentoDeployment CRD(Custom Resource Definition)
in your cluster and enable the deployment UI on Yatai. Similiarly, this script is made for development and testing purpose only.
Once the yatai-deployment component was installed, Bentos pushed to Yatai can be deployed to your
Kubernetes cluster and exposed via a Service endpoint.
A Bento Deployment can be created either via Web UI or via a Kubernetes CRD config:
- Go to deployments page: http://127.0.0.1:8080/deployments
- Click
Createbutton and follow instructions on UI

Define your Bento deployment in a my_deployment.yaml file:
apiVersion: serving.yatai.ai/v1alpha3
kind: BentoDeployment
metadata:
name: my-bento-deployment
namespace: yatai
spec:
bento_tag: iris_classifier:3oevmqfvnkvwvuqj
ingress:
enabled: true
resources:
limits:
cpu: "500m"
memory: "512m"
requests:
cpu: "250m"
memory: "128m"
autoscaling:
max_replicas: 10
min_replicas: 2
runners:
- name: iris_clf
resources:
limits:
cpu: "1000m"
memory: "1Gi"
requests:
cpu: "500m"
memory: "512m"
autoscaling:
max_replicas: 4
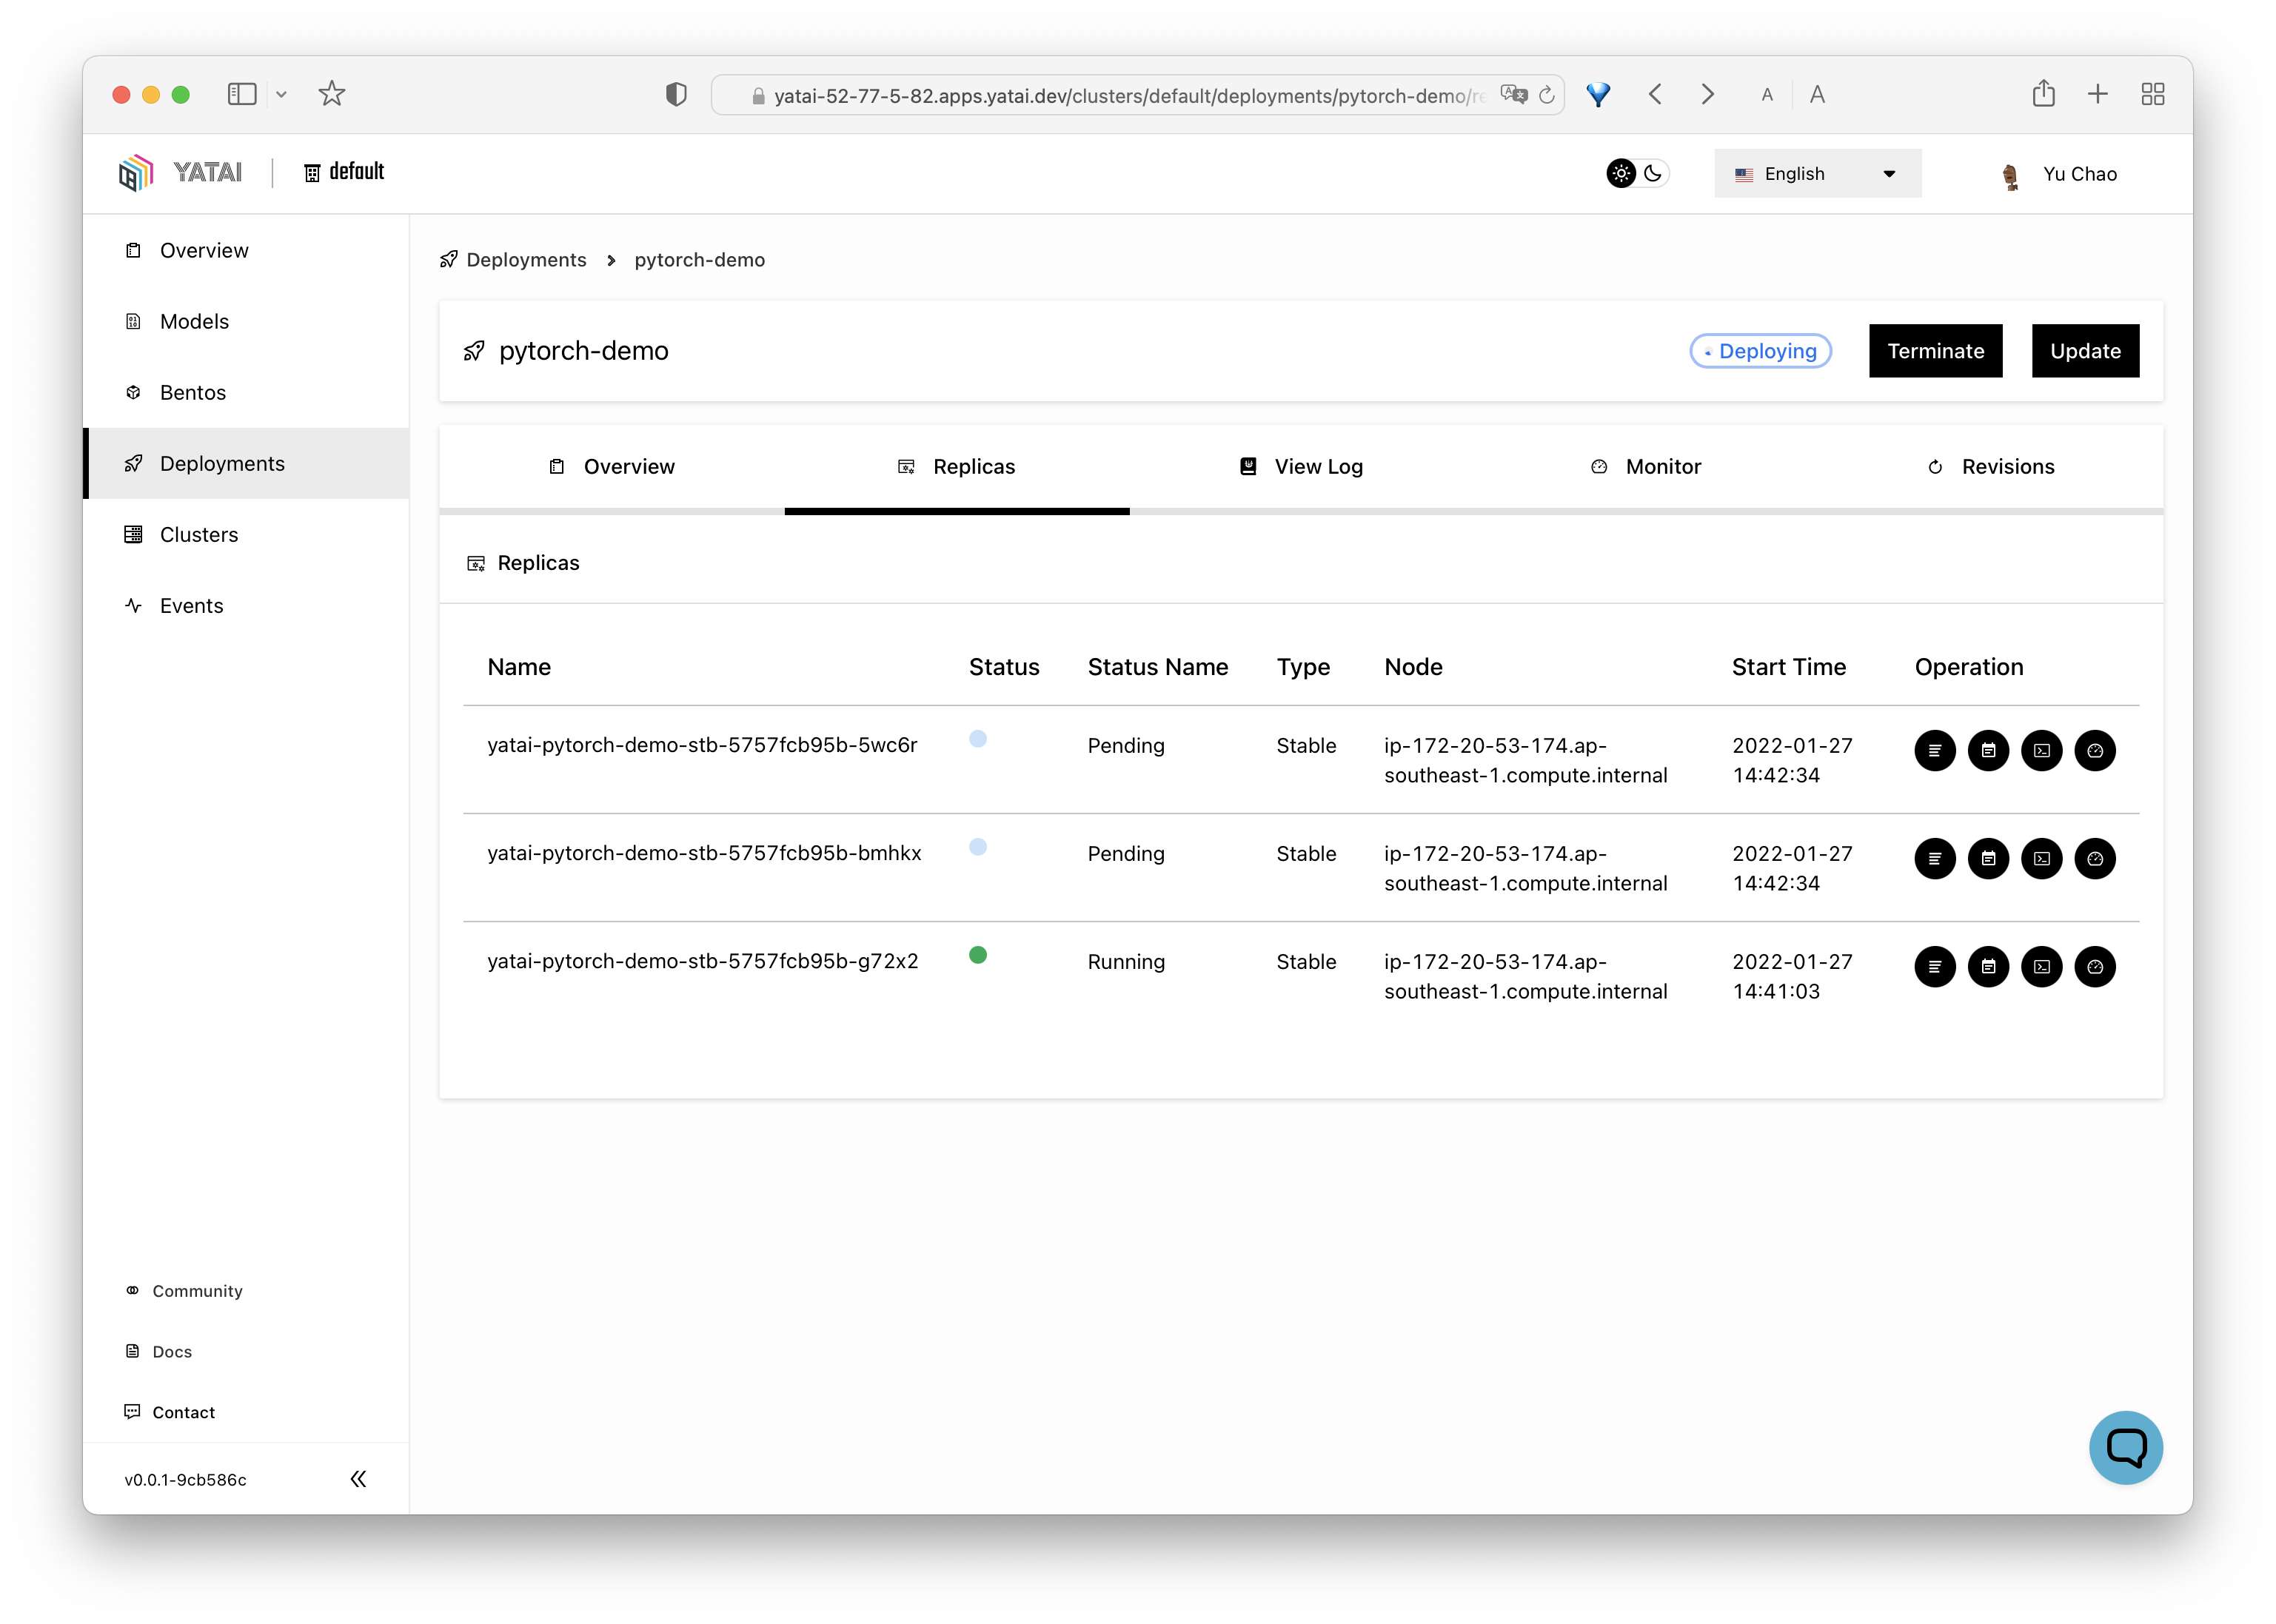
min_replicas: 1Apply the deployment to your minikube cluster:
kubectl apply -f my_deployment.yamlNow you can see the deployment process from the Yatai Web UI and find the endpoint URL for accessing the deployed Bento.
- To report a bug or suggest a feature request, use GitHub Issues.
- For other discussions, use GitHub Discussions under the BentoML repo
- To receive release announcements and get support, join us on Slack.
There are many ways to contribute to the project:
- If you have any feedback on the project, share it with the community in GitHub Discussions under the BentoML repo.
- Report issues you're facing and "Thumbs up" on issues and feature requests that are relevant to you.
- Investigate bugs and reviewing other developer's pull requests.
- Contributing code or documentation to the project by submitting a GitHub pull request. See the development guide.