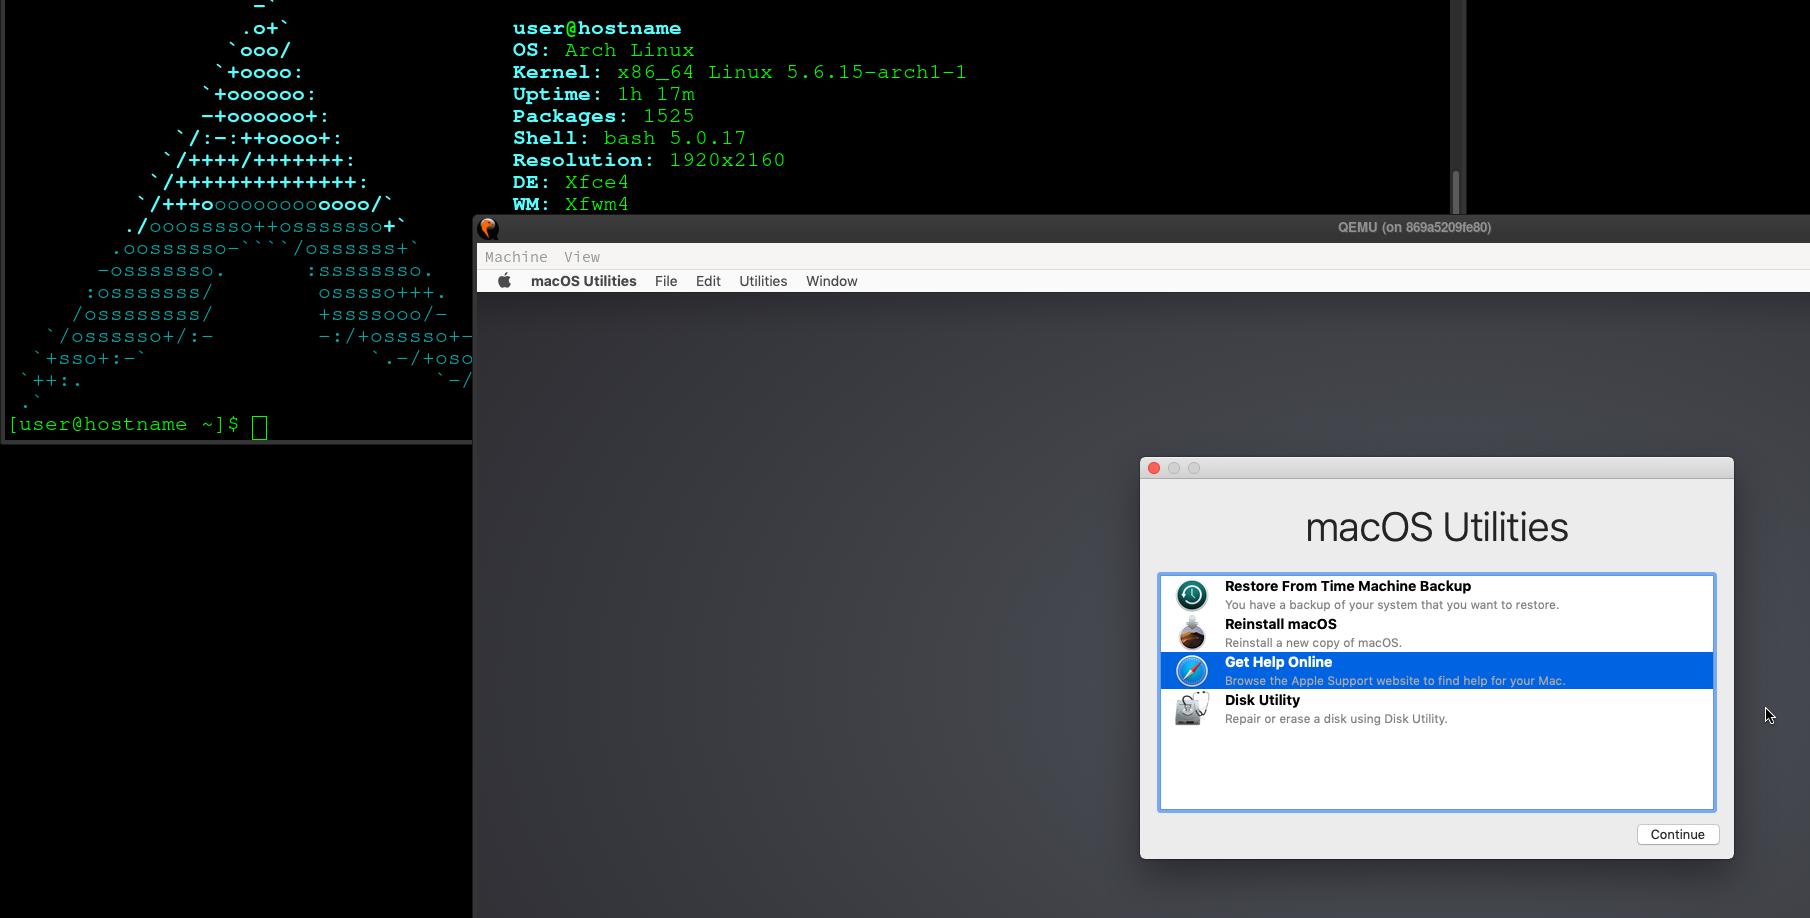
- CI/CD weaponization thru vnc and xdotool
- OSX-KVM
- X11 Forwarding
- SSH on localhost:50922
- QEMU
- VNC on localhost:8888 vnc version is inside a separate directory
- Create an ARMY using
docker commit - XFVB HEADLESS (use vnc)
Run Mac in a Docker container! Run near native OSX-KVM in Docker! X11 Forwarding!
Author: Sick.Codes https://sick.codes/ & https://twitter.com/sickcodes
Based: https://github.com/kholia/OSX-KVM && the great guy @kholia
Credits: https://github.com/sickcodes/Docker-OSX/blob/master/CREDITS.md
Upstream Credits: OSX-KVM project among many others: https://github.com/kholia/OSX-KVM/blob/master/CREDITS.md
Docker Hub: https://hub.docker.com/r/sickcodes/docker-osx
Pull requests, suggestions very welcome!
docker pull sickcodes/docker-osx

docker run --privileged -e "DISPLAY=${DISPLAY:-:0.0}" -v /tmp/.X11-unix:/tmp/.X11-unix sickcodes/docker-osx

# press ctrl G if your mouse gets stuck

# scroll down to troubleshooting if you have problems

# need more RAM and SSH on 0.0.0.0:50922?

docker run -e RAM=4 -p 50922:10022 --privileged -e "DISPLAY=${DISPLAY:-:0.0}" -v /tmp/.X11-unix:/tmp/.X11-unix sickcodes/docker-osx:latest

ssh fullname@localhost -p 50922
Need to turn on hardware virtualization in your BIOS, very easy to do.
Then have QEMU on the host if you haven't already:
# ARCH
sudo pacman -S qemu libvirt dnsmasq virt-manager bridge-utils flex bison iptables-nft edk2-ovmf

# UBUNTU DEBIAN
sudo apt install qemu qemu-kvm libvirt-clients libvirt-daemon-system bridge-utils virt-manager

# CENTOS RHEL FEDORA
sudo yum install libvirt qemu-kvm -y

# then run
sudo systemctl enable libvirtd.service
sudo systemctl enable virtlogd.service
sudo modprobe kvm

# reboot
This is for when you want to run your system later.
If you don't run this you will have a new image every time.
# look at your recent containers and copy the CONTAINER ID
docker ps --all

# docker start the container ID
docker start abc123xyz567

# if you have many containers, you can try automate it with filters like this
# docker ps --all --filter "ancestor=sickcodes/docker-osx"
-
Boot the macOS Base System
-
Click Disk Utility
-
Erase the BIGGEST disk (around 200gb default), DO NOT MODIFY THE SMALLER DISKS.
-
Click Reinstall macOS
# You can create an image of a already configured and setup container. This allows you to effectively duplicate a system.
# To do this, run the following commands

docker ps --all #make note of your container id
docker commit containerID newImageName

# To run this image do the following
docker run --privileged -e "DISPLAY=${DISPLAY:-:0.0}" -v /tmp/.X11-unix:/tmp/.X11-unix newImageNamelibgtk permissions denied error, thanks @raoulh + @arsham
echo $DISPLAY

# ARCH
sudo pacman -S xorg-xhost

# UBUNTU DEBIAN
sudo apt install x11-xserver-utils

# CENTOS RHEL FEDORA
sudo yum install xorg-x11-server-utils

# then run
xhost +

docker run --privileged -e "DISPLAY=${DISPLAY:-:0.0}" -v /tmp/.X11-unix:/tmp/.X11-unix sickcodes/docker-osx ./OpenCore-Boot.sh
Alternative run, thanks @roryrjb
docker run --privileged --net host --cap-add=ALL -v /tmp/.X11-unix:/tmp/.X11-unix -v /dev:/dev -v /lib/modules:/lib/modules sickcodes/docker-osxCheck if your hardware virt is on
egrep -c '(svm|vmx)' /proc/cpuinfoTry adding yourself to the docker group
sudo usermod -aG docker "${USER}"Turn on docker daemon
sudo dockerd
# or daemonize it
sudo nohup dockerd &
Check /dev/kvm permissions
sudo chmod 666 /dev/kvmIf you don't have Docker already
### Arch (pacman version isn't right at time of writing)

wget https://download.docker.com/linux/static/stable/x86_64/docker-19.03.5.tgz
tar -xzvf docker-19.03.5.tgz
sudo cp docker/* /usr/bin/
sudo groupadd docker
sudo usermod -aG docker "${USER}"

### Ubuntu

apt-get remove docker docker-engine docker.io containerd runc -y
apt-get install apt-transport-https ca-certificates curl gnupg-agent software-properties-common -y
curl -fsSL https://download.docker.com/linux/ubuntu/gpg | apt-key add -
apt-key fingerprint 0EBFCD88
add-apt-repository "deb [arch=amd64] https://download.docker.com/linux/ubuntu $(lsb_release -cs) stable"
apt-get update -y
apt-get install docker-ce docker-ce-cli containerd.io -y
sudo groupadd docker
sudo usermod -aG docker "${USER}"
If you have no internet connectivity from the VM, you are using bridge networking, and you are running Fedora:
# Set the docker0 bridge to the trusted zone
sudo firewall-cmd --permanent --zone=trusted --add-interface=docker0
sudo firewall-cmd --reloadYou can use docker cp
# docker copy your image OUT of your container (warning, double disk space)
docker cp oldcontainerid:/home/arch/OSX-KVM/mac_hdd_ng.img .
Or if you lost your container, find it with this:
# fast way
sudo find /var/lib/docker -size +10G | grep mac_hdd_ng.img

# you can move (mv) it somewhere
sudo mv somedir/mac_hdd_ng.img .

# start a new container
# get the new container id
docker ps

# docker cp INTO new container
docker cp ./mac_hdd_ng.img newcontainerid:/home/arch/OSX-KVM/mac_hdd_ng.img
# WARNING deletes all old images, but saves disk space if you make too many containers
# The following command will make your containers RIP
docker system prune --all
docker image prune --allThis Dockerfile automates the installation of OSX-KVM inside a docker container.
It will build a Catalina Disk with up to 200GB of space.
You can change the size and version using build arguments (see below).
This file builds on top of the work done by Dhiru Kholia and many others on the OSX-KVM project.
docker build -t docker-osx:latest \
--build-arg VERSION=10.14.6 \
--build-arg SIZE=200G
docker run \
-e RAM=4 \
-e SMP=4 \
-e CORES=4 \
-e EXTRA='-usb -device usb-host,hostbus=1,hostaddr=8' \
-e INTERNAL_SSH_PORT=23 \
--privileged -v /tmp/.X11-unix:/tmp/.X11-unix docker-osx:latest
- GPU Acceleration (Hackintosh? Passthru bus id of cards? AMD Vega? Nvidia-SMI?)
- Virt-manager
