How to use Traefik Proxy on Kubernetes with Istio
All config files are in the public GitHub repository that accompany this article, so we just have to clone it:
git clone https://github.com/traefik-tech-blog/traefik-istio
cd traefik-istioFor this tutorial, we will deploy Istio and Traefik Proxy on a k3d cluster in order to be able to test everything on a local machine.
k3d cluster create traefik --api-port 6550 --port 80:80@loadbalancer --port 443:443@loadbalancer --port 8000:8000@loadbalancer --k3s-arg "--disable=traefik@server:0"INFO[0000] portmapping '443:443' targets the loadbalancer: defaulting to [servers:*:proxy agents:*:proxy]
INFO[0000] portmapping '8000:8000' targets the loadbalancer: defaulting to [servers:*:proxy agents:*:proxy]
INFO[0000] portmapping '80:80' targets the loadbalancer: defaulting to [servers:*:proxy agents:*:proxy]
INFO[0000] Prep: Network
INFO[0000] Created network 'k3d-traefik'
INFO[0000] Created image volume k3d-traefik-images
INFO[0000] Starting new tools node...
INFO[0000] Starting node 'k3d-traefik-tools'
INFO[0001] Creating node 'k3d-traefik-server-0'
INFO[0001] Creating LoadBalancer 'k3d-traefik-serverlb'
INFO[0001] Using the k3d-tools node to gather environment information
INFO[0001] HostIP: using network gateway 172.18.0.1 address
INFO[0001] Starting cluster 'traefik'
INFO[0001] Starting servers...
INFO[0001] Starting node 'k3d-traefik-server-0'
INFO[0005] All agents already running.
INFO[0005] Starting helpers...
INFO[0005] Starting node 'k3d-traefik-serverlb'
INFO[0012] Injecting records for hostAliases (incl. host.k3d.internal) and for 2 network members into CoreDNS configmap...
INFO[0014] Cluster 'traefik' created successfully!
INFO[0014] You can now use it like this:
kubectl cluster-infoFirst, we will install Traefik Proxy with Helm:
# Add the Helm repository
helm repo add --force-update traefik https://traefik.github.io/charts
# Create a namespace
kubectl create namespace traefik
# Install the Helm chart
helm install traefik -n traefik --wait \
  --version v31.1.1 \
  --set ingressClass.enabled=false \
  --set ingressRoute.dashboard.enabled=true \
  --set ingressRoute.dashboard.matchRule='Host(`dashboard.docker.localhost`)' \
  --set ingressRoute.dashboard.entryPoints={web} \
  --set ports.web.nodePort=30000 \
  --set ports.websecure.nodePort=30001 \
  --set deployment.podLabels.app=traefik \
  --set deployment.podLabels.version=v3.1.4 \
traefik/traefik"traefik" has been added to your repositories
namespace/traefik created
NAME: traefik
LAST DEPLOYED: Wed Sep 25 15:33:05 2024
NAMESPACE: traefik
STATUS: deployed
REVISION: 1
TEST SUITE: None
NOTES:
traefik with docker.io/traefik:v3.1.4 has been deployed successfully on traefik namespace !Once it's installed, we can access the local dashboard: http://dashboard.docker.localhost/
For this tutorial, we can use a go web application that display headers: whoami with this IngressRoute:
apiVersion: traefik.io/v1alpha1
kind: IngressRoute
metadata:
  name: whoami
  namespace: apps
spec:
  entryPoints:
    - web
  routes:
  - match: Host(`whoami.docker.localhost`)
    kind: Rule
    services:
    - name: whoami
      port: 80
Let's deploy it:
kubectl create namespace apps
kubectl apply -n apps -f apps/whoami-deployment.yaml
kubectl apply -n apps -f apps/whoami-service.yaml
kubectl apply -n apps -f apps/whoami-ingressroute.yaml
kubectl wait -n apps --for=condition=ready pod --selector=app=whoami
namespace/apps created
deployment.apps/whoami created
service/whoami created
ingressroute.traefik.io/whoami created
pod/whoami-84cb9b6466-zbcr4 condition metIt should be accessible with curl on http://whoami.docker.localhost
curl whoami.docker.localhostHostname: whoami-84cb9b6466-zbcr4
IP: 127.0.0.1
IP: ::1
IP: 10.42.0.7
IP: fe80::6465:98ff:fe9b:7efa
RemoteAddr: 10.42.0.6:40966
GET / HTTP/1.1
Host: whoami.docker.localhost
User-Agent: curl/7.88.1
Accept: */*
Accept-Encoding: gzip
X-Forwarded-For: 10.42.0.1
X-Forwarded-Host: whoami.docker.localhost
X-Forwarded-Port: 80
X-Forwarded-Proto: http
X-Forwarded-Server: traefik-55c585bb7d-b9dr9
X-Real-Ip: 10.42.0.1We will also use Helm to install Istio, following their documentation.
# Add Istio Helm repository
helm repo add --force-update istio https://istio-release.storage.googleapis.com/charts
# Create the namespace
kubectl create namespace istio-system
# Deploy validating web hook used by Istio
helm install istio-base istio/base -n istio-system --wait
# Deploy Istio
helm install istiod istio/istiod -n istio-system --wait"istio" has been added to your repositories
namespace/istio-system created
NAME: istio-base
LAST DEPLOYED: Wed Sep 25 15:37:32 2024
NAMESPACE: istio-system
STATUS: deployed
REVISION: 1
TEST SUITE: None
NOTES:
Istio base successfully installed!
To learn more about the release, try:
$ helm status istio-base -n istio-system
$ helm get all istio-base -n istio-system
NAME: istiod
LAST DEPLOYED: Wed Sep 25 15:37:33 2024
NAMESPACE: istio-system
STATUS: deployed
REVISION: 1
TEST SUITE: None
NOTES:
"istiod" successfully installed!
To learn more about the release, try:
$ helm status istiod -n istio-system
$ helm get all istiod -n istio-system
Next steps:
* Deploy a Gateway: https://istio.io/latest/docs/setup/additional-setup/gateway/
* Try out our tasks to get started on common configurations:
* https://istio.io/latest/docs/tasks/traffic-management
* https://istio.io/latest/docs/tasks/security/
* https://istio.io/latest/docs/tasks/policy-enforcement/
* Review the list of actively supported releases, CVE publications and our hardening guide:
* https://istio.io/latest/docs/releases/supported-releases/
* https://istio.io/latest/news/security/
* https://istio.io/latest/docs/ops/best-practices/security/
For further documentation see https://istio.io websiteIstio comes with an observability console named kiali.
The simplest way to install it is with yaml. We will expose this dashboard using this IngressRoute:
apiVersion: traefik.io/v1alpha1
kind: IngressRoute
metadata:
  name: kiali
  namespace: istio-system
spec:
  entryPoints:
    - web
  routes:
  - match: Host(`kiali.docker.localhost`)
    kind: Rule
    services:
    - name: kiali
      port: http
Let's deploy it:
kubectl apply -f kiali.yaml
kubectl apply -f kiali-ingressroute.yaml
kubectl wait -n istio-system --for=condition=ready pod --selector=app=kiali --timeout=90s
serviceaccount/kiali created
configmap/kiali created
clusterrole.rbac.authorization.k8s.io/kiali created
clusterrolebinding.rbac.authorization.k8s.io/kiali created
role.rbac.authorization.k8s.io/kiali-controlplane created
rolebinding.rbac.authorization.k8s.io/kiali-controlplane created
service/kiali created
deployment.apps/kiali created
ingressroute.traefik.io/kiali created
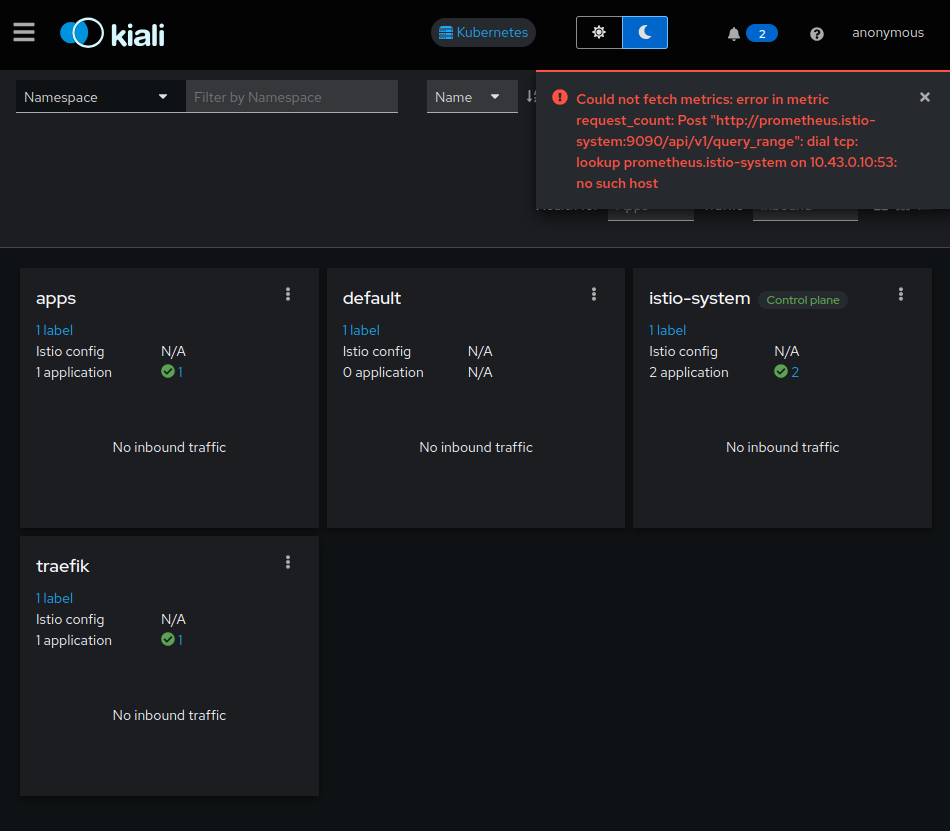
pod/kiali-5df8897db6-bnccl condition metThen we should be able to access to kiali dashboard: http://kiali.docker.localhost
The error message about prometheus is harm-less and expected : we have not configured metrics.
By default, Istio is permissive.
Istio documentation precise what it means:
When PERMISSIVE mode is enabled, a service can accept both plaintext and mutual TLS traffic. In order to only allow mutual TLS traffic, the configuration needs to be changed to STRICT mode.
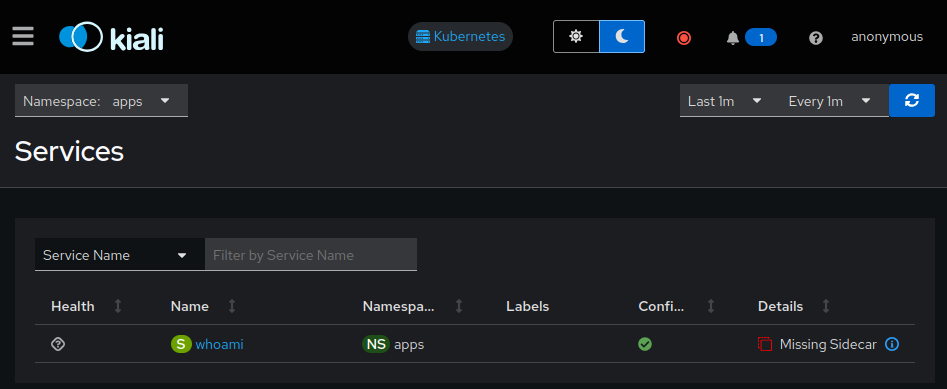
In kiali, we can see istio is not yet fully deployed: sidecar is missing on whoami app:
http://kiali.docker.localhost/kiali/console/services?duration=60&refresh=60000&namespaces=apps
The sidecar can be added automatically using sidecar injection.
Let's try it:
kubectl label namespace apps istio-injection=enabled --overwrite
kubectl label namespace traefik istio-injection=enabled --overwrite
We can check namespace injection status with this command:
kubectl get namespace -L istio-injectionNAME STATUS AGE ISTIO-INJECTION
kube-system Active 4h13m
kube-public Active 4h13m
kube-node-lease Active 4h13m
default Active 4h13m
istio-system Active 4h12m
apps Active 3h50m enabled
traefik Active 4h1m enabledThe sidecar is created on restart, so let's restart both Traefik and Whoami:
kubectl rollout restart -n apps deployment/whoami
kubectl rollout restart -n traefik deployment/traefik
sleep 5
We can see that there is now two containers on those pods with kubectl
kubectl get pods -l 'app in (whoami, traefik)' -ANAMESPACE NAME READY STATUS RESTARTS AGE
traefik traefik-6b5f7d4976-cqrq2 2/2 Running 0 4m
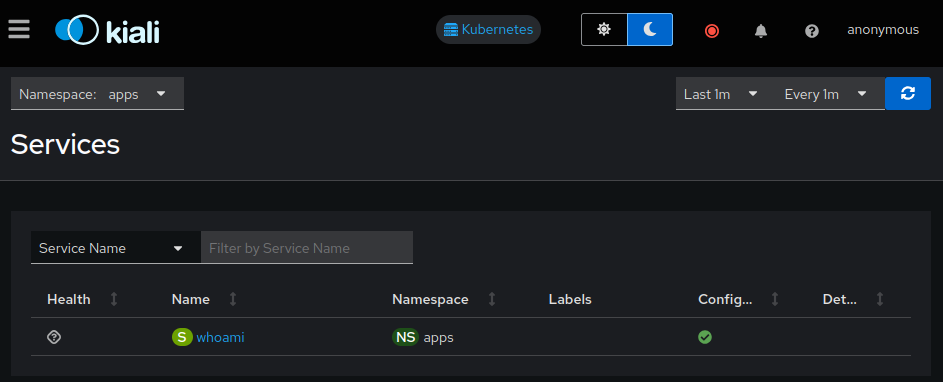
apps whoami-85cdf9b47b-z5xvm 2/2 Running 0 3mand also on Kiali:
Since the sidecar of istio contains tcpdump, we can check the traffic with those commands:
# On Traefik
kubectl exec -n traefik $(kubectl get pod -n traefik  -l app=traefik  -o jsonpath='{.items..metadata.name}') -c istio-proxy -- sudo tcpdump dst port 80 -l -A
# On Whoami
kubectl exec -n apps $(kubectl get pod -n apps -l app=whoami -o jsonpath='{.items..metadata.name}') -c istio-proxy -- sudo tcpdump dst port 80 -l -A
It will fail, since we didn't allow priviliged operation on the sidecar.
sudo: The "no new privileges" flag is set, which prevents sudo from running as root.
sudo: If sudo is running in a container, you may need to adjust the container configuration to disable the flag.
command terminated with exit code 1
We can upgrade istio installation to allow us to see the traffic with this command:
helm upgrade istiod -n istio-system --wait \
  --set global.proxy.privileged=true \
   istio/istiod
We need to rollout the pods in order to re-create the sidecar with this new option:
kubectl rollout restart -n apps deployment/whoami
kubectl rollout restart -n traefik deployment/traefik
sleep 5
Then the tcpdump will show you the data that pass through the proxy each time a curl is done on whoami:
curl whoami.docker.localhostWe can see that it's passing through the sidecar and it's not (yet) ciphered. We'll see how to configure it on the next section.
Istio allows to enforce that mTLS is used between pods.
It can be configured on a namespace level by applying this custom resource:
apiVersion: security.istio.io/v1
kind: PeerAuthentication
metadata:
  name: default
spec:
  mtls:
    mode: STRICT
We can apply it on both traefik and apps namespace:
kubectl apply -n apps -f mtls-strict.yaml
kubectl apply -n traefik -f mtls-strict.yaml
We can confirm with curl that now mTLS is mandatory:
curl whoami.docker.localhostcurl: (52) Empty reply from serverIt's failing because there are pre-requisites when using an (external) Reverse Proxy with Istio:
- Disable inbound traffic redirection
- That can be set with the empty annotation traffic.sidecar.istio.io/includeInboundPorts
- Enable routing on
Service- That can be configured on Traefik Proxy on the Kubernetes provider level with
nativeLBByDefault
- That can be configured on Traefik Proxy on the Kubernetes provider level with
- Setting the
Hostheader to the service internal fqdn
Let's upgrade our setup with those settings:
helm upgrade traefik -n traefik --wait \
  --version v31.1.1 \
  --reuse-values \
  --set providers.kubernetesCRD.nativeLBByDefault=true \
  --set providers.kubernetesIngress.nativeLBByDefault=true \
  --set 'deployment.podAnnotations.traffic\.sidecar\.istio\.io/includeInboundPorts=''''' \
   traefik/traefik
And let's add this Host header on whoami:
--- apps/whoami-ingressroute.yaml
+++ apps/whoami-ingressroute-istio.yaml
@@ -9,6 +9,17 @@
   routes:
   - match: Host(`whoami.docker.localhost`)
     kind: Rule
+    middlewares:
+    - name: whoami-istio
     services:
     - name: whoami
       port: 80
+---
+apiVersion: traefik.io/v1alpha1
+kind: Middleware
+metadata:
+  name: whoami-istio
+  namespace: apps
+spec:
+  headers:
+    customRequestHeaders:
+      Host: whoami.apps.svc
Let's apply it:
kubectl apply -f apps/whoami-ingressroute-istio.yamlEt voilà ! Access to whoami is back, with mTLS:
curl whoami.docker.localhostWe can see in header X-Forwarded-Client-Cert some information about the cert used with mTLS
Hostname: whoami-85cdf9b47b-z5xvm
IP: 127.0.0.1
IP: ::1
IP: 10.42.0.36
IP: fe80::7890:fff:fe00:548f
RemoteAddr: 127.0.0.6:38857
GET / HTTP/1.1
Host: whoami.apps.svc
User-Agent: curl/7.88.1
Accept: */*
Accept-Encoding: gzip
X-Envoy-Attempt-Count: 1
X-Envoy-Internal: true
X-Forwarded-Client-Cert: By=spiffe://cluster.local/ns/apps/sa/default;Hash=2f6c8f985d25ee5496b4747dec67ef5bb36940c02aca24a7cca95aa0860791cf;Subject="";URI=spiffe://cluster.local/ns/traefik/sa/traefik
X-Forwarded-For: 10.42.0.1
X-Forwarded-Host: whoami.docker.localhost
X-Forwarded-Port: 80
X-Forwarded-Proto: http
X-Forwarded-Server: traefik-6b5f7d4976-cqrq2
X-Real-Ip: 10.42.0.1
X-Request-Id: f12c43b7-e637-4c49-a3fd-c927561070d2
We can confirm with tcpdump commands on both sides that now the traffic is ciphered on both ends:
# on Traefik Proxy
kubectl exec -n traefik $(kubectl get pod -n traefik  -l app=traefik  -o jsonpath='{.items..metadata.name}') -c istio-proxy -- sudo tcpdump dst port 80 -l -A
# on Whoami
kubectl exec -n apps $(kubectl get pod -n apps -l app=whoami -o jsonpath='{.items..metadata.name}') -c istio-proxy -- sudo tcpdump dst port 80 -l -AThe cluster can be deleted with k3d:
k3d cluster delete traefik

