Accounting System built on DOTNETCORE, an open-source and cross platform (ASP.NET Core MVC + ReactJS on the Frontend). It's in early stage and still have lots of work to do but happy to share it to anyone. This will be very useful if you have future project to develop accounting system. We do the hard work for you! It is initially designed for small size businesses and the idea is to help them run efficient business by using Accounting System fit to them.
You can use MacOS, Linux, Windows to develop and deploy this project. Make sure you have the latest .net core 2.1 sdk and runtime installed. Go to https://www.microsoft.com/net/download/dotnet-core/2.1 to download the installer. We are also experimenting F# + microservice on some parts.
On a high level, this solution will provide modules including but not limited to
- Accounts Receivable
- Accounts Payable
- Inventory Control
- Financial/Accounting
AccountGoWeb and Api projects are using ASP.NET Core 2.1.
- “AccountGoWeb” requires webpack, webpack-cli, gulp, typescript installed
- “Api” – ASP.NET REST API project to be consumed by “AccountGoWeb”
- Install Visual Studio Code.
- Clone/Fork the latest repo here https://github.com/AccountGo/accountgo
- Build each projects in this order. Core->Services->Dto->Api->AccountGoWeb. To build the project, change directory to project folder, execute
dotnet restorethendotnet build. Make sure all projects build successfully. Alternatively, use accountgo.sln file to use by dotnet build. To do this change directory tosrcfolder, executedotnet restore, thendotnet build.
Note: Preceding steps confirms all projects can build successfully using dotnet build. Succeeding steps will provide specific instructions to build and run Api (Back-end), asnd AccountGoWeb (Front-end), as well as how to setup database. Let's start on database setup first.
You can opt to install SQL Server or use docker image (like we do). Assuming you have docker installed (make sure to use linux container), follow the steps below. (Install docker if you haven't done so.)
- Open command prompt (terminal for MacOS).
- Execute
docker pull microsoft/mssql-server-linux. We prefer to use SQL Server for Linux for lightweight. - Run sql server for linux. Execute
docker run -e 'ACCEPT_EULA=Y' -e 'SA_PASSWORD=Str0ngPassword' -p 1433:1433 -d --name=local-mssql microsoft/mssql-server-linux. Note: If you are encountering issue where the docker container close immediately, try to usedocker-compose upbut be sure to comment outwebandapiservices so thatdbservice is the only service that will be configured to run.
- Download SQL Operation Studio by Microsoft to manage the SQL Server. https://docs.microsoft.com/en-us/sql/sql-operations-studio/download?view=sql-server-2017
- Open SQL Operation Studio and connect to your running SQL Server docker container.
The "database/scripts" folder contains the sql scripts to execute. For the purpose of db migration, you can use DbUp [https://dbup.readthedocs.io] tool and create your own migration console. For simplicity and a quick one, download this cool tool we used in this guide. https://richardtasker.co.uk/2018/09/15/introducing-dotnet-db-migrate/#.W6PIJJMza3U - checkout this site and download. Or directly execute this .net cli dotnet tool install --global dotnet-db-migrate --version 1.0.0 in the command prompt. Confirm if installed properly, execute dotnet-db-migrate -h.
Once dotnet-db-migrate already installed, execute the following in this specific order:
- In root folder
accountgo, open command prompt or terminal (macos) and run the following. dotnet-db-migrate "Data Source=localhost;User ID=sa;Password=Str0ngPassword;Initial Catalog=accountgo;" -s ./db/scripts/tables --ensure-db-existsdotnet-db-migrate "Data Source=localhost;User ID=sa;Password=Str0ngPassword;Initial Catalog=accountgo;" -s ./db/scripts/foreign_keys --ensure-db-existsdotnet-db-migrate "Data Source=localhost;User ID=sa;Password=Str0ngPassword;Initial Catalog=accountgo;" -s ./db/scripts/initial_data --ensure-db-exists
Note: The initial data in the previous steps only include the security initial data. There's more data initialization to in the preceding instructions
- Change directory to Api project folder
- Build the project
dotnet build - Use the
launchsettings.jsonto change database connectionDBSERVER,DBUSERIDandDBPASSWORD. Theappsettings.jsoncontain connectionstring but need to supply some values. - Run the api, execute
dotnet run.- To run in development mode, execute
dotnet run --environment Development - To change it to specific port, execute
dotnet run --environment Development server.urls=http://+:8001. It could be any port as you like, but the front-end is hard-coded to call api on port http://localhost:8001. So change the front-end as too. By default, port is open to 5000 and 5001 (http and https respectively).
- To run in development mode, execute
- To test if Api is running correctly, you can simply call one GET endpoint. e.g. http://localhost:8001/api/sales/customers. This will return list of customers in JSON format.
- AccountGoWeb require more steps to completely build the front-end artifacts. To do this, follow the succeeding steps
- Change directory to src/AccountGoWeb and open Visual Studio Code terminal
- Install all npm packages by executing
npm install - (OPTIONAL) Install typescript globally by executing
npm install -g typescript - (OPTIONAL) Install webpack-cli globally by executing
npm install -g webpack-cli - (OPTIONAL) Install webpack globally by executing
npm install -g webpack - (OPTIONAL) Install gulp globally by executing
npm install -g gulp - Still in the same folder, type and enter the following in command prompt
- If gulp is installed globally, run
gulp(This will run the gulpfile.js). Else runnpm run gulp - If typescript is installed globally, run
tsc(This will run the tsconfig.json). Else runnpm run tsc - If webpack and webpack-cli are installed globally, run
webpack(This will run the webpack.config.js). Else, runnpm run webpack - And lastly, in src/AccountGoWeb terminal, execute
dotnet build - Run the AccoungGoWeb project, execute
dotnet run. Iflaunchsettings.jsonommitted, thus, the following points are important.- To run in development mode, execute
dotnet run --environment Development - To change it to specific port, execute
dotnet run --environment Development server.urls=http://+:8000. It could be any port as you like. By default, port is open to 5000 and 5001 (http and https respectively). dotnet runwill uselaunchsettings.jsonby default if exist.
- To run in development mode, execute
- To test if AccountGoWeb UI is running correctly, open your browser to http://localhost:8000
UPDATE: Above steps are still valid, however, dotnet run --environment Development server.urls=http://+:8000 will automatically execute gulp, tsc, and webpack commands. Changes to the styles must be done inside the Scss folder as any modifications in the css files inside wwwroot/css folder will only be overriden if a sass compilation is done using npm run css. Everytime, you change the source scss files, run npm run css first before dotnet build to ensure that the latest style modifications are being used.
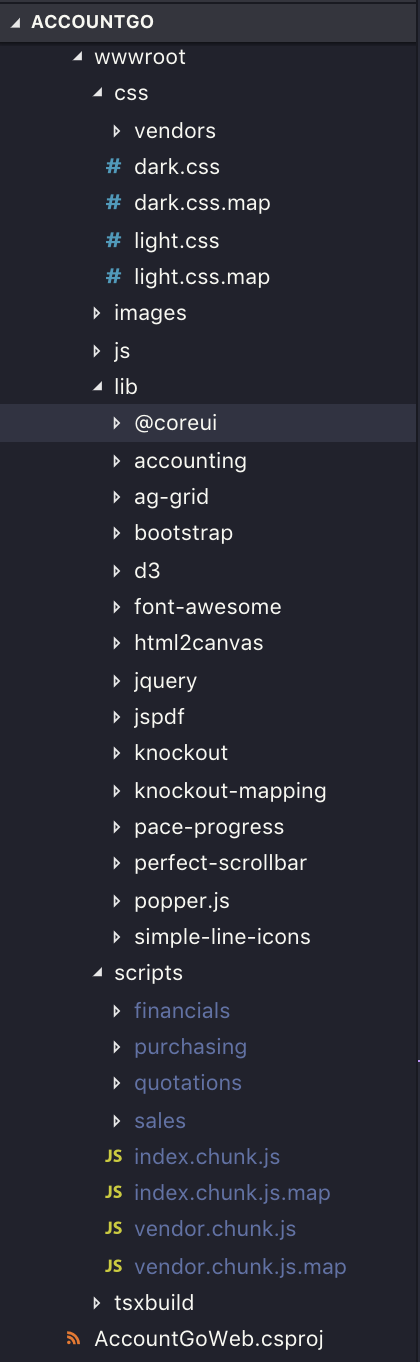
Your wwwroot folder should be look like this if you correctly followed the steps above.
At this point, your database has no data on it. But there is already an initial username and password ([email protected]/P@ssword1) and you can logon to the UI. Now lets, create some initial data that would populate the following models.
- Company
- Chart of accounts/account classes
- Financial year
- Payment terms
- GL setting
- Tax
- Vendor
- Customer
- Items
- Banks
To initialize a company, call the api endpoint directly http://localhost:8001/api/administration/initializedcompany from the browser or by using curl e.g. curl http://localhost:8001/api/administration/initializedcompany. If you encounter some issues, the easy way for now is recreate your database and repeat the Publish Database section.
To run everything (database, api, web) in docker container you can use docker-compose.yml
- Make sure to change directory to the root folder
accountgo - Execute
docker-compose upordocker-compose up --build - Create database, tables, foreign keys, and some initial data. To do this go to
Publish Database (Create Tables, Foreign Keys, and some Initial Data)above. - Initialize data by calling a special api endpoint directly from the browser or curl. e.g.
curl http://localhost:8001/api/administration/initializedcompany
- Database instance running in docker container and you can connect to it
- You should have a running "Api" and can test it by getting the list of customers e.g. http://localhost:8001/api/sales customers
- You can browse the UI from http://localhost:8000 and able to login to the system using initial username/password: [email protected]/P@ssword1
- Initialize data by calling a special api endpoint directly. http://localhost:8001/api/administration/initializedcompany
- ASP.NET Core 2.1
- ReactJS
- MobX, React-MobX
- Axios
- Bootstrap
- D3
- React-router (on some pages)
- Typescript
Demo site (new UI) : http://accountgo.net
Dark theme


If you are a developer and wanted to take part as contributor/collaborator we are happy to welcome you! To start with, you can visit the issues page and pick an issue that you would like to work on.
So go ahead, add your code and make your first pull request.
Feel free to email [email protected] of any questions.