Canvas sizing now integrated into main repo : https://github.com/mut-ex/gligen-gui
- Warning: You may get unexpected reuslts (mainly prompt bleed and cloning) as the Gligen model is only trained at 512x512, from my tests it was still pretty usable with simple compositions and the outputs at 512 from some models were just a little sad, so its a bit of a give and take till someone trains a new model.
- Changed latent + generation to 512px x 768px (quick and dirty)
- Easy run.bat file for launching the app
- Amazing original implementation by @mut-ex
- Allow user to input resolution.
For now the code is commented where the resolution change has been made so you can manually change the fixed resolution. Search for : change res and change all instances within the below files. The GUI canvas might be a bit trickier.
- gligen-gui\gligen_gui\templates\base.html
- gligen-gui\gligen_gui\static\script.js
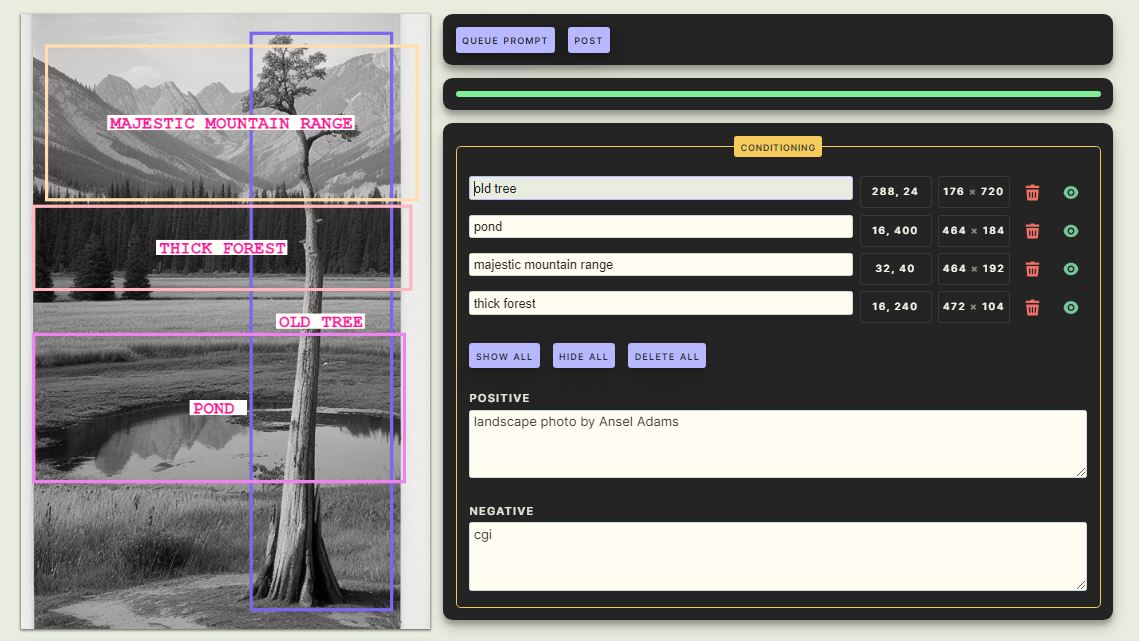
GLIGEN is a novel way to specify the precise location of objects in text-to-image models. I present here an intuitive GUI that makes it significantly easier to use GLIGEN with ComfyUI.


First of all make sure you have ComfyUI successfully installed and running.
Next, download the gligen_sd14_textbox_pruned.safetensors GLIGEN model file and place it in the ComfyUI/models/gligen directory.
Make sure you have Flask installed
pip install flask
Clone this repository
git clone https://github.com/mut-ex/gligen-gui.git
cd gligen-gui
Then to start the GUI, run the following command
flask --app 'gligen_gui:create_app(8188)' run --port 5000
Note that this assumes your ComfyUI instance is using port 8188. If not, replace 8188 with the correct port number.
Finally, open http://127.0.0.1:5000/ in your browser to start using the GUI.
Make sure you have a Stable Diffusion 1.5 checkpoint selected. Usage is pretty simple and straightforward! Envision your image by drawing grounding boxes on the blank canvas with your mouse, and labeling them by entering your desired prompt in the corresponding text input in the table on the right.
You can further describe your image in the text input labelled POSITIVE but in my experience it works better if you only enter tags relating to the style and quality of your desired image.
If there are any LORAs you wish to use, press the + button in the LORA section. Then, select the name of the LORA and adjust its strength, You can add mulitple LORAs.
Finally, press the Queue Prompt to submit the prompt to ComfyUI. Once the image is generated, it will appear on the canvas.