-
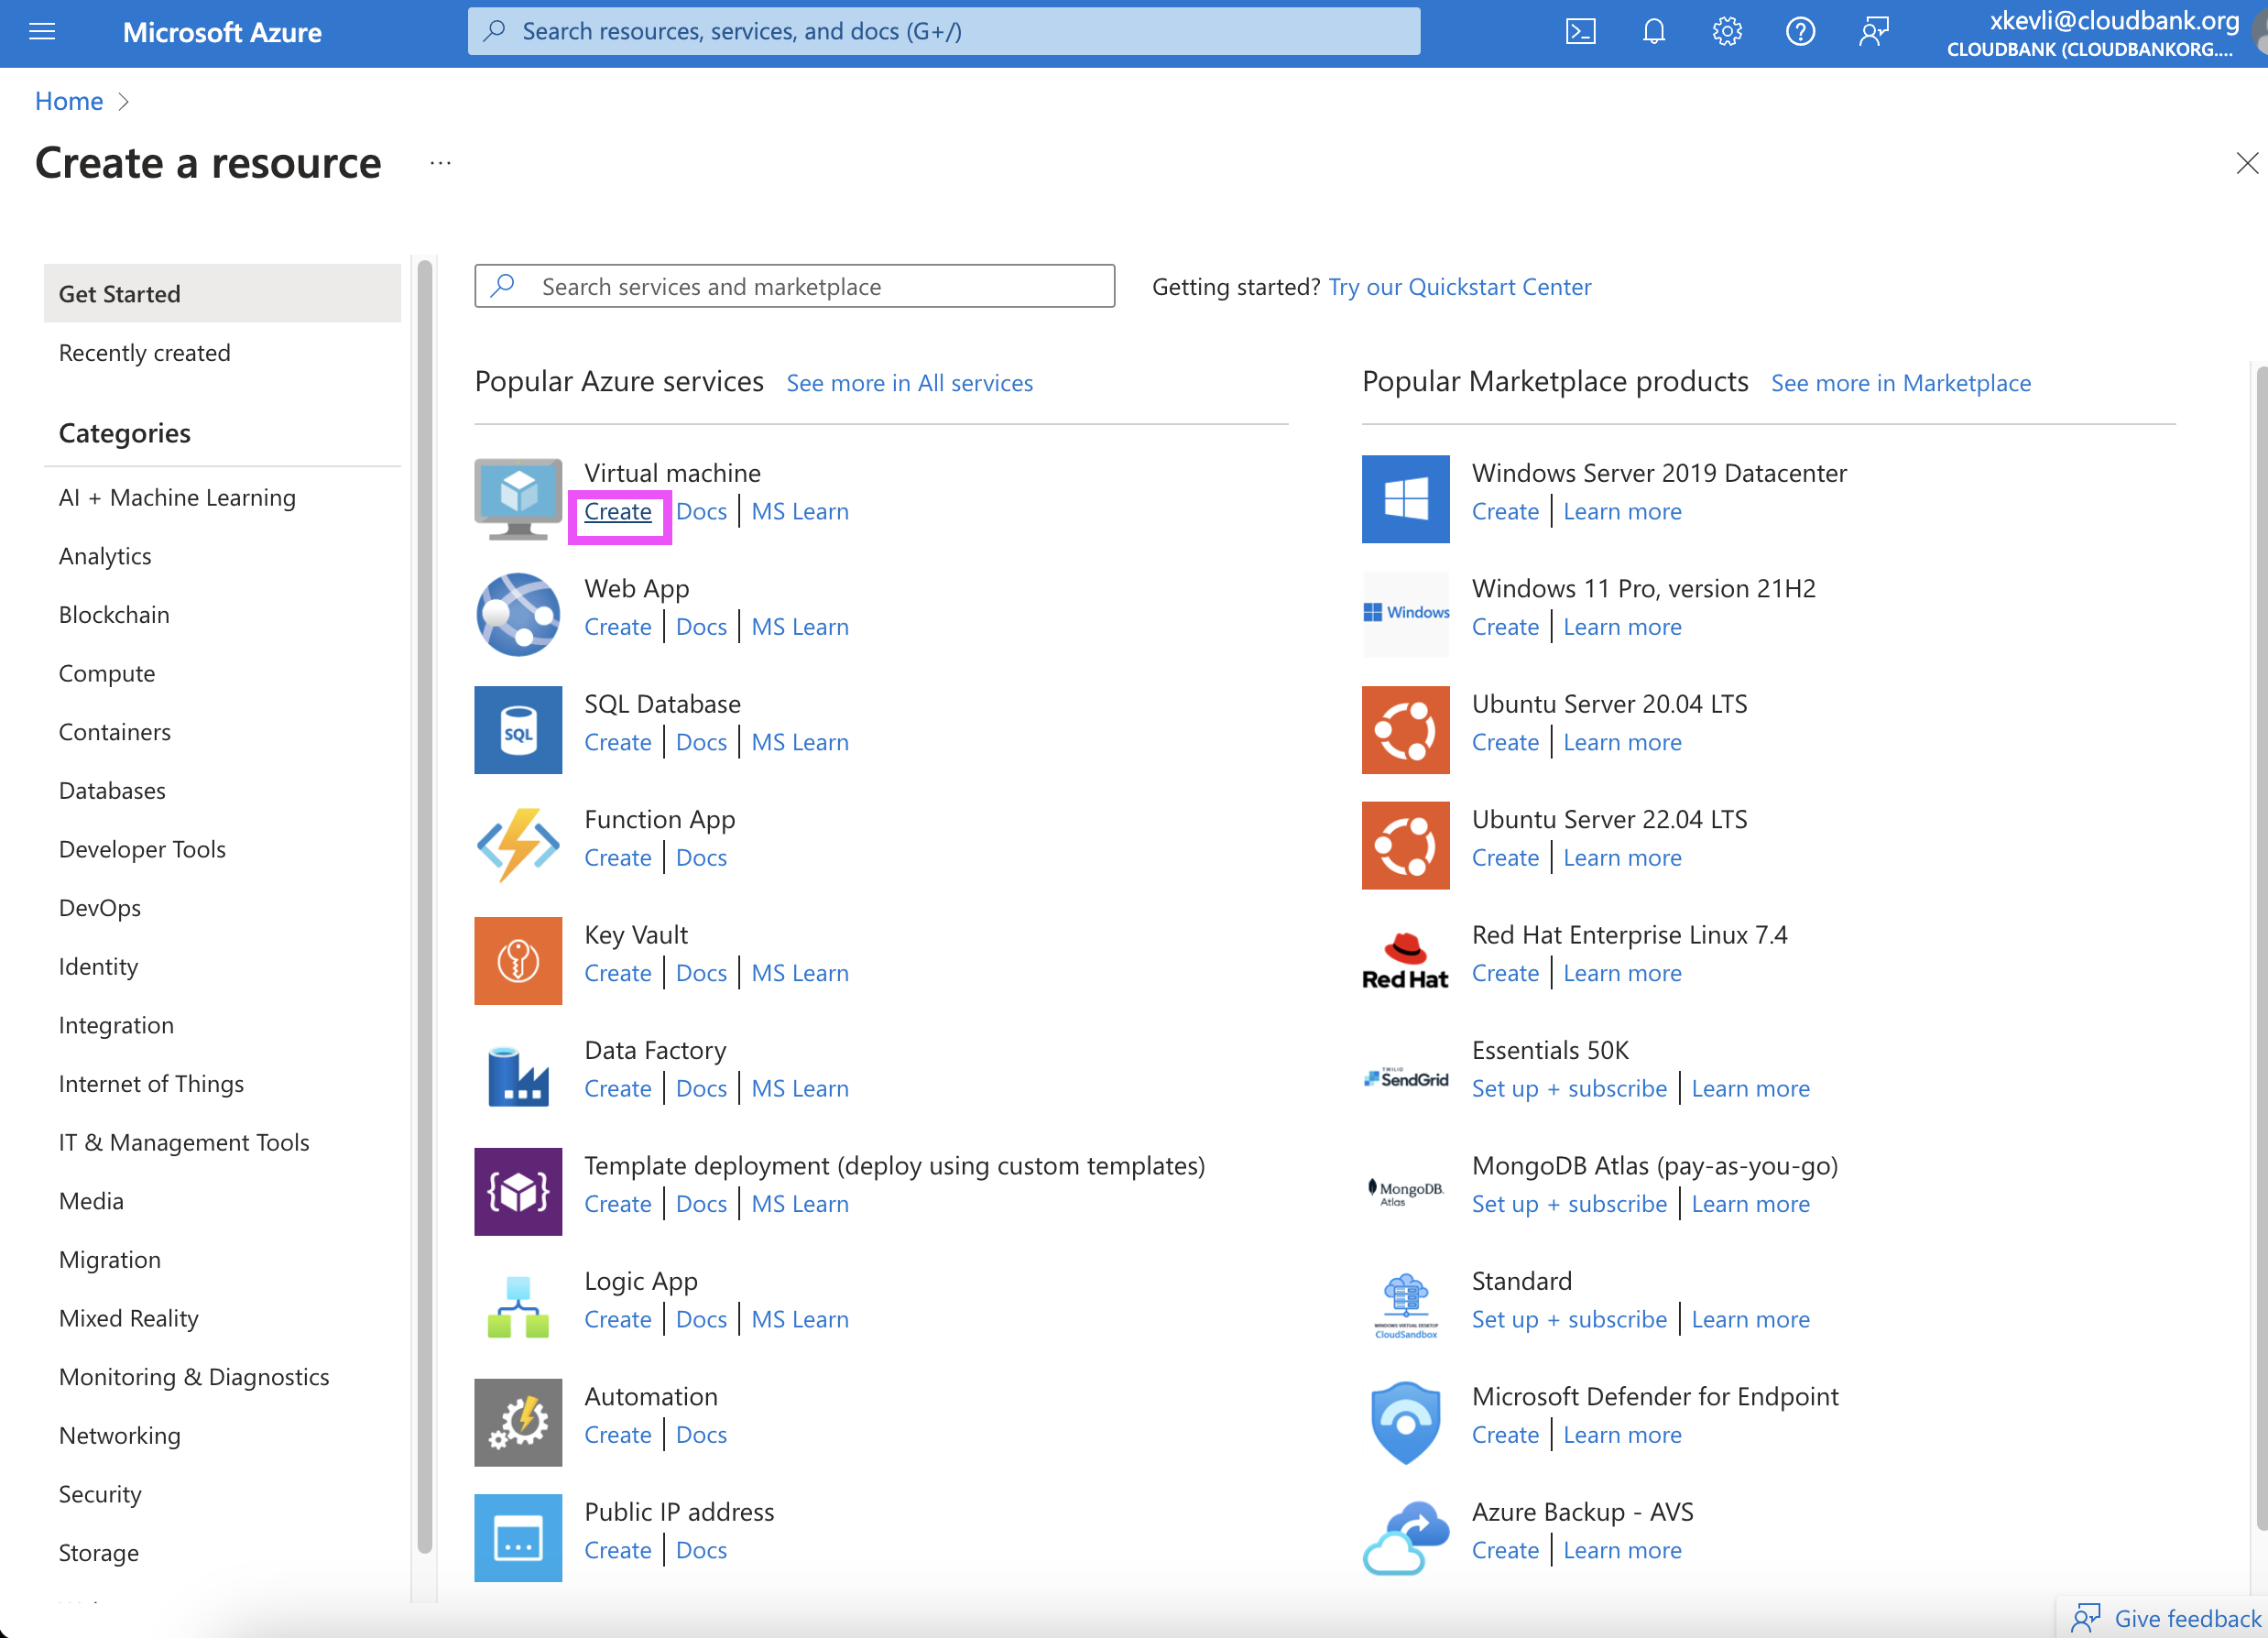
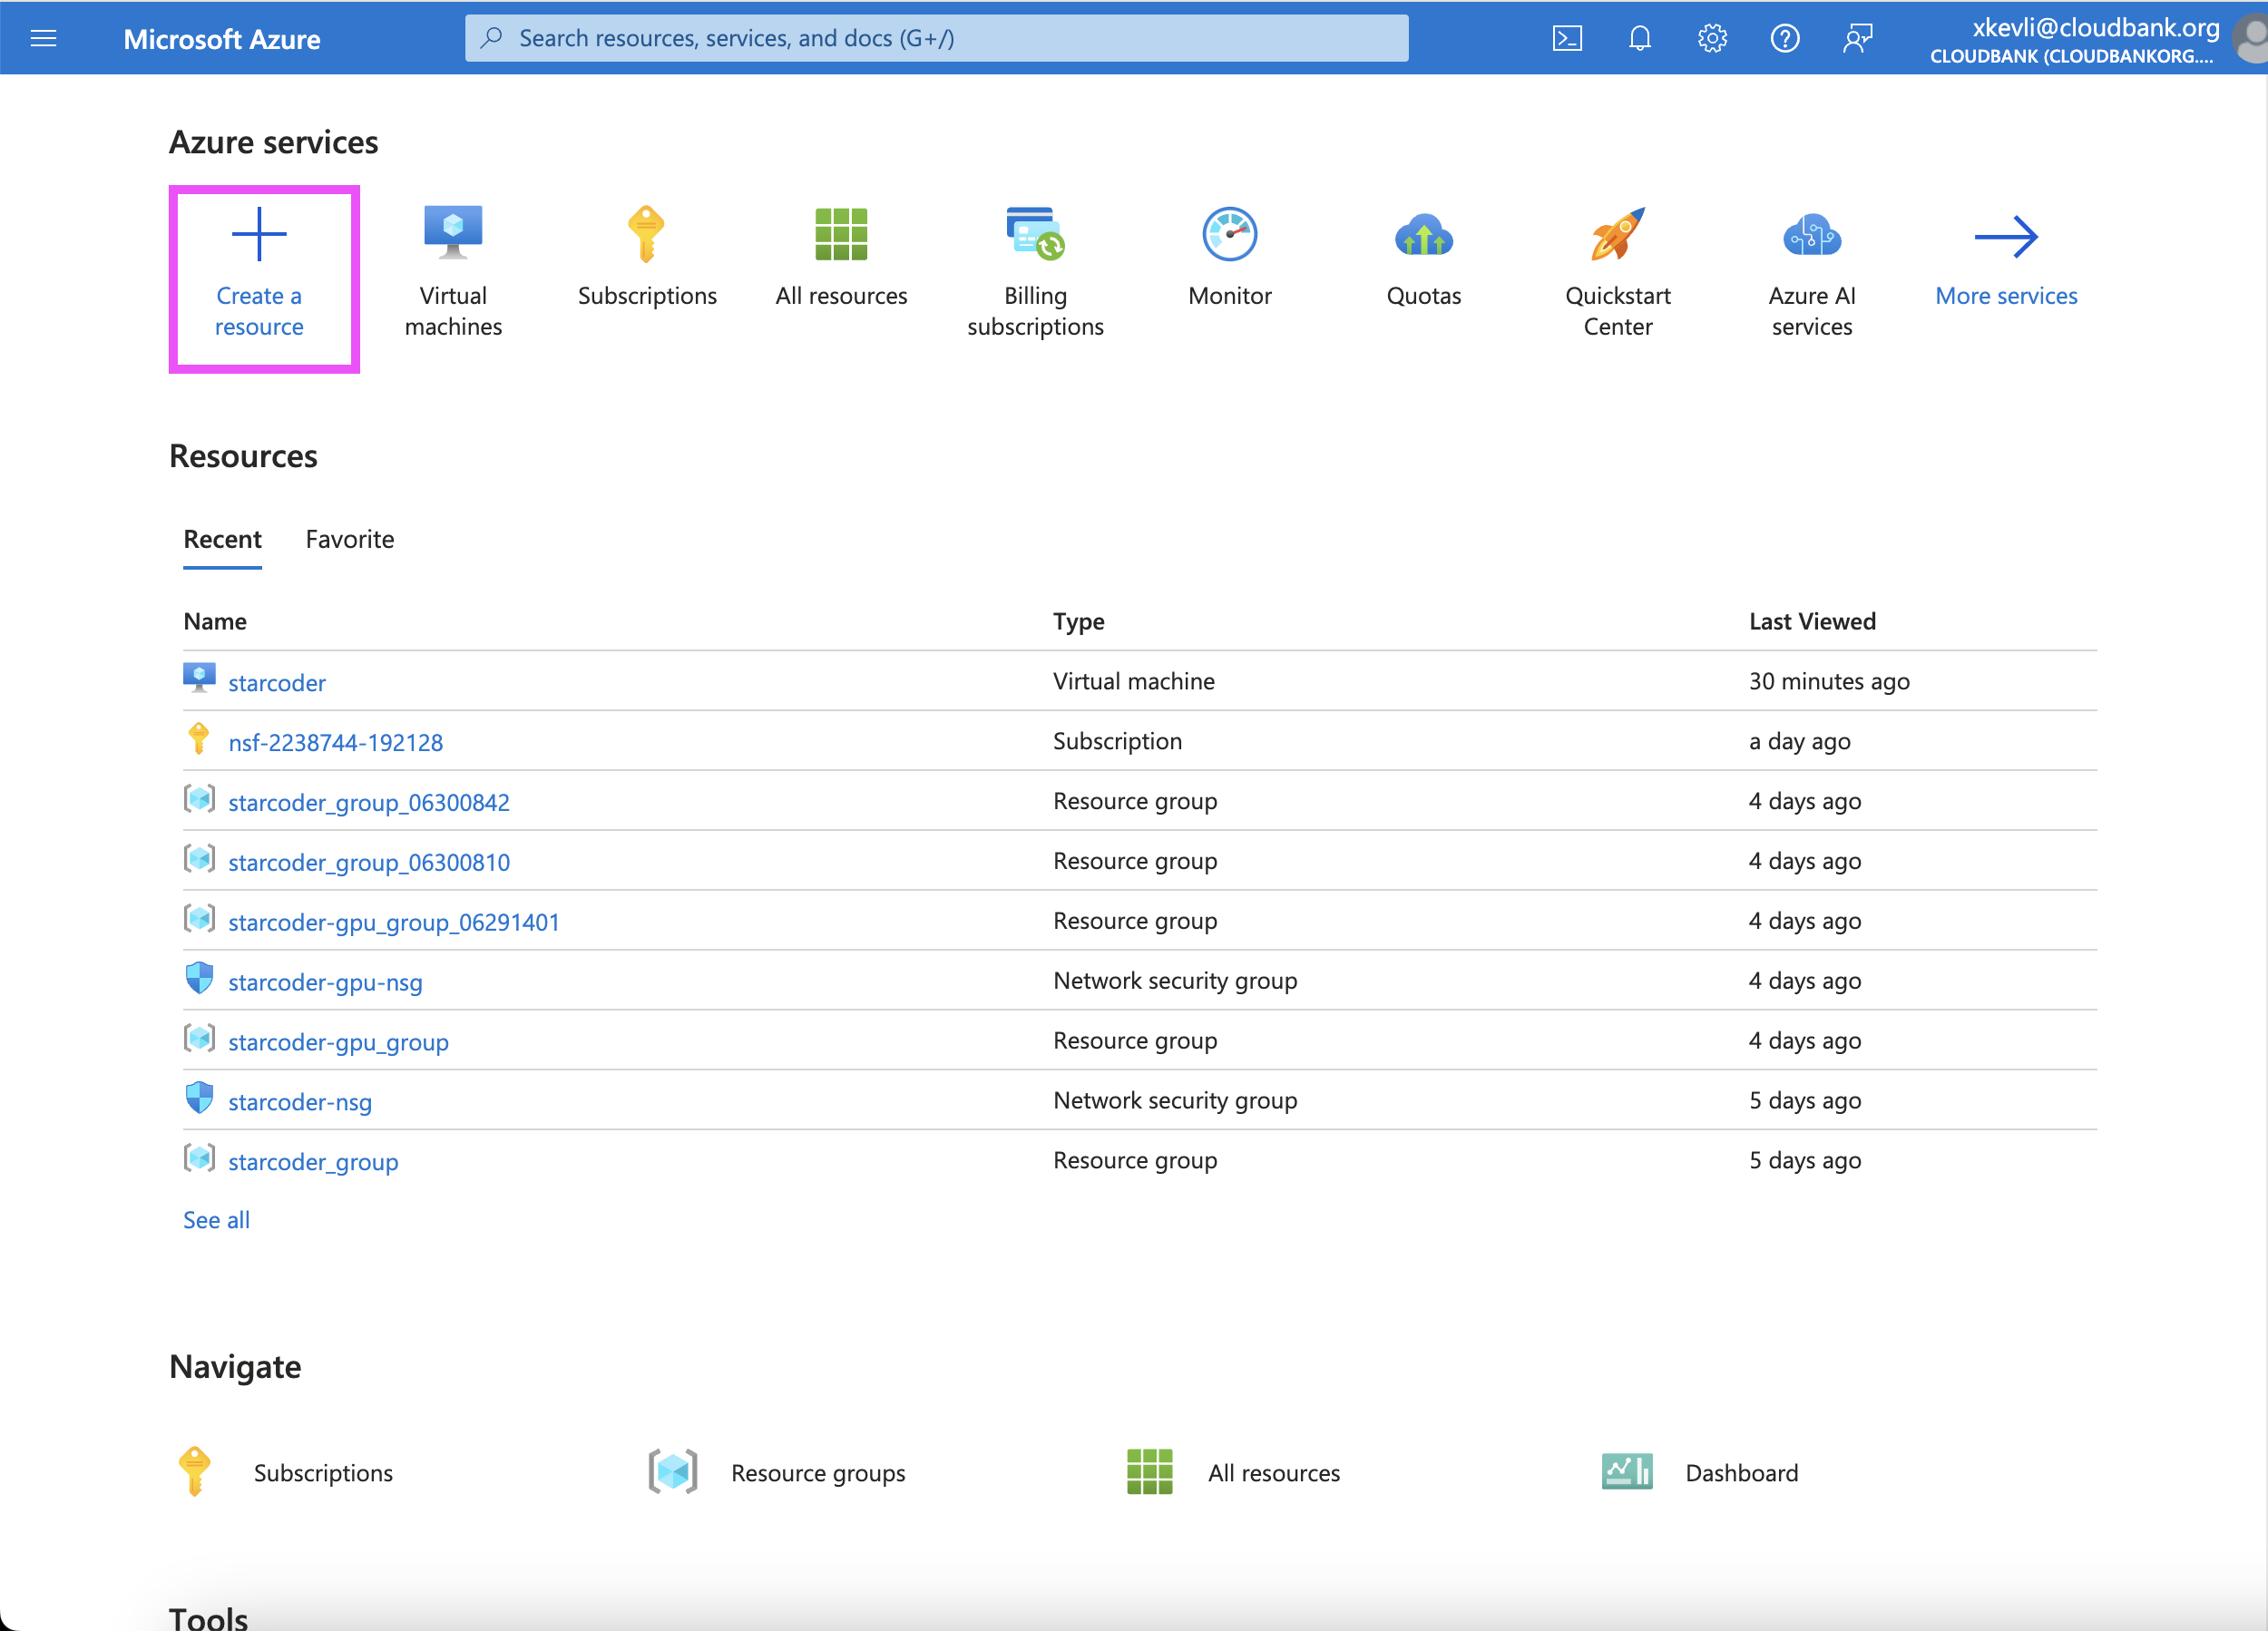
Go to the azure portal and hit "Create a resource":
-
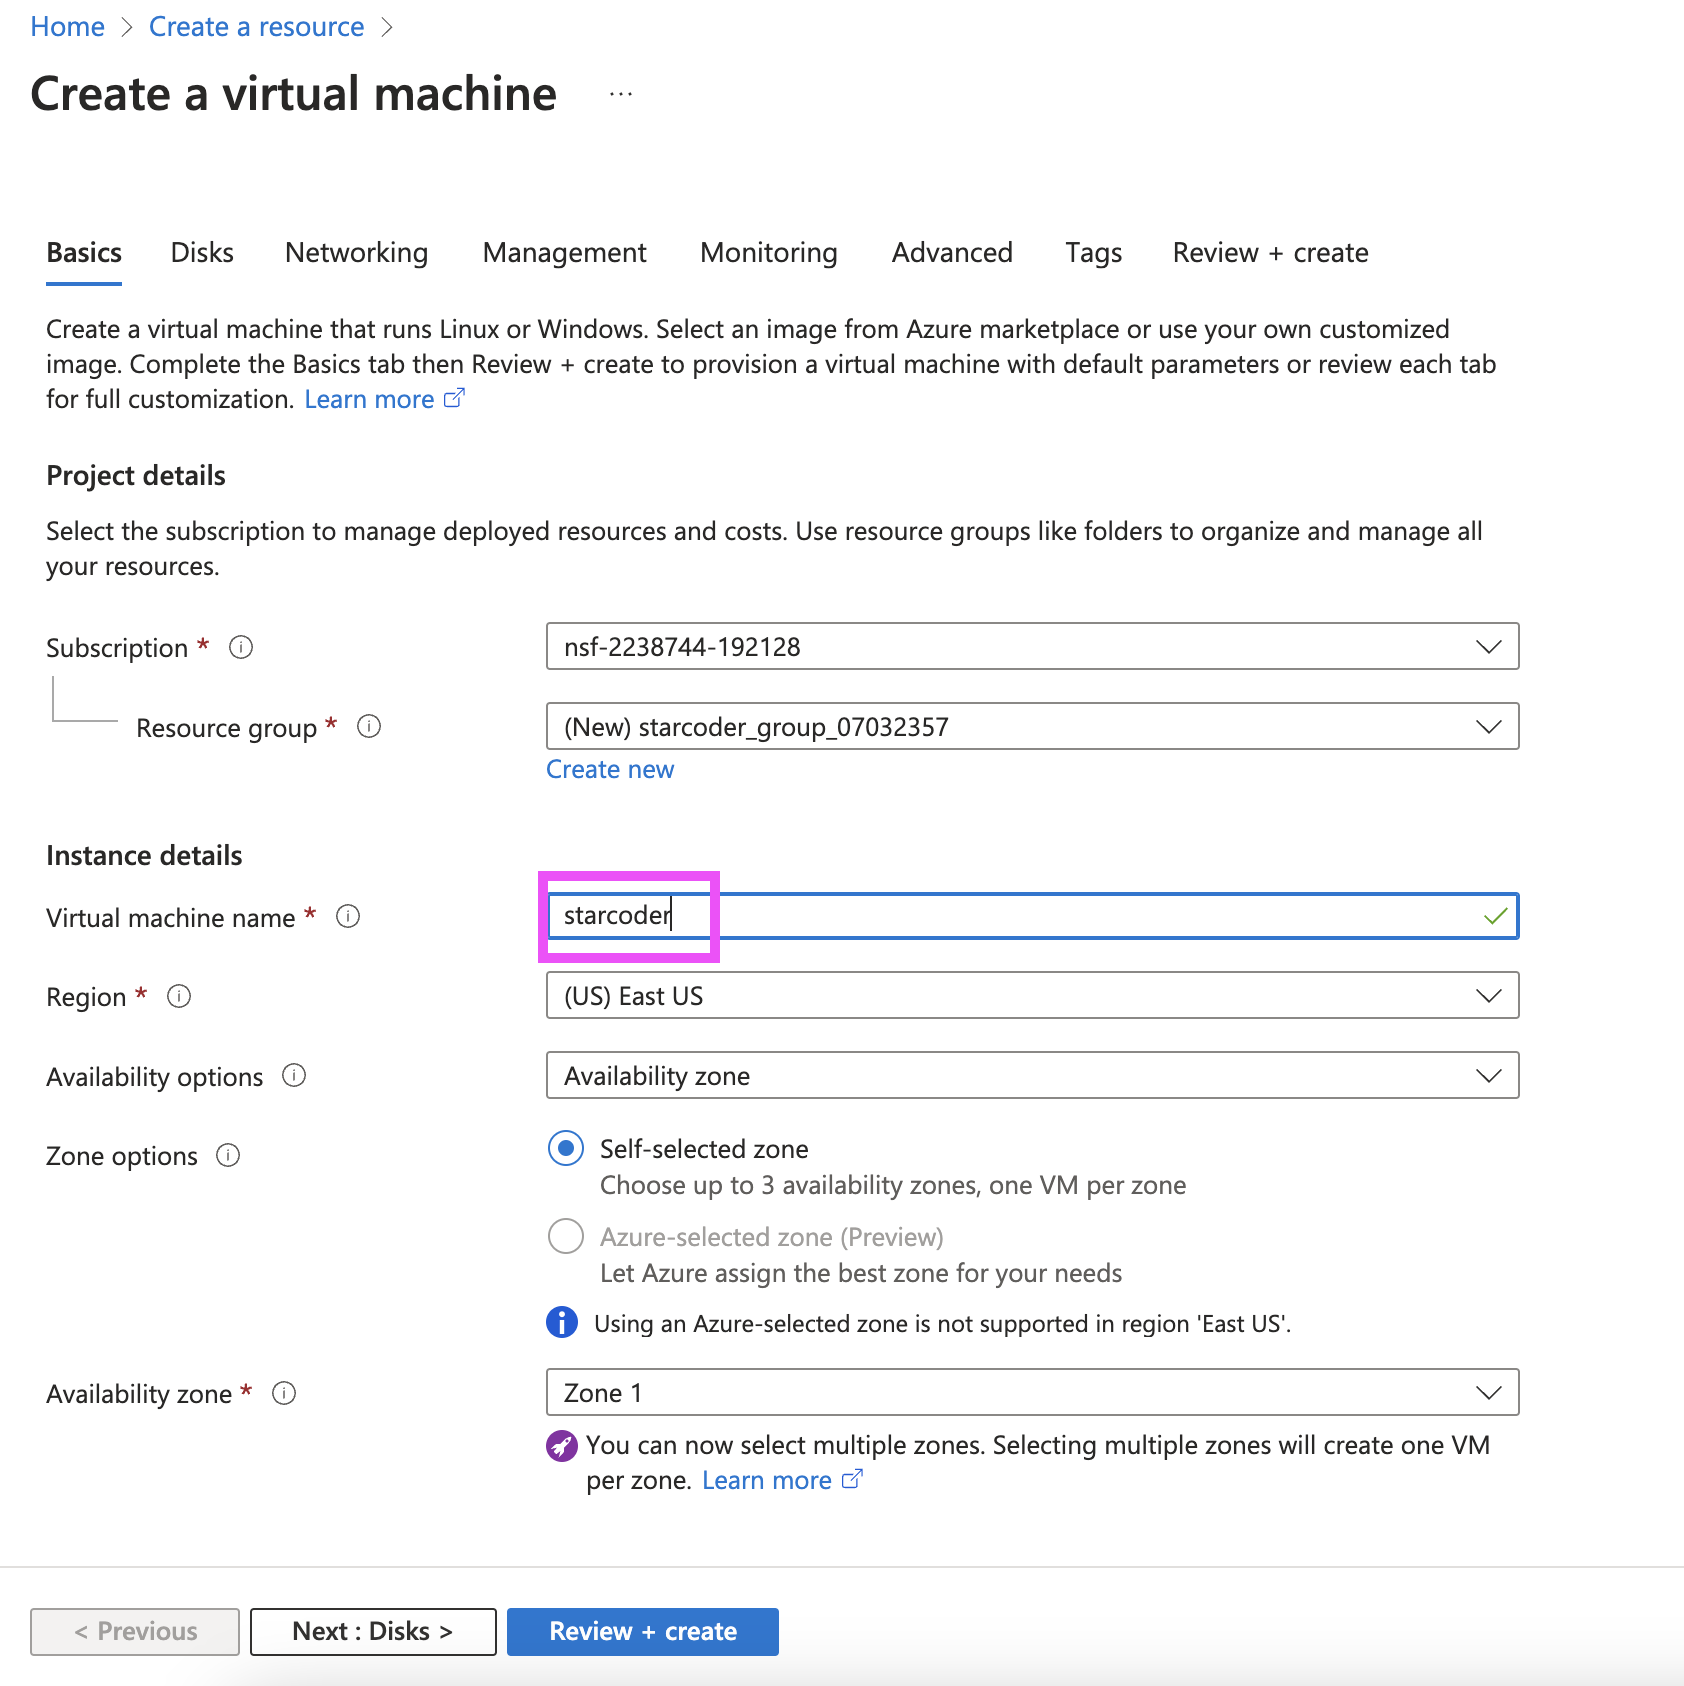
Select the security type as "Standard". Must be standard otherwise can't install Nvidia driver later. Select image as Ubuntu Server 22.04 LTS. Select size as Standard_NV36_A10_v5 - 36 vcpus.

-
Use "Password" as the Authentication type for easy access through SSH:

-
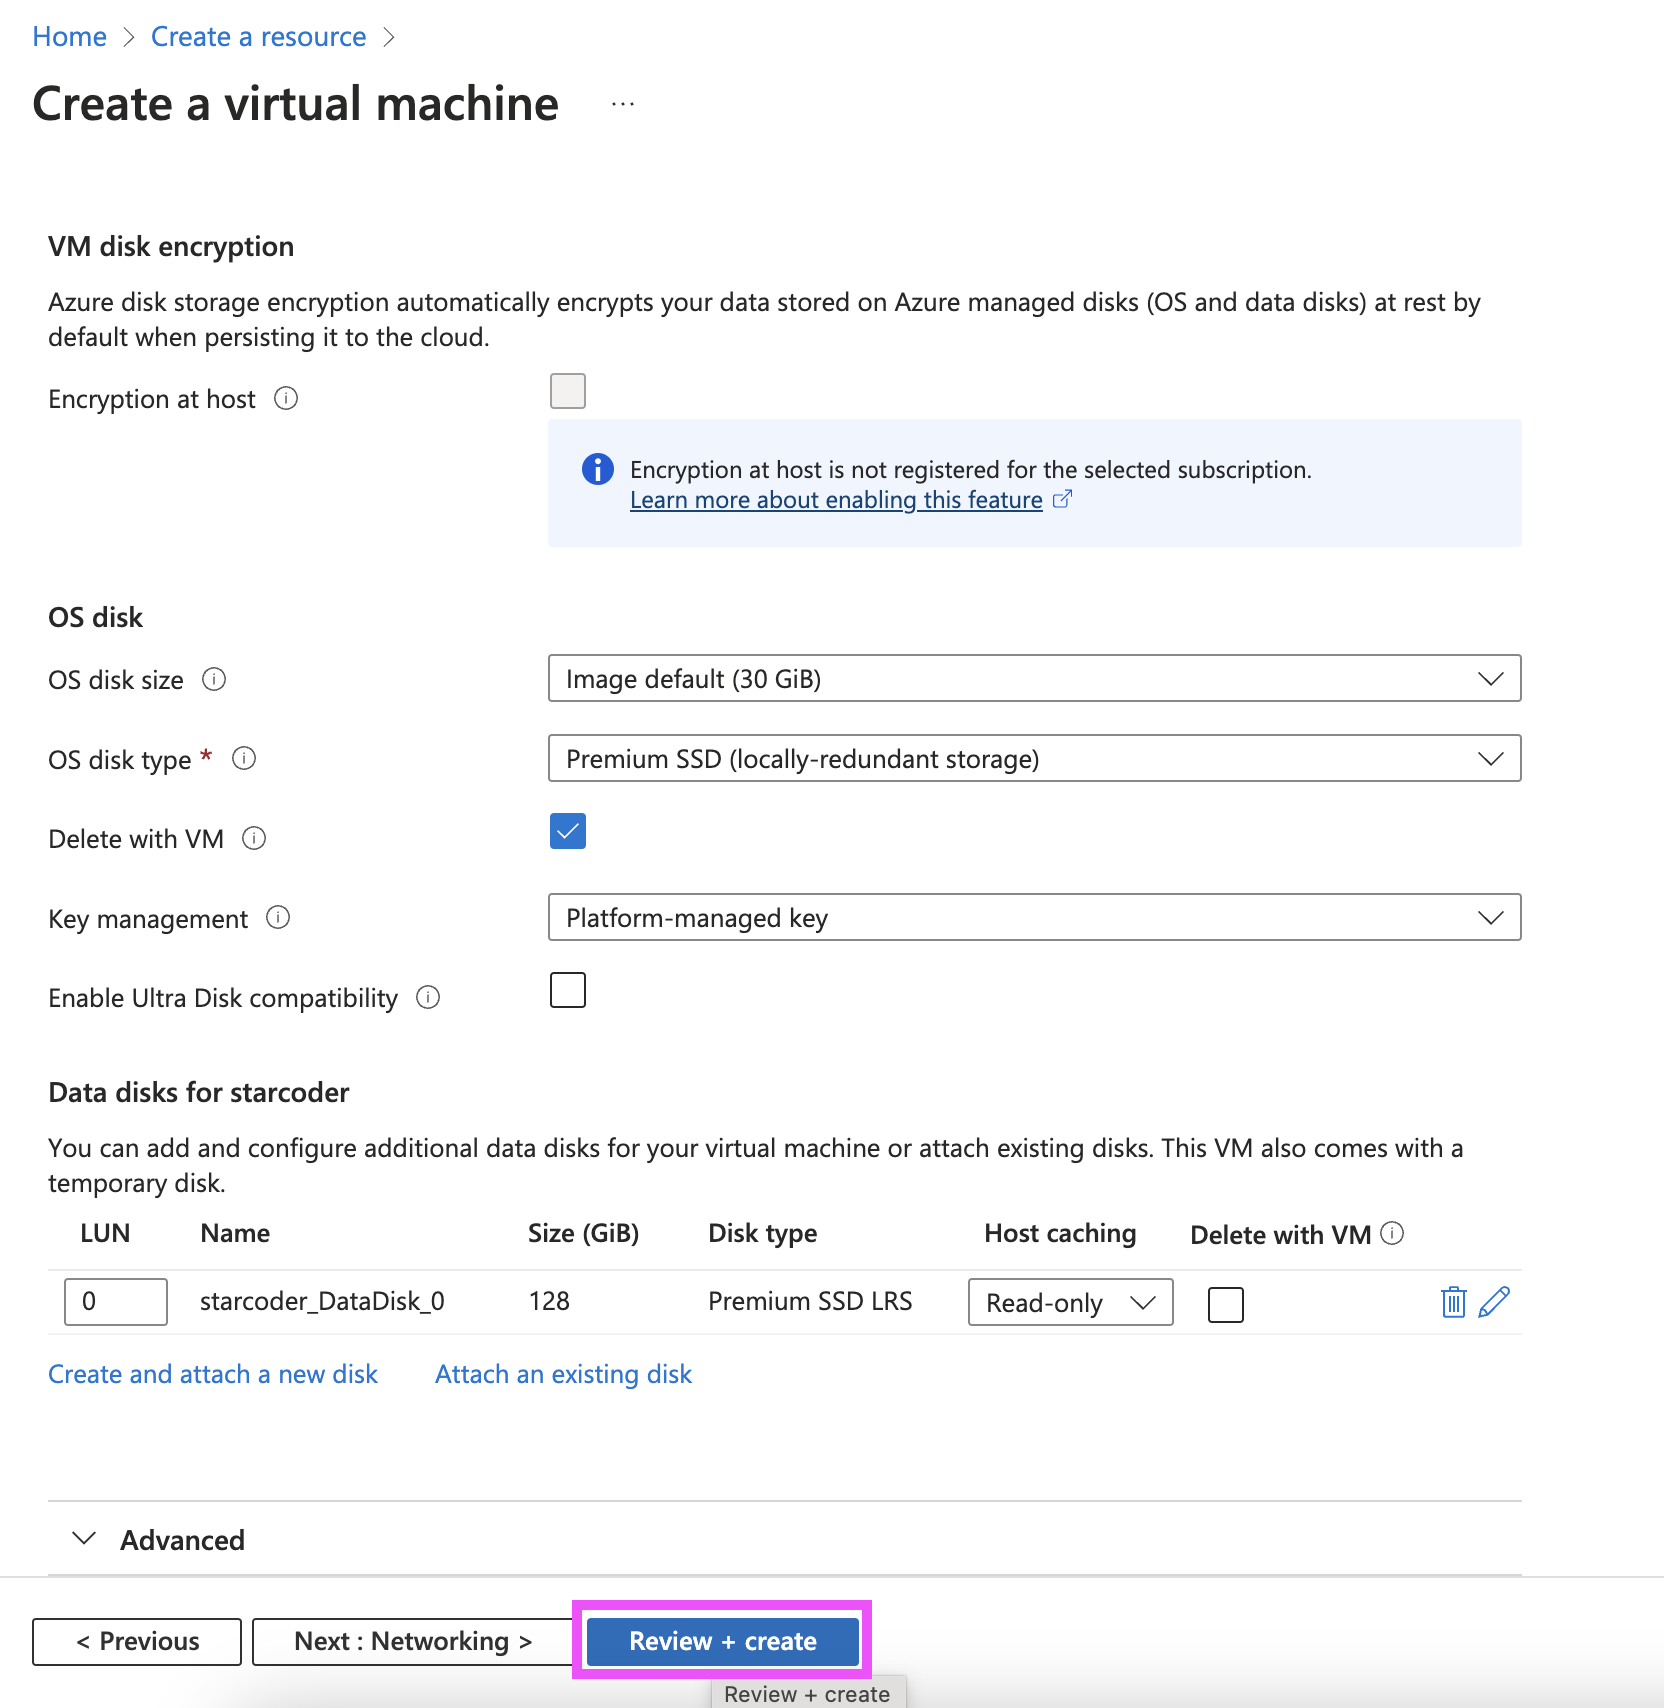
Create and attach a new disk to persistently store model weights and server files:


-
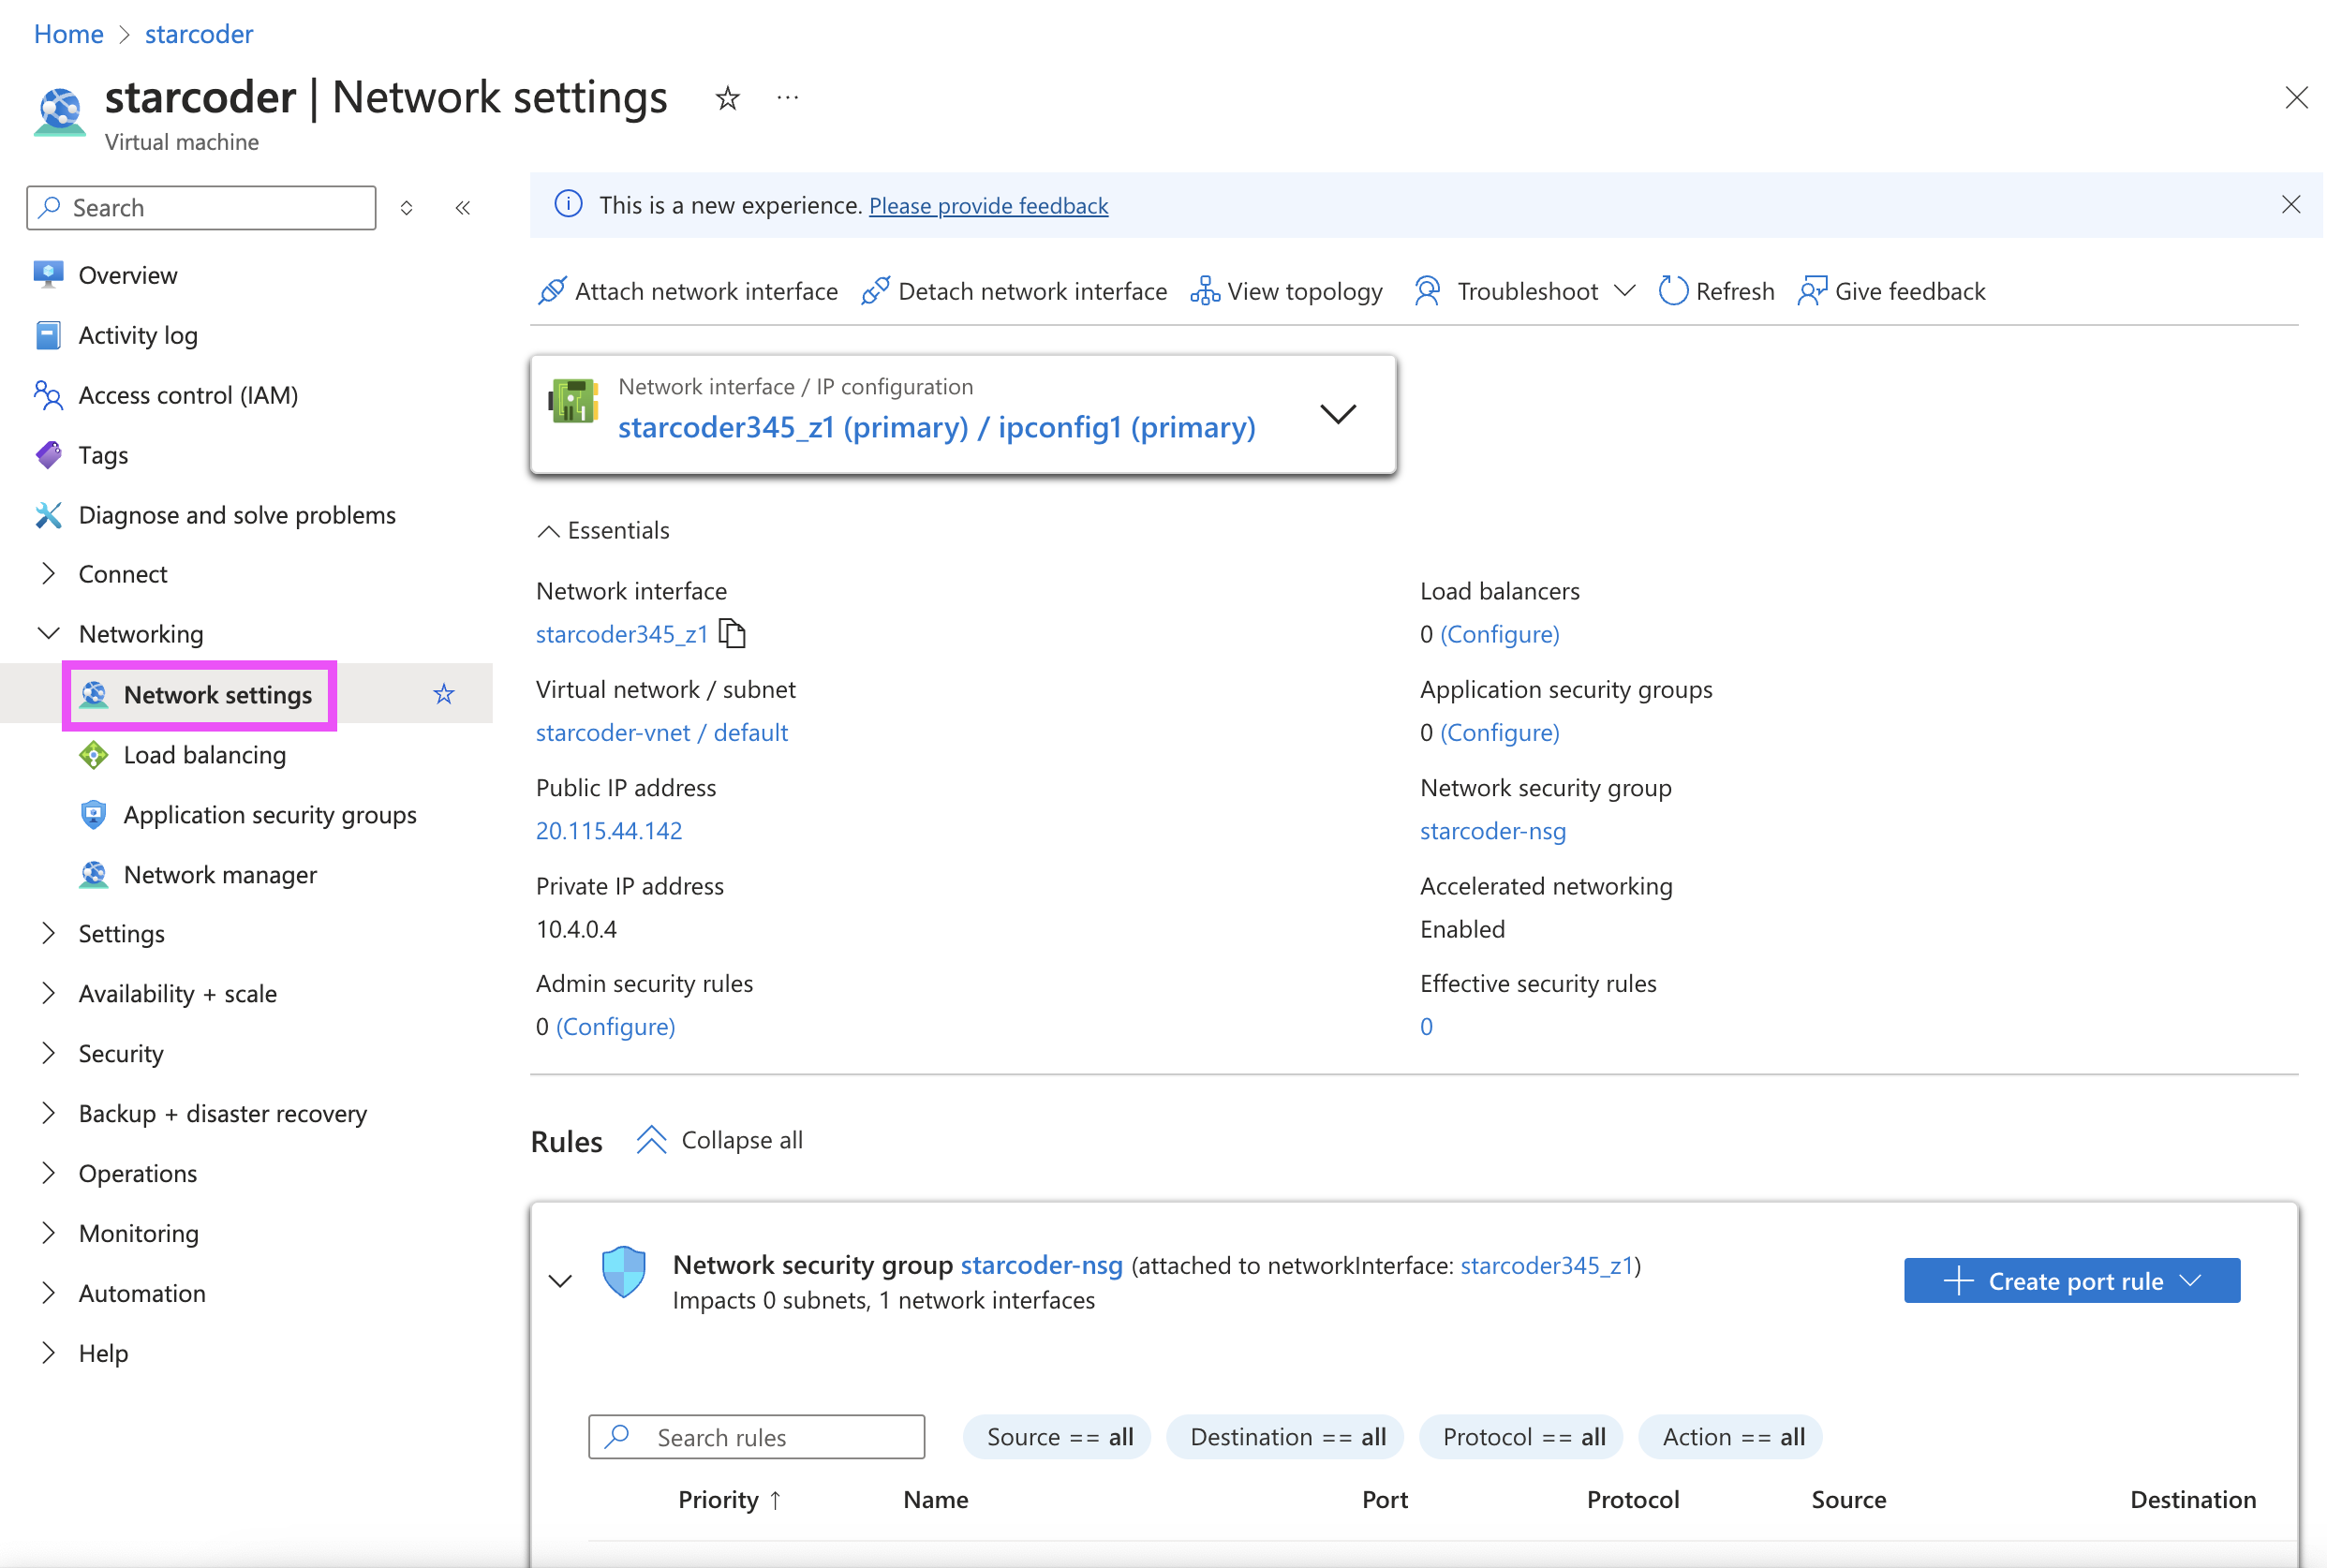
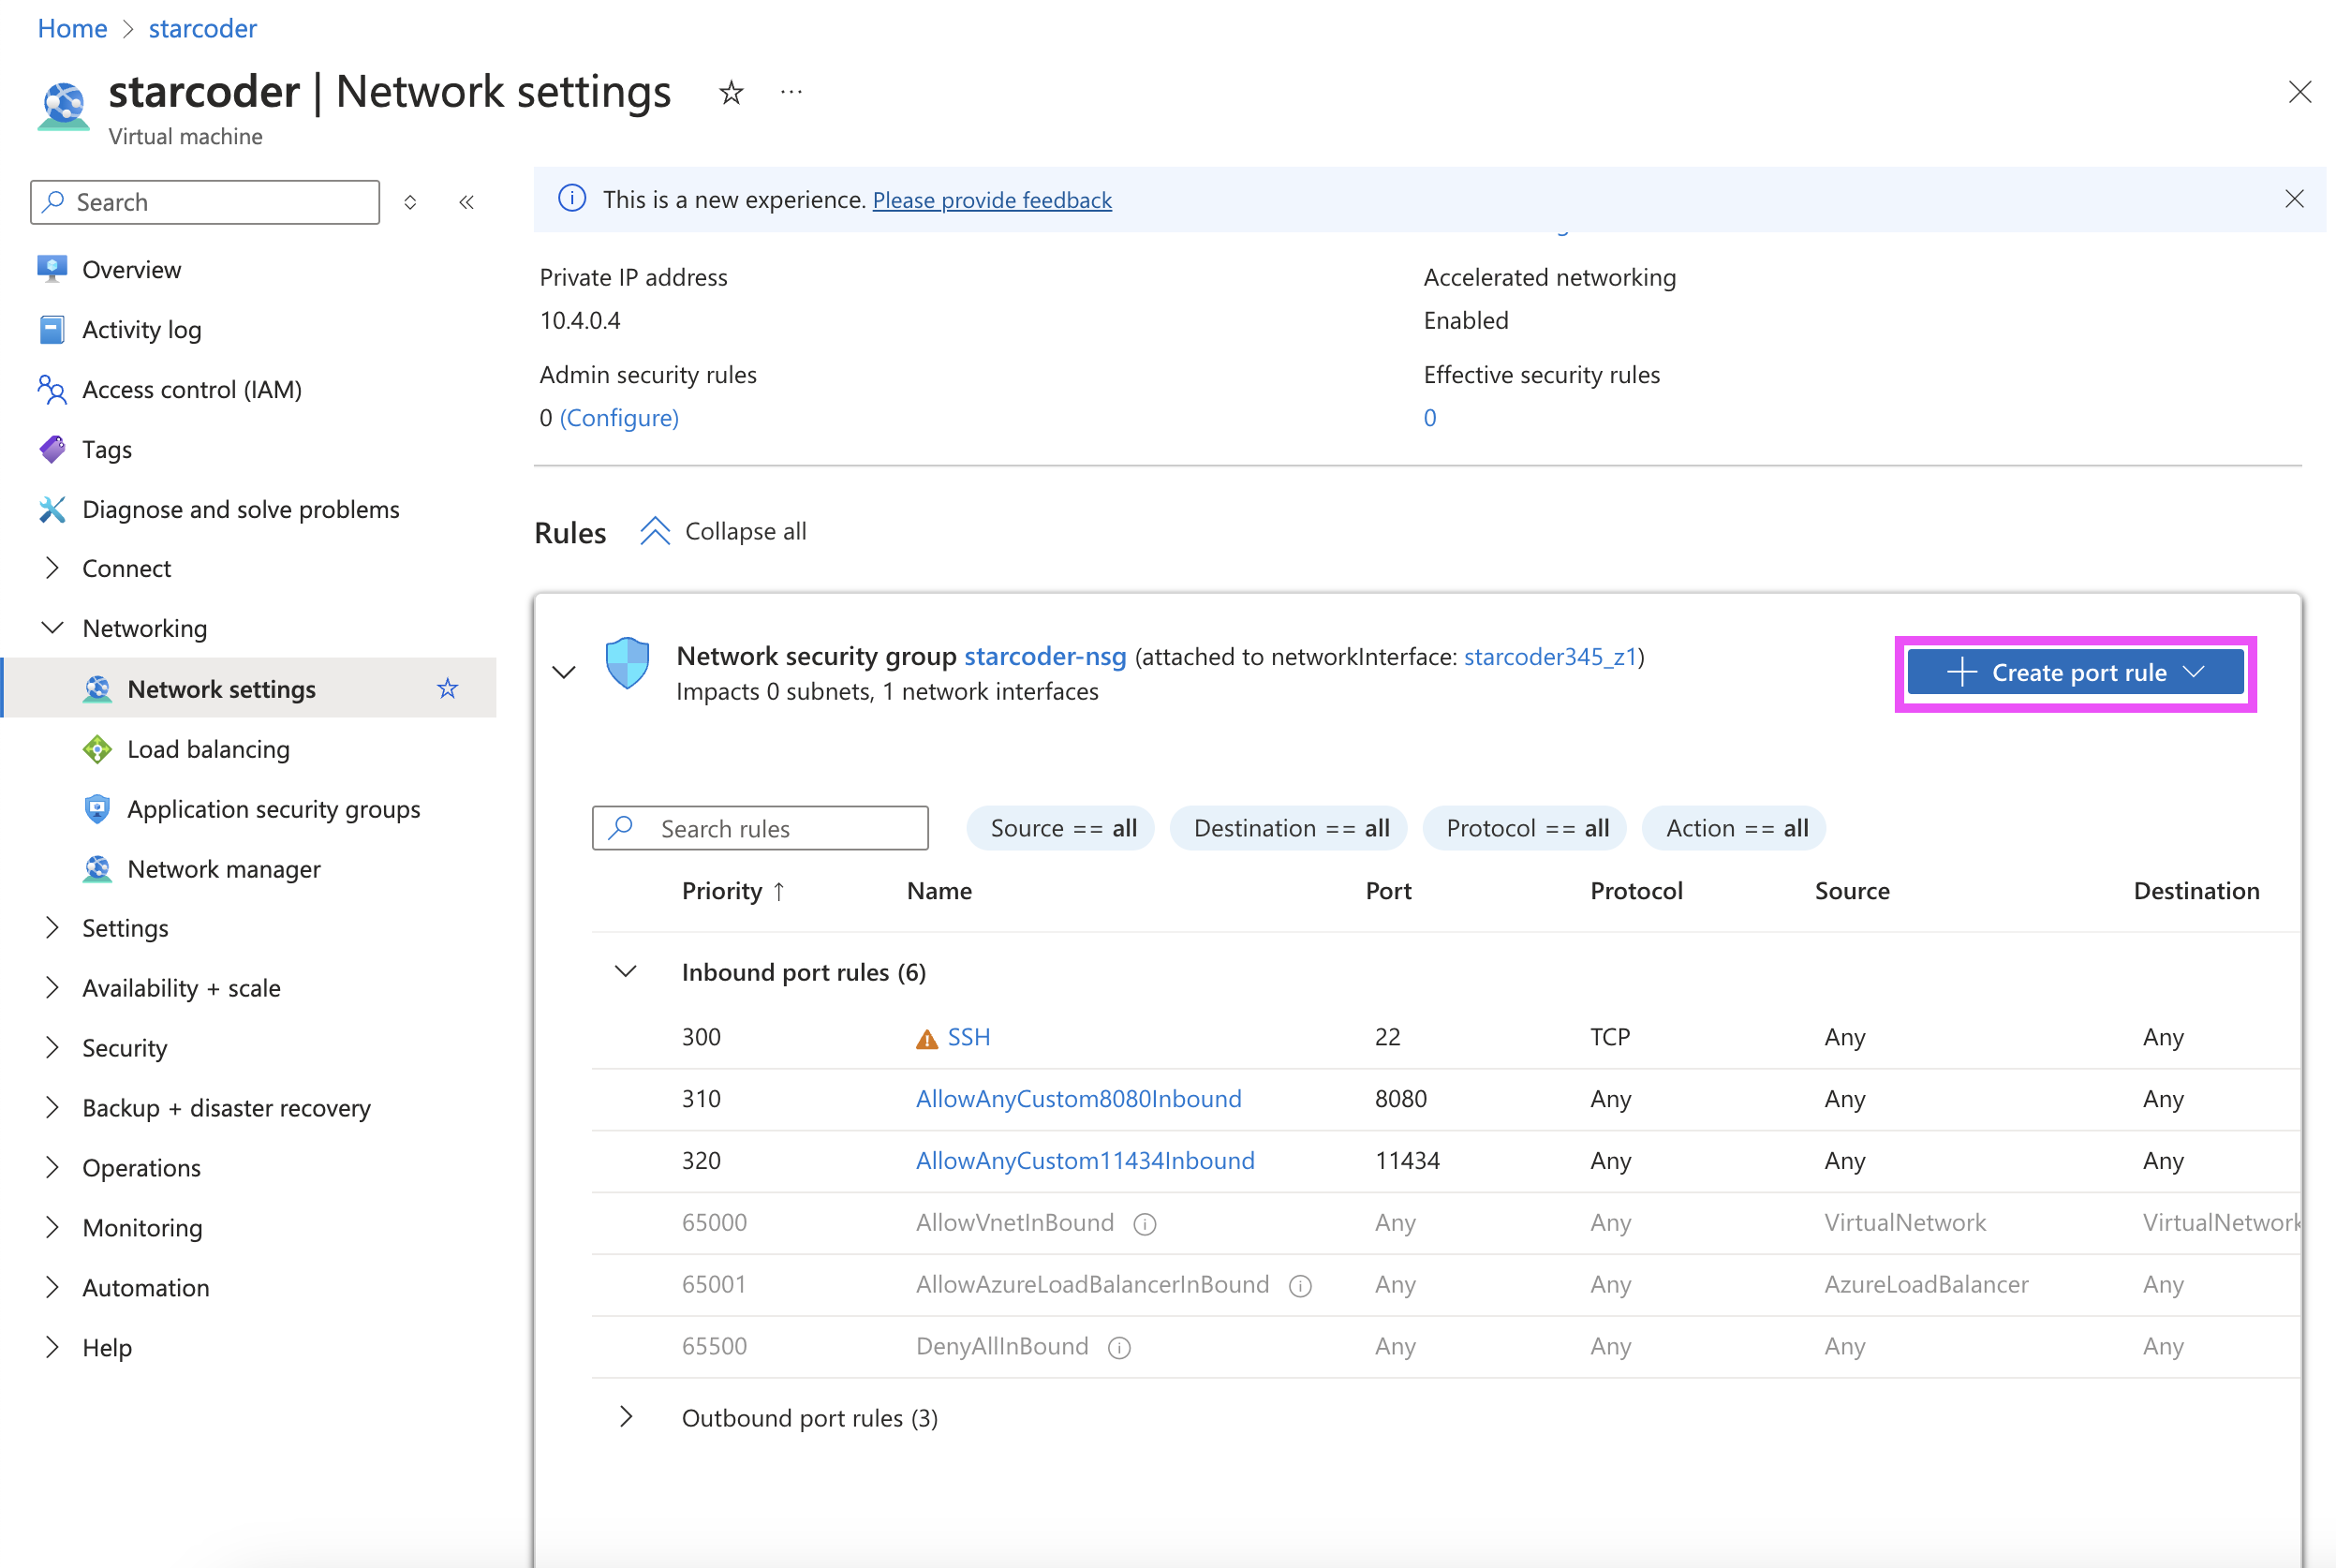
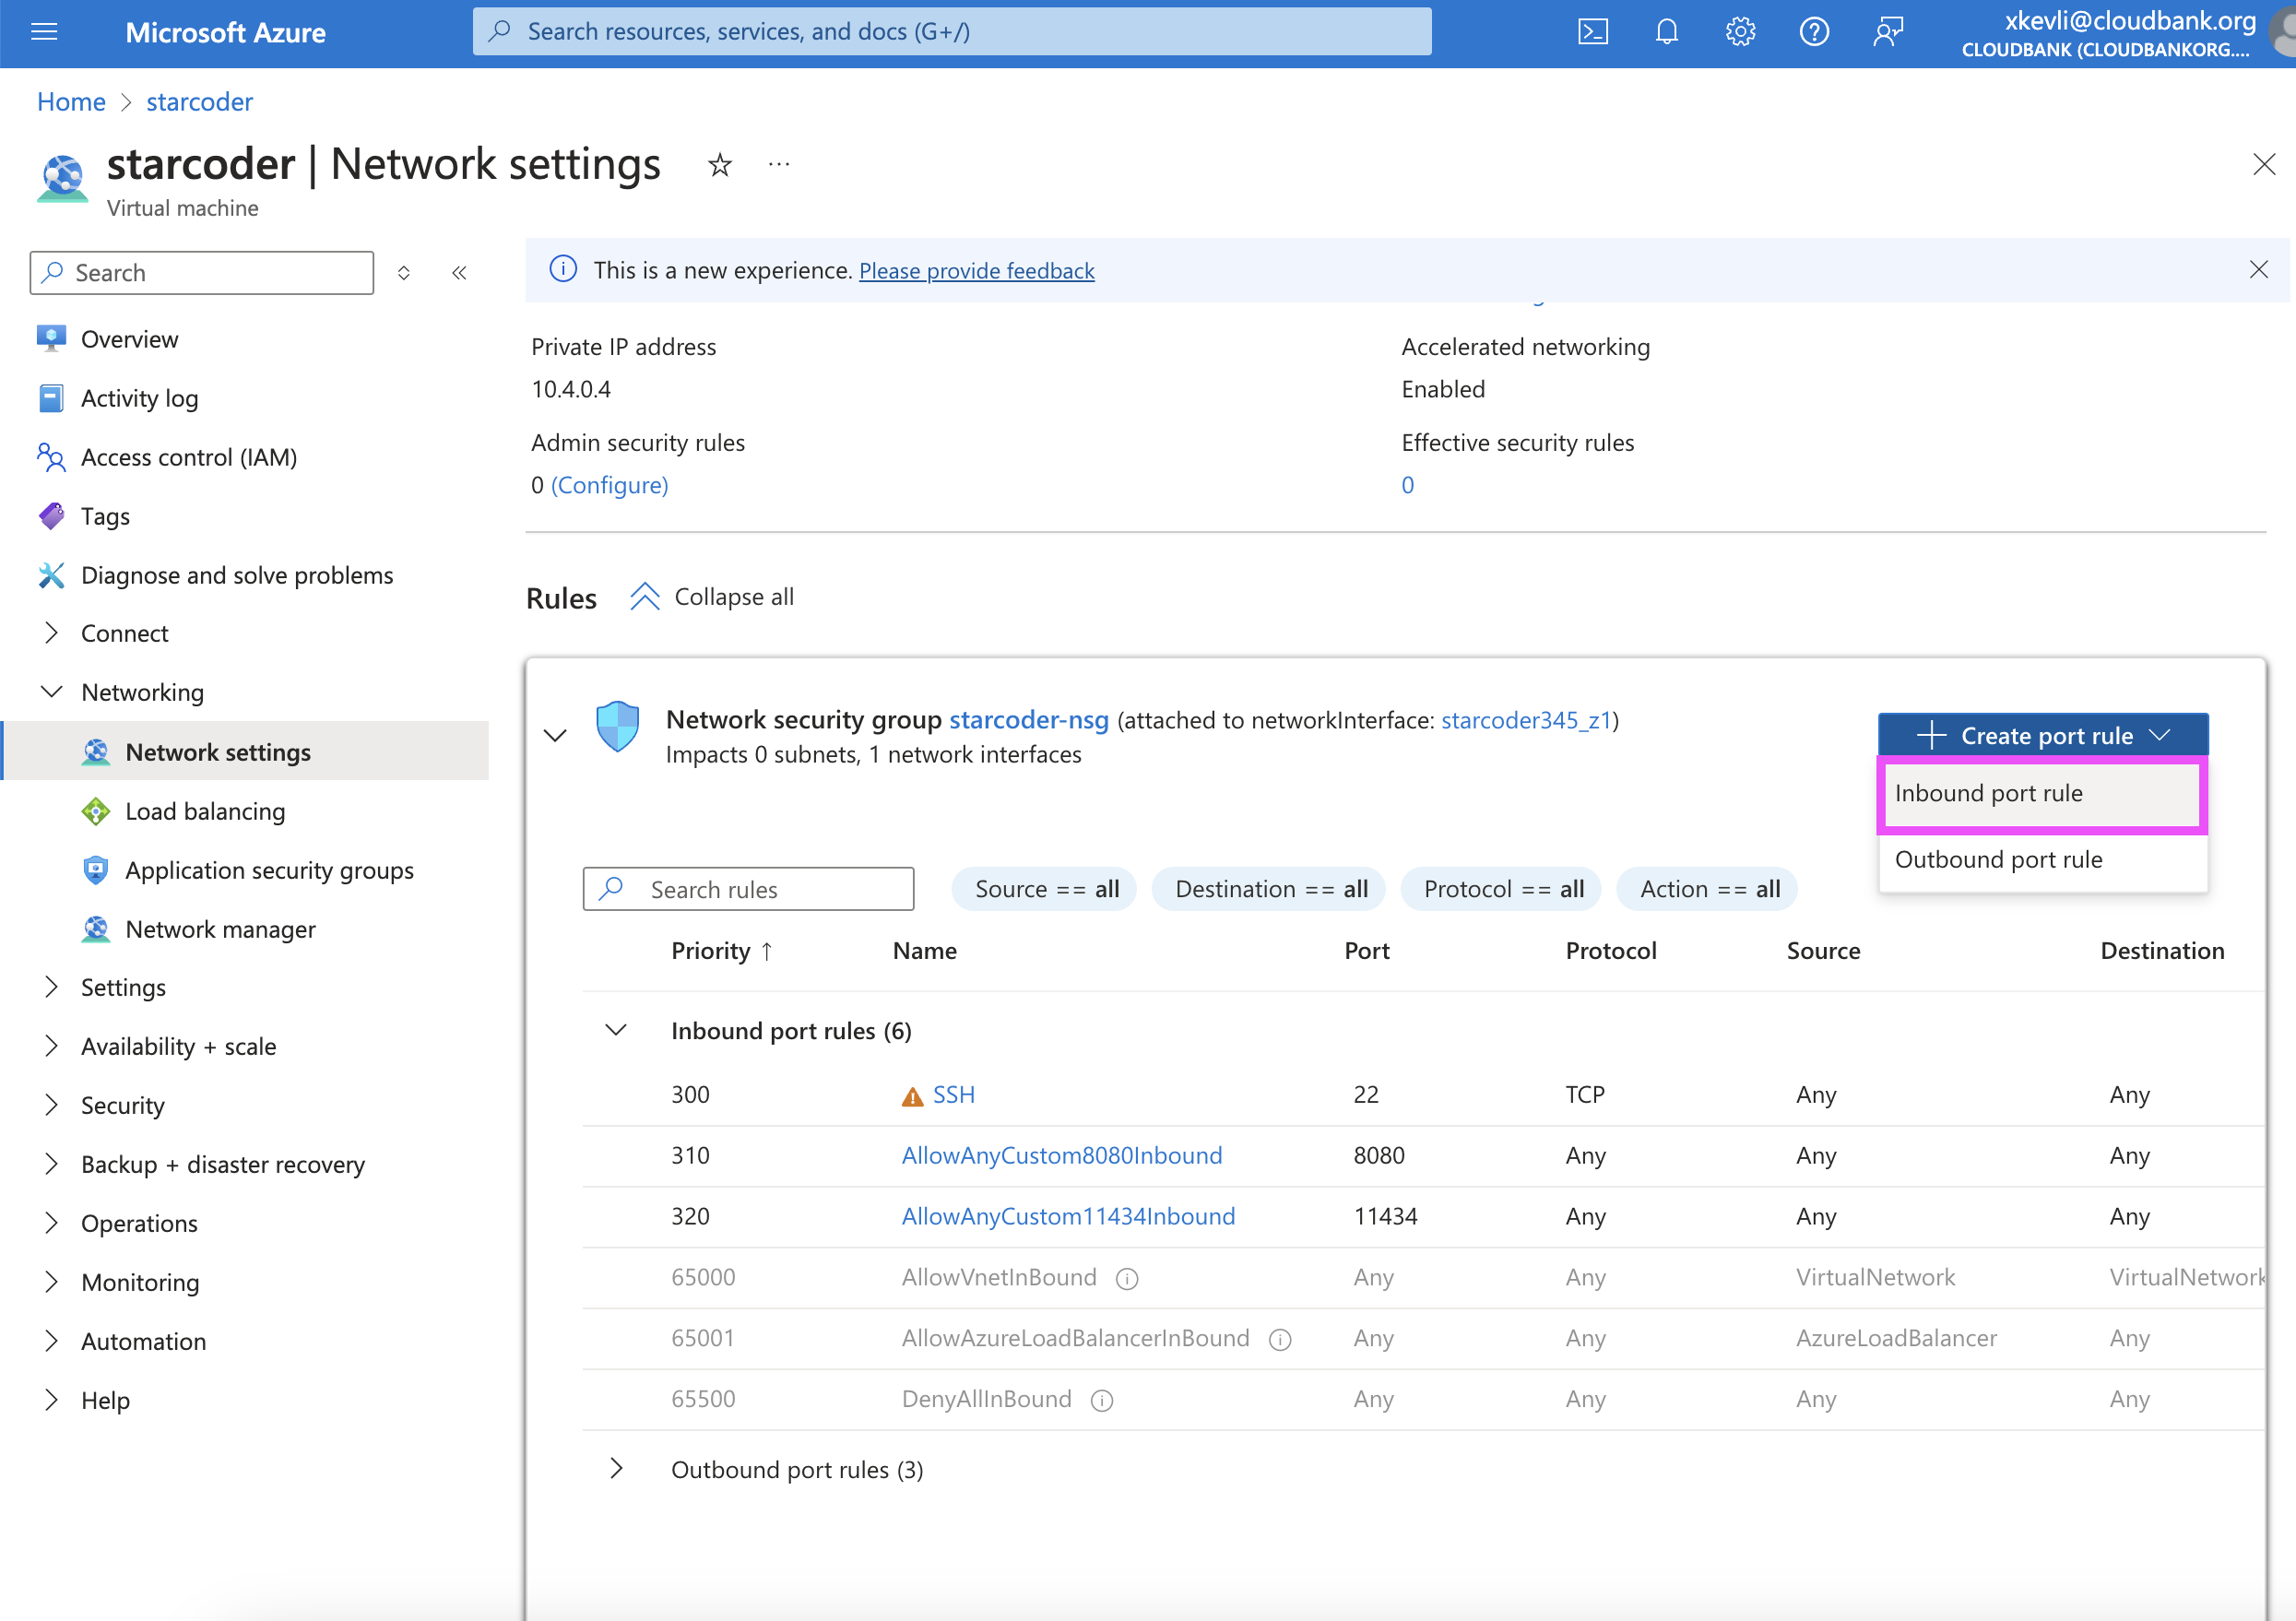
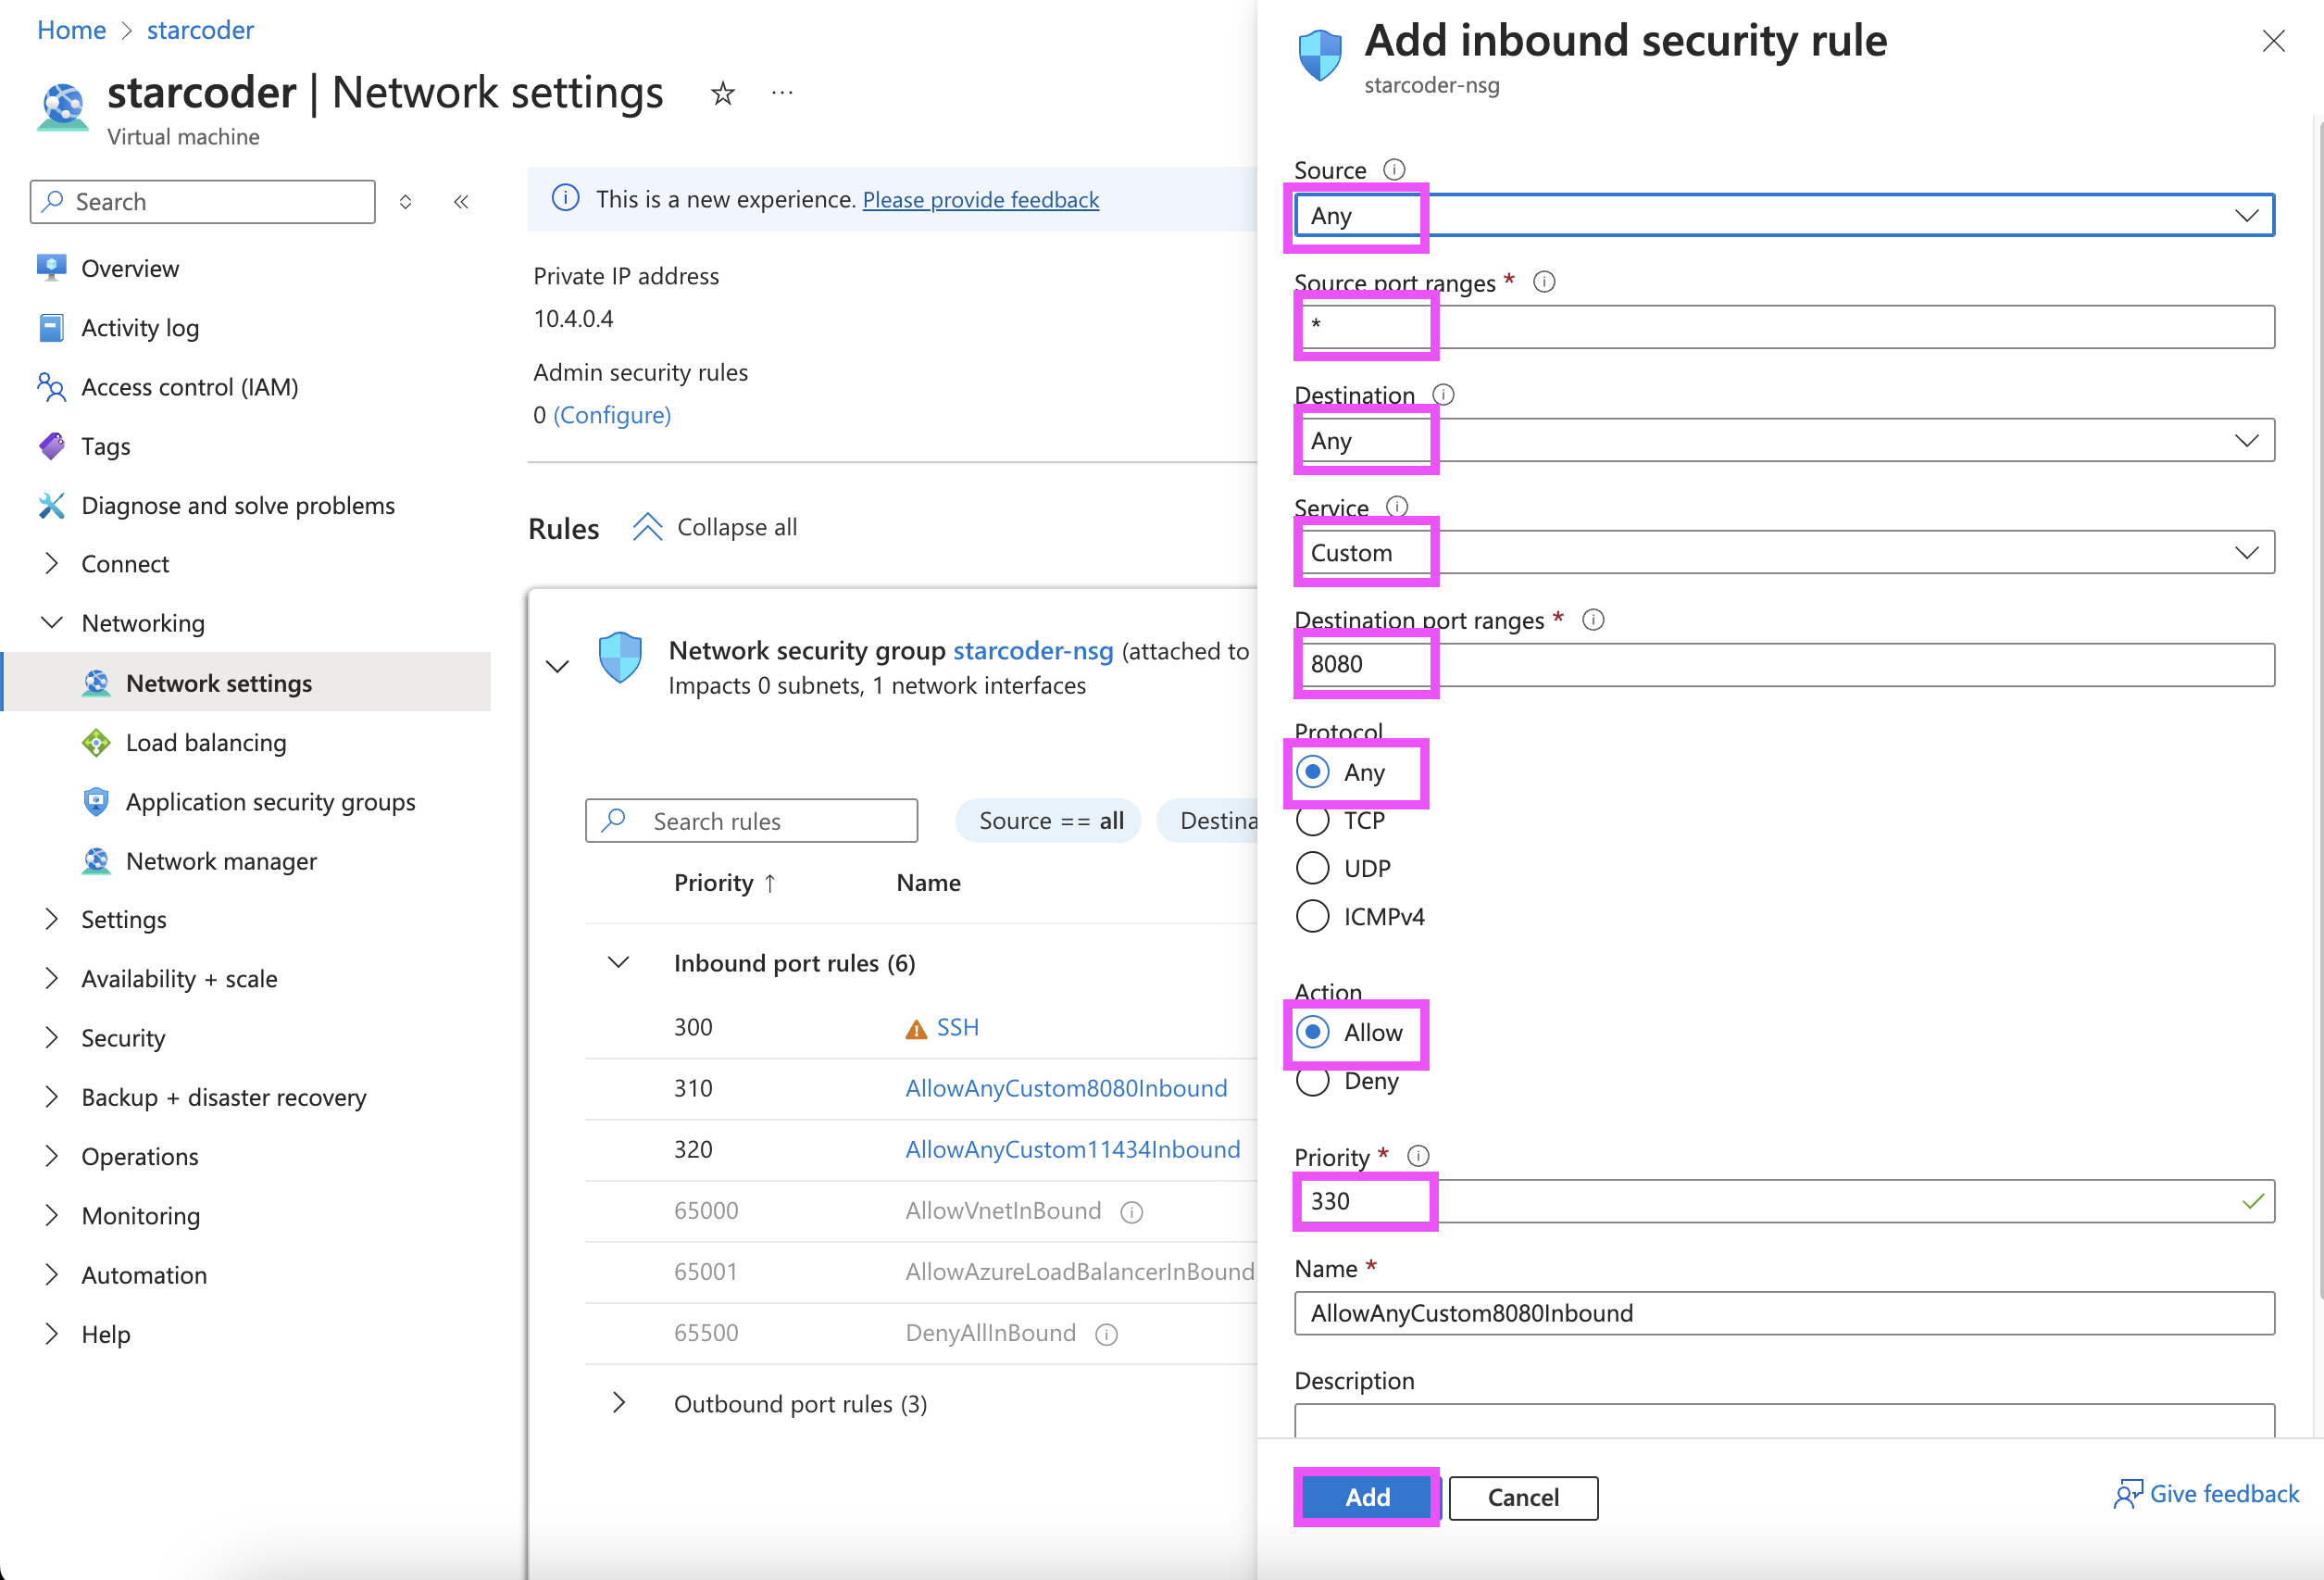
Once the instance is created, configure its network settings to allow inbound connections through port 8080 for use with our starcoder server:
-
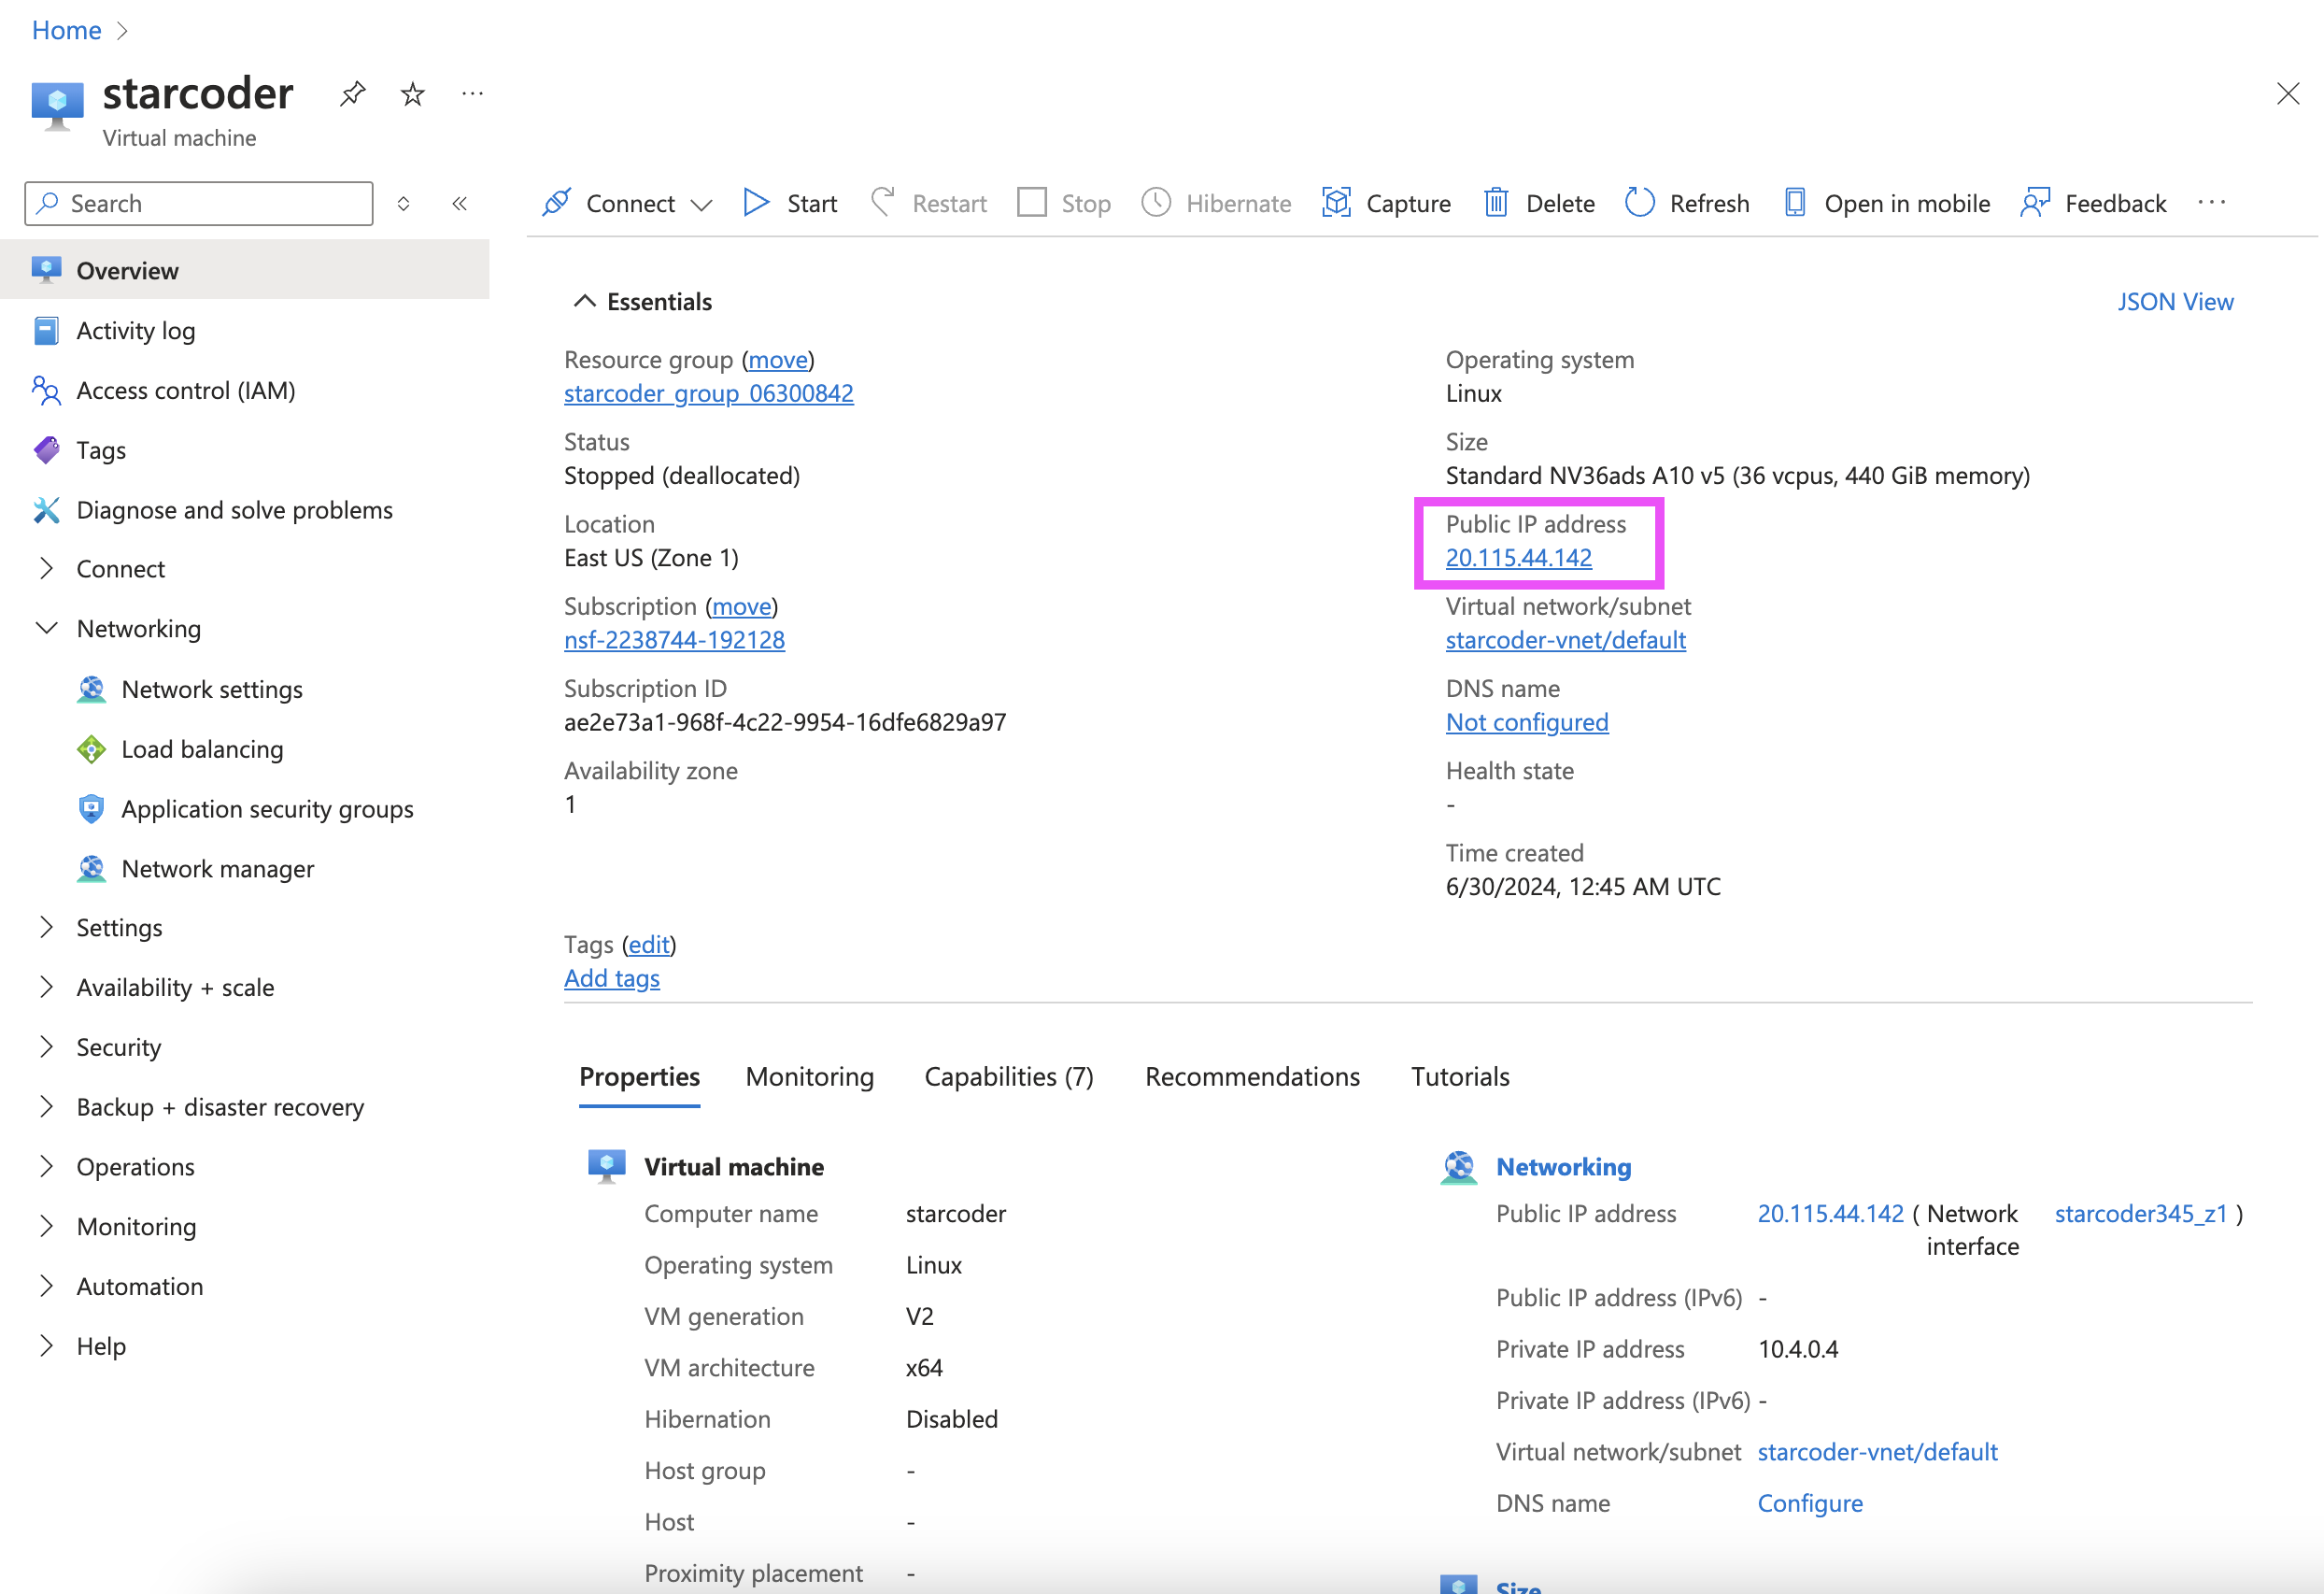
Get your instance's public IP address from the instance dashboard:
-
Connect via ssh
ssh -o ServerAliveInterval=60 azureuser@<your_instance_ip_address> -
Follow the official tutorial to attach the data disk created in the setup step. Name the mount point
/workspaceinstead of/datadirin the tutorial. Start from the "Prepare a new empty disk" section and stop after finishing the "Verify the disk" section in the tutorial: https://learn.microsoft.com/en-us/azure/virtual-machines/linux/attach-disk-portal -
Grant permission to the user (otherwise always require sudo for any file operation)
sudo chmod -R -v 777 /workspace -
Follow the steps in the official doc to install Nvidia driver. The instance will automatically be restarted during the installation and your SSH connection will break. Reconnect to the instance after the installation finishes. https://learn.microsoft.com/en-us/azure/virtual-machines/extensions/hpccompute-gpu-linux#azure-portal
-
Install dependencies
sudo apt-get update
sudo apt-get install build-essential wget nvidia-cuda-toolkit -y
The installation can take several minutes.
-
RESTART the instance on the instance's dashboard. Otherwise will get
Failed to initialize NVML: Driver/library version mismatchwhen runningnvidia-smi. -
Verify that the GPU is correctly recognized:
nvidia-smi
-
Download the a quantized version of the StarCoder 2 model from HuggingFace:
cd /workspace mkdir models/ cd models/ wget https://huggingface.co/second-state/StarCoder2-15B-GGUF/resolve/main/starcoder2-15b-Q5_K_M.gguf -
Build llama.cpp
cd /workspace
git clone https://github.com/ggerganov/llama.cpp.git
cd llama.cpp
CUDA_DOCKER_ARCH=compute_86 make GGML_CUDA=1
Note: 86 is specifically for the A10 GPU. See https://github.com/distantmagic/paddler/blob/main/infra/tutorial-installing-llamacpp-aws-cuda.md#cuda-architecture-must-be-explicitly-provided
-
Start the server to listen on port 8080 for requests
cd /workspace/llama.cpp

./llama-server \
    -t 10 \
    -ngl 64 \
    -b 512 \
    --ctx-size 16384 \
    -m ../models/starcoder2-15b-Q5_K_M.gguf \
    --color -c 3400 \
    --seed 42 \
    --temp 0.8 \
    --top_k 5 \
    --repeat_penalty 1.1 \
    --host :: \
    --port 8080 \
    -n -1
Optional: Use GNU screen to allow persist access to server even when the SSH connection breaks:
-
Start a new screen session:
screen -S starcoder
This starts a new screen session named
starcoder. -
Run your server inside the screen session:
cd /workspace/llama.cpp

./llama-server \
    -t 10 \
    -ngl 64 \
    -b 512 \
    --ctx-size 16384 \
    -m ../models/starcoder2-15b-Q5_K_M.gguf \
    --color -c 3400 \
    --seed 42 \
    --temp 0.8 \
    --top_k 5 \
    --repeat_penalty 1.1 \
    --host :: \
    --port 8080 \
    -n -1
This will keep running inside the screen session.
-
Detach from the screen session: Press
Ctrl-afollowed byd. This detaches the screen session and keeps it running in the background. -
Reattach to the screen session (if needed):
screen -r starcoder
This reattaches you to the
starcodersession. -
List all screen sessions:
screen -ls
This shows all the running screen sessions.
-
Kill a screen session (when you're done): First, reattach to the session:
screen -r starcoder
Then, stop the server and exit the session:
exit
-
