
This exercise allows you to practice and apply the concepts and techniques taught in class.
Upon completion of this exercise, you will be able to:
-
Clone and set up an existing React app and run it in development mode.
-
Create and render React components.
-
Use JSX to render content within a React component.
-
Use props to pass data to components and display the data received through props within the components.
-
Render multiple instances of a React component while passing different data to each instance.
-
Extract and organize parts of the existing UI into separate new components.
Passing data through props is an important React concept that is best understood by hands-on practice. We'll use this exercise to help you solidify your understanding of props.
We will be cloning an existing piece of UI from a popular app, Twitter. Let's get started!
-
Fork this repo
-
Clone this repo
-
Open the LAB and start:
cd lab-react-tweets-vite
npm install
npm run dev
-
Upon completion, run the following commands:
git add .
git commit -m "done"
git push origin master
-
Create a Pull Request and submit your assignment.
This lab is equipped with unit tests to provide automated feedback on your progress and help you understand whether your code is working as expected. If you want to check the tests, they are located in the src/test folder.
During an iteration, if your code seems to work as expected but some tests don't pass, feel free to move on to the next iteration. Once you've completed all the mandatory iterations, you can go back and resolve any remaining failed test
-
To execute the tests, run the following command in the terminal:
npm run test -
The above command will execute the tests and open the
@vitest/uiTest Reporter in the browser. -
To see the test results, open http://127.0.0.1:51204/__vitest__ in your browser.
-
We will use Font Awesome for the icons. Add the following stylesheet in the
headof theindex.htmlpage:<link rel="stylesheet" href="https://pro.fontawesome.com/releases/v5.10.0/css/all.css" integrity="sha384-AYmEC3Yw5cVb3ZcuHtOA93w35dYTsvhLPVnYs9eStHfGJvOvKxVfELGroGkvsg+p" crossorigin="anonymous" />
To allow you to focus on React without having to worry about the styling we provided you with the CSS styles. All the CSS is included in the starter code in the src/index.css file.
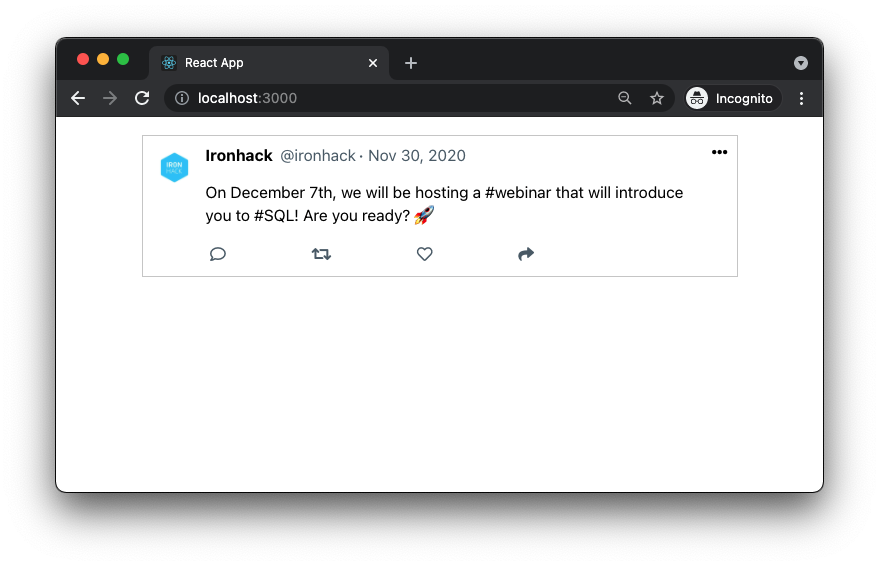
We have also provided you with the initial content of the App.jsx and we included the HTML structure for the Tweet.jsx component. Before you start working take a moment to go over these two files.
Once you initially run the app you should see the following:
See Expected Result
The Tweet component is at the moment rendering static content, but we will modify it to show the content dynamically. In this iteration, we'll modify the Tweet component to display the content coming from the props.
In App.jsx, we have an array named tweetsArray that holds objects representing tweets. We will use the Tweet component to display these tweet objects.
The Tweet component should display the user's name, user's image, user's handle, tweet timestamp and the message.
Pass the tweet as a prop
Pass the first object from the tweetsArray as a tweet prop to the component:
// src/App.jsx

// ...

      <Tweet tweet={ tweetsArray[0] }>

// ...
Display the tweet content in the Tweet component
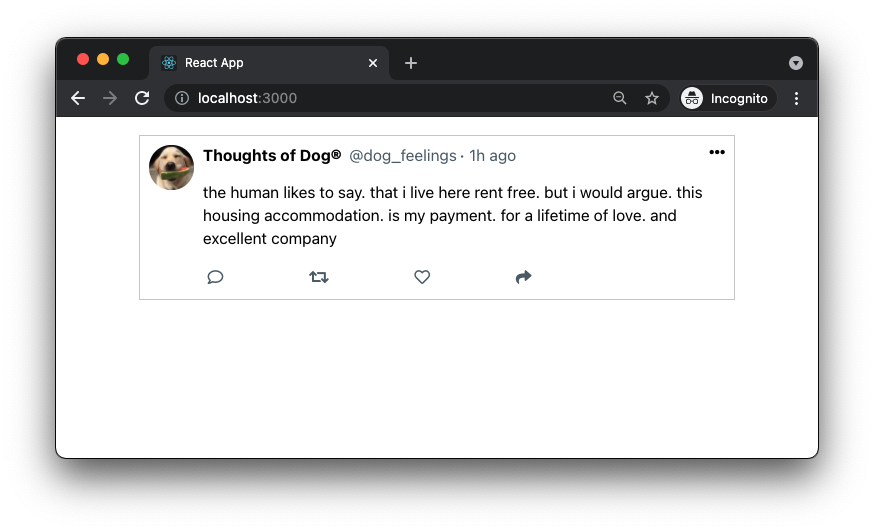
Update the Tweet component to display the values coming from the tweet prop. Remember that the value we passed is an object, so you may want to check the object's structure.
Once done, your Tweet component should display the following content:
See Expected Result
We will now create new files for the components that we'll make in the following iterations. Inside the folder src/components/ create the following new files:
src/components/ProfileImage.jsx,src/components/User.jsx,src/components/Timestamp.jsx,src/components/Message.jsxandsrc/components/Actions.jsx.
In the following iterations, you will work on refactoring the Tweet component. You will be asked to extract parts of the existing HTML structure into new components:
See Expected Result

Extract HTML
Extract the existing img tag and render it through the ProfileImage component:
<img src="IMAGE_URL" className="profile" alt="profile" />Render the component
Once done, import the ProfileImage component to Tweet.jsx. After importing it, render the component inside of Tweet in the following way:
// ...

  <ProfileImage image={IMAGE_URL} />

// ...
Access the Props
ProfileImage receives a prop image. Set this value as the src of the <img /> tag.
Extract HTML
Extract the existing span tags displaying the user information and render them through the User component:
<span className="user">
  <span className="name"> USER_NAME </span>
  <span className="handle">@ USER_HANDLE</span>
</span>
Render the component
Import the User component to Tweet.jsx. After importing it, render the component inside of Tweet in the following way:
// ...

 <User name={USER_NAME} handle={USER_HANDLE} />

// ...
Access the Props
User component should take name and handle as props. Access these values and display the user's name and the twitter handle.
Extract HTML
Extract the existing span tag displaying the timestamp information and render it through the Timestamp component:
<span className="timestamp"> TWEET_TIMESTAMP </span>Render the component
Import the Timestamp component to Tweet.jsx. After importing it, render the component inside of Tweet in the following way:
// ...

  <Timestamp time={TWEET_TIMESTAMP} />

// ...
Access the Props
Timestamp should take a prop time. Display this value as the content of the span tag.
Extract HTML
Extract the existing p tag and render it through the Message component:
<p className="message"> TWEET_MESSAGE </p>Render the component
When done, import the Message component and render it in the Tweet.jsx in the following way:
// ...

  <Message message={TWEET_MESSAGE} />

// ...
Access the Props
Message component should take a prop message. Display this value in the p tag.
Extract HTML
Extract the existing div.actions tag and its content and render it through the Actions component:
<div className="actions">
  <i class="far fa-comment" data-testid="comment-icon"></i>
  <i class="fas fa-retweet" data-testid="retweet-icon"></i>
  <i class="far fa-heart" data-testid="heart-icon"></i>
  <i class="fas fa-share" data-testid="share-icon"></i>
</div>
Render the component
When done, import the Actions component and render it in the Tweet.jsx like this:
// ...

  <Actions />

// ...
Actions component is not supposed to take any props.
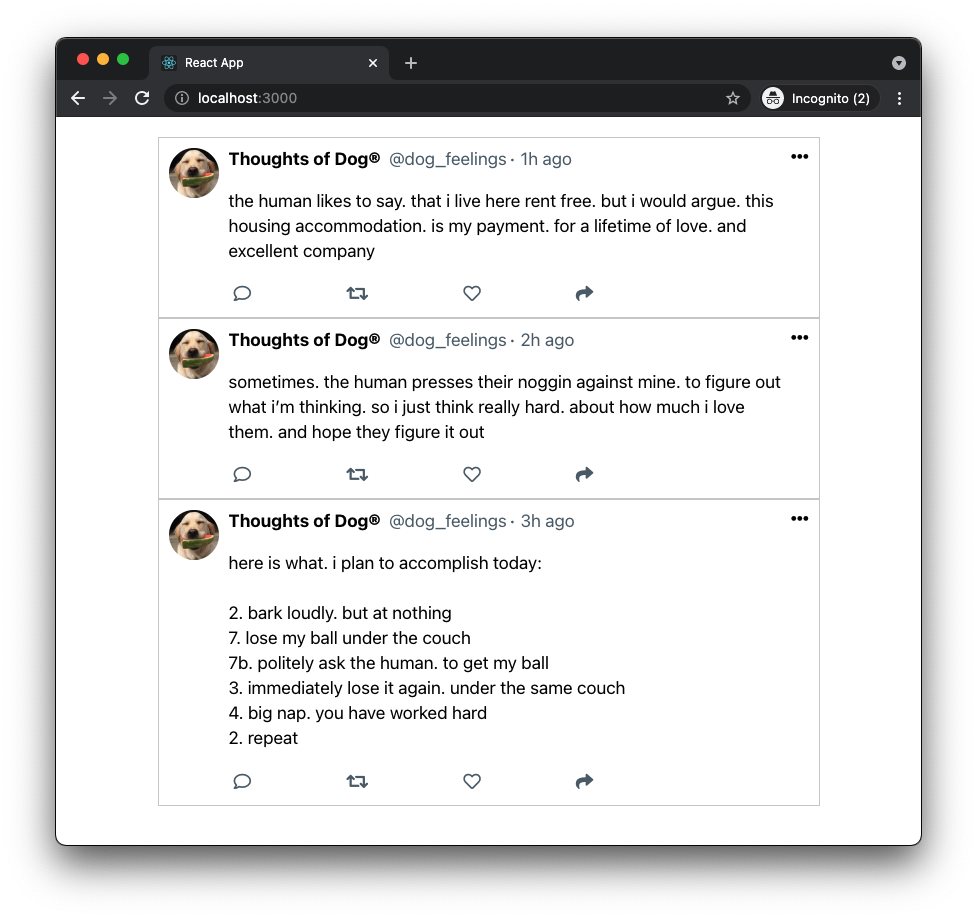
Once you are done refactoring the Tweet component, update App.jsx to display three <Tweet /> components. Each <Tweet /> should receive a separate tweet object from the tweetsArray.
Once finished, your app should be displaying the following content:
See Expected Result
Happy coding! 💙
I am stuck and don't know how to solve the problem or where to start. What should I do?
If you are stuck in your code and don't know how to solve the problem or where to start, you should take a step back and try to form a clear question about the specific issue you are facing. This will help you narrow down the problem and come up with potential solutions.
For example, is it a concept that you don't understand, or are you receiving an error message that you don't know how to fix? It is usually helpful to try to state the problem as clearly as possible, including any error messages you are receiving. This can help you communicate the issue to others and potentially get help from classmates or online resources.
Once you have a clear understanding of the problem, you will be able to start working toward the solution.
I got the error: "Cannot find module 'Node.js'". How can I resolve it?
The error "Cannot find module" in a Node.js application means that the module you are trying to import or use does not exist in your project or cannot be found by Node.js.
There are a few things you can try to resolve the issue:
- Dependencies are not installed: Make sure that all dependencies are installed.
To do this, run the command npm install in the root folder of your project.
This will install all of the dependencies listed in the project's package.json file, and ensure that all of the modules that your Node'js application requires are available.
- Module is not installed: Make sure that the package you are trying to use is listed in the project's
package.jsonand that it is installed.
To do this, run the command npm install <package_name>, replacing the <package_name> with the name of the package.
This will add the package to the list of dependencies in the package.json file, and install it in the project.
-
Module is not imported: Make sure that you've imported the module/package correctly and that the
importstatement is spelled correctly and available in the correct place in your code. -
Wrong file path: If you are importing another file as a module, make sure that the file you are trying to import is located in the correct folder and that you are using the correct file path.
-
Wrong module/package name: Check the spelling of the package name you are trying to import.
I got the message: "Something is already running at ... Would you like to run the app at another port instead? [Y/n]". What should I do?
This message means that another process is already using the specified port. This could be another instance of your React app, or it could be another application that is using that port.
To resolve this, you can change the port your React app is running on by typing Y when prompted. This will kill the process and automatically start the server on another port.
Another approach is to manually terminate the process using the port in question and then try running the app again.
How do I display an image in a React component?
To display an image in a React component, you should first import the image in the component and then render it. Here is an example of how to do this:
import example from "./example.png"; // Import the image file

function App() {
  return (
    <img src={example} alt="example" /> // Display the image
  );
}

export default App;
In the above example, the example variable is assigned the value of the imported image file. The image is then displayed using the <img> element, with the src attribute set to the example variable.
Where should images for a React project be stored?
The images for your React project should be stored inside the src/ folder. To keep things organized you should create a separate assets/ or images/ directory inside of the src/ folder.
I got the warning in my React app:" 'variable' is assigned a value but never used: no-unused-vars". What should I do?
This warning is a linting error thrown by a linting tool in your React project, and it is warning you that the variable is created, but that it is never being used in your code.
To resolve this issue, you can either use the variable in your code, or you can simply remove the variable if you don't need it.
I am getting an error: "not defined". How do I fix it?
The "ReferenceError: variable is not defined" error in JavaScript occurs when you try to access a variable or a function that has not been defined yet or is out of scope.
To fix the issue, check that you have defined the variable or function that you are trying to use and double-check the spelling to make sure you are using the correct name.
In case the variable or a function is defined in another file, make sure that the file has been imported or loaded correctly.
I am unable to push changes to the repository. What should I do?
There are a couple of possible reasons why you may be unable to push changes to a Git repository:
- You have not committed your changes: Before you can push your changes to the repository, you need to commit them using the
git commitcommand. Make sure you have committed your changes and try pushing again. To do this, run the following terminal commands from the project folder:
git add .
git commit -m "Your commit message"
git push- You do not have permission to push to the repository: If you have cloned the repository directly from the main Ironhack repository without making a Fork first, you do not have write access to the repository. To check which remote repository you have cloned, run the following terminal command from the project folder:
git remote -vIf the link shown is the same as the main Ironhack repository, you will need to fork the repository to your GitHub account first, and then clone your fork to your local machine to be able to push the changes.
Note: You may want to make a copy of the code you have locally, to avoid losing it in the process.