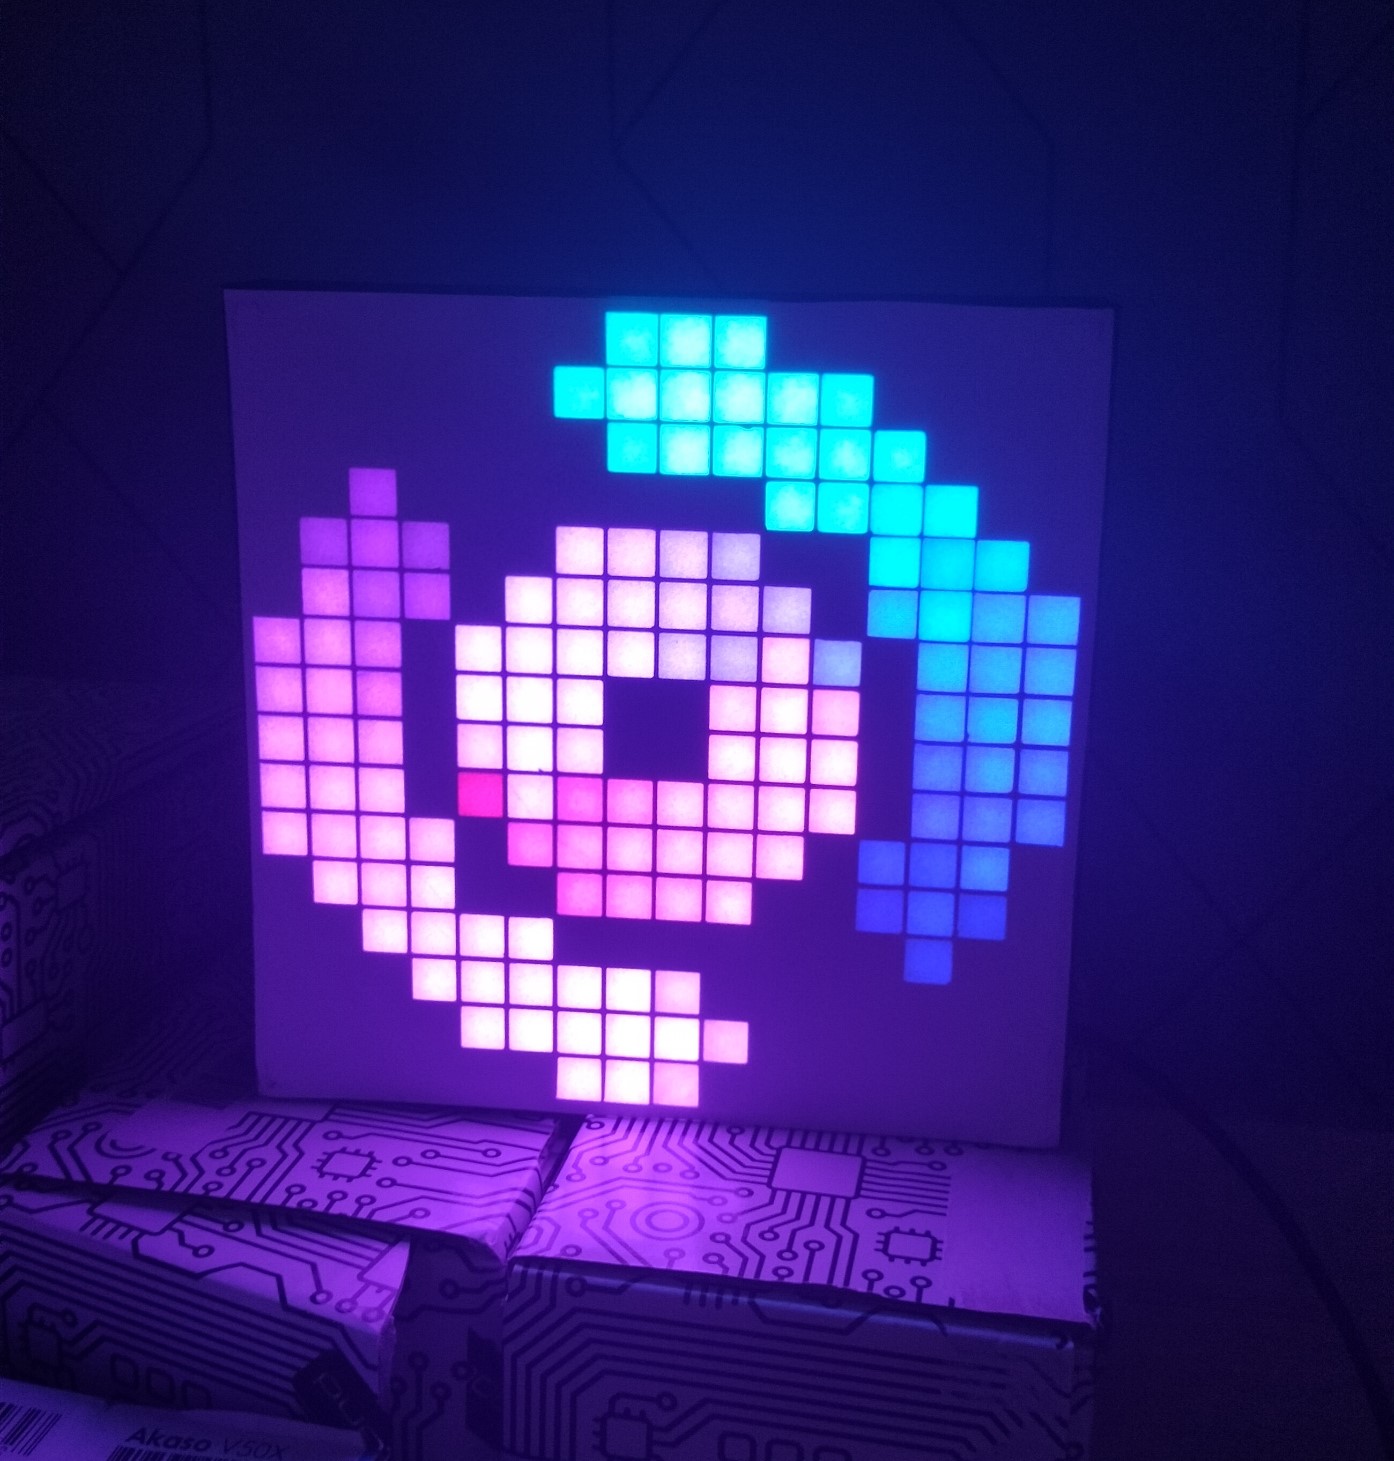
16x16 WS2812B matrix display controlled via Wi-Fi TCP socket with a Raspberry Pi Pico W. This project is my passion project but it also puts emphasis on performance and code readabilty in order to serve as a simple example for people learning.
- Both 8 bits per-channel mode and 4 bits per-channel mode for lowering network usage and decreasing delay.
- TCP used instead of HTTP for additional performance.
- Seamless handling of client<->server connect / disconnect.
- Readable code that can easily be used for learning purposes.
- Images, Image sequences and GIFs can be stored in flash memory and played back offline with no interruptions.
Any controller that uses TCP sockets and conforms to the Packet Format and the Data Protocol sections below will be compatible with the display.
Take a look at the working example of a compatible controller
The display receives packets through a TCP socket open on port 4242 by deafault. (It can be changed)
- Controller sends a valid packet (look at Packet Format) to the Pico W
- Controller waits for a response from the Pico W
- If the response reads exactly
"ACK", then the whole packet was sent and received succesfully.
After reading the correct response, the next packet can be sent immediately.
Take a look at the packet.hpp file to see all packet types. Mind the default C/C++ struct alignment.
The first byte (uint8_t) of a received packet is always the data_type field. Each packet type has its own unique data type.
RGB data is expected to be in the row-major order with (x:0, y:0) being the lower-left corner:
...       , ...       , ...
(x:0; y:2), (x:1; y:2), ...
(x:0; y:1), (x:1, y:1), ...
(x:0; y:0), (x:1, y:0), ...
8bpp (Full) RGB data layout:
data[0] , data[1] , data[2] , data[...]
RRRRRRRR, GGGGGGGG, BBBBBBBB, ...
4bpp (Half) RGB data layout:
data[0] , data[1] , data[2] , data[...]
RRRRGGGG, BBBBRRRR, GGGGBBBB, ...
The working example of a compatible controller can be found here in this repository
- Native GNU C++ compiler (for example MinGW) that is added to PATH
- ARM GNU Toolchain and the
PICO_TOOLCHAIN_PATHenvironmental variable. - Pico SDK and the
PICO_SDK_PATHenvironmental variable.
Once the prerequisites are satisfied, run the following command:
mkdir build
cd build

cmake -G "MinGW Makefiles" ..
make (ming32-make on Windows)
And copy the built .uf2 file to your Pico's Mass Storage
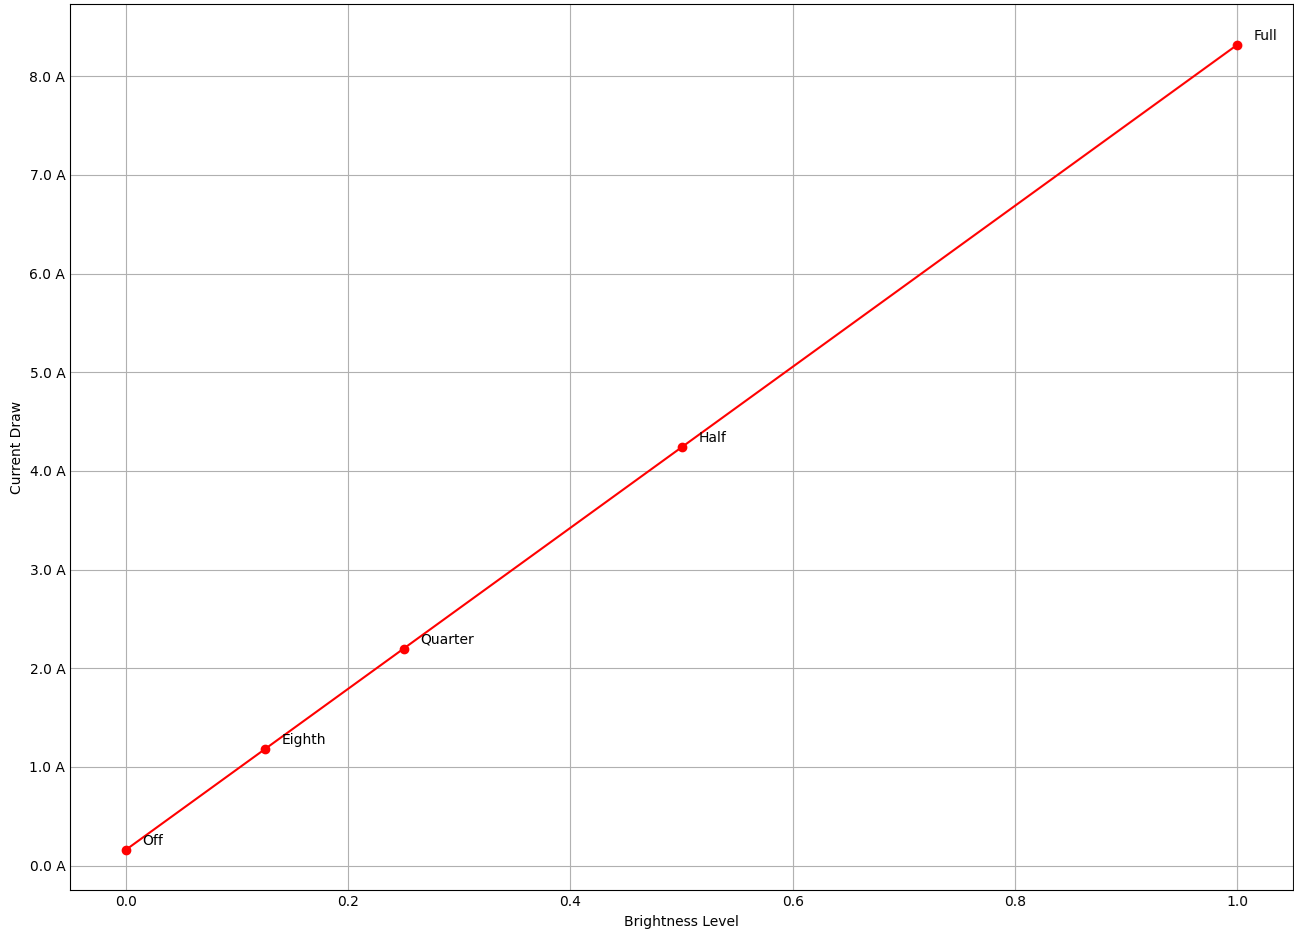
Please double-check if your power supply can safely provide enough current at 5V. Note that not every WS2812B draws the same amount of current.
Current draw was measured only at 0%, 12.5% and 25% brightness with the whole display set to RGB(255, 255, 255). Higher values were calculated by extrapolatating the measurements.
- 16x16 WS2812B RGB LED Matrix
- Raspberry Pi Pico W
- Short Breadboard
- 3 Male-Male Jumper Wires (or any other way to connect WS2812B to the Pico)
- DC 5,5x2,1mm socket with quick connection
- A piece of white paper or thin plastic that works well as a light diffuser
- 3D printed frame and grid (both .stl files are in the
3dprintsdirectory)
- Put the WS2812B in between the printed
Frame.stland the printedGrid.stlso that it fits nicely - Glue
Frame.stlandGrid.stltogether - Glue the light diffuser to
Grid.stlso that it fully covers the LEDs - Stick the breadboard to the matrix's backside - inside
Frame.stl - Insert the DC socket into the dedicated hole and correctly connect the power cables of the LED matrix.
- Put the Raspberry Pi Pico W into the breadboard and correctly connect the jumper wires.
I am not responsible for any physical damage caused by running this code. Use adequate brightness levels and double-check if your power supply can safely provide enough current in order to avoid any unwanted damage. Some WS2812B LED matrices may require more current than others. The TCP server accepts every incoming connection and every packet with no verification so it may potentially pose a threat to your local network's overall security.

