How were 3D triangles drawn by the first PC graphics accelerators in 1997? This was my deep dive into understanding the software algorithms involved in drawing triangles line by line.
This is a software simulation only approach. I do not seek to mimic exact hardware pipelines, command registers, or video memory controller implementations. Draw the pixels to a framebuffer using entirely the CPU to perform the 3D math, and then let whatever GPU take that framebuffer and display it in a window.
The point here was to understand what the digital logic on a low-end PC level 3D Graphics Accelerator was doing in that time period based on the Silicon Graphics hardware rendering pipeline model.
- 3Dfx Voodoo 1 & 2
- NVIDIA RIVA TNT
- S3 ViRGE series
- SGI Ultra 64 RDP
I tried this project once before in the mid 1990s. Back on my first PC with Windows 95 and a ViRGE Graphics Accelerator, I noticed that the DirectX D3D Software Reference Rasterizer on a Pentium 200 was performing on par or often better than the S3 hardware (to put it lightly). The software textured triangles were good looking and more specifically were perspective correct. So, I had direct evidence it was possible.
The books on 3D Graphics at the time felt condescending, always assuming the reader is starting from the beginning, wasting page after page with personal anecdotes, and when finally getting at the meat of the problem would say the most hurtful thing a technical author can say, which is "that is beyond the scope of this book". Me shocked in disbelief as the author then continued with their dated affine mapping and DOS 8086 palletized 256 color VGA. As a result with everything so secret and so poorly described, I basically didn't pursue 3D anything as a career. If I couldn't understand it at the core mathematical level, I didn't want to deal with it.
If someone would have just said to me, the secret to perspective correct texturing is to interpolate 1/Z aross the face of the triangle instead of Z, that would have been enough for me to keep rolling along. I would have naturally figured out with things now expressed "per Z", to interpolate the (U, V) texel coordinates also as U/Z and V/Z.
Instead, it had to be decades later when a random Youtube video suggestion led me to javidx9 "Code-It-Yourself! 3D Graphics Engine" series. To him I am eternally grateful for cutting through the rubbish and explaining things in a straightforward manner. I was once again able to soar, getting to write performant realtime tri-linear mip-mapping, which was the darling technology of the time.
Let's list what has currently been implemented or explored, Final Reality Advanced benchmark style.
| Y/N | 3D graphics options |
|---|---|
| Yes | Texture bi-linear filtering |
| Yes | Z-buffer sorting |
| Yes | Texture mip-mapping |
| Yes | Texture tri-linear mapping |
| Yes | Depth Fog |
| Yes | Specular gouraud |
| Yes | Vertex Alpha |
| Yes | Alpha blending (crossfade) |
| Yes | Additive alpha (lighten) |
| Yes | Multiplicative alpha (darken) |
| Yes | Subpixel accuracy |
| Yes | Z-Fight Bias |
This collection of BASIC programs is written for the QB64 compiler. https://github.com/QB64-Phoenix-Edition/
Be sure to set the option "Output EXE to Source Folder" in the Run menu. This is so that the .exe can find the texture image files.
In the Options menu, set "Compile program with C++ optimization flag", because why wouldn't you want a faster running program?
Also in Options, set "Max C++ Compiler Processes" to the number of your CPU cores, because again why wouldn't you want a quicker compile?
QBASIC was used because of the very quick edit-compile-test iterations. I wanted this exploration to be fun.
A verbose style of naming variables and keeping ideas separated per source code line is used.
Only one .bas file per program instead of hunting around multiple files. Use F2 within the editor to jump to a certain subroutine.
Floating point numbers are used for the sake of understanding. On early 3D accelerators there were many different fixed-point number combinations for the sake of speed and reduced transistor count. But all that bit shifting hinders understanding.
No dropping to assembly or using pokes!
Try to avoid external libraries unless performance is severely hindered and no alternatives exist.
Expand upon the previous program, but do go back to earlier programs to refactor or to consistently name variables.
This table lists the rough order in which the programs were written. The programs features get more complicated further down the list.
- VertexColorCube.bas
- As basic as it gets.
- TexturedCubePlains.bas
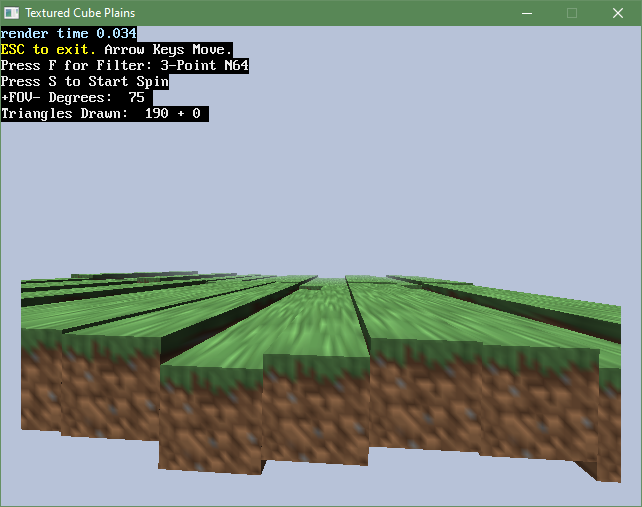
- Fly over and spin a grass plane and also adjust Field of View.
- DitherColorCube.bas
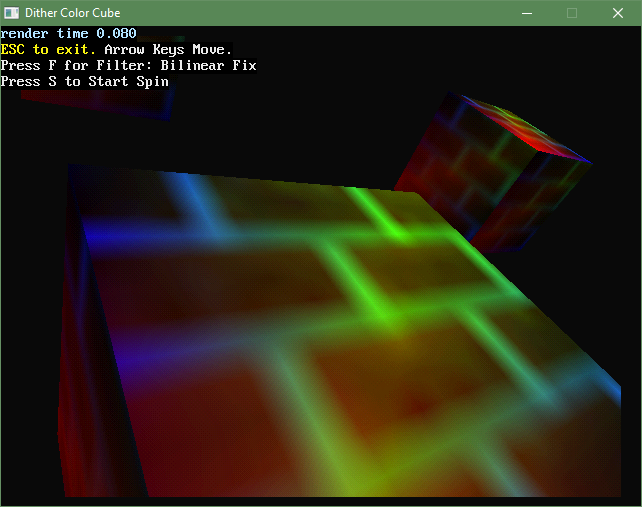
- Colorful RGB 555 Bayer Dithering example.
- TextureZFightDonut.bas
- Z Fight Bias adjustment and interesting table fog (pixel fog) effect.
- SkyboxLongTube.bas
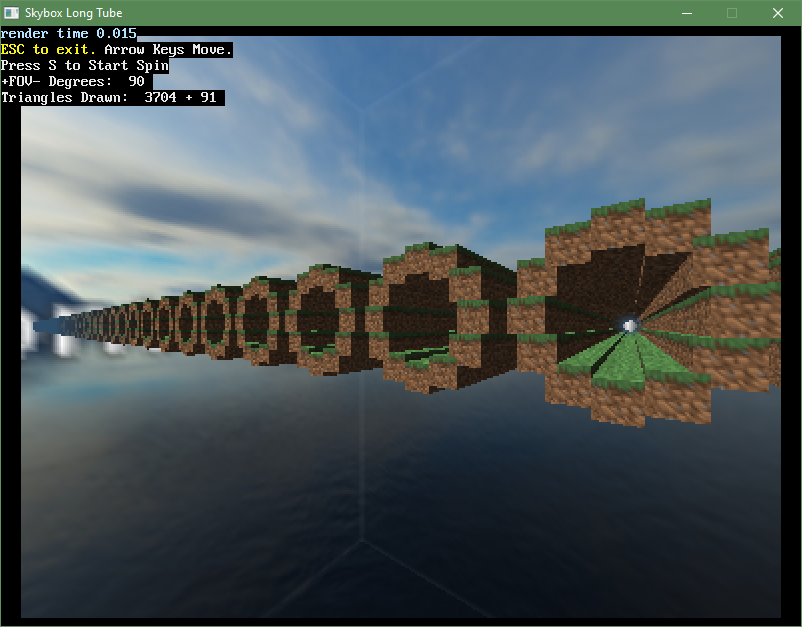
- Skybox background, near plane clipping, and major drawing speed increase.
- VertexAlphaDitherColorCube.bas
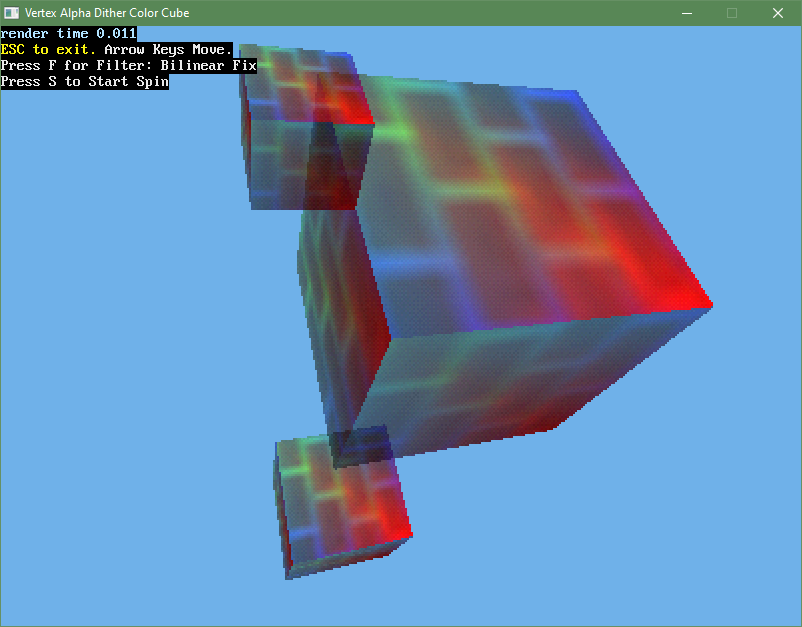
- Back to the Cube for testing Alpha Transparency.
- ColorCubeAffine.bas
- Easily toggle Affine versus Perspective Correct triangle rendering.
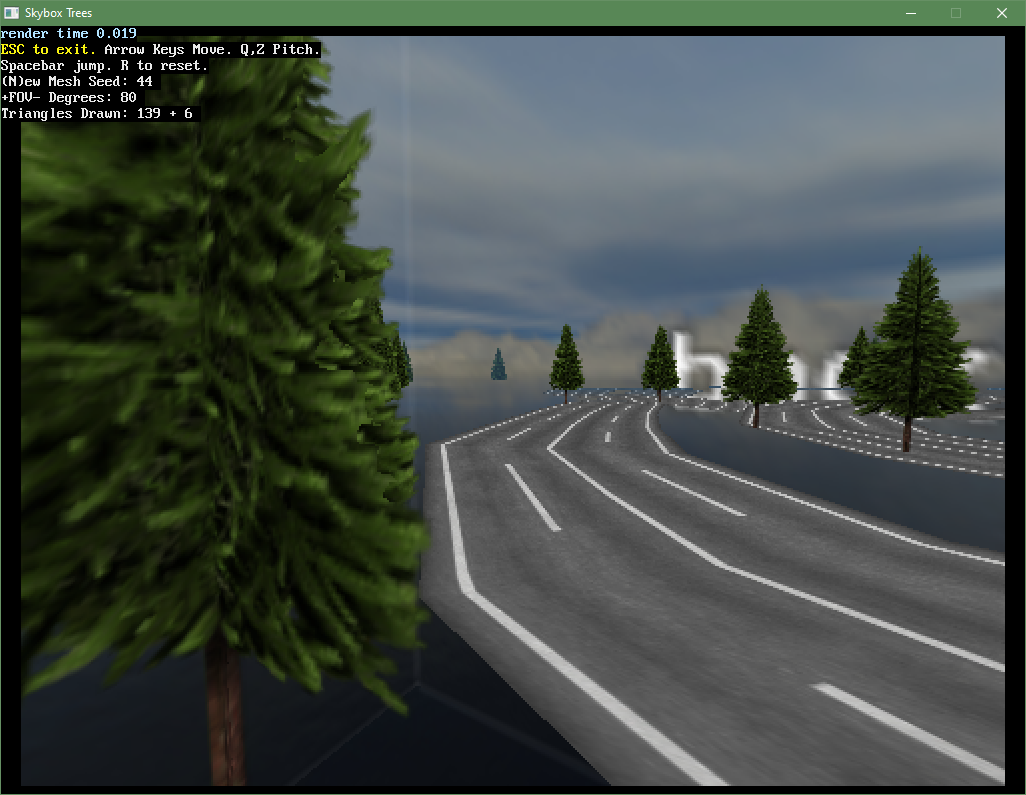
- SkyboxTrees.bas
- Procedural Road and Tree drawing. Allows Camera Pitch.
- TwinTextureTriangles.bas
- TwiN Texturing (TNT). Orange lights circling above the road.
- IsotropicMipmapRoad.bas
- Integer Level of Detail (LOD) calculation selects which size road texture to draw.
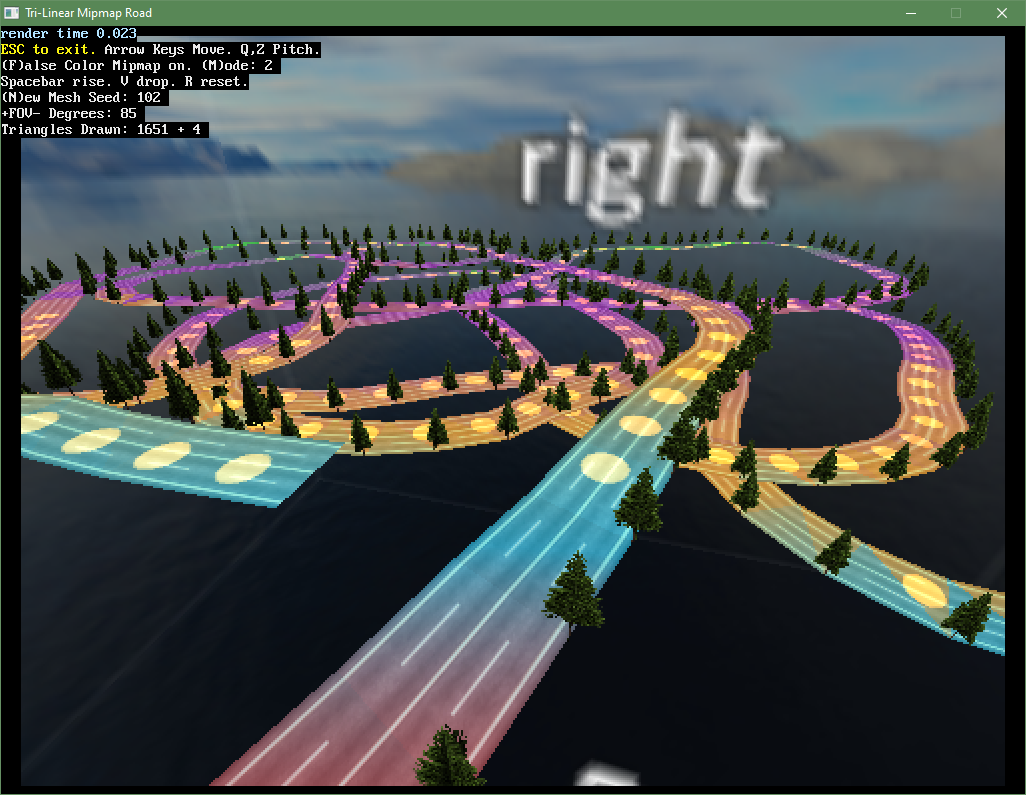
- TrilinearMipmapRoad.bas
- The final boss. Realtime blend between two mipmap textures based on LOD fraction.
- TrilinearMipmapFences.bas
- An alpha-blended, alpha-masked, mipmapped fence to go alongside the road.
- TrilinearVariants.bas
- Adds a moving sun light source to the road and fence scene, and you can switch between 5 or 8 point TLMMI
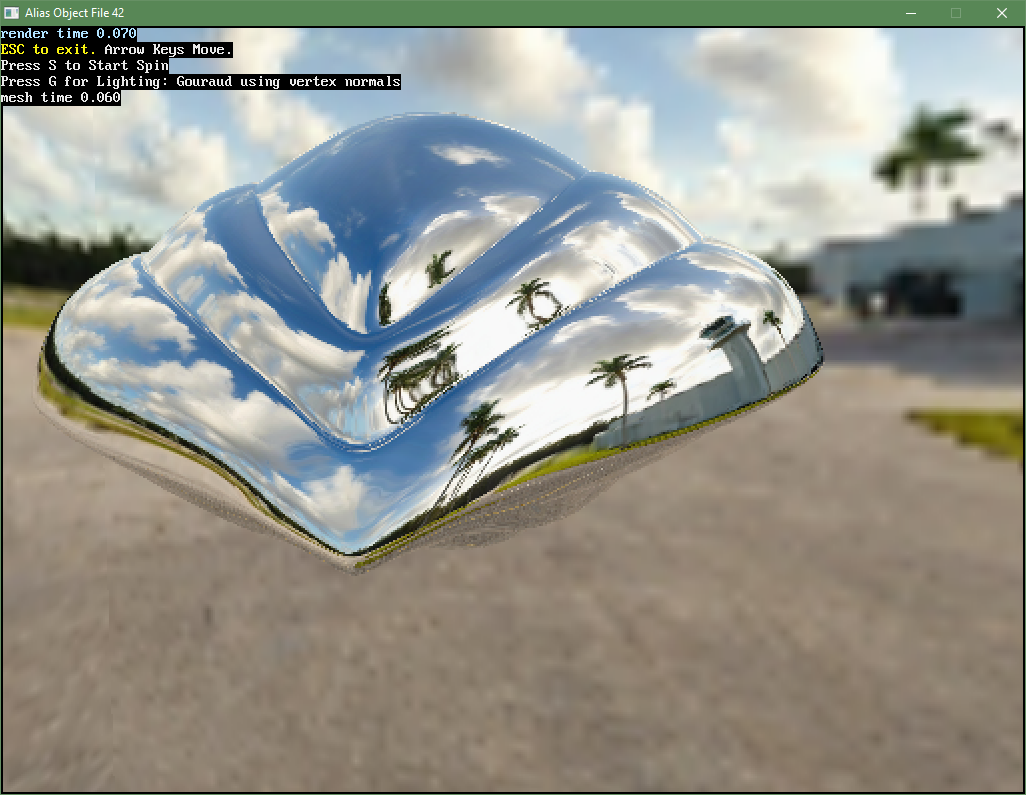
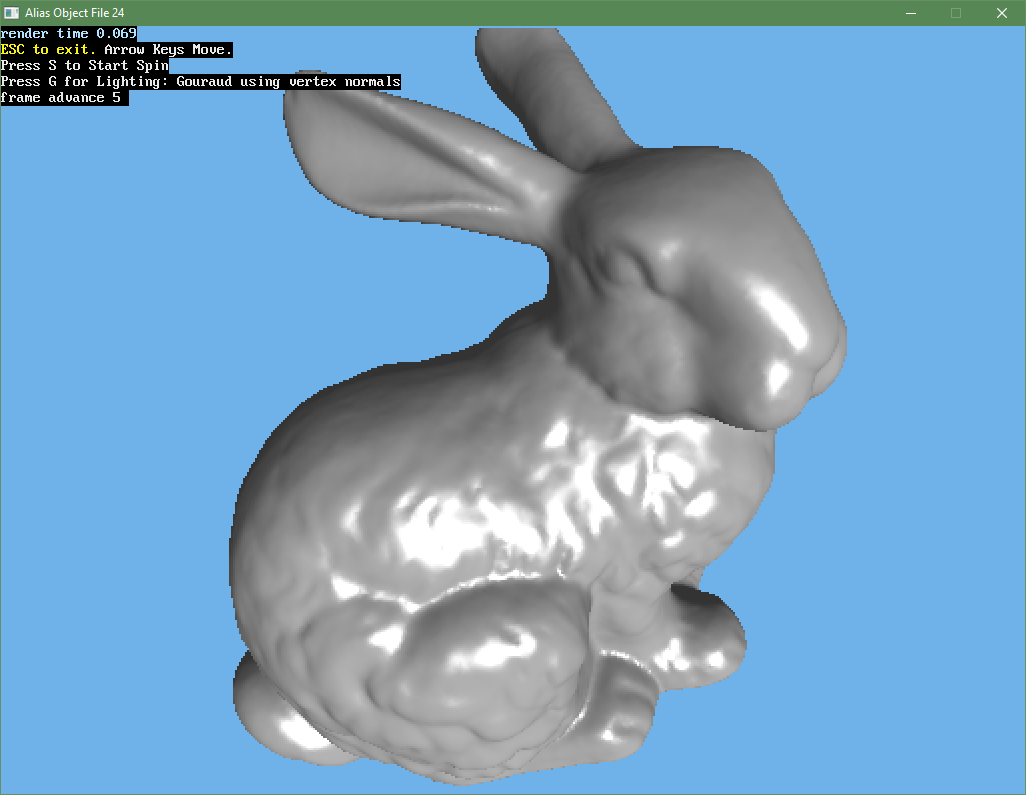
- AliasObjFile.bas
- Loads .obj files and draws them with Gouraud shading (ambient, diffuse, and specular vertex lighting).
The triangles are specified by vertexes A, B, and C. They are sorted by the triangle drawing subroutine so that A is always on top and C is always on the bottom. That still leaves two categories where the knee at B faces left or right. The triangle drawing subroutine also adjusts for this so that pixels are drawn from left to right.
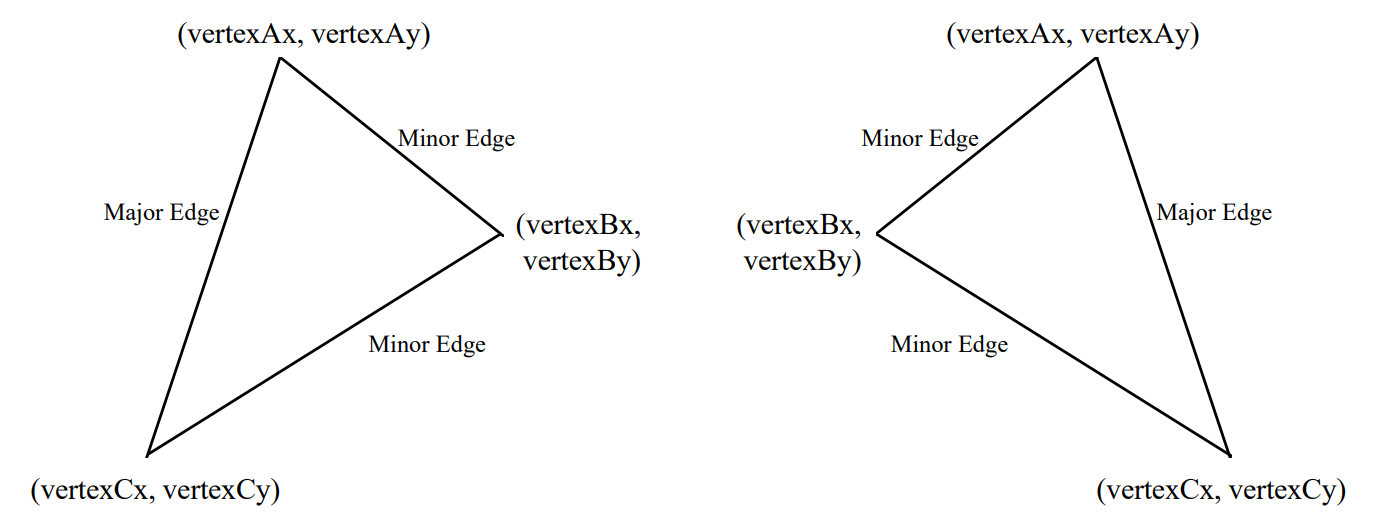
DDA (Digital Difference Analyzer) is a complicated name for a simple concept. Count from a start value to an end value by steps of 1. And then set up additional counter(s) that change in value along with those steps.
Simplified example:
X1_start = 8.0 'minor edge
X1_step = -0.5

X2_start = 6.0 'major edge
X2_step = 0.25

X1_acc = X1_start
X2_acc = X2_start
For Y = 1 to 10
  plot(Y, X1_acc, X2_acc)
  X1_acc = X1_acc + X1_step
  X2_acc = X2_acc + X2_step
Next Y
The DDA algorithm is used to simultaneously step on whole number Y increments from vertex Ax to vertex Cx on the major edge, and from vertex Ax to vertex Bx on the minor edge. When the Minor Edge DDA reaches vertex By, the minor edge start values and steps are recalculated to be from vertex Bx to vertex Cx. This process is often termed "edge walking". Note that for a flat-topped triangle where vertex By = vertex Ay, the minor edge recalculation is performed immediately.
Horizontal spans of pixels are drawn from Major edge X to Minor edge X-1. This process of writing to sequential memory addresses can be performed at the maximum speed of the video memory with a very efficient hardware-assisted pixel pipeline. The purpose of drawing up to but not including Minor edge X has to do with overdraw. Two triangles sharing two vertexes will have the pixels of the shared edge redrawn, wasting cycles. This is in fact so commonly encountered when drawing meshes, it has the term "rounding rule". The rounding rule for this rasterizer is to skip the rightmost and bottom pixels.
Please see the program in the Concepts folder titled TwoTriangles.bas for a concise example of how DDA is used to draw textured triangles.
DDA was used because not all math operations complete in the same amount of time. In this case we are comparing repeated additions to an accumulator, versus multiply then divide operations. Addition requires significantly less circuitry than division. Division also requires multiple clocks whereas addition can complete in one clock. Multiplication is somewhere inbetween, but any multiplication that can be avoided helps speed.
In other words, dividing (deltax / deltay) once before a loop to determine a step value and then adding that step value, is going to be faster than multiplying and dividing at every single step within the loop.
Sneakily, many of the earliest PC graphics accelerators left the division calculation up the main system CPU as part of the driver library. The driver then fed these DDA values over to the Graphics Accelerator in a large block move.
vertexAy is a floating point value but pixels are evenly spaced at integers. It is not okay to just round vertex coordinates to the nearest screen pixel integer, as in motion this causes vertex wobbling and unsightly seams between adjacent triangles.
The start value of Y at vertex A is pre-stepped ahead to the next highest integer pixel row using the ceiling (round up) function. This prestep of Y also factors in the clipping window so that the DDA accumulators are correctly advanced to the top row of the clipping region. To ensure that the sampling is visually correct, the X major, X minor, and vertex attributes (U, V, R, G, B, etc.) are also pre-stepped forward by the same Y delta using linear interpolation. This also holds true for the start of each horizontal span. The starting X is also rounded up to the next integer. The span attribute's starting X values are also interpolated ahead using the amount by which X was rounded up.
Gouraud shading offers a visual improvement as compared to flat shading (flat as in the entire triangle having one same color). Gouraud is very fast, but it does not factor in depth. This can make for odd results under close scrutiny.
As mentioned above, each triangle vertex can have attributes. For example it is common to assign Red, Green, Blue primary color components to each of the 3 vertexes. DDA can be used to smoothly transition the color across the face of the triangle.
To try to explain this in the most simple way, it is calculated this way: Starting at vertex A, how much does the red color channel change when moving one pixel down? How much does red change when moving one pixel to the right? Repeat the calculations for green and blue channels respectively. Use these six values of delta Red per delta Y, delta Red per delta X, delta Green per delta Y, etc. when drawing the triangle to affect the final color. For example the RGB values could be used directly for a non-textured colored triangle, or added to a color sampled from a texture, or multiplied with the texture color, or many other combinations.
Projection is division. In order to project a 3D point (X, Y, Z) onto a 2D screen (X, Y) a division by Z is required: (X / Z, Y / Z). As Z becomes larger, the closer the projected point gets to the origin (X=0, Y=0). In art this is called the vanishing point. As an object gets further away in Z distance, it appears to shrink in size and approach the vanishing point.
The vanishing point is usually centered on the display screen. Doesn't have to be, but usually. So half the screen width is added to X, and half the screen height is added to Y. Otherwise you'd see 1/4 of the image you expected to see with the origin at the top left of the screen.
If for example we had a 16x16 texture (16 dots wide by 16 dots tall flat surface), after moving it somewhere in 3D space, we could forward project each of the 256 dots (X, Y, Z) coordinates using the projection equation:
 SX = D * X / Z + CX
 SY = D * Y / Z + CY
 'note: D is a constant that represents the field of view
 '      and (CX, CY) is the center of the screen.
This definitely does work. But what ends up happening is with increasing Z distance, there will be many overlapping pixels. A pixel is drawn, and then most likely immediately overwrote.
Zooming in poses another problem. Viewed up close with low Z values, there will be gaps between those dots. This is solvable, and filling those diamonds in is something clever the 3DO console does.
But ultimately foward projection is an evolutionary dead end along with all other quad hardware.
The purpose of inverse projection is to visit each screen pixel within a triangle exactly once, casting a ray straight back to determine where it hits the texture, to determine the color of the pixel.
This gets rid of the overdraw problem, but introduces a new challenge. There is no way around needing to unproject at each and every pixel. As in requiring expensive divisions.
To get the terminology clear, a "screen" is the two dimensional pixel grid that comprises what you see on your monitor. So the projection equation takes a 3D point and places it on the 2D screen.
Projection into screen space is non-linear. So it is not correct to give equal step changes to the Z depth when traversing from projected vertex to vertex of the triangle in screen space.
Division is expensive. The best we can do is use 1 / Z. The Inverse of Z has a special symbol: W.
W = 1 / Z
Two multiplications by an inverse are already swifter than two divisions.
This gets a little bit abstract at this point, but would you agree that Z = 1 / 1 / Z ?
As in if we take the inverse of an inverse of a number, we get the same number back?
How about expressing this as Z = 1 / W, having previously calculated W = 1 / Z?
So to regain the depth Z, the inverse of the depth W can be taken.
But the point here is that W is linear when interpolating depth from vertex to vertex on the projected triangle.
At some point back in the 20th century, someone mathing around had a eureka moment to express the vertex attributes per units of Z. For example, divide the blueness of VertexA and VertexB both by Z, then linearly interpolate, and then undo the "over Z" to get the blue value back. This gets beyond the visually incorrect but very fast Gouraud shading.
Or more seriously, this insight led to dividing the U and V texel coordinates each by Z before starting the drawing loops. Then using linear interpolation of 1/Z across the triangle face. And then finally multiplying U * Z and V * Z at each pixel to recover the true texel coordinate pair to sample.
 ' unoptimized
 OoZ = 1 / depth Z
 UoZ = U texel horizontal attribute / depth Z
 VoZ = V texel vertical attribute / depth Z

 ' optimized
 OoZ = 1 / depth Z  ' also known as W
 UoZ = U texel horizontal attribute * OoZ
 VoZ = V texel vertical attribute * OoZ
Dividing the vertex attributes by Z makes it possible to then use DDA to achieve correct perspective projection when stepping from one pixel to the next.
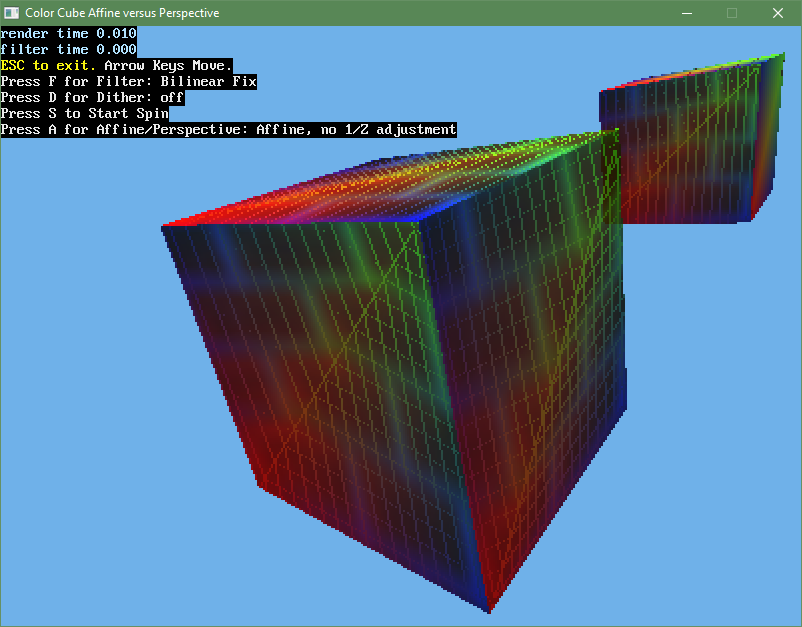
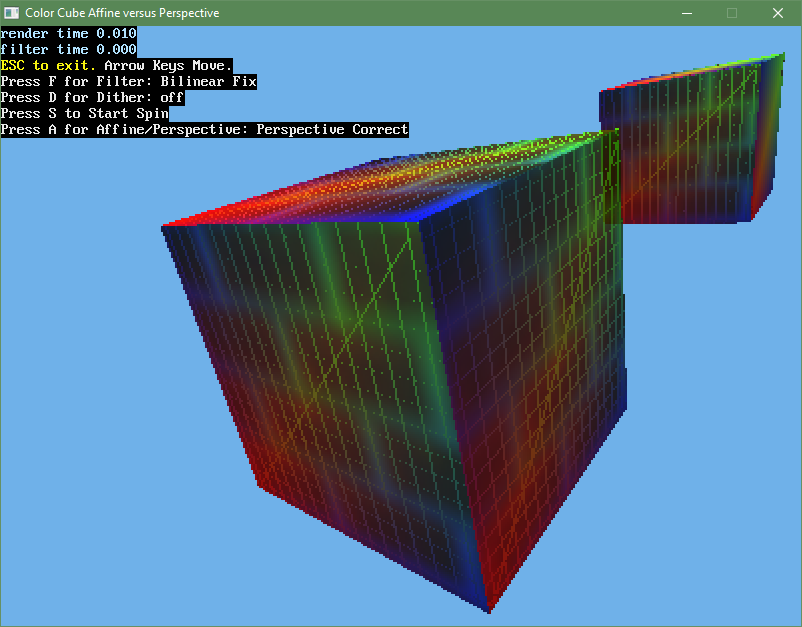
The program called ColorCubeAffine.bas allows you to easily flip between Affine and Perspective Correct rendering. Please review the code comments in the two locations where the small difference is made depending on the value of Affine_Only. The first location is where the vertex attributes are loaded in the main triangle drawing loop. The second location is where the pixel color value is determined in subroutine TexturedVertexColorAlphaTriangle().
| Affine | Perspective |
|---|---|
 |
 |
Being willing to dedicate huge amounts of silicon real estate to perform this 1 / 1 / Z algorithm is what separated true perspective projection graphics acceleration hardware from the more primitive affine transformation hardware.
Division is expensive, but overdraw of a pixel is ever so more. Division by Z can be optimized by multiplying by the inverse of Z instead. The visual benefits outweigh the costs and this is why reverse projection won.
For this discussion, I am asserting that an object moving forward from the viewer increases in +Z distance. Note this can differ in well-known graphics libraries.
Projecting and rendering what is behind the camera (-Z) makes no sense perceptually. Although it might be mathematically correct for surfaces to invert that pass the Z=0 camera plane, we do not have double-sided eyeballs that are able to simultaneously project light onto both sides of our retinas. So we need to handle this limited field of view while rendering.
We have 3 options:
- Constrain movement so that any Z coordinate can never be less than the near frustrum plane Z value.
- Do not draw (as in cull) the triangle if any Z is less than the near frustum plane Z value.
- Clip the triangle so that its Z coordinates remain at least at the near frustum.
I would say the options follow a natural progression, where many programmers give up before reaching option 3.
With option 3, we are fortunate with front clipping because the near frustum plane is always parallel to the rendering screen surface (with traditional single-point projection). This reduces the required math down from a 3D vector intersecting a 3D plane, to a 2D line intersecting a 1D plane.
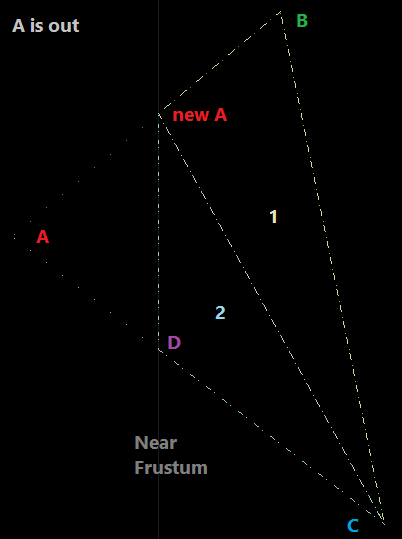
We are also in a sense unlucky in trying to just draw triangles. If one Z value (of 3) needs to be clipped, this creates a 4 point "quadrangle". We need to tesselate to create 2 triangles out of this quadrangle.
Imagine hammering 3 nails partially into a board. The nails representing the vertexes of the triangle. Then proceed to wrap a string around the outline of these nails. You have 2 ways of winding: clockwise or counter-clockwise. Preserving winding order preserves which side of the tesselated triangle is facing the viewer.
Setting some ground rules can make this clipping process less painful. In this codebase, two triangles share a side (vertex A and vertex C). Triangles wind in the following order:
Triangle 1: A to B, B to C, C to A
Triangle 2: A to C, C to D, D to A
The near clipping function returns the number of triangles (n = 0, 1, or 2) after clipping.
-
n = 0: The input triangle is culled (not drawn).
-
n = 1: Do not need Triangle 2, so do not update vertex D but do update vertexes A, B, and C.
-
n = 2: Cautiously update vertex D along with vertexes A, B, and C. Preserve "winding order".
The test program that was used to develop and debug the NearClip function is available in the Concepts folder. Program NearFrustumClipTriangleAttributes.bas rotates and clips a single triangle, while animating the winding order as crawling dots.
Imagine ink bleeding through paper so that both sides have ink on them. The printed side is the front face, and the opposite bled-through side is the back face. Seeing both sides is sometimes desirable, like for a leaf. But with closed solid objects made of multiple triangles, it is more efficient to not draw the back-facing triangles because they will never be seen.
The winding order of the triangle's vertexes determines which side is the front face. The sign (positive or negative) of the triangle's surface normal as compared to a normalized ray extending out from the viewer (using the dot product) can determine which side of the triangle is facing the viewer.
If the triangle were to be viewed perfectly edge-on to have a dot product value of 0, it is also invisible because it is infinitely thin. So then not drawing the triangle if this value is less than or equal to 0.0 accomplishes backface culling.
The following texel filters are selectable in the examples that showcase them:
| ID | Name | Description |
|---|---|---|
| 0 | Nearest | Blocky sampling of a single texture point. |
| 1 | 3-Point N64 | A distinct hexagonal look using Barycentric (area) math. |
| 2 | Bilinear Fix | Blurry 4-point sampling, with some speed-up tricks. |
| 3 | Bilinear Float | The standard blurry 4-point sampling written without tricks. |
I have always wondered about the "rupee" 3-Point interpolation of the N64. Its creator calls it triangle (triangular?) texture sampling. An optimized version can be seen in the function ReadTexel3Point().
I hope to be able to describe the math behind it clearly.
When a rendered triangle is drawn larger than the size of the texture, the texture is sampled in-between the texels to magnify it more smoothly.
If each of the dots of a texture are considered to be at whole number intervals, then the space between two adjacent texels is some fractional number. The fractional U and V coordinates vary from 0 to 0.999....
Fractional_U = U - floor(U)
Fractional_V = V - floor(V)
When we desire to interpolate on 2 axes for the U and V coordinates it would seem we need a square. We would need to interpolate somewhere inbetween the the 4 corners.
| (U, V) | (U+1, V) |
|---|---|
| (U, V+1) | (U+1, V+1) |
But what if we cut the square diagnonally in half, forming two triangles that share a hypotenuse? Now there are only 3 texels to interpolate between.
Independent of which half is used, two sampling coordinates will stay the same. But for the third point, it must be determined what triangle "half" an interior point is in. Which of the two possible ways the triangles are divided requires an algorith for determining which sample is chosen. This can be done by:
- IF Fractional_U + Fractional_V > 1.0 THEN ...Bottom Right... ELSE ...Top Left...
- IF Fractional_U > Fractional_V THEN ...Top Right... ELSE ...Bottom Left...
Now for the blending between these three points. It is entirely possible to use the general case Barycentric math formula. It would be used to find out the 3 subdivided areas of any given point within the interior of these 3 vertexes. And then sum the ratios (weights) of the 3 areas multiplied by the color at each of the opposing vertexes arrives at the correct blended color. But to do that would require more math steps than bilinear interpolation. That is clearly not what is going on in the N64 hardware if the entire intention was cost reduction.
Consider the following truths about this Barycentric triangle:
- The lengths of the legs of the outer triangle are exactly 1.0
- The outer triangle is always a right triangle.
- The area of the outer triangle is 0.5 always. (1/2 * base * height).
- Two of the three interior subdivided triangles can be easily decomposed into a sum of two right triangles.
- Two of the three interior subdivided triangles have one leg that is exactly 1.0 in length.
- The area of the more difficult subdivided triangle can instead be determined by subtraction from the total area 0.5
The big leap in understanding is that twice the area of a right-triangle is a rectangle. If the total area of the triangle is 0.5, conceptually the area of a square is 1.0. Removing the 1/2 constant in the process of determining the areas is one less operation step. Doing that allows the fractional U or fractional V coordinate to be used directly as the area.
Area = 2 * 1/2 * 1.0 * Fractional_U is just Fractional_U.
So it ends up being 3 area multiplications per color component. For RGB, that is just 9 total multiplications.
More tricks for speed even with bilinear.
The straightforward approach is to use weights to tug at the four corners of a unit square. For RGB, this requires 15 multiplications:
Given packed RGB values T1_uv_0_0, T1_uv_1_0, T1_uv_0_1, T1_uv_1_1; and texel coordinate (cm5, rm5):
Frac_cc1 = cm5 - Int(cm5)
Frac_rr1 = rm5 - Int(rm5)

weight_11 = Frac_cc1 * Frac_rr1
weight_10 = Frac_cc1 * (1.0 - Frac_rr1)
weight_01 = (1.0 - Frac_cc1) * Frac_rr1
weight_00 = 1.0 - (weight_11 + weight_10 + weight_01)

r1 = Int(_Red32(T1_uv_0_0)   * weight_00 + _Red32(T1_uv_1_0)   * weight_10 + _Red32(T1_uv_0_1)   * weight_01 + _Red32(T1_uv_1_1)   * weight_11)
g1 = Int(_Green32(T1_uv_0_0) * weight_00 + _Green32(T1_uv_1_0) * weight_10 + _Green32(T1_uv_0_1) * weight_01 + _Green32(T1_uv_1_1) * weight_11)
b1 = Int(_Blue32(T1_uv_0_0)  * weight_00 + _Blue32(T1_uv_1_0)  * weight_10 + _Blue32(T1_uv_0_1)  * weight_01 + _Blue32(T1_uv_1_1)  * weight_11)
Flip a captital H on its side to envision the strategy. Interpolate between points (0, 0) and (1, 0) for the first row. Also Interpolate between points (0, 1) and (1, 1) for the second row. Then finally interpolate between the two rows vertically. For RGB, this reduces the required multiplications to 9 when using fixed point integer math and bit shifting.
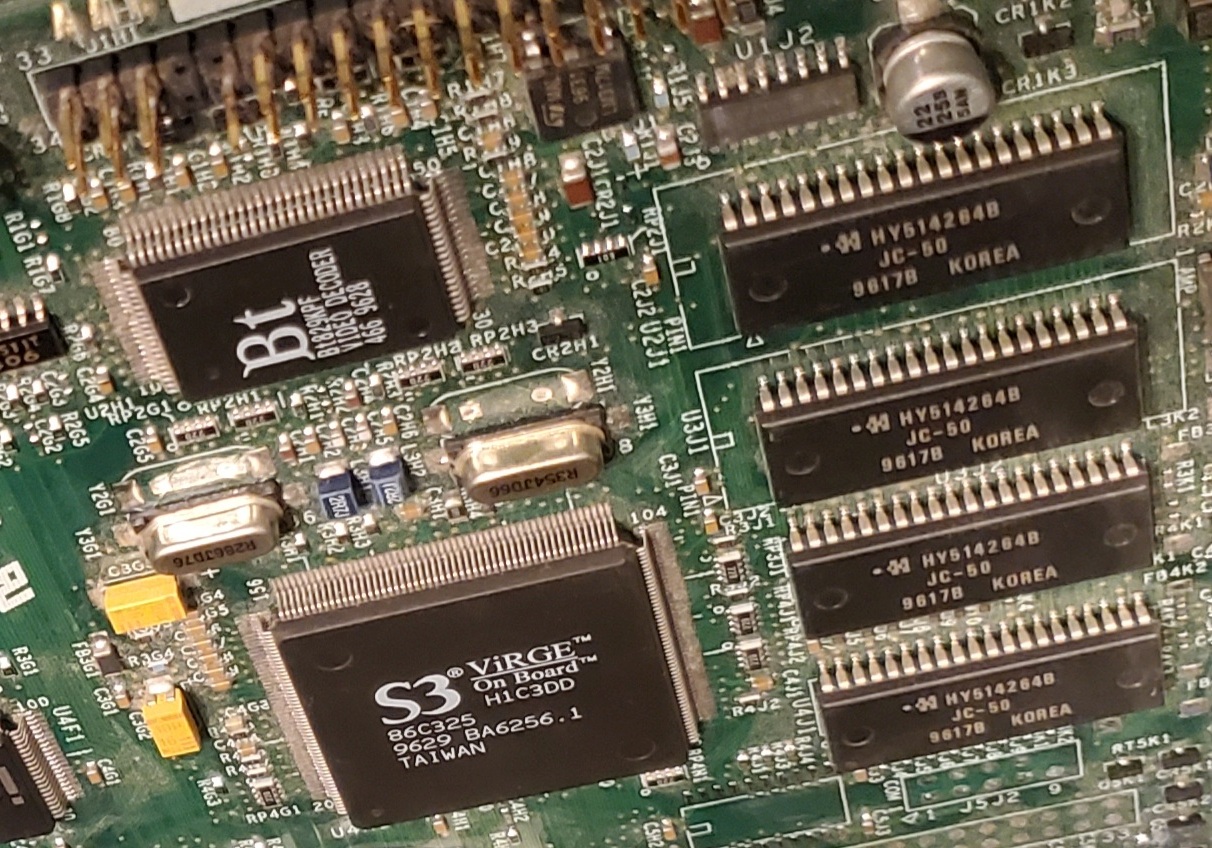
Go take a close look at the circuit board of a 3D graphics accelerator from around 1996 - 2002 searching for the memory chips. You will notice them in groups of 4. This is entirely due to bilinear sampling. The need is to pull four 16-bit texture samples in one read cycle, requiring a 64-bit bus at minimum. The general expectation set by 3dfx became zero-penalty 4-point bilinear texture sampling.
Photo: Each of the four EDO-RAM chips have a 16-bit bus, creating a 64 bit wide bus. The texturing performance issues are more to do with the memory controller and lack of texture cache on the 86C325, because 50 nanoseconds is quite fast for the time.
Nothing is really preventing the U or V texel coordinates from going outside of the range of the sampled texture. The question becomes what to do. And the answer is that it depends on what the artist wants. So it makes sense to give them the option.
- Tile - Texture is regularly repeated. The bitwise AND function is used to keep only the lower significant bits.
- Clamp - Texture coordinates are clamped to the min and max boundaries of the texture.
- Mirror - (uncommon) Texture coordinates fold back symmetrically. For example 2 texels above the maximum, coordinate becomes maximum - 2.
A program named TextureWrapOptions.bas in the Concepts folder was used to develop the Tile versus Clamp options. It draws a 2D visual as the options are changed by pressing number keys on the keyboard.
To arrive at the blended color for a given pixel, Graphics Accelerators made available a linear interpolation circuit in the form of:
Color = (A - B) * C + D
Variables A thru D could be configured from a numbered list of various signal sources, much like how patch cables can be moved around on an audio modular synthesizer. Note that letters A to D here are indexes representing the patch channel. The red, green, and blue components are calculated in parallel. In other words, this takes 6 full adders and 3 multipliers.
Because "A - B" would be too restrictive, some of the indexes for "B" would be "one minus B", so that it was effectively A + B instead. Logically this is an XOR (2's complement NOT inversion) so it's not as if it took many transistors to implement.
Since multi-texturing or alpha blending from a reference texture requires at least two passes of this equation, the SGI Ultra 64 RDP had what they termed "2 cycle mode" to allow the output from the first pass of color blending to be combined with a second pass (at the cost of speed).
The 3dfx Voodoo series has provisions for up to 3 physical TMU chips, allowing the output of of the first TMU to patch into the next TMU.
Boards with only one 3dfx TMU, or for that matter the S3 ViRGE, would need multiple passes over the same triangle implemented in the low-level system driver or library.
The alpha channel is a 4th channel that runs parallel to (but separate from) the red, green, and blue color channels. Alpha has its own configurable texture sampling, interpolation, and blending settings.
Alpha is used to mix the newly calculated foreground pixel color with the existing background color.
Alpha functionality is often overloaded in the sense that there are at least four major concepts: transparency, masking, coverage, and fog.
This represents how much the foreground color shows through the background, by way of linear interpolation. A value of 0 represents the background entirely with no foreground. A value of 1.0 or 255/255 represents the foreground only. When represented as an 8-bit value, there are subtle issues. Using fixed-point multiplication, 255 * 255 = 254. In certain hardware implementations, this means that pixels cannot be completely opaque when using alpha as transparency. In motion this could be undesirable like seeing through the walls.
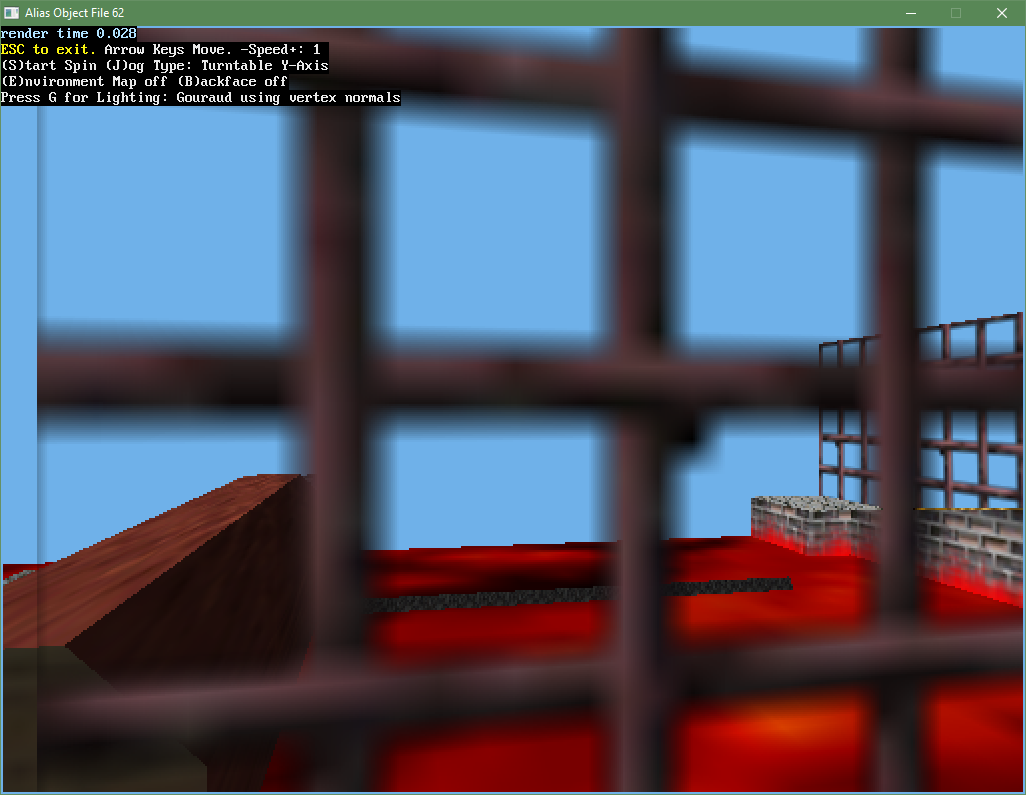
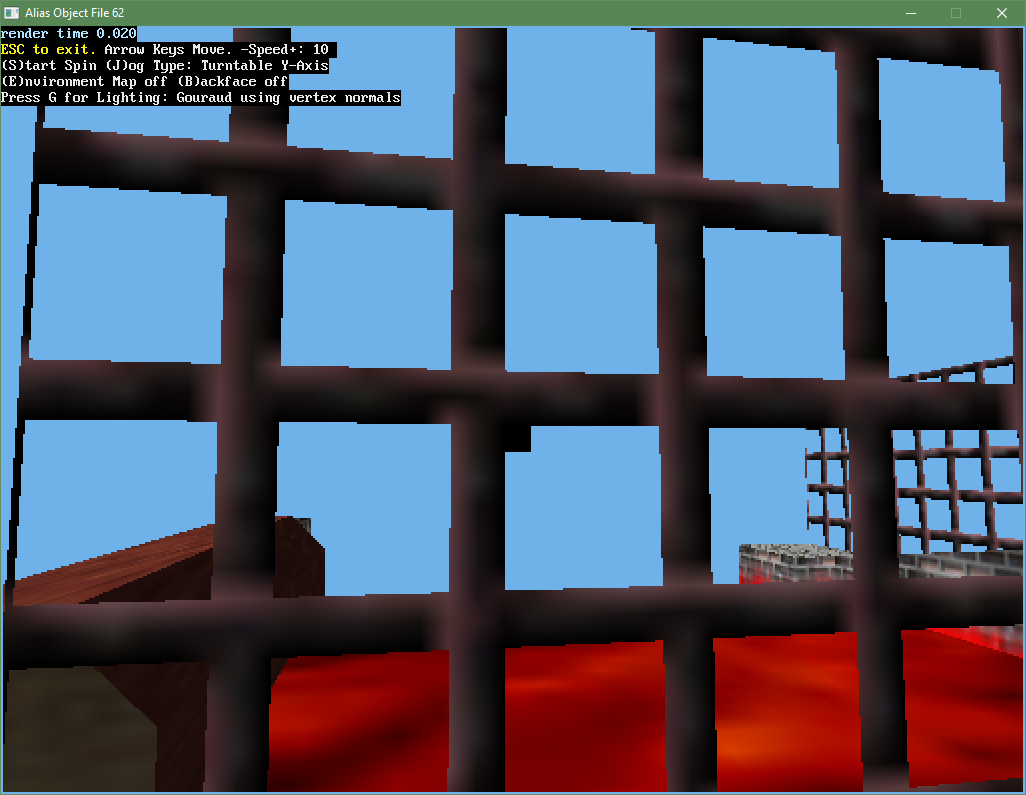
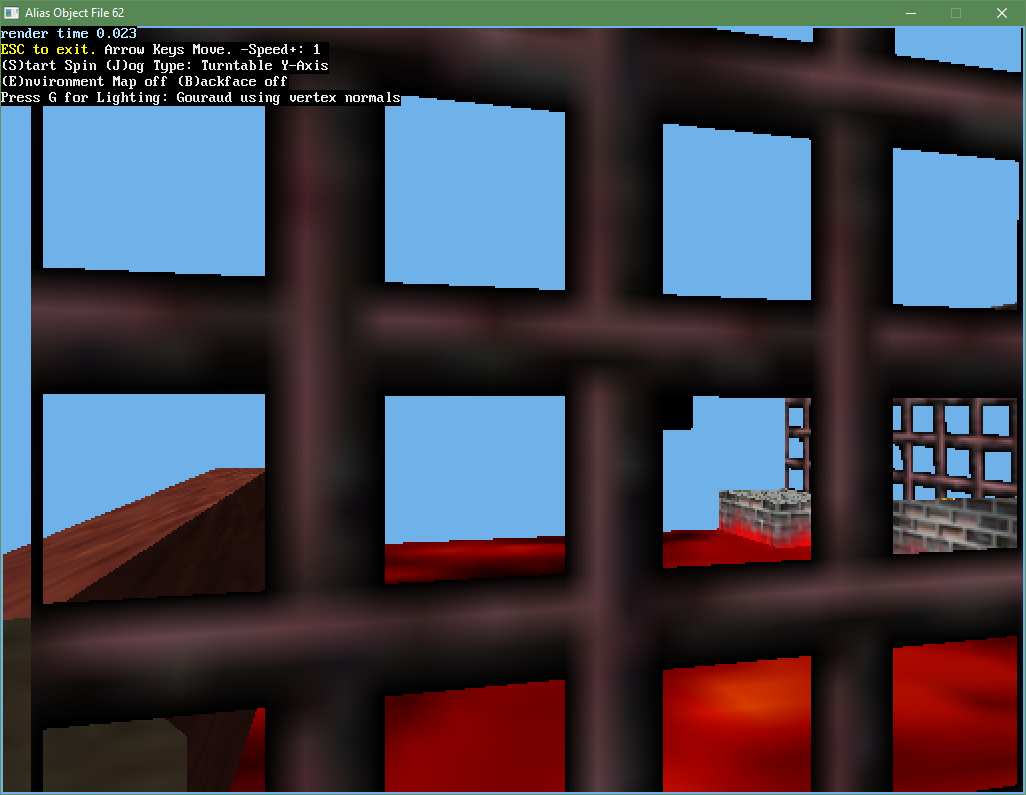
In the case of a fence texture that has both opaque areas and areas intended to be seen through, masking is used. Masking determines the sharpness of the transition at the edges between opaque and transparent texels on a bilinear filtered texture.
Instead of trying to explain in words, lets take 3 examples:
| Soft Edge | Hard Edge | 1-Bit Mask |
|---|---|---|
 |
 |
 |
Optimizaton: If it can be known from the mask that only the existing background color is intended to be seen, processing time can be saved. The read-modify-write of the pixel color and depth can be skipped early.
Anti-aliasing is a technique intended to smooth the otherwise stair-step edges caused by digital sampling. Aliasing (AA) isn't really the right term, but it is what stuck. Subpixel Partial Coverage would be a better term.
Coverage is a representation of how filled in a sampled pixel is. Let's just give an example of what might be seen at one pixel at the curved edge of a circle. The "#" represents the foreground, and the "." represents the background. This has a coverage value of 6 out of a possible value of 16, in what is termed 4 x 4 sub-sampling.
| . | 1/4 X | 2/4 X | 3/4 X | X |
|---|---|---|---|---|
| 1/4 Y | . | . | . | . |
| 2/4 Y | . | . | . | # |
| 3/4 Y | . | . | # | # |
| Y | . | # | # | # |
Coverage = 6 / 16 = 0.375, and this would be the alpha value calculated at this pixel.
When stored in a texture, coverage can go into the alpha channel. It does not necessarily mean the object is partially transparent, just that the pixel wasn't completely filled in where sampled.
So now when drawing the texture onto the screen, curves can be less jagged.
As the look of fog lost its popularity in the marketplace, hardware supported fog disappeared from later models and was pulled back into the alpha channel as an option.
In this mode, the alpha blend value at each triangle vertex is determined by the Z depth. Z depth is calculated, scaled, and offset by the system CPU and sent along as a vertex attribute.
During drawing by the 3D accelerator, vertex alpha is perspective corrected across the face of the triangle and blends between the newly calculated foreground color and the background color. The background can either be a fixed register color (to mimic table fog, explained below) or the existing screen pixel background color (gradually fades away with increasing distance).
The 3D Accelerators started out with a dedicated fog calculation path semi-independent of the alpha channel.
Pixel Fog (Table Fog) is calculated at the end of the pixel color blending process. Fog is usually intended to have objects blend into a fixed background color with increasing distance from the viewer. Fog is just a general term, and could also represent smoke or liquid water, but I think you get the picture. This depth cueing helps make outdoor scenes look more realistic.
It is implemented here as a gradient, where the input color values blend linearly into the fog color for Z values between the fog_near and fog_far variables. If the input Z value is closer than the fog_near value, the input color values are passed through unchanged. At the fog_far Z value and beyond, the input color is replaced with the fog color but yet the Z-Buffer is still updated and the screen pixel is still drawn.
At the time of writing the code, I could not arrive at a rational reason why fog tables existed, so just the linear gradient is implemented here for simplicity sake. For different batches of triangles with different visual rendering requirements, the depths fog_near and fog_far could be adjusted accordingly.
I have since learned that if the W value is used instead of the Z value for distance from the viewer, fog calculation becomes a non-linear function. So a lookup table is required to re-linearize. I have also learned that this so-called table fog was a vendor-specific implementation (3dfx). Although a few competitor chips did mostly achieve equivalency for a short while, table fog was dropped from future models in favor of vertex alpha-channel fog. The reason for that is seeing unsatisfactory or inconsistent results depending on the precision and representation (fixed or floating point) of the depth buffer. A fog table must be recalculated based on the precision of the depth buffer. Applications or games that did not, or could not, have this adjustment programmed in experienced wildly different fog results.
Mipmapping is a solution to the resulting visual noise (aliasing) when rendering a large texture onto a comparatively smaller triangle. High contrast textures fare the worst. For example, imagine the terrible interference patterns a fence texture like |||| would render out to when vanishing off into the distance.
In technical terms, texture sample aliasing occurs when the delta change in texel coordinates between adjacent screen pixels is greater than one. Meaning that entire texture cells are being skipped and not contributing to the color.
M.I.P. stands for multum in parvo. Academics like latin because they must do something with this otherwise useless language they learned. Many in the bundle. Basically you have a stack of 2 or more texture maps you can look at.
A complete mipmap set has each subsequent textures at half the dimension of the one preceding it.
For example, index 0 could be a 64x64 texture, index 1 is then 32x32, index 2 is 16x16, index 3 is 8x8, index 4 is 4x4, index 5 is 2x2, and index 6 is 1x1. Just an example. Indexes don't define the dimensions, just the lineup.
A full mipmap stackup is often referred to as a Pyramid for obvious reasons due to its shape. For a given size base texture, a mipmap Pyramid takes 4/3 more storage memory.
Now with a stack of at least two texture maps (a mipmap), how do you choose which one to use? If you said, distance from the viewer you're on the wrong track.
If we were to display a triangle at the exact 1:1 ratio where one onscreen pixel maps to one texel, LOD = 0. If one pixel maps to the area of 4 texels, LOD = 1. If one pixel maps to 16 texels, LOD = 2. And so on.
So it is more to do with how cleanly a texel maps onto a pixel, than distance. One could have different sized triangles at the same Z distance, with the same texture and same (U,V) vertex attributes, but they would demand different LOD levels.
Think about rendering a certain text character like 'A' in size 8 font and again in size 120 font. You'd want both to look nice and not be pixellated.
It is correct, however, that a given sized triangle will increase its average LOD when travelling further away from the viewer due to perspective projection.
It takes entire articles to explain why, but let's simplify with this recipe:
- We're rendering one pixel (X, Y) on a triangle.
- When looking one pixel to the right (X+1, Y), by how much do the U and V texture sample coordinates change? Use pythagorean distance (delta_U * delta_U + delta_V * delta_V).
- When looking one pixel down (X, Y+1), by how much do the U and V texture sample coordinates change? Use pythagorean distance (delta_U * delta_U + delta_V * delta_V).
- Pick the larger of the two numbers from either step 2 or from step 3. Calculate its square root.
- Now take the base 2 logarithm (LOG2) from step 4. The whole number is the texture index to use. This index is given the special name: Level Of Detail.
- Limit LOD to a reasonable range. Between 0 and 7 is common. If you only have 4 textures, limit it between 0 and 3. Let the programmer configure what min and max are.
- Optional: The fractional portion of step 5 is the interpolation value between two independent samples from texture LOD and texture LOD+1.
To summarize, LOD is the index number of what texture map to use in a set of mipmap textures.
Plug your noise and say it in a really snobby voice: Tri-Linear Mipmap Interpolation (TLMMI).
Using an integer LOD to select only one texture map isn't enough for the highest quality graphics. You actually can see the jump from one texture to the next plain as day, just like you can see the jump from one texel to the next when using nearest point sampling.
Blending is needed. The visually optimal ideal is to straddle two textures with index int(LOD) and int(LOD) + 1.
Recall the bilinear texture sample filter requires 4 texel reads, so double that to get 8 reads per pixel for TLMMI. Unless you had a Voodoo 2 graphics card with two T-REX samplers, this cuts the fill rate by a little over half. And if you have a S3 ViRGE... all I can say is oof.
So in the end, the fractional LOD portion is used in yet another round of interpolation between two bilinear interpolated RGB values, to reach the final pixel color values. Remember your adjectives: mono = 1, bi = 2, tri = 3.
One could use 5 texel reads on the S3 ViRGE instead of 8. It could be configured so that the larger texture gets bilinear sampling, and the smaller texture gets nearest point sampling. And then combine the two to result in a modified tri-linear mipmap interpolation. As for a visual description, it looks fuzzy but still better than the abrupt changes of not having any interpolation.
Examining the road textures by moving the camera around, it becomes blurry rather soon into the distance. This is because the highest value of the 4 possible LOD numbers is determining what reduced size texture to sample.
Nice high-resolution vertical walls or horizontal ground surface textures that occupy the largest portions of texture memory will barely get used when LOD is performed this way.
This realization lead to two innovations not long after the graphics accelerators covered here.
- Lossy data compression can be used on the largest textures. For example store exact values every 4th texel and then some bitfields to shape the interpolation curve between them. A tiny bit more hardware but this could lead to a patent (groan).
- Keep the X and Y LODs separated for a 2 dimensional lookup of the texture. This is called Anisotropic texturing. In our program examples, this would work great for the square road texture because it is often drawn crushed vertically but wide horizontally.
- Unnecessary: Due to memory size limitations, textures weren't very large in this era. A good majority of the time a small texture was being stretched (magnified) onto a larger triangle.
- Temporal Blending: When in motion, the hit and missed texels average out over time. Most interesting 3D games involve exploring a huge world.
- Shimmering: On a hot sunny day, our human visual system already deals well with the shimmering lensing distortion of objects off in the distance caused by heated air currents. Undersampling kind of mimics this.
- Low resolution: NTSC and VGA analog signals have intrinsic blending (low pass filtering). Remember we're talking 320x240 to 640x480 resolutions being upscaled here.
- Performance: Mip mapping is slower than not doing it. It was already a battle between looking nice and frames per second. It was common to be in the 12 to 20 fps range.
A lot of what I researched and discovered cannot be reflected in these program's source. But perhaps you would appreciate some brief random thoughts.
It would have been tough to predict the winning companies in the PC 3D Accelerator era. Consider two approaches that could not have been more different: S3 ViRGE series versus 3dfx Voodoo series.
- S3 had an extremely well-performing and well-priced 2D accelerator Super VGA chip. To ride the wave they decided to tack on a minimalistic 3D triangle edge stepper. Their new 3D chip fit in the same PCB footprint as their earlier 2D only chip. This is the cautious retreat approach. Let's not kill our existing income base on a risky fad that might not ever materialize. Be able to roll back to safe territory when the smoke clears. Did you know the ViRGE series had hardware video playback overlay and NTSC video capture capability that also worked decently well?
- 3dfx started from scratch, and focused their limited engineering resources and transistor budget on just drawing triangles. Starting over with new hardware is usually a horrible idea because there isn't any existing software that works with it. Go big or go home. Their design had to be so blatantly obviously better in a field of competing geniuses. They won on fill rate speed, and speed indeed matters. But what to leave out, what to copy, what to skimp on, and what would waste time and be unused was largely unknowable at the time. I would say they wasted a lot of time and silicon die space on "data swizzling" (mixed big- and little endian swap conversion) features.
In the end, both companies were sold off. But it's how they're remembered and celebrated, either famously or infamously.
Puffery: Did you know that ViRGE stands for Virtual Reality Graphics Engine? Which is complete and utterly laughable P.T. Barnum SUCKER level marketing? Reading the headlined features and benefits claimed in the official datasheet is entertainment alone, compared to how it benchmarks. Truth be told, though, that the ViRGE draws very fast untextured triangles. Textures slow it down (it has no cache), Z-buffer slows it down further, and then TLMMI really slows it to a crawl.
Worthless Patents: Untold time was spent on 16-bit Z-Buffers to cater to stingy manufacturers that wanted minimum viable product. Hey, we noticed RAM is going to be very inexpensive soon, so what is the least amount of onboard RAM required?! Is it really genius to think if you have 80-bit, 64-bit, or 32-bit floating point, that it is possible to have a 16-bit floating point number? But really, is that a good use of resources? By the time the Patent Lawyer's check clears, technology would have just moved on. The value of a company's patent portfolio is more about jumping out from the shadows and saying GOTCHA and hoping the competitor also made the same shortcut.
16-bit doesn't cut it: Basically all of these first-generation 3D accelerator chips internally had 8 bits per color channel, but dithered the final colors into either RGB 555 or RGB 565, thinking we wouldn't notice. For perspective, having a healthy variety of texture color reduction and compression choices to save memory footprint leads to overall more visual variety and better graphical look. But skimping on 3 bits per channel in the final display framebuffer is just being really cheap. This isn't the first time, and it won't be the last time that dithering is used to inflate the number of bits. Well on average it's 8 bits... if you stand far enough back and squint your eyes. And yes a lot of your HDR displays are only 8-bit, twice dithered.
Page 1298 of a bloated Black Book I quote as follows: "Try to imagine any American 17-year-old of your acquaintance inventing backface removal. Try to imagine any teenager you know even using the phrase 'the cross product equations found in any math book'." Well, I was probably 16 at the time I read it, and that stung leaving a permanent scar.
