Made for McCanny Secondary School, Dev by HongCheng Wei ([email protected]).
Currently, OST Helper only supports Windows Platform.
To install OST Helper, download the latest installer from here, double click to run the OST Helper installer. The installer will prompt you where to install. After the installation is complete, open the folder that the program is installed in and double click OST Helper.exe to run OST Helper. There might be a short delay after you double click to run the program, this is normal.
See the previous Release of OST Helper, check here.
OST Helper is a program that helps to create and modify the Ontario Student Transcript (OST) easily.
- OST Helper saves each OST as an json file, which makes storing and transporting OST easily (takes less space).
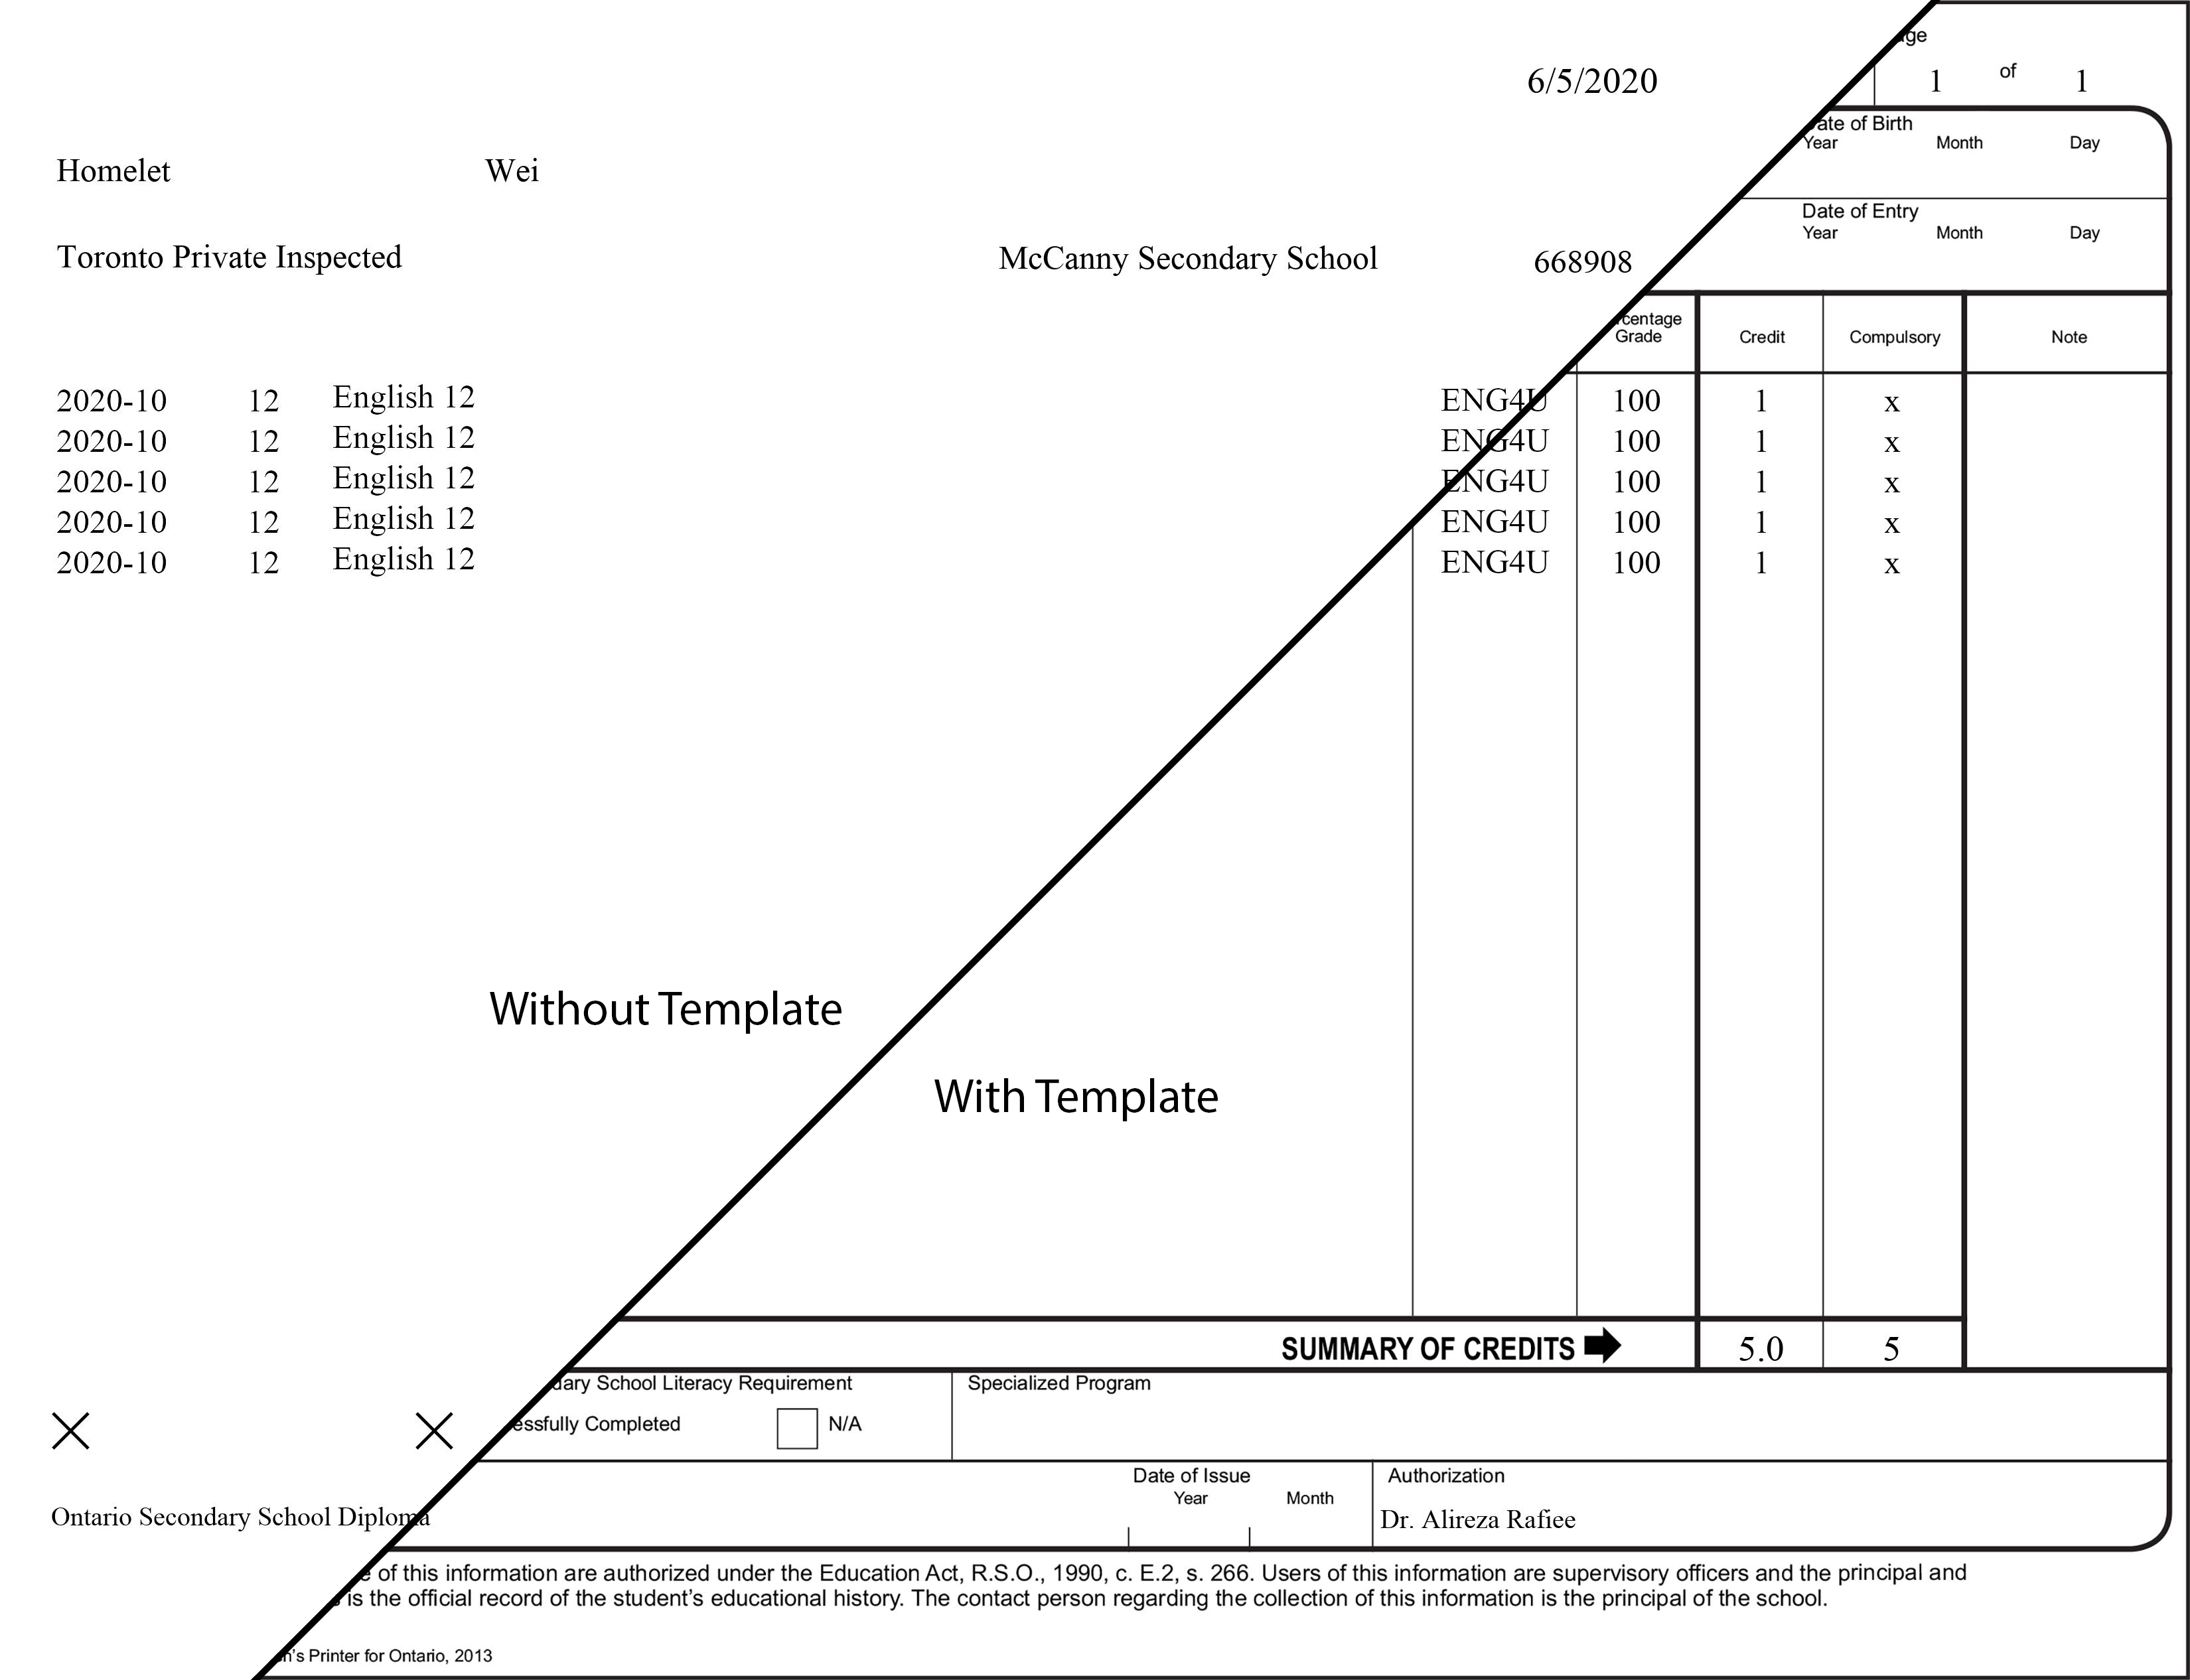
- Users can choose to export the OST to PDF either with a template in the background (good for backup), or without a template in the background (good for print).
- The
Smart FillandTrainfeature helps quickly add Course to the OST, check out Smart Fill and Train. - The
Previewfeature allows you to change the font size and spacing of the OST to suit your need. Check out Adjustment. - Production Tool helps to create OST in batches, more detail in production tools, check out Production Tool.
First, Install OST Helper, after the program is correctly installed, run the program, and you will be greeted with the main screen:
The layout of the OST Helper should be familiar. Every field corresponds with a field in OST. However, there are still some adjustments made:
- The date of issue is moved to the bottom of the screen.
- The Summary of Credit is automatically calculated.
- The credit count is the sum of all
Credityou have input. For example, if you have0.5and1, the credit count will appear1.5(Note: this count ignores all NaN reference). - The compulsory count is the number of courses that have something in
comp.(that is thecomp.field is not empty).
- The credit count is the sum of all
- There is a
Sortbutton under all of theDate (Y/M)field. The function of this button is to sort the Course in ascending order by their date (i.e. from before to after). The accepted format of date include:2000\102000/102000-102000.102000 10
To add a course, press + ADD Course button, and a course will appear at the end of the list.
There are a handful of tips and tricks about adding Courses that can help speed up the process.
- Up arrow, Down arrow, Left arrow, Right arrow moves the focus in their expected direction.
- Press on the red
xdeletes that Course, pressingDelwhile you have focus does the same trick. EnterandTabalso moves you to the next field. (Enteris preferred)Smart FillandTrainfeature helps to add Course quickly, detail about this feature, check out Smart Fill and Train.- Note that the
Course Codeis the Entry ofSmart Fill, pressing any key that causes you to move focus away fromCourse CodetriggersSmart Fill(i.e., When you have a focus onCourse Code, Up, Down, Left, Right, Enter, Tab triggersSmart Fill).
- Note that the
After Finnish filling the required field, save your work by pressing Save in the bottom bar or the File menu.
Note that OST Helper does not save the file automatically, it only saves when pressing Save and when you exit the program.
Now it is ready to generate the OST to PDF, but you might want to preview what the OST looks like, press the Preview... button in the bottom bar to make look at a preview. More about Adjustment, check out Adjustment.
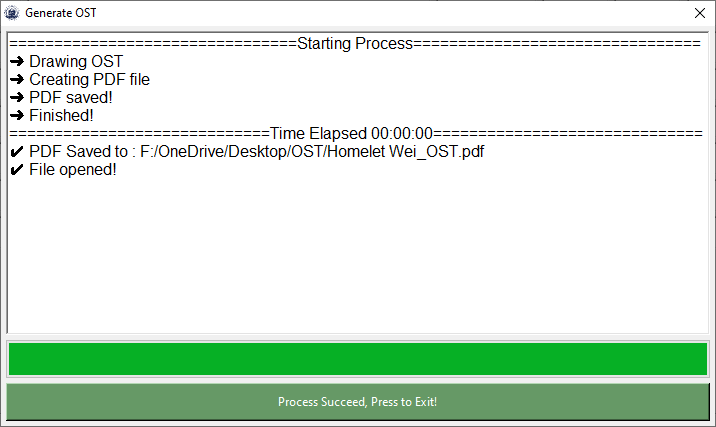
After inspected the OST and made the Adjustment, press the Generate! button, choose your output directory, and leave the rest to OST Helper.
Note that there are two options in OST Helper in generating OST:
- With OST Template, suitable for direct use and back up.
- Without OST Template, suitable for printing on official OST paper.
Toggle output with or without the template, toggle Draw OST Template when output in the Setting menu.
Other things to note of:
- The default name of the OST file and the generated file is in the following format:
[FIRST NAME] [LAST NAME]_[OEN]_OST
- To start a new draft, press
Newin the bottom bar or theFilemenu. This will save the current OST if the user has already saved this file before. Otherwise, it will ask the user to save to a location. - To open an existing OST file, press
Openin the bottom bar or theFilemenu. This will also save the current OST (the save behavior is identical toNew). - To drop all info and reset everything to the factory condition, press
Resetin theFilemenu, Note thatResetwill not ask you to save the current file, if you want to start a new file useNew. - The
Smart FillandTrainfeature can be turned off, toggleSmart FillandTrainin theSettingmenu.
Smart Fill and Train is an assistant feature that helps users to add courses quickly. As the user spends more time with this program, this feature also becomes more and more helpful.
Note that Smart Fill and Train feature can be turned off, toggle Smart Fill and Train in the Setting menu.
To use smart fill, start typing a Course Code in Course Code field and then press Up Arrow Key or Down Arrow Key or Left Arrow Key or Right Arrow Key or Enter Key or Tab Key all triggers Smart Fill (pressing any key that causes you lost focus from Course Code triggers Smart Fill, Note that mouse click to other field doesn't trigger Smart Fill) .
When Smart Fill is triggered, the program will look for the Course Code (not case sensitive) you just typed in the CCCL (Common Course Code Libary), if a reference is found, it will fill Level, Title, Credit, Comp. for you. (Note that if any of Level, Title, Credit, Comp. already have value, Smart fill will not perform!)
When you save an OST json, OST Helper will remember the courses that were entered and save it in CCCL. The smart fill feature will then use the CCCL.
CCCL (Common Course Code Library) only saves the valid Course that you inputted. A valid course must have Course Code and Level and Title and Credit, that means the corresponding field must not empty at the time a training cycle performs.
CCCL is saved to resource/CCCL.json.
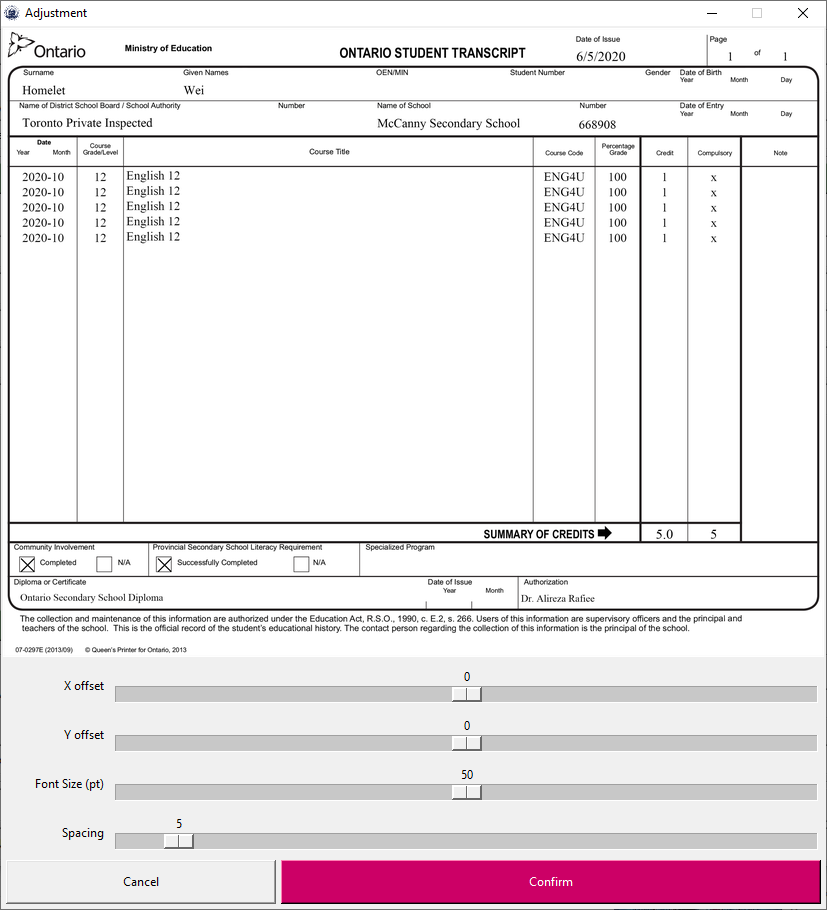
The preview Window provides several functionalities to fine-tune the layout of the OST.
- A preview of the OST.
- Note that if the OST consists of several pages, the preview will only display the first page.
- A slider that changes the
x offset. - A slider that changes the
y offset. - A slider that changes the
Font size(in pt) of the courses.- This slider changes the font size if you want to squeeze more lines in one page, change the font to the smallest acceptable size.
- A slider that change the
Spacingof the courses.- This slider changes the space between each line (this slider goes as low as -10). Any value below 0 means there will be some overlap on the text; this should be the second option when you want to squeeze more lines in one page.
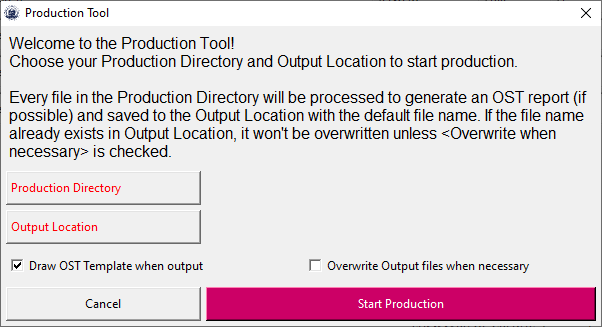
The Production tool helps generate OST to PDF in batches.
First, put all OST file you want to process in a Directory (referred to as Production Directory), and then create another directory for output (referred to as Output Location). Then you can open the Production Tool by clicking the Production Tool in the Tools menu. Choose the Production Directory and Output Location then press Start Production to start production.
Every file in the Production Directory will be processed to generate an OST report (if possible) and saved to the Output Location with the default file name. If the file name already exists in Output Location, it won't be overwritten unless Overwrite when necessary is checked.
Default, if the PDF already exists in the Output Location, it will not be overwritten. To disable this behavior, check Overwrite Output files when necessary.


