This sdk allows for creation of blueprint mods referencing game functions, which makes it possible to add custom pals, change player behavior, modify constants, etc.
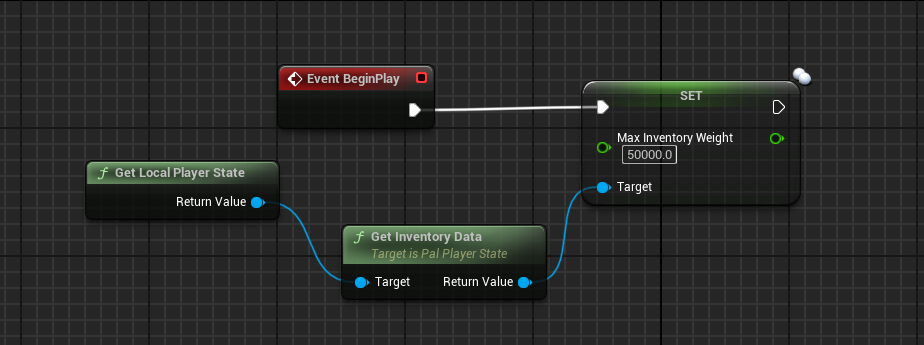
Simple example usage could look like this:
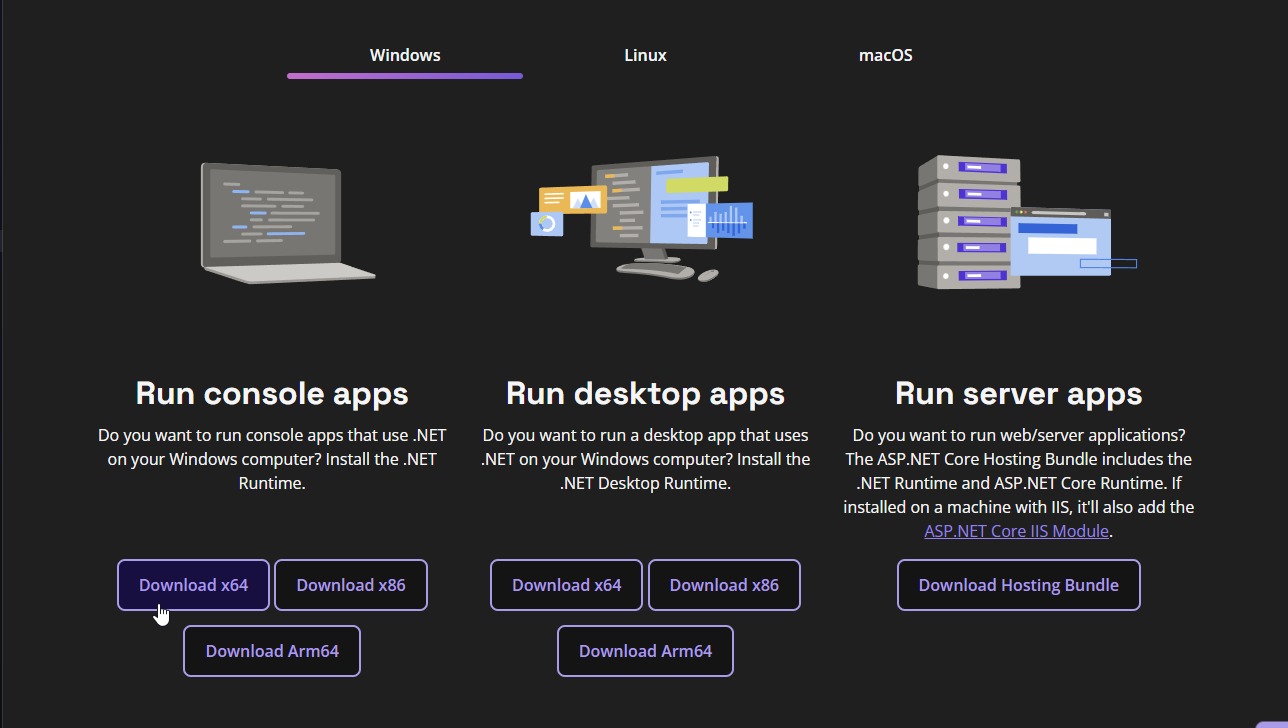
For unreal build tools to function correctly, you will need to have .NET 6 installed on your system, head over to this link. Here, click on the Download x64 button to download the runtime:
Afterwards, open the installer, and install the runtime.
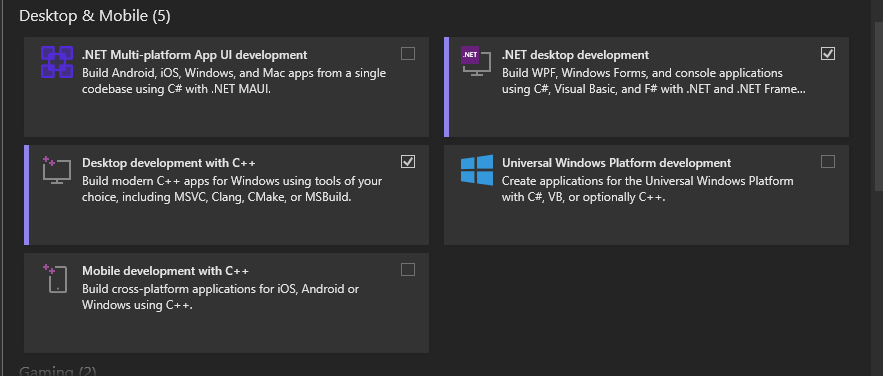
To compile the sdk you will need Visual Studio 2022 installed, you can grab it from this link. A community edition version will suffice. While installing it, make sure to check the following components in the installer:
Then press continue, and wait for visual studio to install.
After installing Visual Studio, we need to install Unreal Engine. To do so, open Epic Games Launcher, and head over to the Unreal Engine tab. Here, go to the Library tab, and press on the little yellow plus button to add a new version:
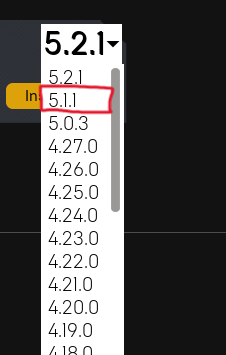
After this, you should see a new card appear with the ability to select an engine version, open the dropdown and select 5.1, like this:
Note
Any 5.1 version will work, it doesn't matter if it's 5.1 or 5.1.1
Palworld uses Wwise for it's sounds, so we will need to install this too.
Important
Even if you are not planning on making sounds, you still need wwise, otherwise the project will not compile
To install wwise, go to this website, and press Download Audiokinetic Launcher:
This will require you to make an account. After downloading the launcher, install it and log in. Head over to the Wwise tab. On the bottom of your screen you should see an Install A New Version header. Select 2021.1.11 as your wwise version and press install:
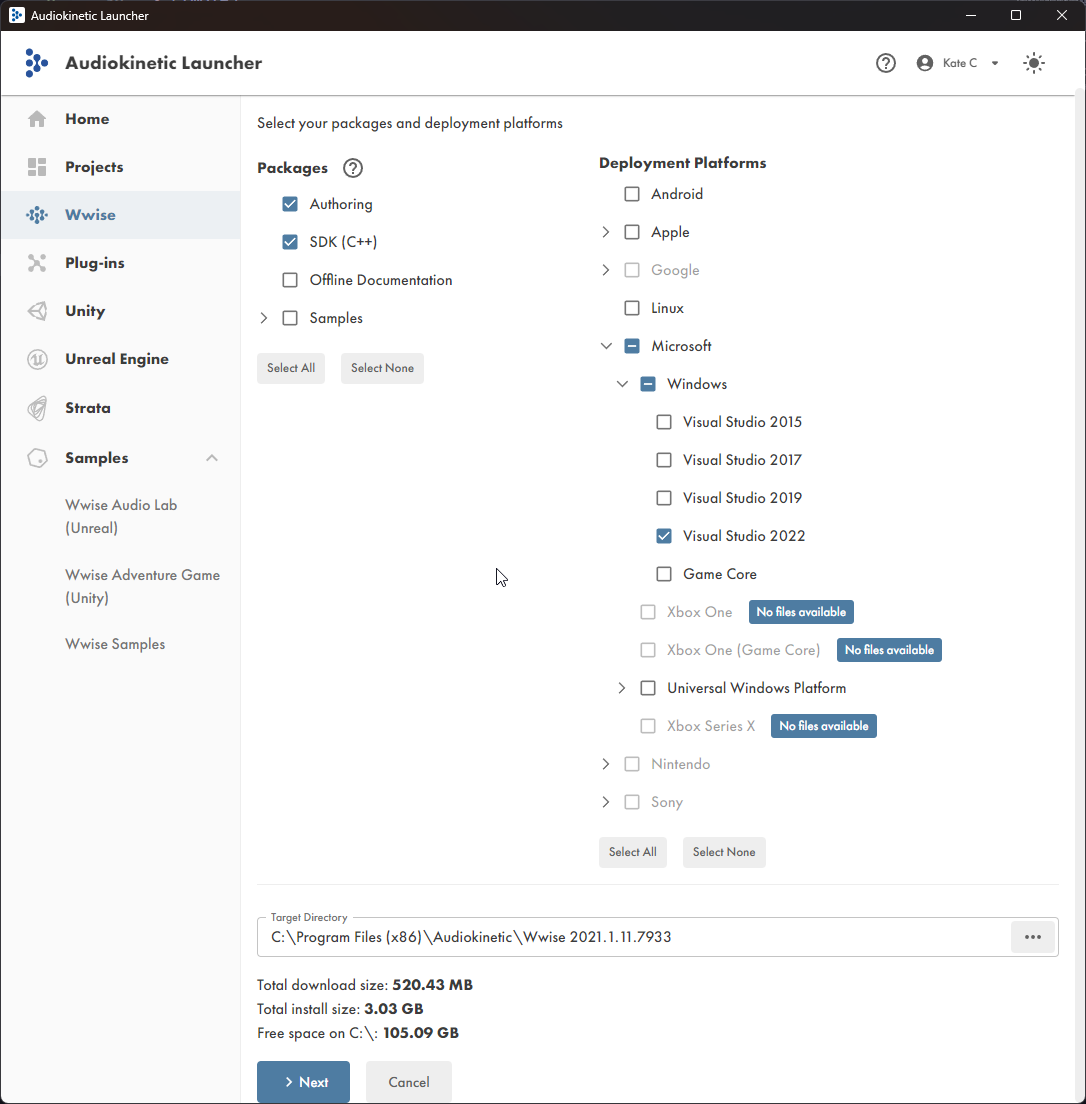
On the next page, select:
- SDK (C++)
- Microsoft -> Windows -> Visual Studio 2022
The selection should look like so:
Now press next, on the plugins page you don't need to add any plugins, so hit install!
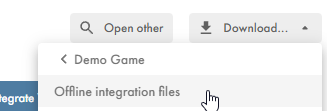
After installing the Wwise sdk, head over to the Unreal Engine tab, there press on the Download button, and select Offline integration files:
In the integration version, choose the same wwise version you chose when installing the sdk, and remember the download directory, now hit install!
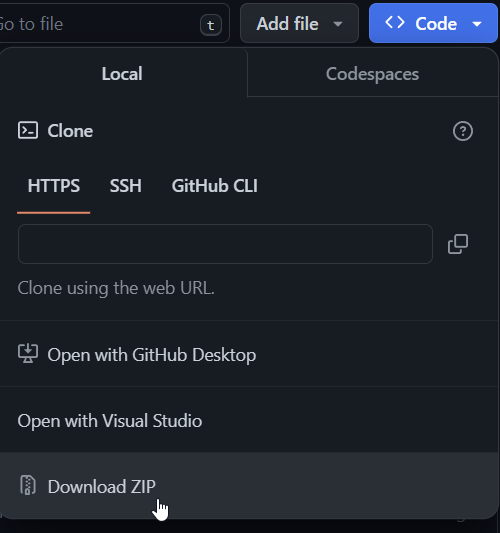
With the prerequisites out of the way, we are ready to download the sdk. Download this repo using the colored button on the top right, and presss Download ZIP:
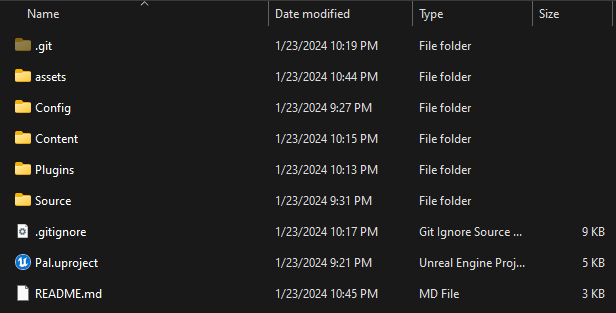
After downloading the repo, unpack it anywhere you want, and you should see the following file structure:
Before continuing to open the sdk in unreal, we must integrate wwise manually. This is because the wwise version that the game uses, is not officially compatible with the engine version, so we have to manually copy it over.
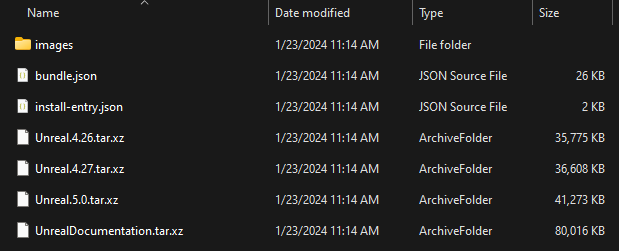
Open the directory you downloaded offline installation files for wwise in, you should see the following structure:
Unpack the Unreal.5.0.tar.xz archive.
Note
You might need to do it twice, first time you unpack it, you might get a .tar file, unpack that one too.
Copy over the unpacked Wwise folder into the Plugins folder of the SDK.
Almost done with wwise integration, now we just need to copy over the needed dlls.
Open the Wwise folder inside of the SDK, and create a ThirdParty folder there.
Now go to the folder where you installed the Wwise SDK
Important
This is not the folder where you installed the integration files, but the folder where you installed the SDK
For me this path is:
C:\Program Files (x86)\Audiokinetic\Wwise 2021.1.11.7933\SDK
Inside of this folder, select:
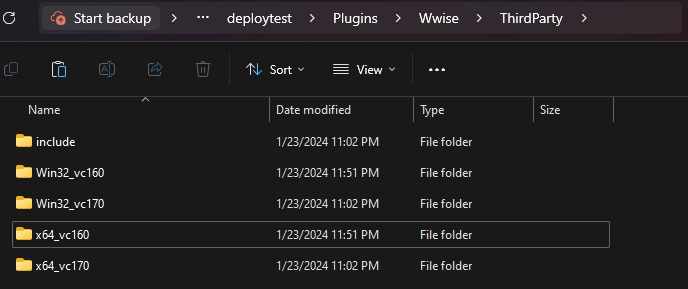
Win32_vc170x64_vc170include
And copy over those folders to the ThirdParty folder.
After copying over those folders, make sure to duplicate the vc170 folders as vc160 also, so the structure will look as follows:
Note
If you continue without the following change, you will have to click OK on a dialog box that says Wwise is not compatible with the current Unreal Engine version every time you load up the editor.
To fix this, navigate to Plugins\Wwise and open Wwise.uplugin with any text editor. Then change the entry "EngineVersion" : "5.0.0", to "EngineVersion" : "5.1",.
Yay! Now we are done with integrating wwise!
In Unreal Engine 5.1, by default, Visual Studio 2019 build tools will be used if they are installed.
Important
The below changes should only be made if Visual Studio 2019 is installed alongside Visual Studio 2022.
Note
If you don't see "Unreal Engine" in %APPDATA% that means you haven't launched Unreal Engine before. Go to Epic Games Launcher -> Unreal Engine -> Library 0> Click "Launch" on the Unreal Engine version that you've downloaded (5.1.*). Let it load until you see the create a new project screen then close it and continue with the guide.
To change this, navigate to %APPDATA%\Unreal Engine\UnrealBuildTool and open BuildConfiguration.xml with your favorite XML editor.
Your initial configuration will look like below:
<?xml version="1.0" encoding="utf-8" ?>
<Configuration xmlns="https://www.unrealengine.com/BuildConfiguration">
</Configuration>
Update the configuration to look like this:
<?xml version="1.0" encoding="utf-8" ?>
<Configuration xmlns="https://www.unrealengine.com/BuildConfiguration">
    <VCProjectFileGenerator>
        <Version>VisualStudio2022</Version>
    </VCProjectFileGenerator>
    <WindowsPlatform>
        <Compiler>VisualStudio2022</Compiler>
    </WindowsPlatform>
</Configuration>
Congratulations on making it through the configuration!
After doing all of those steps, we are ready! Double click the Pal.uproject file and it should open in Unreal Engine!
Note
If it tells you that modules are out of date and need to be recompiled, press YES
Note
Wwise will complain about not being compatible with the current Unreal Engine version, just ignore that.
Important
If the file doesn't open in unreal engine and instead asks you for associations, open Unreal Engine, and open the file from there instead
Note
You may see a popup on launch about Wwise project path issues, ignore it and press the X in the corner to close the popup.
Note
You may think nothing is happening, unreal engine has to compile a lot of things in the background before the editor opens. This may take a LONG while.
Important
The next step in the process will be to create a Compatible Blueprint Mod
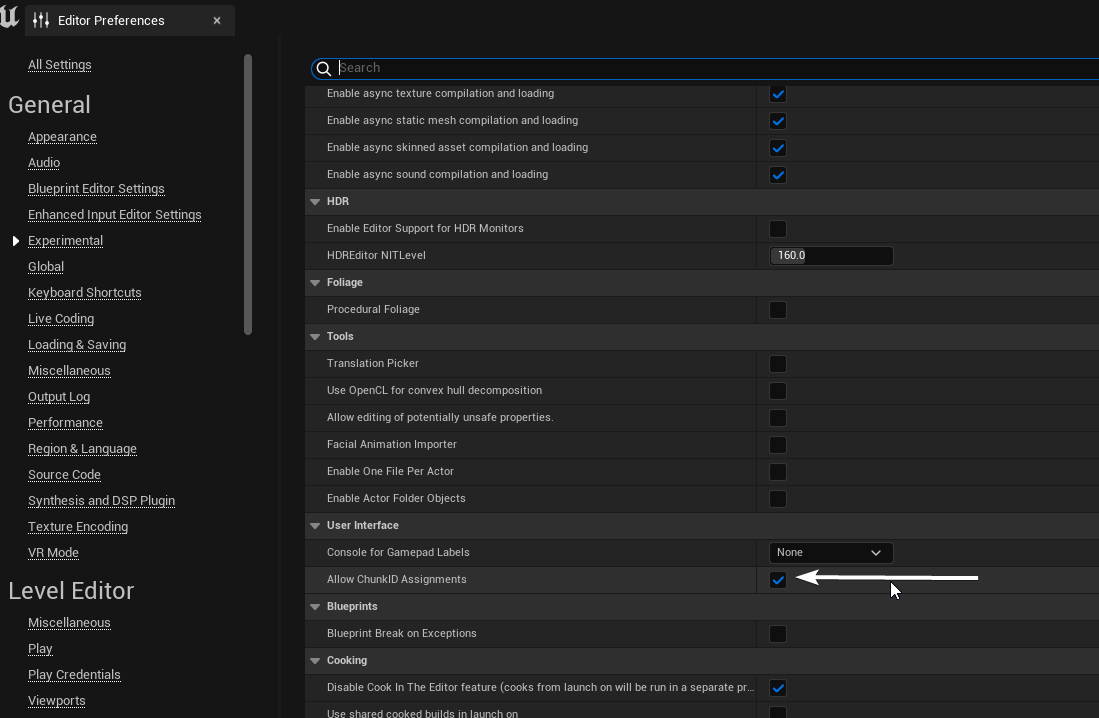
- Create a Data Asset ( Primary Asset Label ) named after your mod name in your Contents folder. Set the priority to 1, and the Chunk ID to a memorable ID.
- Set your Mods (ModActor and any other Assets you are going to include in your mod) Chunk ID to the same you used above.
- Go into Project Settings -> Assets Manager and verify your settings are similar below ( Make sure the rules match the primary asset label you made )
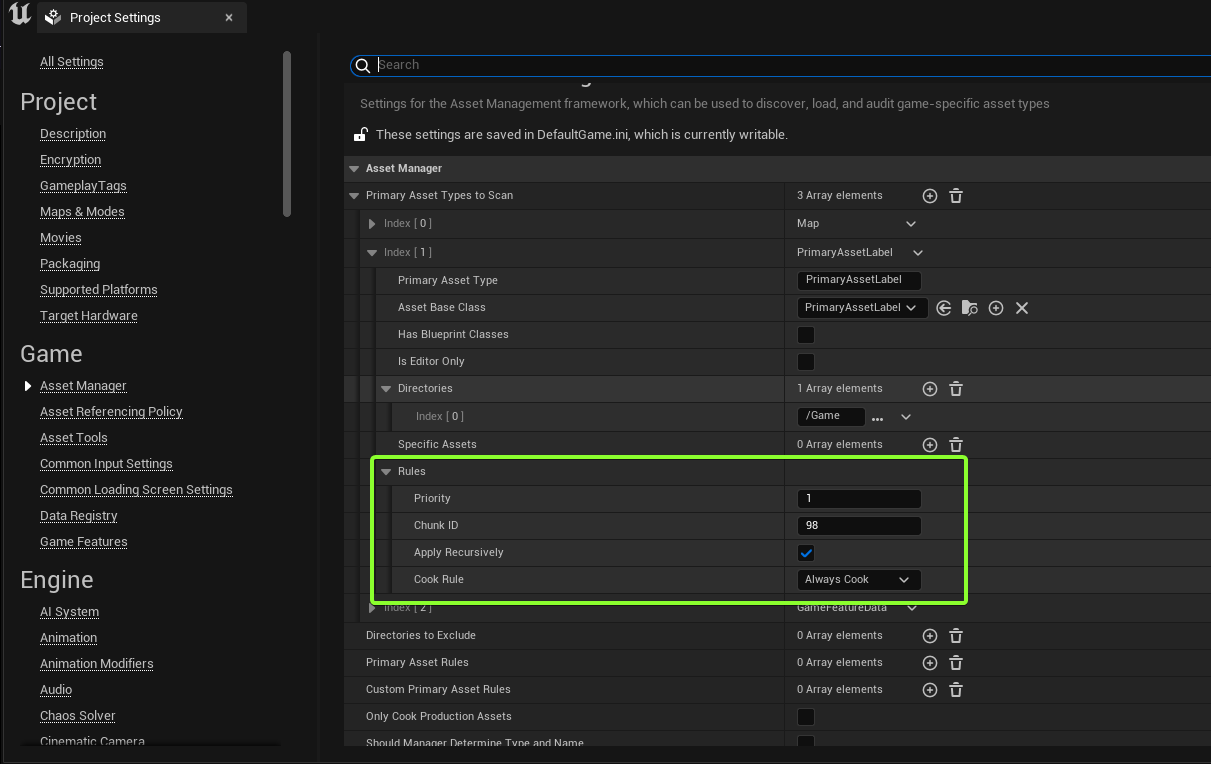
- Once all Chunk ID's match on each mod file you are including, you can package your project
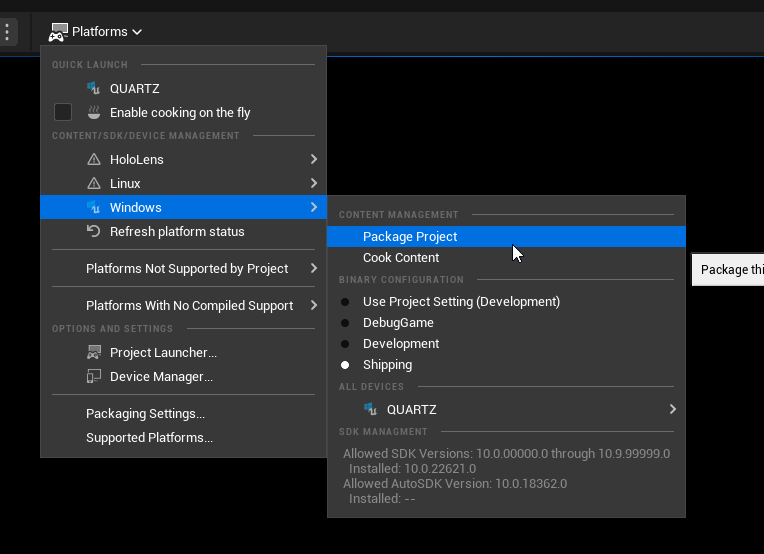
- You should have
pakchunk{Your Chunk ID}-Windows.pakin the Paks output folder. Rename that to the mod name. There's your packaged mod!
Note
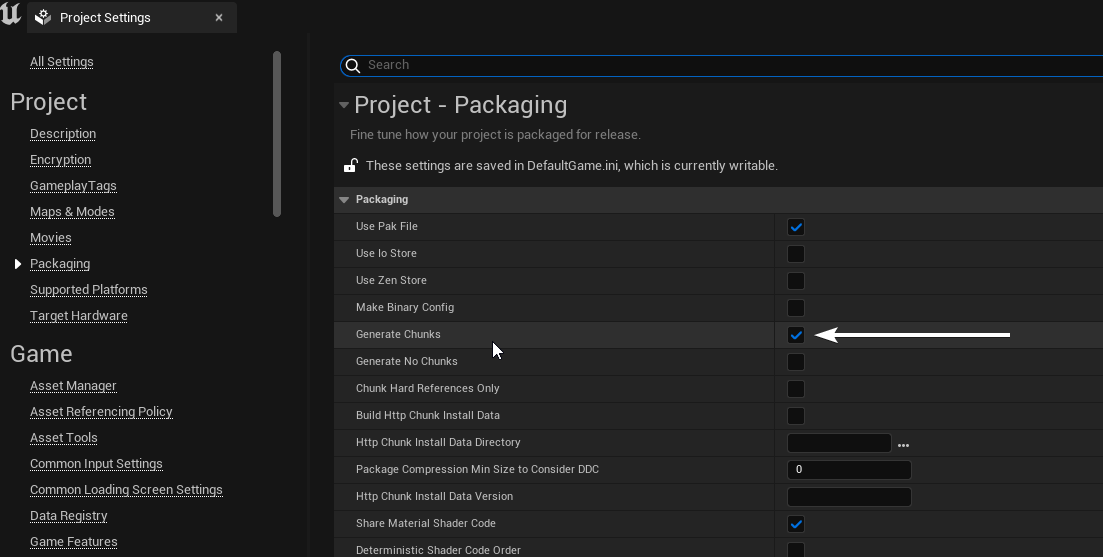
If you only get 'pakchunk0-Windows.pak' instead of your memorable ID. Go into Project Settings -> Packaging
Then tick "Cook everything in the project content directory(ignore list of maps below)" **
**
If you encounter any issues using the SDK, feel free to open an issue, or shoot a message on discord.
