This repository contains some material of my "Physical Prototyping" workshop.
In the workshop I use a Raspberry Pi and Node-RED to show how easy it is to prototype hardware interactions.
- Send push messages
- Read Temperature and Humditiy
- Detecht a putton press
- Control a remote power plug
- Control a LED
- Build your own remote control (using Blynk)
- Talk to the Pi (via Alexa)
- Chat with the Pi (via Telegram)
- Get weather information (via OpenWeatherMap)
You can view a subset of the workshops slides here.
In addition, you can find some basic information to get you started below.
- Raspberry Pi Zero WH & case
- mini USB cable and power adapter
- a mini breadboard
- jumperwire set
- DHT11 Temperature Sensor
- 433Mhz Transmitter & Receiver
- pushbutton
- 5mm neopixel LED (or a clone, e.g. WS8212, WS8211, PD9823, ...)
Note: Above are just sample links, I'd try to order most material from China to reduce the cost (with the exception of the Pi). The resulting total cost is around 30€.
- SD Card Burner: Etcher or ApplePi Baker for Mac
- Terminal Manager: puTTY for Windows or iTerm for Mac
- IP Scanner: Angry IP Scanner or IP Scanner Home for Mac
- the SD card with the flashed image
- your credentials
- your pi name:
protopi[nn].local - login:
pi|pipapo
- your pi name:
Note: The SD card contains a an image of Raspian, the Linux operating system for the Raspberry Pi, with some additions to it (SSH and headless mode is enabled, additional Pi nodes are installed, file access (SAMBA) is activated, etc.).
-
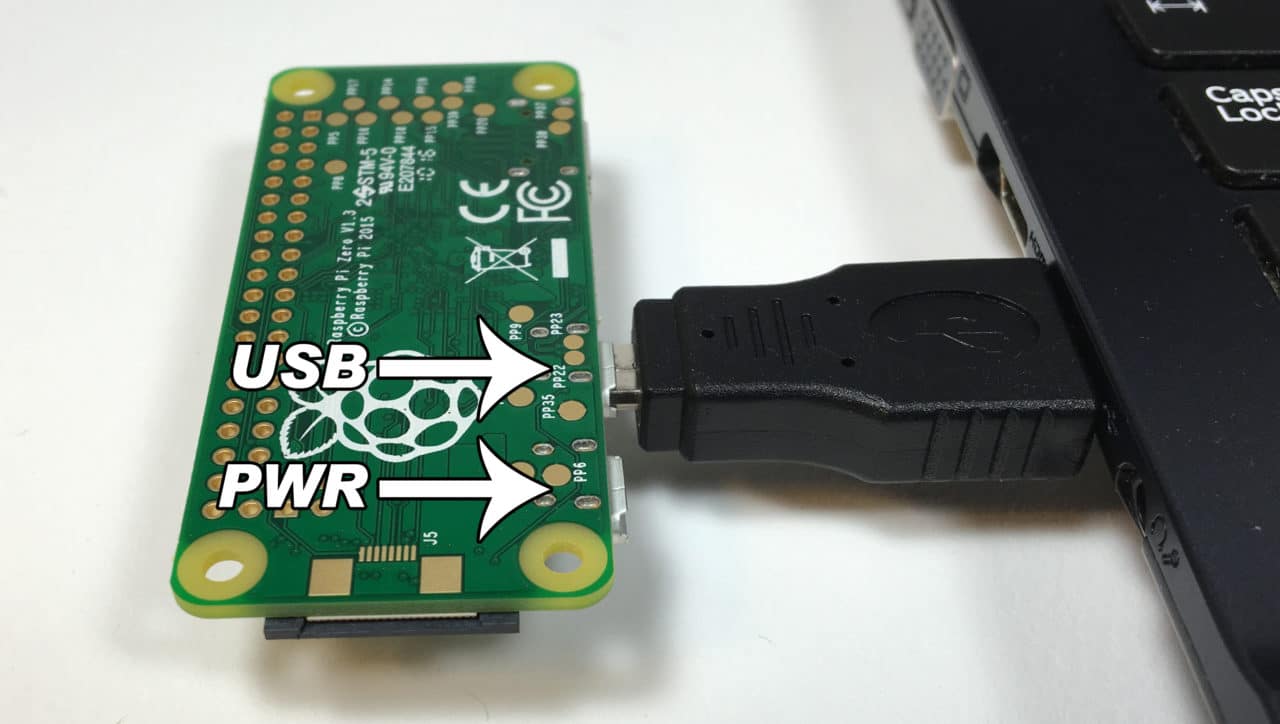
Connect you Pi to your computer
 Note: You need a "good" USB cable, one that you can sync your phone with
 -
Follow the instructions for Mac or Windows
Note: They also teach you how to use the Terminal, so give it a read -
Learn some additional commands for the command line
- Follow these steps for the Mac and share the connection for the "RNDIS/Ethernet Gadget" (thats your the name of your Pi)
- For Windows follow the steps described here
- Follow these steps
- Close the editor (CTRL + x and confirm with "y")
- To restart the Pi, type
sudo reboot -h nowin the console
- You can either use your pi's name (
protopi[nn].local) or its IP address - Type
ping protopi[nn].localin the Terminal (Mac) or on the command line (Windows) - You should get a result with a time attaced to it, e.g.:
64 bytes from 128.65.210.8: icmp_seq=1 ttl=59 time=14.428 ms - There you can also see the IP address of your Pi
- Enter
http://protopi[nn].local:1880in the browser (Firefox or Chrome, please) - You should find the Pushover flow, please remove my credentials and start tinkering
-
Make: Magazin - Node Red Intro (German)


