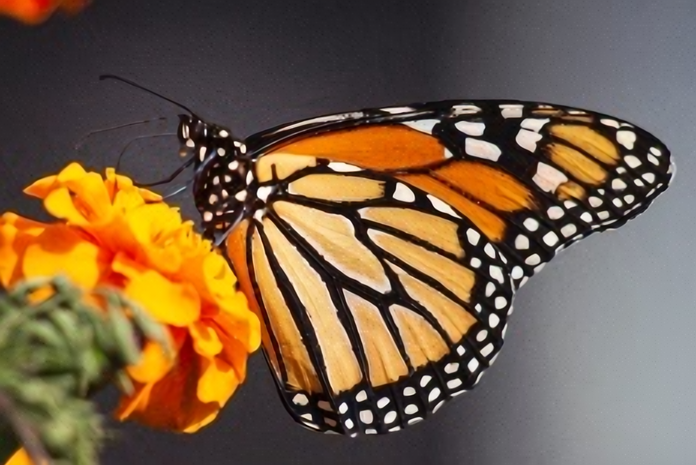
On this repo I'll explain (but not deep explanation about how DNN works) how-to-use Neural Network to upscale an Lo-Res image to create Hi-Res image.
Super Resolution (SR) is a process to recovering a Hi-Res image from Lo-Res image. How do we achieve that? The answer is using Deep Neural Network.
OpenCV is an open source computer vision library that have a lot algorithm for image processing. Luckily, OpenCV have an easy-to-use function for implementing SR based on deep learning methods. Yey!
Also, you don't need to have any knowledge about SR, deep learning, a good coding, yada,,yada,,yada (I'm also lack knowledge about this KEKL).
I'm running this on Windows 10 LTSC, this also will work on ther OS like Ubuntu. Any machine that can install Python will work (probably).
On Windows is simply goto This Link and then download the Python.
Make sure you install Python version 3. I'm using Python 3.10.2
To check if Python already installed on your machine, open Terminal or Command Prompt on Windows then run py.
If you already install OpenCV, an older version below 4.3 you need to upgrade it using this command:
pip install opencv-contrib-python --upgrade
But, if not installed run this:
pip install opencv-contrib-python
It will install OpenCV with the latest version of OpenCV along with the opencv-contrib module.
The OpenCV it self not have pre-trained models on their library, so we need make it one. But don't worry, some people already make their pre-trained models that we can use here. Also, I'll give a link to the paper that explain how the model works and made.
- EDSR [1] This is the best performing model. But, it is also the biggest model and the biggest file size, also slowest inference. You can download it here.
- ESPCN [2] This is a small model with good inference. It also fast! You can download it here.
- FSRCNN [3] This also small and fast, and accurate inference. You can download it here.
- LapSRN [4] This is a medium sized model that can scale by a factor as high as 8. You can download it here.
Time for use the code. You can simply run py imgUpscale.py on Terminal or Command Prompt.
For testing, I'm using input.png as input image. The input image must be formated as PNG or JPG, other than that it won't work. For model I'm use ESDR_x3.pd. The result will be showed and saved with file named result_upscaled.png. Here example of scalling the image.
Image 1. Low-resolution image as input.
Image 2. High-resolution image scalled using ESDR Model (factor by 3).
image_input = cv.imread('input.png')
Are used for importing the image. To change the target, just rename the input.png to the image file you want to process.
model_path = "models/EDSR/EDSR_x3.pb"
sr.readModel(model_path)
This loads all the variables of the chosen model and prepares the neural network for inference. The parameter is the path to your downloaded pre-trained model. On this block of code, it will loads ESDR Model with factor by 3.
sr.setModel("edsr", 3)
This lets the module know which model you have chosen, so it can choose the correct pre- and post-processing. You have to specify the correct model, because each model uses different processing.
The first parameter is the name of the model. You can choose between: “edsr”, “fsrcnn”, “lapsrn”, “espcn”. It is very important that this model is the correct one for the model you specified in sr.setModel().
The second parameter is the upscaling factor, i.e. how many times you will increase the resolution. Again, this needs to match with your chosen model. Each model will have a separate file for the upscaling factor.
[1] Bee Lim, Sanghyun Son, Heewon Kim, Seungjun Nah, and Kyoung Mu Lee, “Enhanced Deep Residual Networks for Single Image Super-Resolution”, 2nd NTIRE: New Trends in Image Restoration and Enhancement workshop and challenge on image super-resolution in conjunction with CVPR 2017.
[2] Shi, W., Caballero, J., Huszár, F., Totz, J., Aitken, A., Bishop, R., Rueckert, D. and Wang, Z., “Real-Time Single Image and Video Super-Resolution Using an Efficient Sub-Pixel Convolutional Neural Network”, Proceedings of the IEEE conference on computer vision and pattern recognition CVPR 2016.
[3] Chao Dong, Chen Change Loy, Xiaoou Tang. “Accelerating the Super-Resolution Convolutional Neural Network”, in Proceedings of European Conference on Computer Vision ECCV 2016.
[4] Lai, W. S., Huang, J. B., Ahuja, N., and Yang, M. H., “Deep laplacian pyramid networks for fast and accurate super-resolution”, In Proceedings of the IEEE conference on computer vision and pattern recognition CVPR 2017.

