Author: Nikita Kozlov
Date: Jan.2022
This project shows how to organize development in AWS Cloud with staging. We would be using different AWS accounts to organize staging. It is the most efficiently way for development in Cloud.
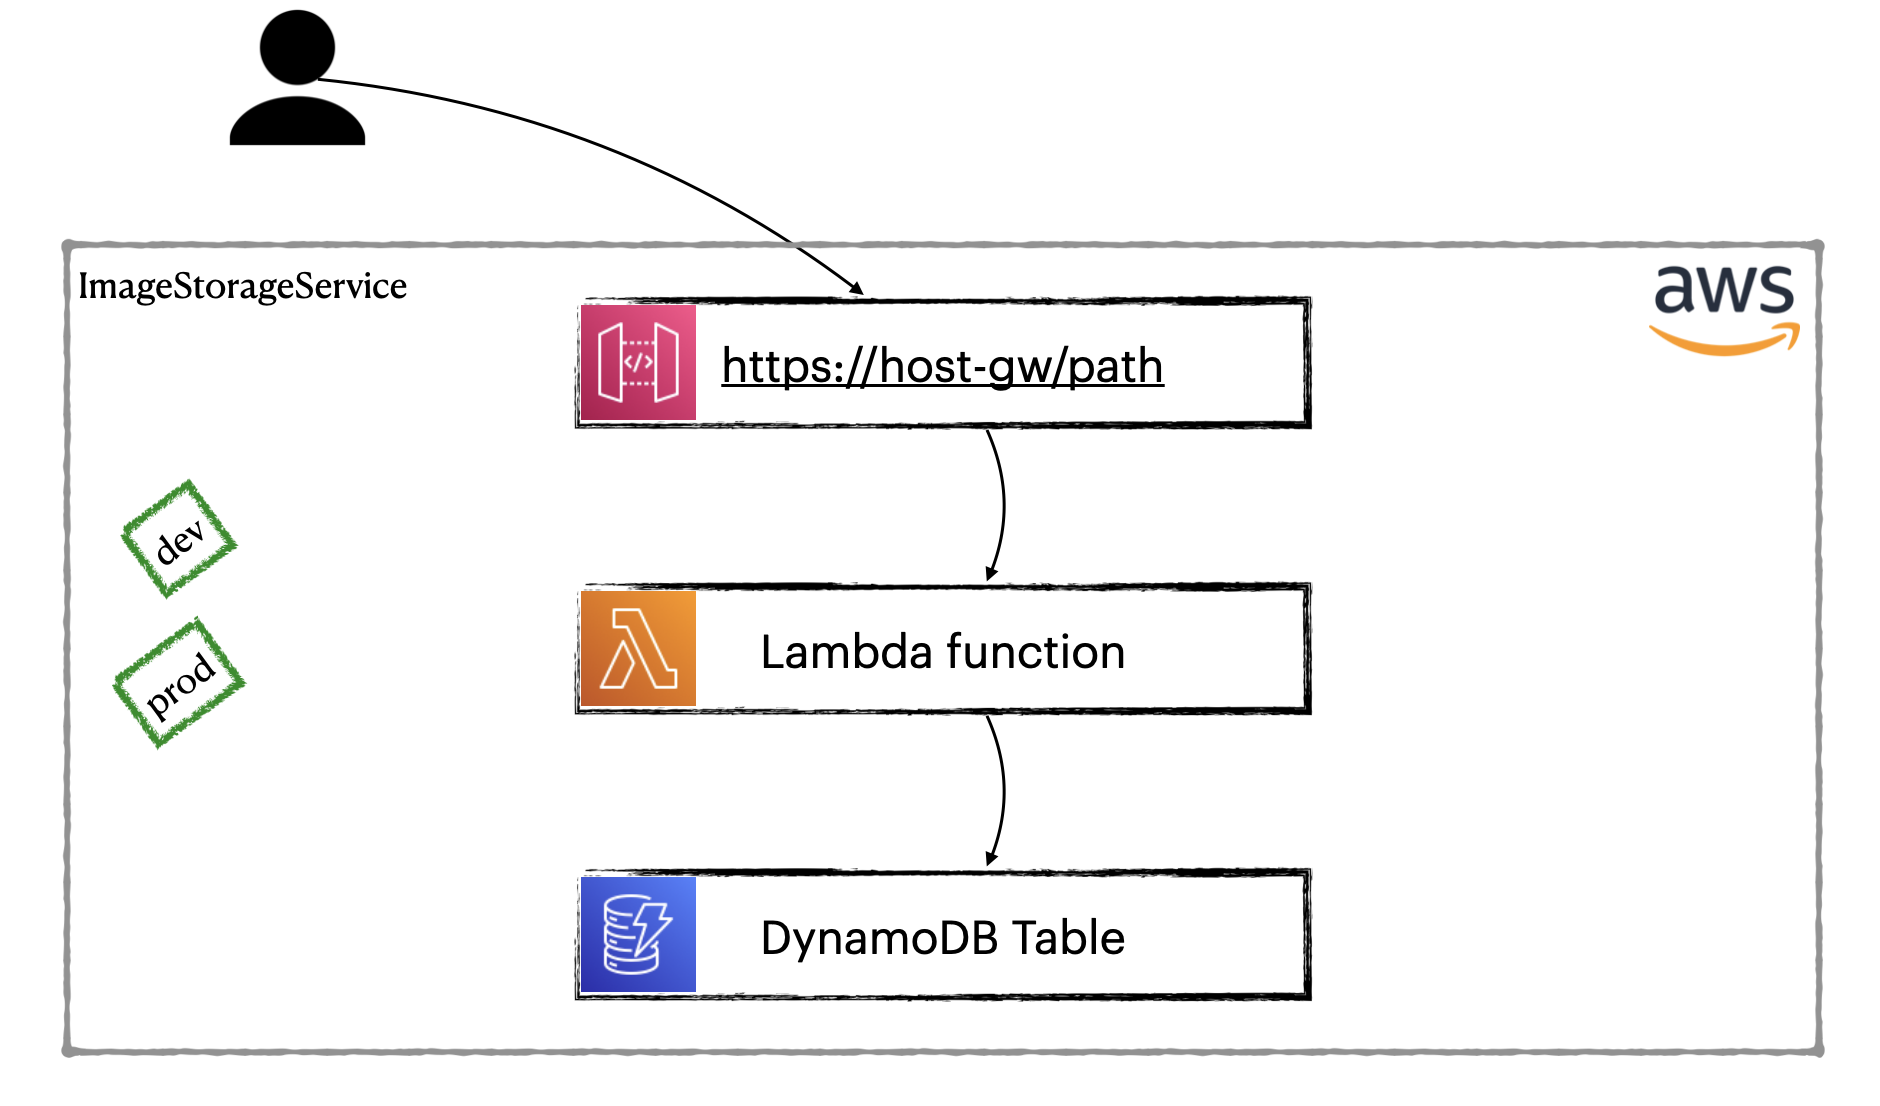
We build simple application that is based on Lambda. Additionally it integrates with API Gateway and DynamoDB.
This project was created by Serverless Framework using command serverless create --template aws-nodejs --path aws-staging-demo and then configure.
| Component | Description |
|---|---|
_dev/ |
Used for local testing only |
infra/ |
Consists of AWS Cloud Formation templates |
presentation/ |
Consists of presentation's files |
staging/ |
Configuration files are located here for different stages |
*.ts |
TypeScript code of lambda function |
serverless.yml |
Configuration of serverless application (using by Serverless Framework) |
| other files | Rest of files are standard for nodejs projects |
- NodeJS (version 14+)
- npm
- Serverless Framework (how to install)
- aws-cli (official doc or install via brew)
Go to AWS website and create two independent accounts (require two different emails). One of them will be using for dev stage, another will be prod.
Serverless Framework requires special user for working. So, let's create them for our dev and prod accounts.
We create users with same name for both accounts, it is called serverless-admin. You can choose your own name, but it is recommended name.
- Log in to dev account
- Create user
serverless-adminin dev account using documentation - Repeat steps 1 and 2 for prod.
- Save API Key & Secret to a temporary place for both users.
We need to configure aws-cli for dev and prod account working with.
- Open Terminal
- Create profile for dev
aws configure --profile dev-sls-admin-us-east-2- API Key & Secret using for dev
serverless-admin(we are saved it above) - Default region name is us-east-2
- Default output format is json
- API Key & Secret using for dev
- Create profile for prod
aws configure --profile prod-sls-admin-us-east-2- API Key & Secret using for prod
serverless-admin(we are saved it above) - Default region name is us-east-2
- Default output format is json
- API Key & Secret using for prod
See AWS CLI docs
AWS Lambda is following way when you build your code locally with all necessary dependencies.
Then you deploy archive to Lambda (via S3 for example). Let's install npm dependencies and
configure serverless plugin serverless-plugin-typescript. We need the plugin because we are using TypeScript.
- Open Terminal and go to project folder
- Install npm dependencies
npm install - Install Serverless plugin
serverless plugin install --name serverless-plugin-typescript
As we have not run DynamoDB locally, we should create DynamoDB on dev firstly. Then we can run Lambda locally and test it.
- Open Terminal
- Set AWS_PROFILE
export AWS_PROFILE=dev-sls-admin-us-east-2
It is necessary for correct working aws-cli with our dev. - Create DynamoDB table using template
infra/Create-DynamoDB-table.yaml
aws cloudformation deploy \
--template-file infra/Create-DynamoDB-table.yaml \
--stack-name dynamoDB-image-storage-service-stack-dev \
--tags cf/stack.name=dynamoDB-image-storage-service-stack-dev \
--parameter-overrides Stage=dev StackName=dynamoDB-image-storage-service-stack-dev \
--region us-east-2
Check your AWS dev account, you find resources that have been created. It is CloudFormation stack dynamoDB-image-storage-service-stack-dev
and DynamoDB table ImageDescription-dev.
- Run lambda locally
- Create record in DynamoDB table
sls invoke local -f imageStorageService --path _dev/http-gw-post-with-params.json - Get created record
sls invoke local -f imageStorageService --path _dev/http-gw-get-with-params.json - Get all records
sls invoke local -f imageStorageService --path _dev/http-gw-get-no-params.json
- Create record in DynamoDB table
- For debugging in Intellij IDEA
- Find Actions -> Registry ->
js.debugger.use.node.optionsset to false - Add Run Configuration
- Add New Configuration Node.js
- JavaScript file: /usr/local/lib/node_modules/serverless/bin/serverless.js
- Application parameters: invoke local -f imageStorageService --path _dev/http-gw-get-with-params.json
- Environment variables: AWS_PROFILE=dev-sls-admin-us-east-2
- Run your configuration, then set breakpoints in file
.build/handler.jsand then run in debug mode.
- Find Actions -> Registry ->
We are ready to deploy our lambda to AWS (dev).
- Open Terminal
- Set AWS_PROFILE
export AWS_PROFILE=dev-sls-admin-us-east-2 - Deploy lambda
sls deploy - In Terminal we can see endpoint, click on it!
- You can use
_dev/rest-client/client-dev.restfor testing your lambda on dev.
When we want to migrate our lambda to prod we doesn't want to build and package our code again. We want to use artifact that was tested. In our tutorial we don't use separate s3 bucket for our artifacts, but it needs ideally. We will use bucket that was created by Serverless Framework on our dev.
- Make our *.zip into S3 accessible for prod account (sure that you execute command by
AWS_PROFILE=dev-sls-admin-us-east-2)
aws cloudformation deploy \
--template-file infra/ServerlessDeploymentBucket-Policy.yaml \
--stack-name serverless-deployment-bucket-policy \
--tags cf/stack.name=serverless-deployment-bucket-policy \
--region us-east-2
- Let's go to AWS Console (dev), open S3 Service and find ServerlessDeploymentBucket
In my case bucket is called image-storage-service-de-serverlessdeploymentbuck-2yxlci5u0dg6 - Open it and find inside
image-storage-service.zipfile - Click on it and copy S3 URI
- Open file
staging/prod/serverless.ymland replace value infunctions.imageStorageService.package.artifactwith copied - We are ready to deploy our app to prod!
- In Terminal set
export AWS_PROFILE=prod-sls-admin-us-east-2 - Create DynamoDB table in prod
aws cloudformation deploy \
--template-file infra/Create-DynamoDB-table.yaml \
--stack-name dynamoDB-image-storage-service-stack-prod \
--tags cf/stack.name=dynamoDB-image-storage-service-stack-prod \
--parameter-overrides Stage=prod StackName=dynamoDB-image-storage-service-stack-prod \
--region us-east-2
- Deploy serverless app to prod using
staging/prod/serverless.yml
Execute commandcd staging/prod && sls deploy - For testing use
_dev/rest-client/client-dev.restwith 'prod' environment (set it before).
Thank you!
See you soon.
