- What is splunk
- Why use splunk
- Using splunk Interface
- How to use search in splunk
- How to import data static files into splunk
- how to visualize data and create dashboards
- Splunk Connect for Kafka – Connecting Apache Kafka with Splunk
Splunk is the software for searching, monitoring, analyzing the big data though web interface. Splunk can capture live data and it can genarate graphs, reports, alerts, dashboards and visualizations.
- We can Analyze system performance
- Troubleshoot any failure condition
- Monitor business metrics
- Search & Investigate a particlar outcome
- Create dahboards to visualize & analyze results
- Store and retrive data for later use
Clone this repo before you start working!!
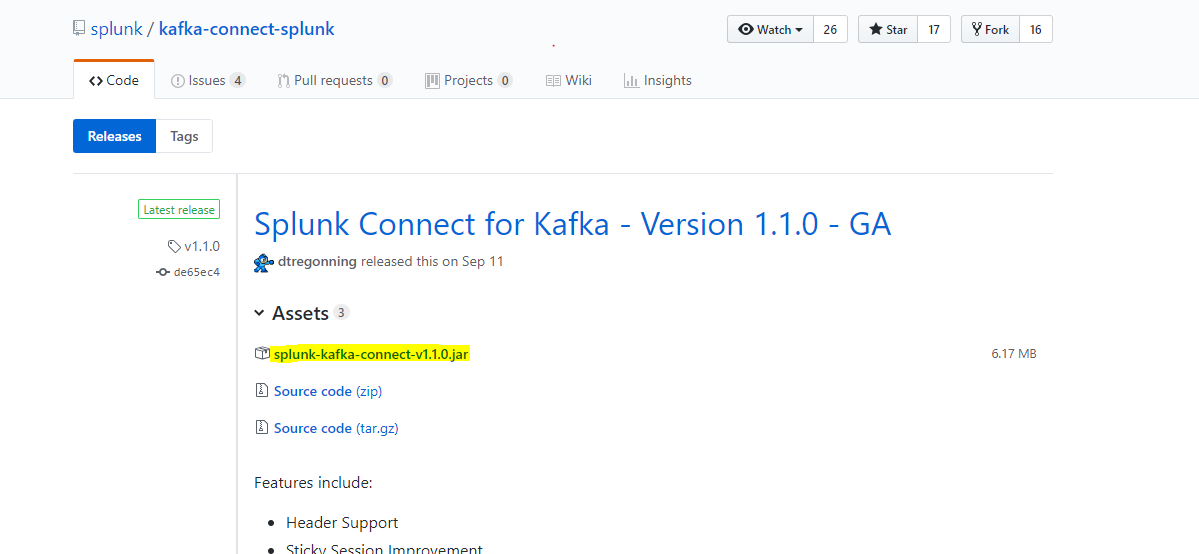
By Following the link below download the executable jar file Download
Make sure that you place the jar file in
Splunk-Kafka-Connector/kafka/bin/windows/we will use this path later to start our kafka connector
Please make sure that your current working directory is Splunk-Kafka-Connector
Start the Zoopkeeper using the following command kafka/bin/windows/zookeeper-server-start.bat zookeeper.properties
You can also double click on the
zookeeper-server-start.batfile
Please make sure that your current working directory is Splunk-Kafka-Connector
Start the kafka server using the following command kafka/bin/windows/kafka-server-start.bat server.properties
You can also double click on the
kafka-server-start.batfile
Please make sure that your current working directory is Splunk-Kafka-Connector
Create a topic on the previous server using the following command kafka/bin/windows/kafka-topics.bat --create --zookeeper localhost:2181 --replication-factor 1 --partitions 1 --topic bearcat_messages
You can also double click on the
kafka-topics.batfile
Please make sure that your current working directory is Splunk-Kafka-Connector
Start a console producer to write to the kafka topic we created earlier using the following command kafka/bin/windows/kafka-console-producer.bat --broker-list localhost:9092 --topic bearcat_messages
You can also double click on the
kafka-console-producer.batfile
Please make sure that your current working directory is Splunk-Kafka-Connector
Start a console consumer to read from the kafka topic we created earlier using the following command kafka/bin/windows/kafka-console-consumer.bat --bootstrap-server localhost:9092 --topic bearcat_messages --from-beginning
You can also double click on the
kafka-console-consumer.batfile
Please make sure that your current working directory is Splunk-Kafka-Connector
Start a console consumer to read from the kafka topic we created earlier using the following command kafka\bin\windows\connect-distributed.bat kafka\config\connect-distributed.properties
You can also double click on the
connect-distributed.batfile
- Make a
GETRequest to the Kafka Connector API Service and verify that you have started in step 7 using the URIhttp://localhost:8083/connector-plugins/and verify that you must have an entry forcom.splunk.kafka.connect.SplunkSinkConnector - You can refer to the below screenshot for more details.
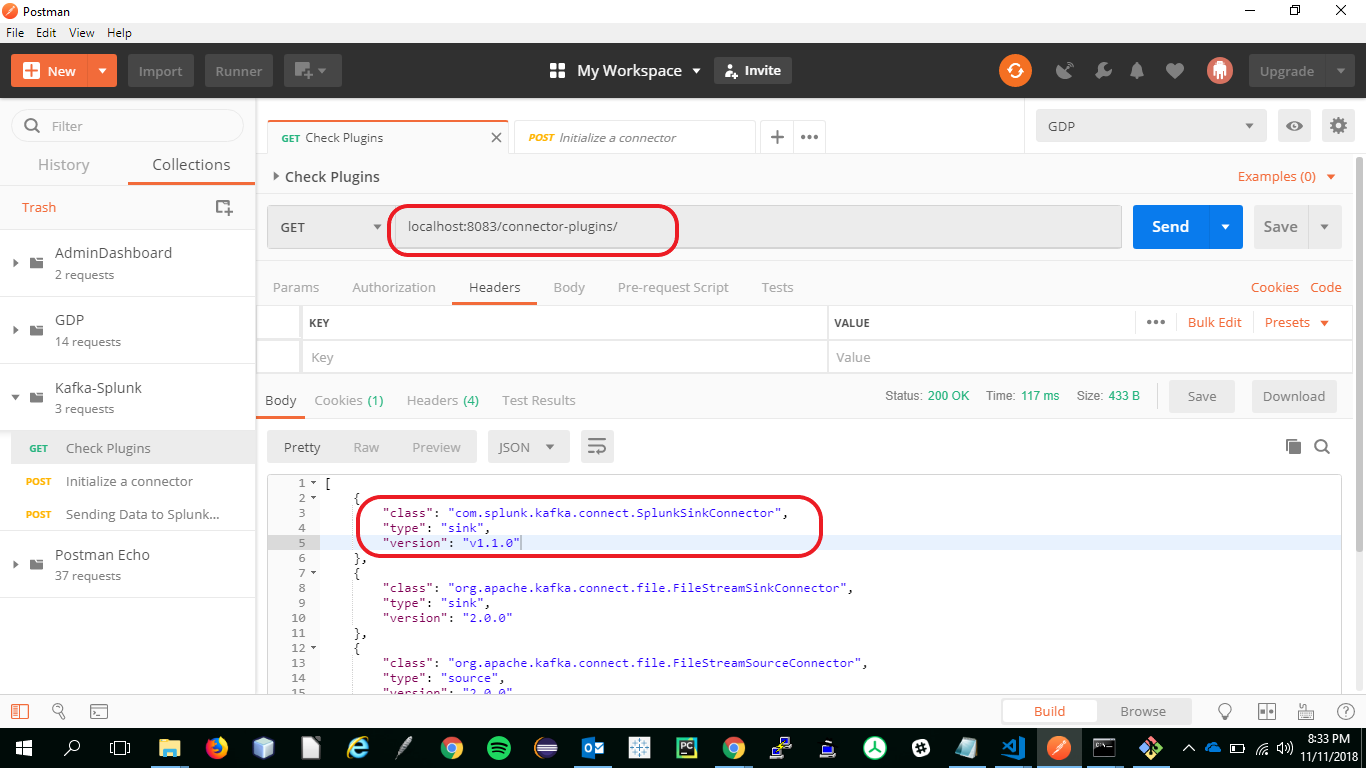
- Use the following command to make a
GETrequest using CURL
curl http://localhost:8083/connector-plugins/ and verify that you must have an entry for
com.splunk.kafka.connect.SplunkSinkConnector
-
On the Search and reporting Page, Click on Settings.
-
On the Data Inputs page, click on the HTTP Event Collector option.

-
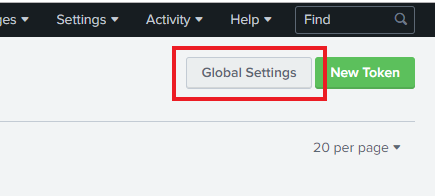
In the Edit Global Settings modal, make sure all the details are similar to the image shown below.
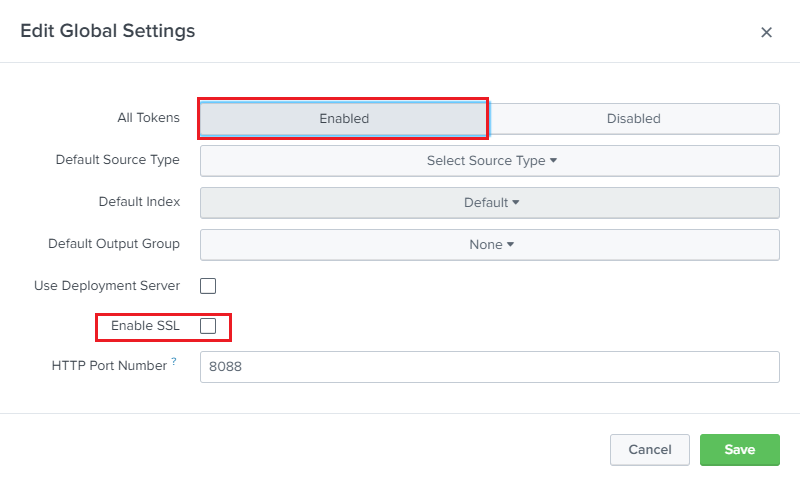
-
Then Click on Save.
-
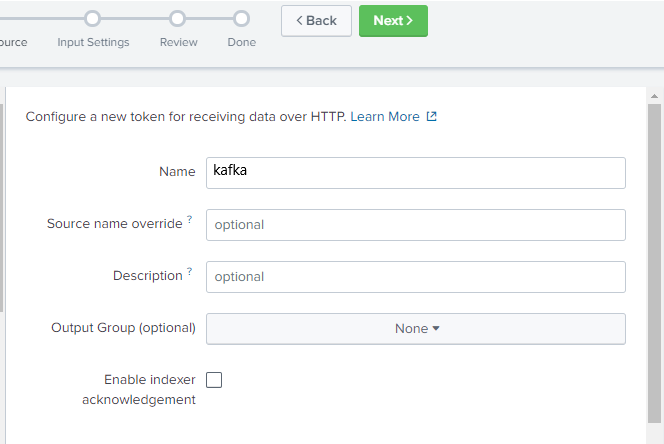
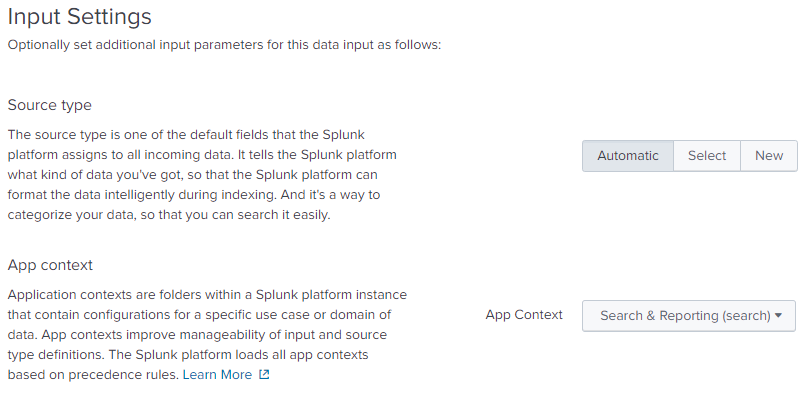
Then, click on New Token and make sure all of the details as per the following screenshots.
- After creating a new token, remember to make a note of it.
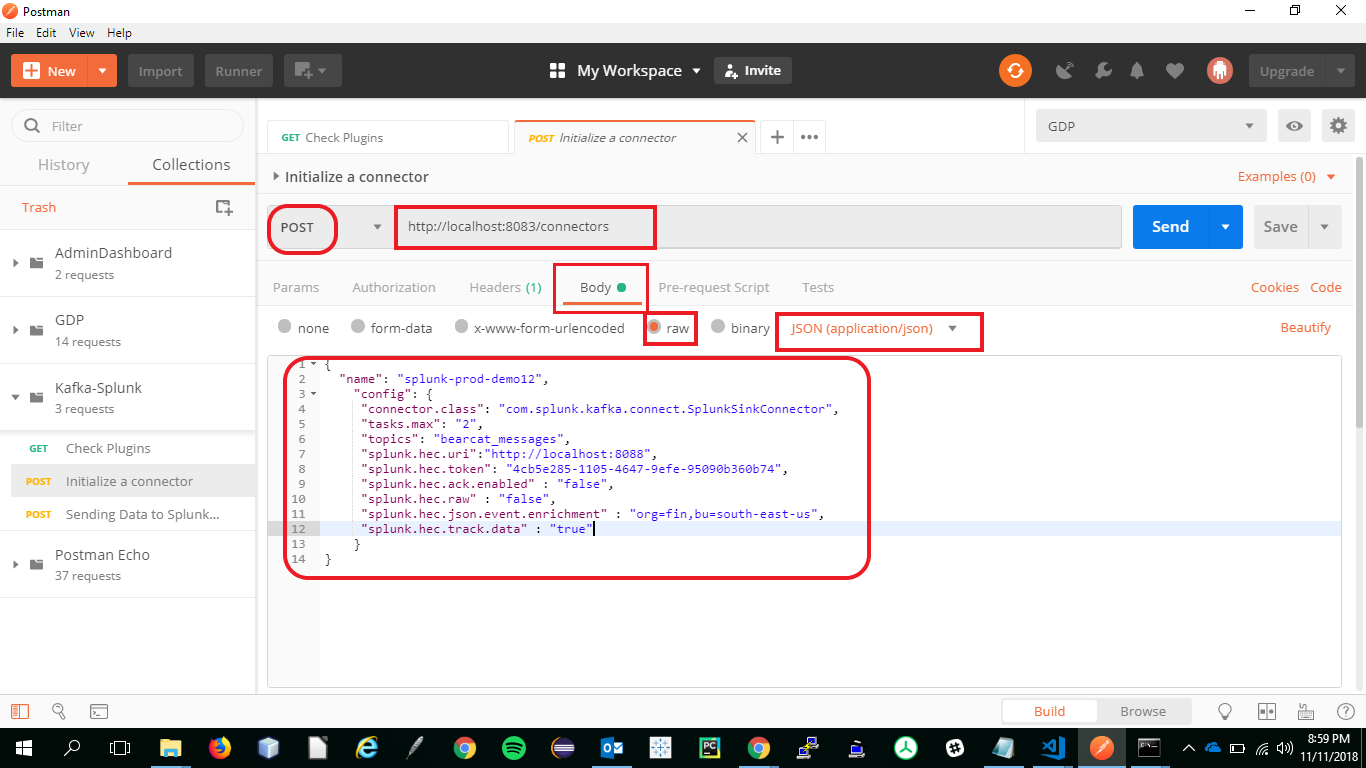
POSTthe following data to splunk HEC using the following URI and payload
{
  "name": "splunk-prod-demo12",
    "config": {
     "connector.class": "com.splunk.kafka.connect.SplunkSinkConnector",
     "tasks.max": "2",
     "topics": "bearcat_messages",
     "splunk.hec.uri":"http://localhost:8088",
     "splunk.hec.token": "<use the token generated in previous step>",
     "splunk.hec.ack.enabled" : "false",
     "splunk.hec.raw" : "false",
     "splunk.hec.json.event.enrichment" : "org=fin,bu=south-east-us",
     "splunk.hec.track.data" : "true"
    }
}
- https://github.com/splunk/kafka-connect-splunk/
- https://docs.confluent.io/current/connect/userguide.html#id3
- https://docs.confluent.io/current/connect/references/restapi.html
- https://kafka.apache.org/intro
- https://bitbucket.org/professorcase/h07/src
- Vipul chandoor ([email protected])
- Saivarun Illendula ([email protected])
- Krishnaveni Karri ([email protected])
- Santhosh Bonala ([email protected])
