This is a fork of usef-kh/fer. We made an application for detecting user-provided human face image.
And we use the code from atulapra/Emotion-detection to implement a real-time camera emotion detector.
Please see README of application for more information.
Our platform is i7-10750H with RTX2060 (6G). Our environment is python 3.7.12 on pyenv with virtualenv on Ubuntu 20.04. Required packages are listed in requirements.txt. The environment of environment.yml for anacoda3 on Windows 10 works fine as well.
This work is published on arXiv
Our final model checkpoint can be found here
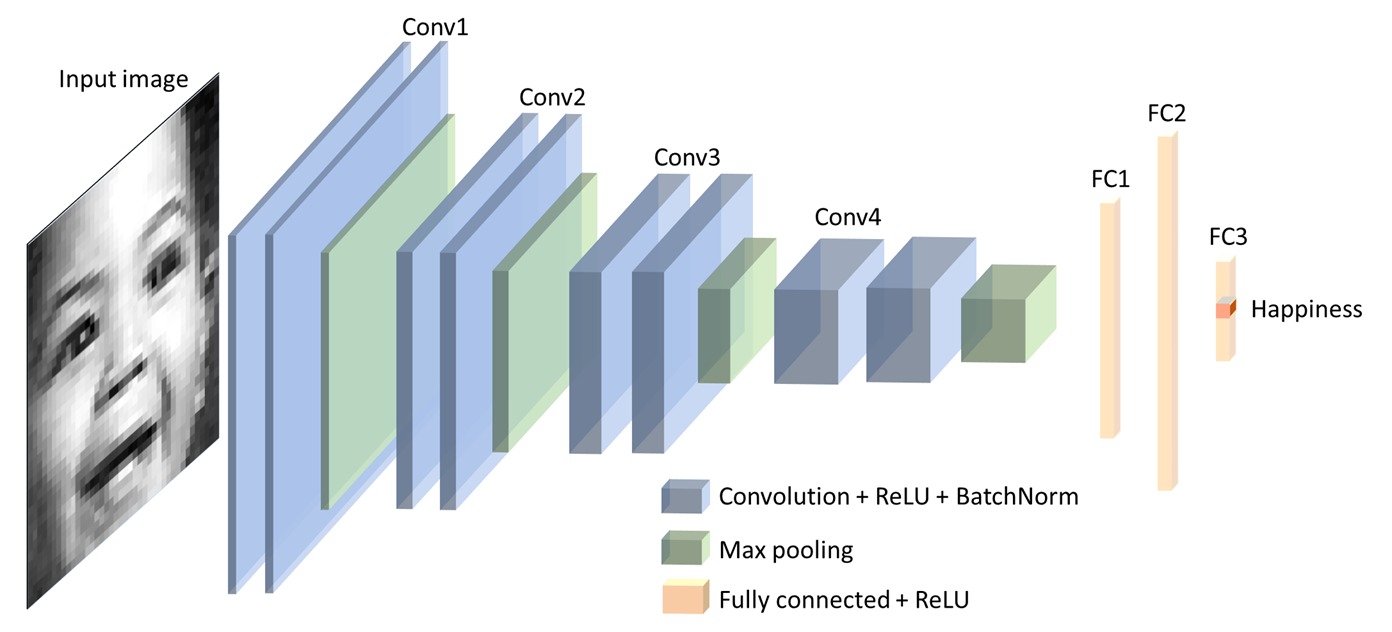
In this work, we achieve the highest single-network classification accuracy on FER2013. We adopt the VGGNet architecture, rigorously fine-tune its hyperparameters, and experiment with various optimization methods. To our best knowledge, our model achieves state-of-the-art single-network accuracy of 73.28 % on FER2013 without using extra training data.
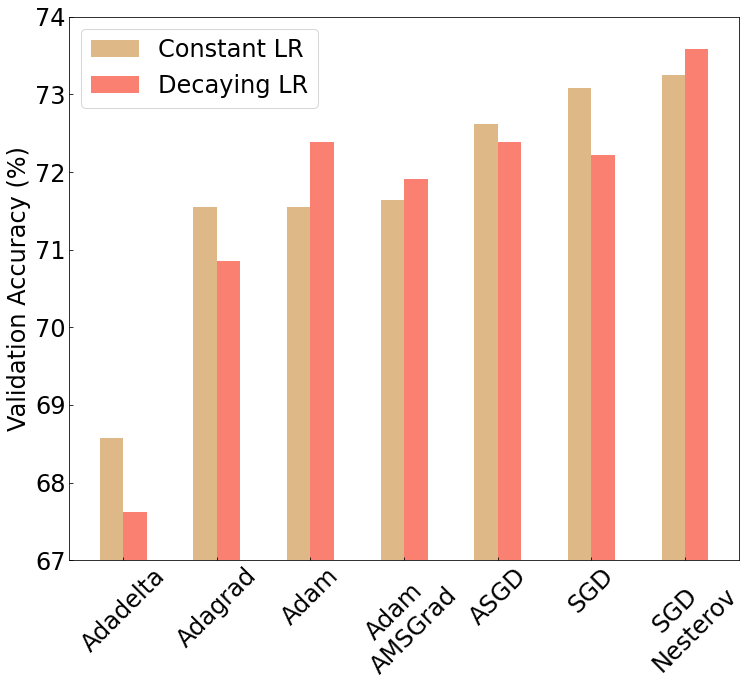
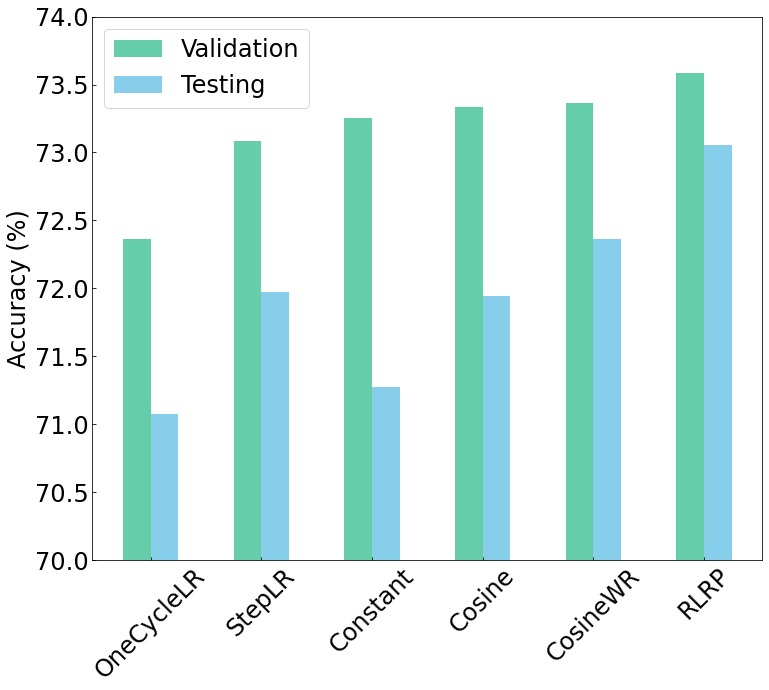
In tuning, we experiment with several deifferent optimizers, learning schedulers and run a grid search over all parameters. Some of our results are shown below.
| Optimizers | Schedulers |
|---|---|
 |
 |
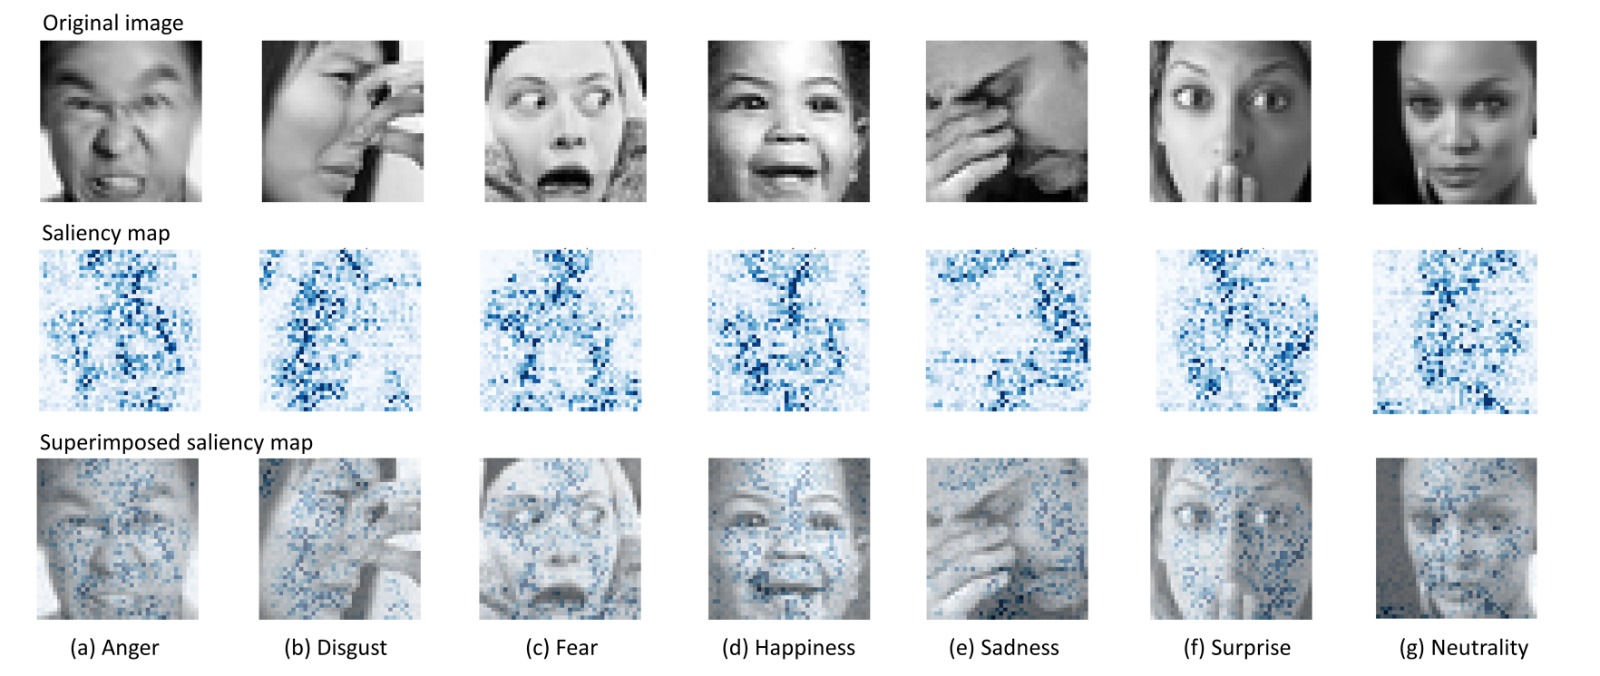
Visualizing the information captured inside deep neural networks helps describe how they differentiate between different facial emotions. A saliency map is a common technique used in visualizing deep neural networks. By propagating the loss back to the pixel values, a saliency map can highlight the pixels which have the most impact on the loss value. It highlights the visual features the CNN cancapture from the input; thus, allowing us to better understand the importance of each feature in the original image on the final classification decision.
To use this repo, create a conda environment using environment.yml or requirements.txt
# from environment.yml (recommended)
conda env create -f environment.yml
Download the offical fer2013 dataset, and place it in the outmost folder with the following folder structure datasets/fer2013/fer2013.csv
To train your own version of our network, run the following
python train.py network=vgg name=vgg_test
To change the default parameters, you may also add arguments such as bs=128 or lr=0.1. For more details, please refer to utils/hparams.py


