In many situations, you may really enjoy debugging your neo3 smart contract using neo-express. However, you may have met some frustrating exceptions raised deep from the source code of neo that you have no idea how to fix them. Besides, you may desire to inspect a running neo-node instead of its static source codes.
Follow this guide to set a full neo-cli (3.1.0) on Windows 10 that can be debugged! We will attempt to install the C# environment for neo, and interact with the blockchain using Python.
Some screenshots in this guide might be in Chinese.
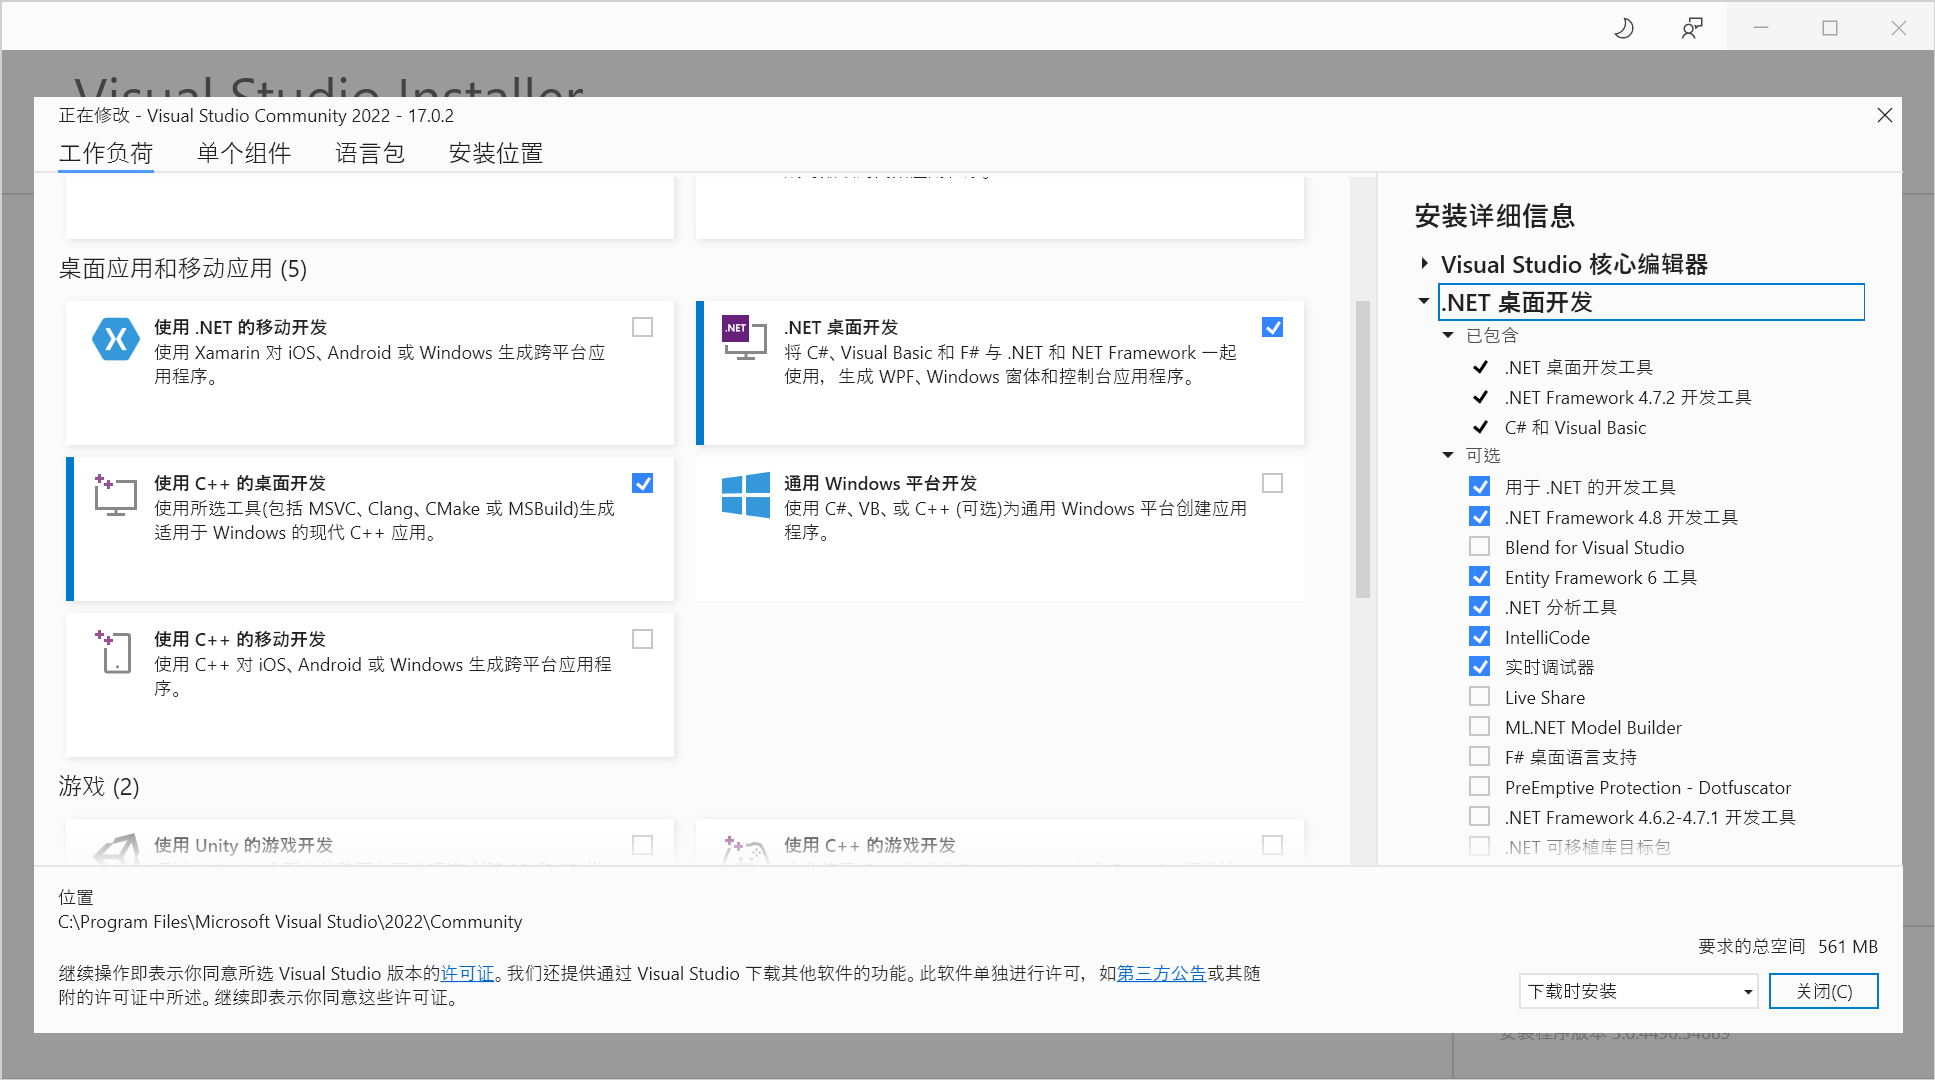
Because Visual Studio 2019 does not natively support .NET 6.0, we had better use the latest version.
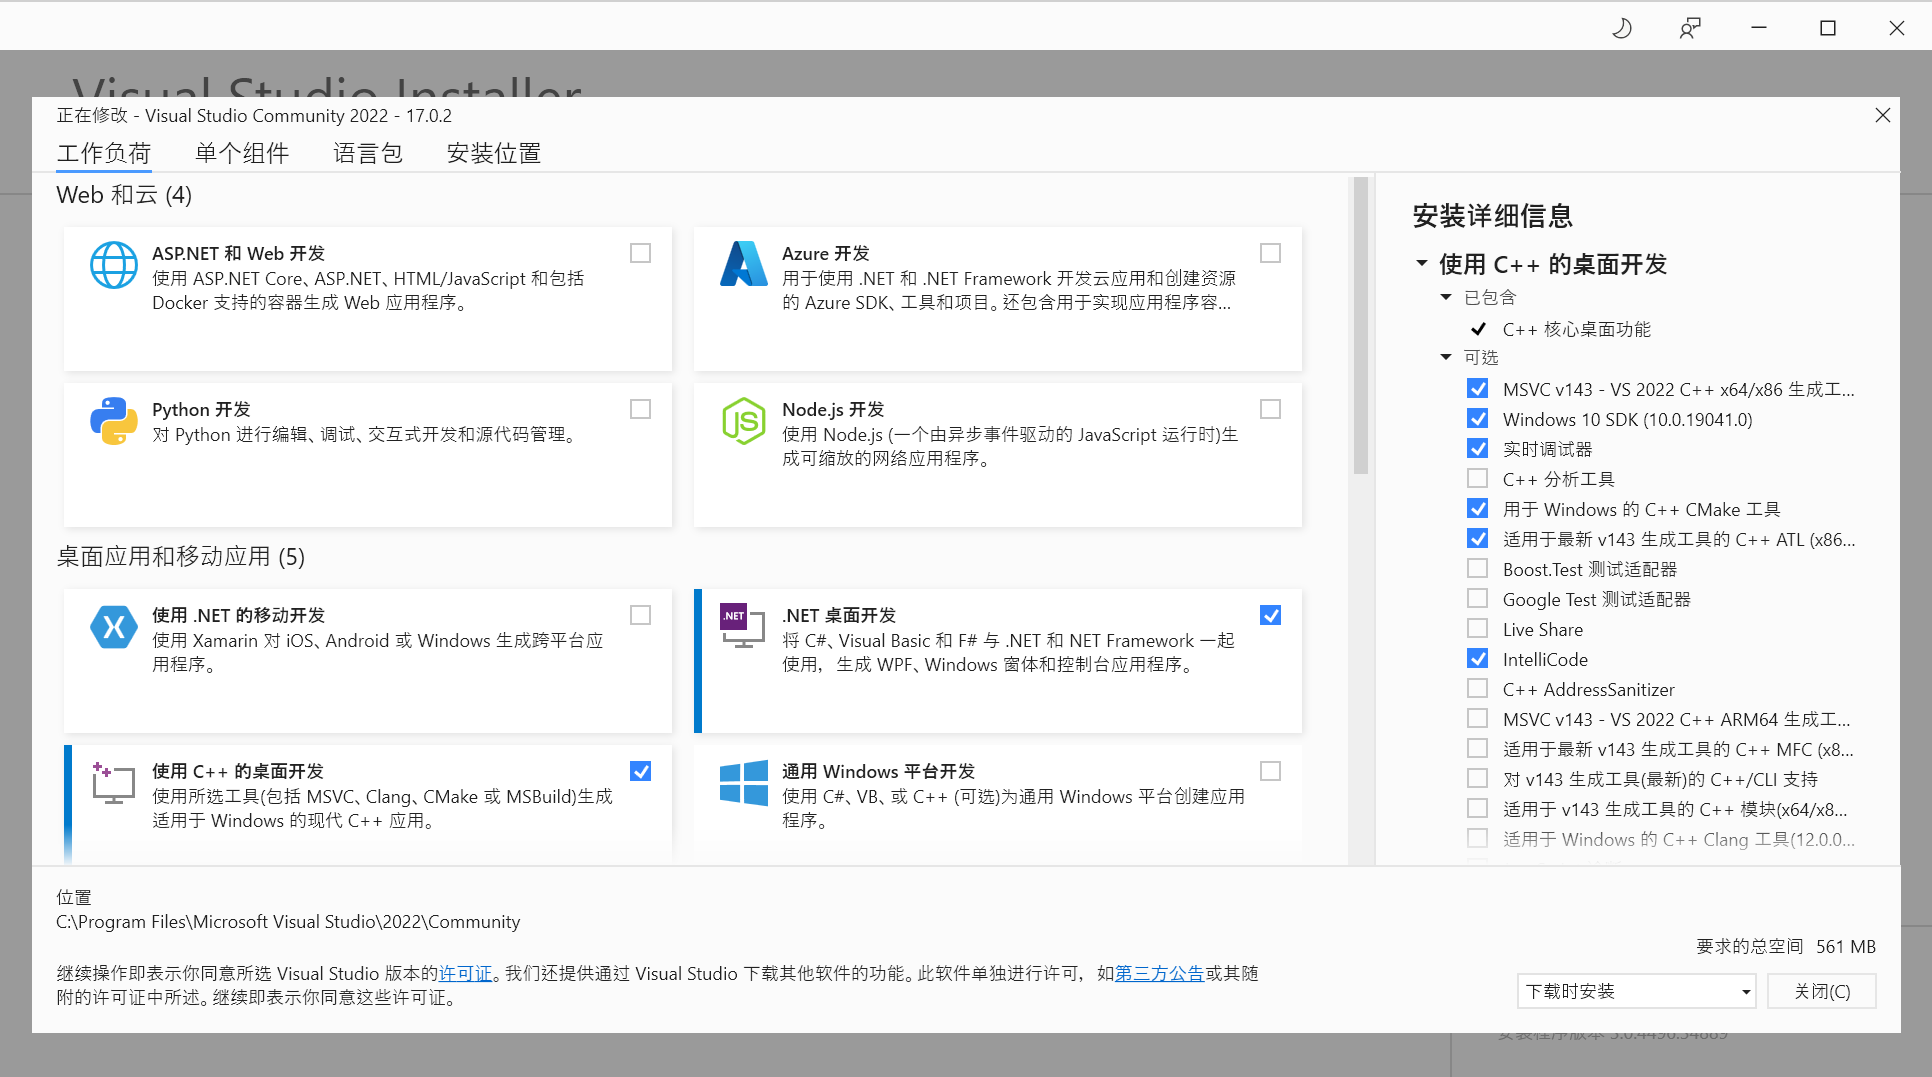
Choose .NET desktop development and C++ desktop development, and wipe of some unnecessary components. Here we do not consider Python, but you may also install Python workloads in Visual Studio. The following workloads should be enough (C++ environments are for Python). Be aware that Windows 10 SDK is needed so that you can compile components of neo-mamba.
Let Visual Studio Installer download for you. We can just move on.
3.9 is also OK, but not 3.7! I suggest downloading it from https://www.python.org/downloads/ .
Ensure that Python executables are added to your PATH, and that the command pip can be used. Try this in your local terminal:
pip install requests
pip install neo3-boagit clone [email protected]:neo-project/neo-node.gitAnd you may still need to download the release of neo-cli. This is just for two leveldb dll files inside the released zip file: Plugins/LevelDBStore.dll and libleveldb.dll. The dlls will be copied into the compiled neo-node later.
Then you should also
git clone [email protected]:neo-project/neo.git
git clone [email protected]:neo-project/neo-vm.git
git clone [email protected]:neo-project/neo-modules.git
git clone [email protected]:CityOfZion/neo-mamba.git
Do not forget to consider git checkout a proper commit or branch for each repository, so that the versions of all these codes can match.
Make sure you are actually downloading N3 testnet full offline package. Unzip it and get the file chain.0.acc.
The following steps may fail if Visual Studio is not installed.
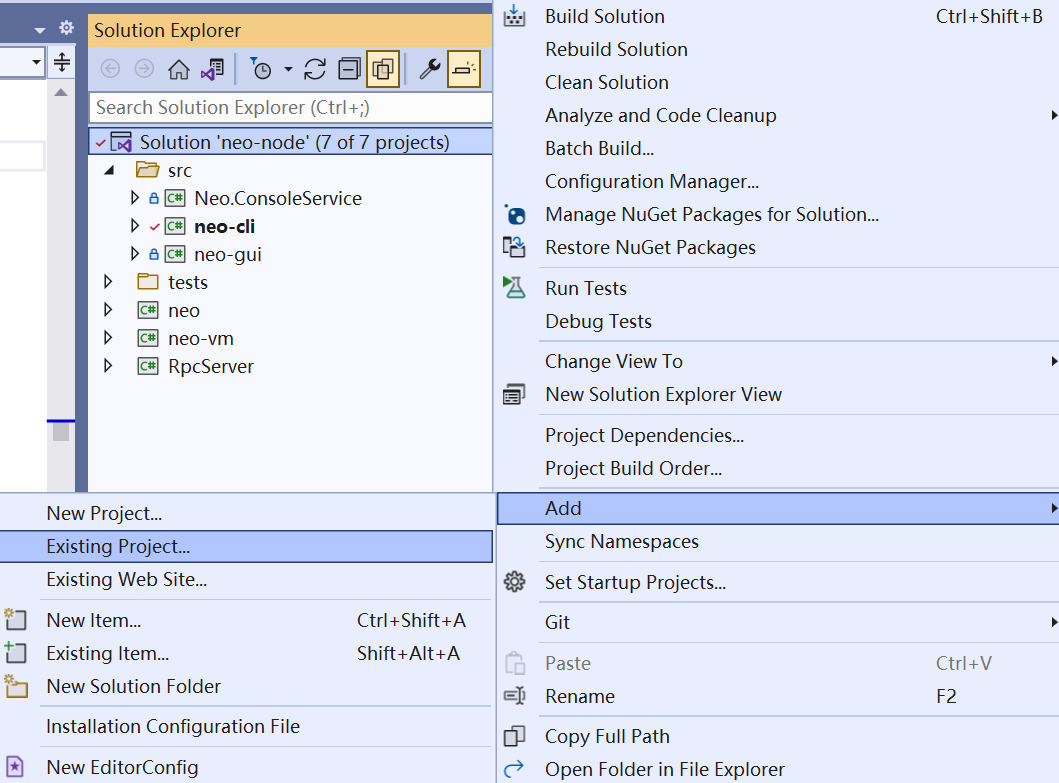
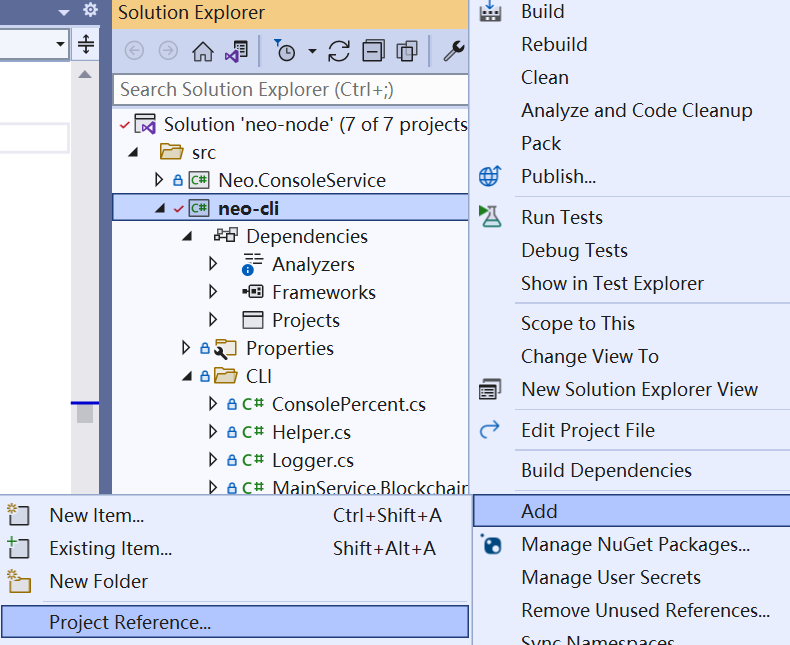
Add projects neo, neo-vm and RpcServer (in neo-modules) to the solution. Add project neo as project reference for neo-cli. If there is any compilation error, especially package dependency conflict, consider adding neo-vm as project reference for neo-cli.
The package dependencies of neo-cli should be cleared.
Paste the content of neo-cli/config.testnet.json into neo-cli/config.json, replacing the original neo-cli/config.json. This ensures that neo-cli connects to the testnet instead of the mainnet.
Set neo-cli as the Startup project and debug it. It is likely that the cli would not run properly and throw some exceptions about leveldb. Just copy libleveldb.dll to neo-cli\bin\Debug\net6.0, and LevelDBStore.dll to neo-cli\bin\Debug\net6.0\Plugins.
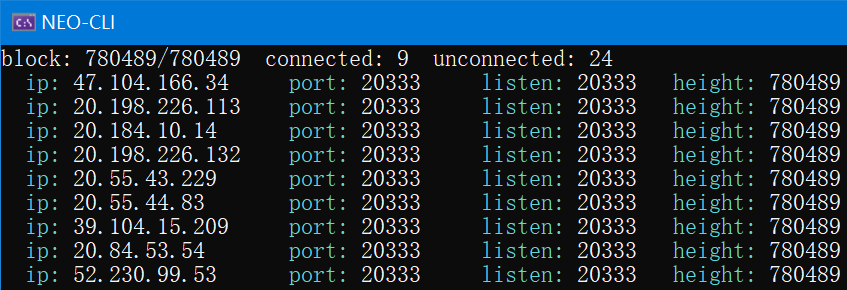
If neo-cli is started properly, execute show state and watch if it is synchronizing blocks.
Stop neo-cli. Put chain.0.acc at neo-cli\bin\Debug\net6.0. Add --noverify flag in neo-cli debug properties.
Launch neo-cli.
A simple way is just to execute install RpcServer in neo-cli, and edit neo-cli/bin/Debug/net6.0/Plugins/RpcServer/config.json to make sure that your configs matches the testnet. For example, the network value should be the same as that in neo-cli/config.testnet.json, and meanwhile you probably want to leave "DisabledMethods": []. You may also consider larger values for MaxGasInvoke, MaxConcurrentConnections and MaxIteratorResultItems. But remember that the installed dlls cannot be debugged! You can replace the installed neo-cli/bin/Debug/net6.0/Plugins/RpcServer.dll with that compiled in debugging mode from the project RpcServer in neo-modules. Specifically, add project reference neo to RpcServer, and build RpcServer in debug mode. Move RpcServer.dll and maybe directory RpcServer from neo-modules/src/RpcServer/bin/Debug/net6.0/ to neo-cli/bin/Debug/net6.0/Plugins. Add project reference RpcServer for neo-cli.
Execute start RpcServer after RpcServer is equipped with debuggable dlls and correct configs, or just restart neo-cli.
cd neo-mamba
python setup.py install
If python setup.py install is deprecated, try python setup.py build and then pip install the-whl-file-that-was-built.whl
This step involves C language compilation. I cannot really help if there is any error, but if you do meet exceptions, try upgrading your pip and pip install cmake.
Execute show state in neo-cli, and wait for your local blocks to be synced to the latest height.
Congratulations. You are now probably able to inspect the execution of all the assembly instructions in your compiled smart contract. Try adding a breakpoint at ExecuteInstruction(); in neo-vm/ExecutionEngine.cs, near the following codes
                    try
                    {
                        ExecuteInstruction();
                    }
                    catch (CatchableException ex) when (Limits.CatchEngineExceptions)
                    {
                        ExecuteThrow(ex.Message);
}Make sure your neo-cli has been equipped with the plugin RpcServer, and that the config (especially Network, MaxGasInvoke, MaxFee, MaxIteratorResultItems) is proper. You probably would like to leave "DisabledMethods": [] to openwallet from another process.
Certainly you can use tools like Hoppscotch as an HTTP client, but you may also use the client module here with git clone [email protected]:Hecate2/neo-ruler.git and check out the directories neo_test_with_rpc and tests as a non-official Python RPC client. This package rules out the difficulty from data conversion, and allows you to interact with neo-cli in very natural, detail-irrelevant codes. There are also official RPC clients built in a series of common programming languages, included in official Neo SDKs.
Make sure your invokefunction calls can break at breakpoints in neo-vm.
To be continued...
