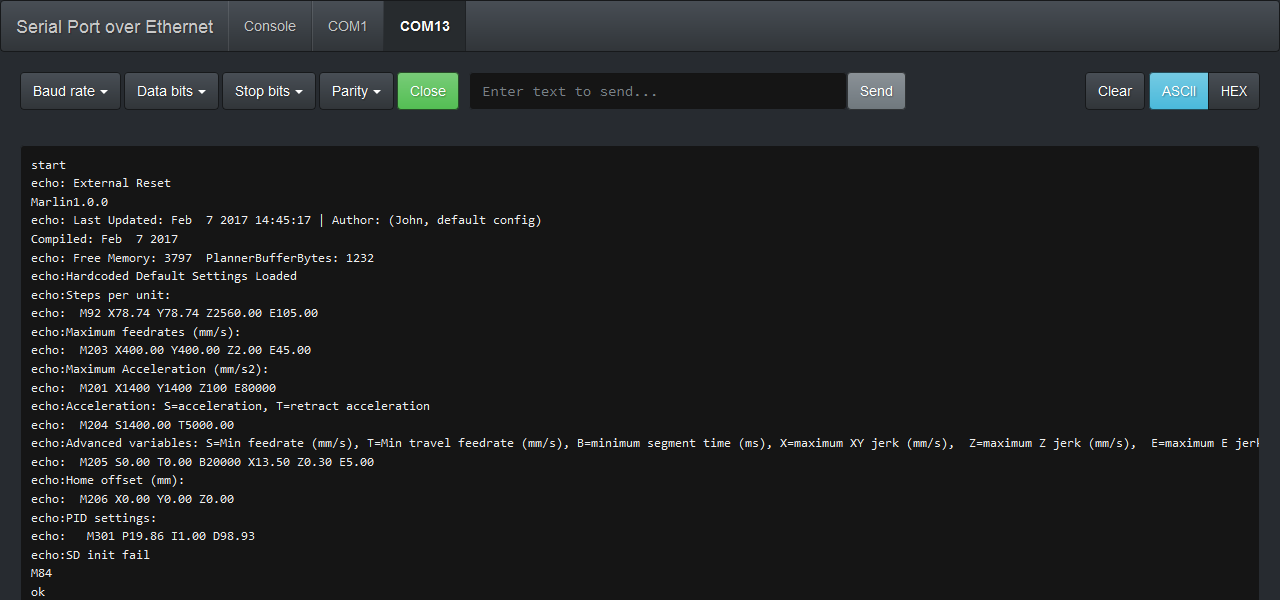
Serial port over ethernet using a HTTP server with WebSockets and REST API.
NOTE: This is an early version of the script - not yet ready for production environment. Please be patient.
Install the package:
npm install -g remote-serial-port-serverStart the server:
remote-serial-port-server --port 5147Open in web browser:
http://localhost:5147/- list and control serial ports remotely
- REST API
- WebSocket to serial port
- TCP or UDP socket to serial port
- simple web interface
- monitor traffic
- shared serial port (connect multiple clients to a single serial port)
Usage:
  remote-serial-port-server [options]

Options:
  --help                 Print this message
  --list                 Print serial ports and exit
  --port, -p [num]       Socket port number, default: 5147
  --mode, -m [mode]      Server mode: http, tcp, udp, echo; default: http
  --prefix [path]        URL prefix: '/' for root or '/api/v1' etc.
  --no-list              Disable serial port list
  --no-read              Disable read ops
  --no-write             Disable write ops
  --no-ui                Disable web interface
  --no-ws                Disable web socket
  --allow-ports [list]   Allow only specific ports
  --config [port,baud,extra]
                         Socket serial port configuration, only for TCP and UDP
                         [extra] as data bits, parity and stop bits
                         Data bits 5, 6, 7 or 8 and stop bits 1 or 2
                         Parity: N-none, E-even, O-odd, M-mark or S-space
                         For example 8N1 = 8 data bits, N no parity, 1 stop bit
  --verbose              Enable detailed logging
  --version              Print version number

Examples:
  remote-serial-port-server
  remote-serial-port-server --list
  remote-serial-port-server --allow-ports COM1,COM2,COM3
  remote-serial-port-server --no-read --no-write --no-ws --port 80
  remote-serial-port-server --mode tcp --config COM1,115200 --port 3000
  remote-serial-port-server --mode udp --config /dev/ttyUSB0,9600,8N1 -p 3000
Handle data over the data line
//Initialize a WebSocket connection
var ws = new WebSocket('ws://localhost:5147/api/v1/port/COM1/data');
ws.binaryType = 'arraybuffer';
ws.onopen = function(event) {
  console.log("WebSocket connected");
};
ws.onclose = function(event) {
  console.log("WebSocket disconnected");
};
ws.onmessage = function(event) {
  console.log("WebSocket read");
};
ws.onerror = function(event) {
  console.error("WebSocket error", error);
};

//Send something to serial port
ws.send("AT;\n");Use --mode argument with tcp or udp value. Note that TCP and UDP sockets can handle only data transfer (no control line). Also there is a limitiation of one serial port per socket port. The serial port must be preconfigured when opening the socket.
Example of TCP socket: opens a serial port COM1 with default configuration on port 3000
remote-serial-port-server --mode tcp --config COM1 --port 3000
Test TCP socket using telnet
telnet 127.0.0.1 3000
Example of UDP socket
remote-serial-port-server --mode udp --config /dev/ttyUSB0,9600,8N1 --port 3000
where 9600 is baud rate, 8 data bits, N for no parity and 1 stop bit.
See remote-serial-port-client library to use with Node.js or inside a web browser.
var express = require('express');
var app = express();

//Register the remote serial port REST API with the prefix
var srv = require('remote-serial-port-server');
app.use("/api/v1", srv.http({ verbose: true }));

var port = 5147;
var server = app.listen(port, function() {
  console.log('HTTP on port ' + server.address().port);
});Send received bytes from a serial port immediately back to the serial port
remote-serial-port-server --mode echo --config COM1,9600,8N1 --verbose
- Accessing a serial port via internet, lets say port 80 and web interface. Could be set up with a secure connection using SSL for both HTTP and WebSocket using a proxy, e.g. nginx or Apache.
- Sharing a single serial port with multiple clients. Connected clients can read/write to one serial port. User can also monitor the traffic for development and debugging purposes.
- Accessing a serial port on virtual machines when there is no hardware attached.
- Also used for crappy serial port drivers for cheap chinese Arduino clones. This can be done by running a virtual machine and attaching a USB device. Drivers are then installed to the virtual machine instead of host machine.
- Using a Raspberry Pi as a remote serial port host, e.g. hosting a WS2300 weather station connected to a Raspberry Pi and controlled from a desktop computer.
- Access to a serial port from node-webkit or electron UI frames.
- Echo - send received bytes from a serial port immediately back to the serial port.
