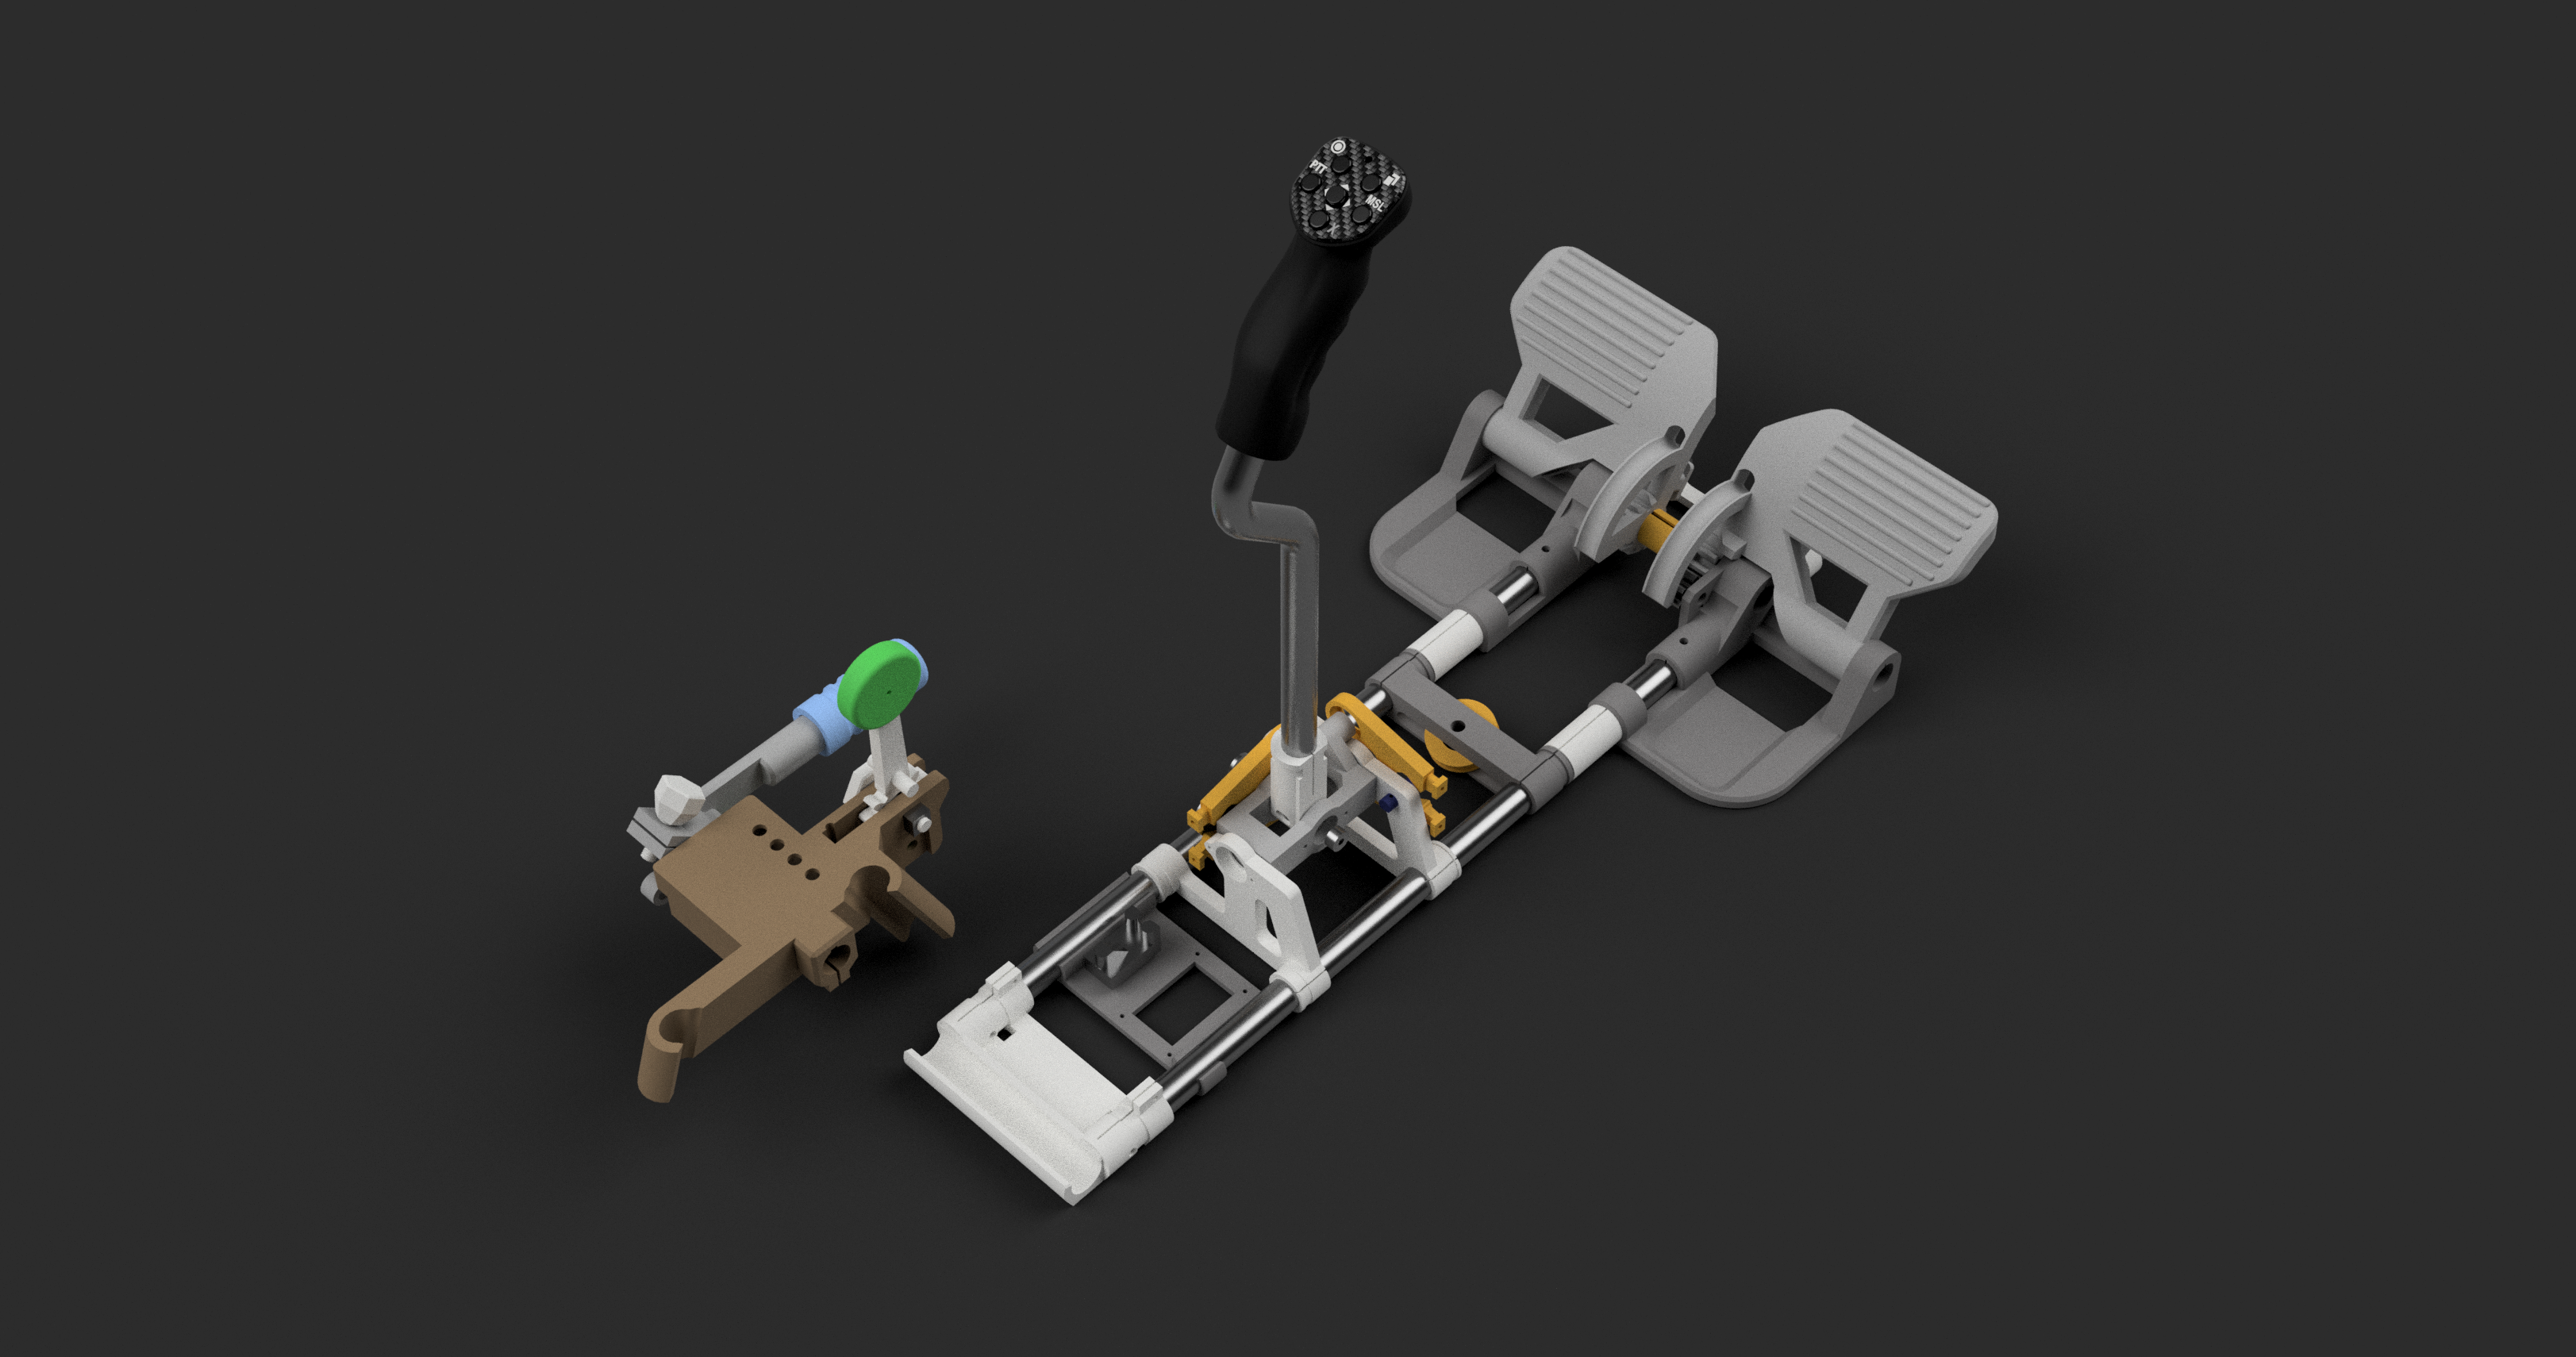
3D printable flight stick and pedals with minimal hardware. Great for Condor 2 and other VR gliding simulators.
Video: https://www.youtube.com/watch?v=8db8fcycaJI
Features a robust joystick gimbal that only needs 608 "skate" bearings and no other hardware. Instead of metal bolts or shafts, it uses 3D printed dowels.
The frame and the stick shaft are 18 mm PVC pipe. The whole device clips onto a pipe chair. Unless you have the same chair as I do, you will need to modify the left-hand panel 3D files to make it fit.
The stick head is styled like a glider stick.
Stick motion is sensed with a pair of TLE5010/11 digital magnetoresistive sensors (in the video I briefly show how you could use bare hall effect sensors too). Other axes are sensed with the common potentiometer. I recommend the MMJoy2 firmware and an Arduino Micro to manage the USB device.
- PLA filament for 3D printed parts (PETG or ABS should work equally well). Less than 500 g is used.
- Arduino Micro or other equivalent microcontroller board with ATmega32U4, or any board supported by the MMJoy2 firmware
- 608 bearings 12 pieces. These are the bearings commonly found in skateboards.
- 20 mm M3 bolts and nuts. About 10 pairs.
- PVC pipe with an outer diameter of 18 mm. About 3 meters is needed.
- Magnetoresistive sensor TLE5010/5011, 2 pcs, and associated magnets
- Rotary potentiometers. (What's the part number of that classic pot?) 10 KOhm or similar value. 4 pcs
- Panel mount switches
- Rubber bands
- Zip ties
- 1 shoe string or other non-stretching rope
- Multiple core wire to carry signals between modules. I used some ethernet cable with 8 cores. You could use a bunch of single core wire too. For joystick head:
- PCB prototyping board with 0.1" pitch holes. Approx. 5 cm x 5 cm
- Throughhole tactile switches, similar to SKHHAJA010, 6 pcs
- Thoughhole 5-way navigation switch. SKQUCAA010
- Throughhole diodes, about 10 pcs
The inner frame of the gimbal must be assembled in a specific order:
- Insert 608 bearings in the cam elements and gimbal frame (8 locations in total)
- Insert a dowel and the 2 mm printed washer to the right-hand side of the shaft mount. Let it extend about 20 mm
- Slide the above dowel into the bearing in the U-shaped piece of the inner gimbal frame
- Slide the left side side of the inner gimbal frame into place. It needs to bend a little to get into position
- Slot in the remaining piece of the inner frame
- Insert dowels in all 6 available locations The dowel through the bearing on the left side of the inner frame will complete the Y axis shaft. The four dowels in the round "ears" will receive the cams After this you can add the cams and the cam follower bearings, and assemble the outher frame around it
The joystick shaft can be formed into shape by carefully heating the PVC pipe. Burning PVC is very dangerous. Please research a safe way to bend the pipe before starting.
The head of the stick has a cut-up PCB protoboard inside it. 6 tactile buttons and a 5-way hat switch are soldered onto the board, to match the holes in the stick head. Form a diode matrix on the PCB board according to instructions in the MMjoy2 documentation. The face of the head is held in place with M3 bolts and captured nuts.
Assemble the pedals and left-hand panel according to the layout in the STEP file.
Various pieces are mounted to the two parallel PVC pipes using 3D printed collars. You can clamp these by using 3M bolts and nuts. I found they had to be very tight or they would slip, so in the end I often used some short wood screws and just screwed through the 3D printed part and the PVC pipe to hold pieces in place permanently.
- Use a dowel and a bearing to fit the pulley wheel in front of the rudder pedals.
- Tie a shoetring between the pedals and around the pulley, to link the motion of the two pedals together.
- Tie some rubber bands to tension the pedals. One rubber band should be tied between the two pedals, so that they return to center. One rubber band should go from each pedal to behind the pedal, to pull the pedal back against the shoestring.
The airbrake lever and trim lever have friction clutches. They are tensioned by a printed bolt and nut. The lever positions are sensed by geared potentiometers.
You can use a single potentiometer on just one of the pedals. The pedals are linked to move together, so it is enough to measure just one of them. However, the PVC pipe frame can bend if you press on both pedals at the same time, and give you a false reading on the rudder axis. To prevent this, you can wire two identical potentiometers in a differential configuration ( https://github.com/akakikuumeri/pipechair-cockpit/blob/main/pedals%20wiring%20diagram.jpeg ). This way the potentiometers cancel out any movement that happens on both pedals in the same direction, and only ouput the difference between them.
Pay attention to the order of GND and 5V wires. When installed on the pedals, one pot should have the GND on the top and one on the bottom. https://github.com/akakikuumeri/pipechair-cockpit/blob/main/pedals%20wiring%20photo.jpg
Notice that if the two potentiometers are moved all the way in one direction (both pedals pushed all the way back or all the way forward) this wiring might short out the GND and 5V pins. To protect your electronics from this unlikely risk, you can add two small resistors on the wiper pins of the potentiometers as in the diagram. I used 47 Ohm reistors, any value that is large enough to prevent a large current in case of a short, and small enough compared to the potentiometer resistance, is fine (10 to 100 Ohms perhaps).
