Extensible, powerful checkout powered by Saleor API.
This monorepo uses PNPM as a package manager and Turborepo for building packages.
Here's the list of each app and shared package in the monorepo (click to see a README of that project)
apps/checkout: an SPA React 18 checkout app, ready to be extended/modifiedapps/checkout-app: an Next.js Saleor app with dashboard for managing settings and theme, backend for checkout SPA, ready to be extended/modified
packages/ui-kit: UI kit for checkout and React Storefrontpackages/config:eslintconfigurations (includeseslint-config-nextandeslint-config-prettier)packages/tsconfig:tsconfig.jsons used throughout the monorepo
pnpm i
To build all apps and packages, run the following command:
pnpm run build
You can also build a specific app or package by running this command:
pnpm run build:checkoutIn this example, we'll only build apps/checkout
Create a tunnel for checkout-app:
cd apps/checkout-app && npx saleor app tunnel 3000Note: the process needs to be running in the background
Before you start the server, you need to change default environment variables. Create .env.local file in each app:
To run the development server for all the apps, use the following command:
pnpm run dev
You can also run only a specific app by running this command:
cd apps/checkout && pnpm devChange environment variables inside .env file:
-
SALEOR_API_URL— GraphQL endpoint of your SaleorExample:
https://my-env.eu.saleor.cloud/graphql/To run sandbox Saleor environment in Saleor Cloud use this command:
npx saleor project create && npx saleor environment createYou can also run Saleor locally. See Saleor docs for more instructions
-
CHECKOUT_APP_URL— URL of deployed Checkout AppExample:
https://saleor-checkout-app.vercel.appSee guide below on how to deploy the Checkout App
There are more environment variables available in each app. Go to their README's to learn more
The repo needs to be hosted on GitHub or some other git repository. Before you start, fork the repo to your account or organization.
- Authenticate the Turborepo CLI with your Vercel account
pnpm dlx turbo login
- Link the repo to a Vercel scope to enable the Remote Caching feature
pnpm dlx turbo link
Remote Caching drastically reduces build times if you work in a team. Learn more about it at Turborepo documentation and Vercel documentation
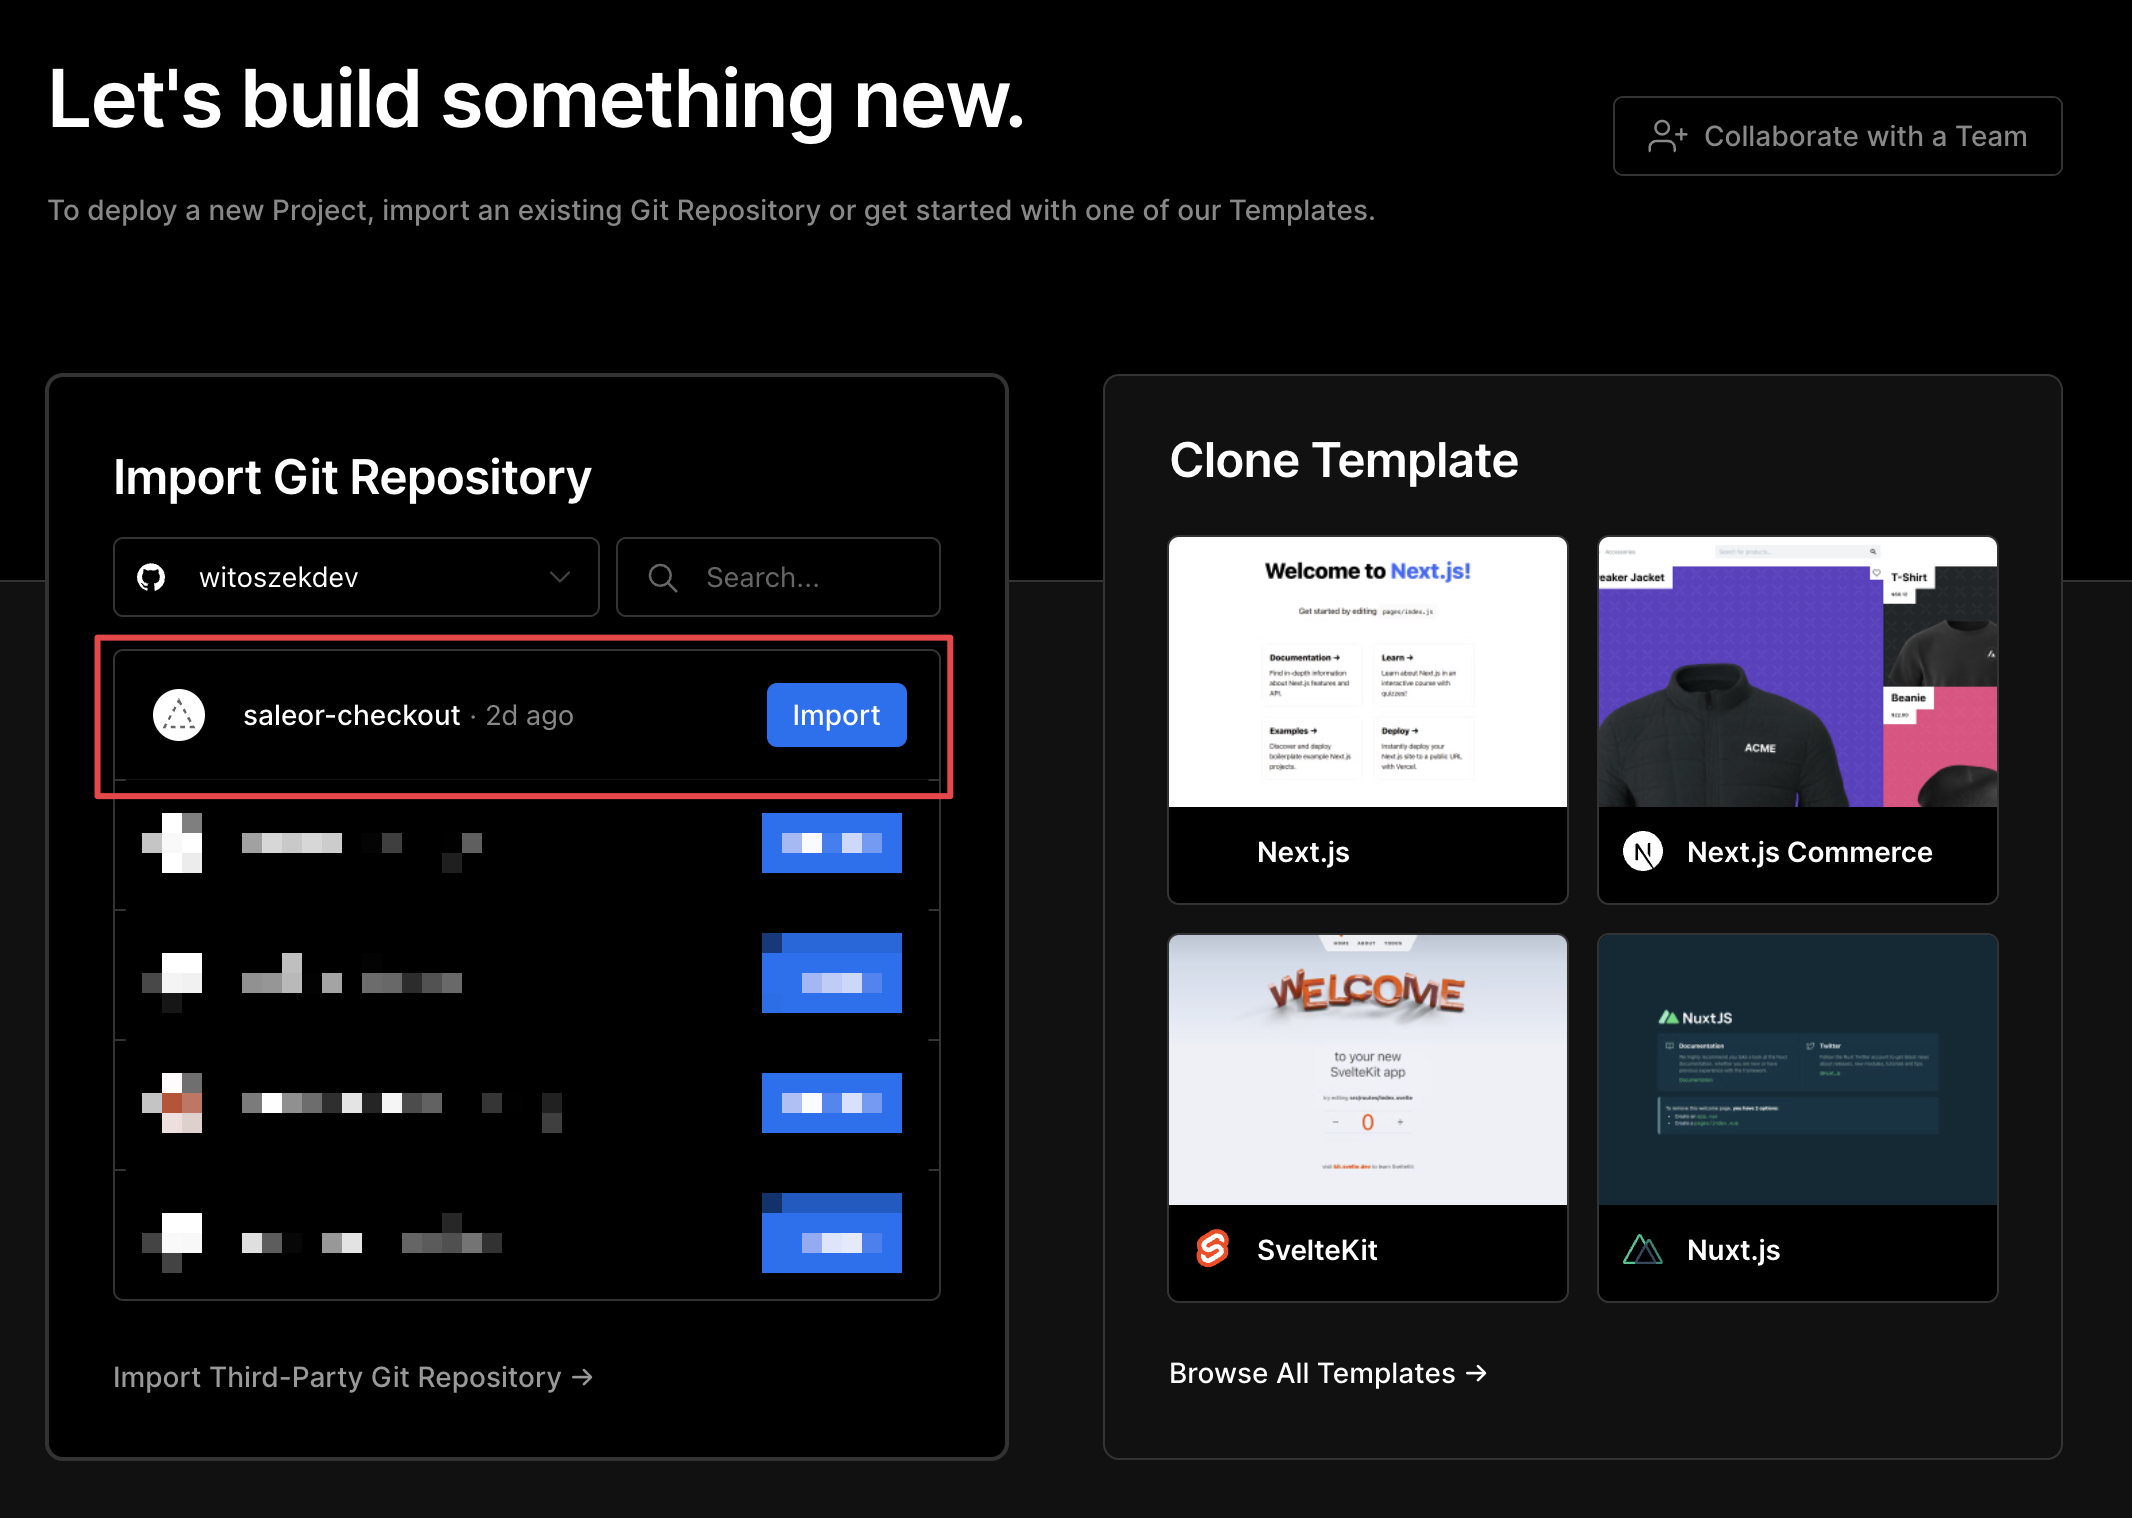
- Start creating new project on Vercel and select your forked GitHub repo
Note: Vercel now doesn't support importing the entire monorepo, you will need to set up a project yourself for each app inside
/appsfolder
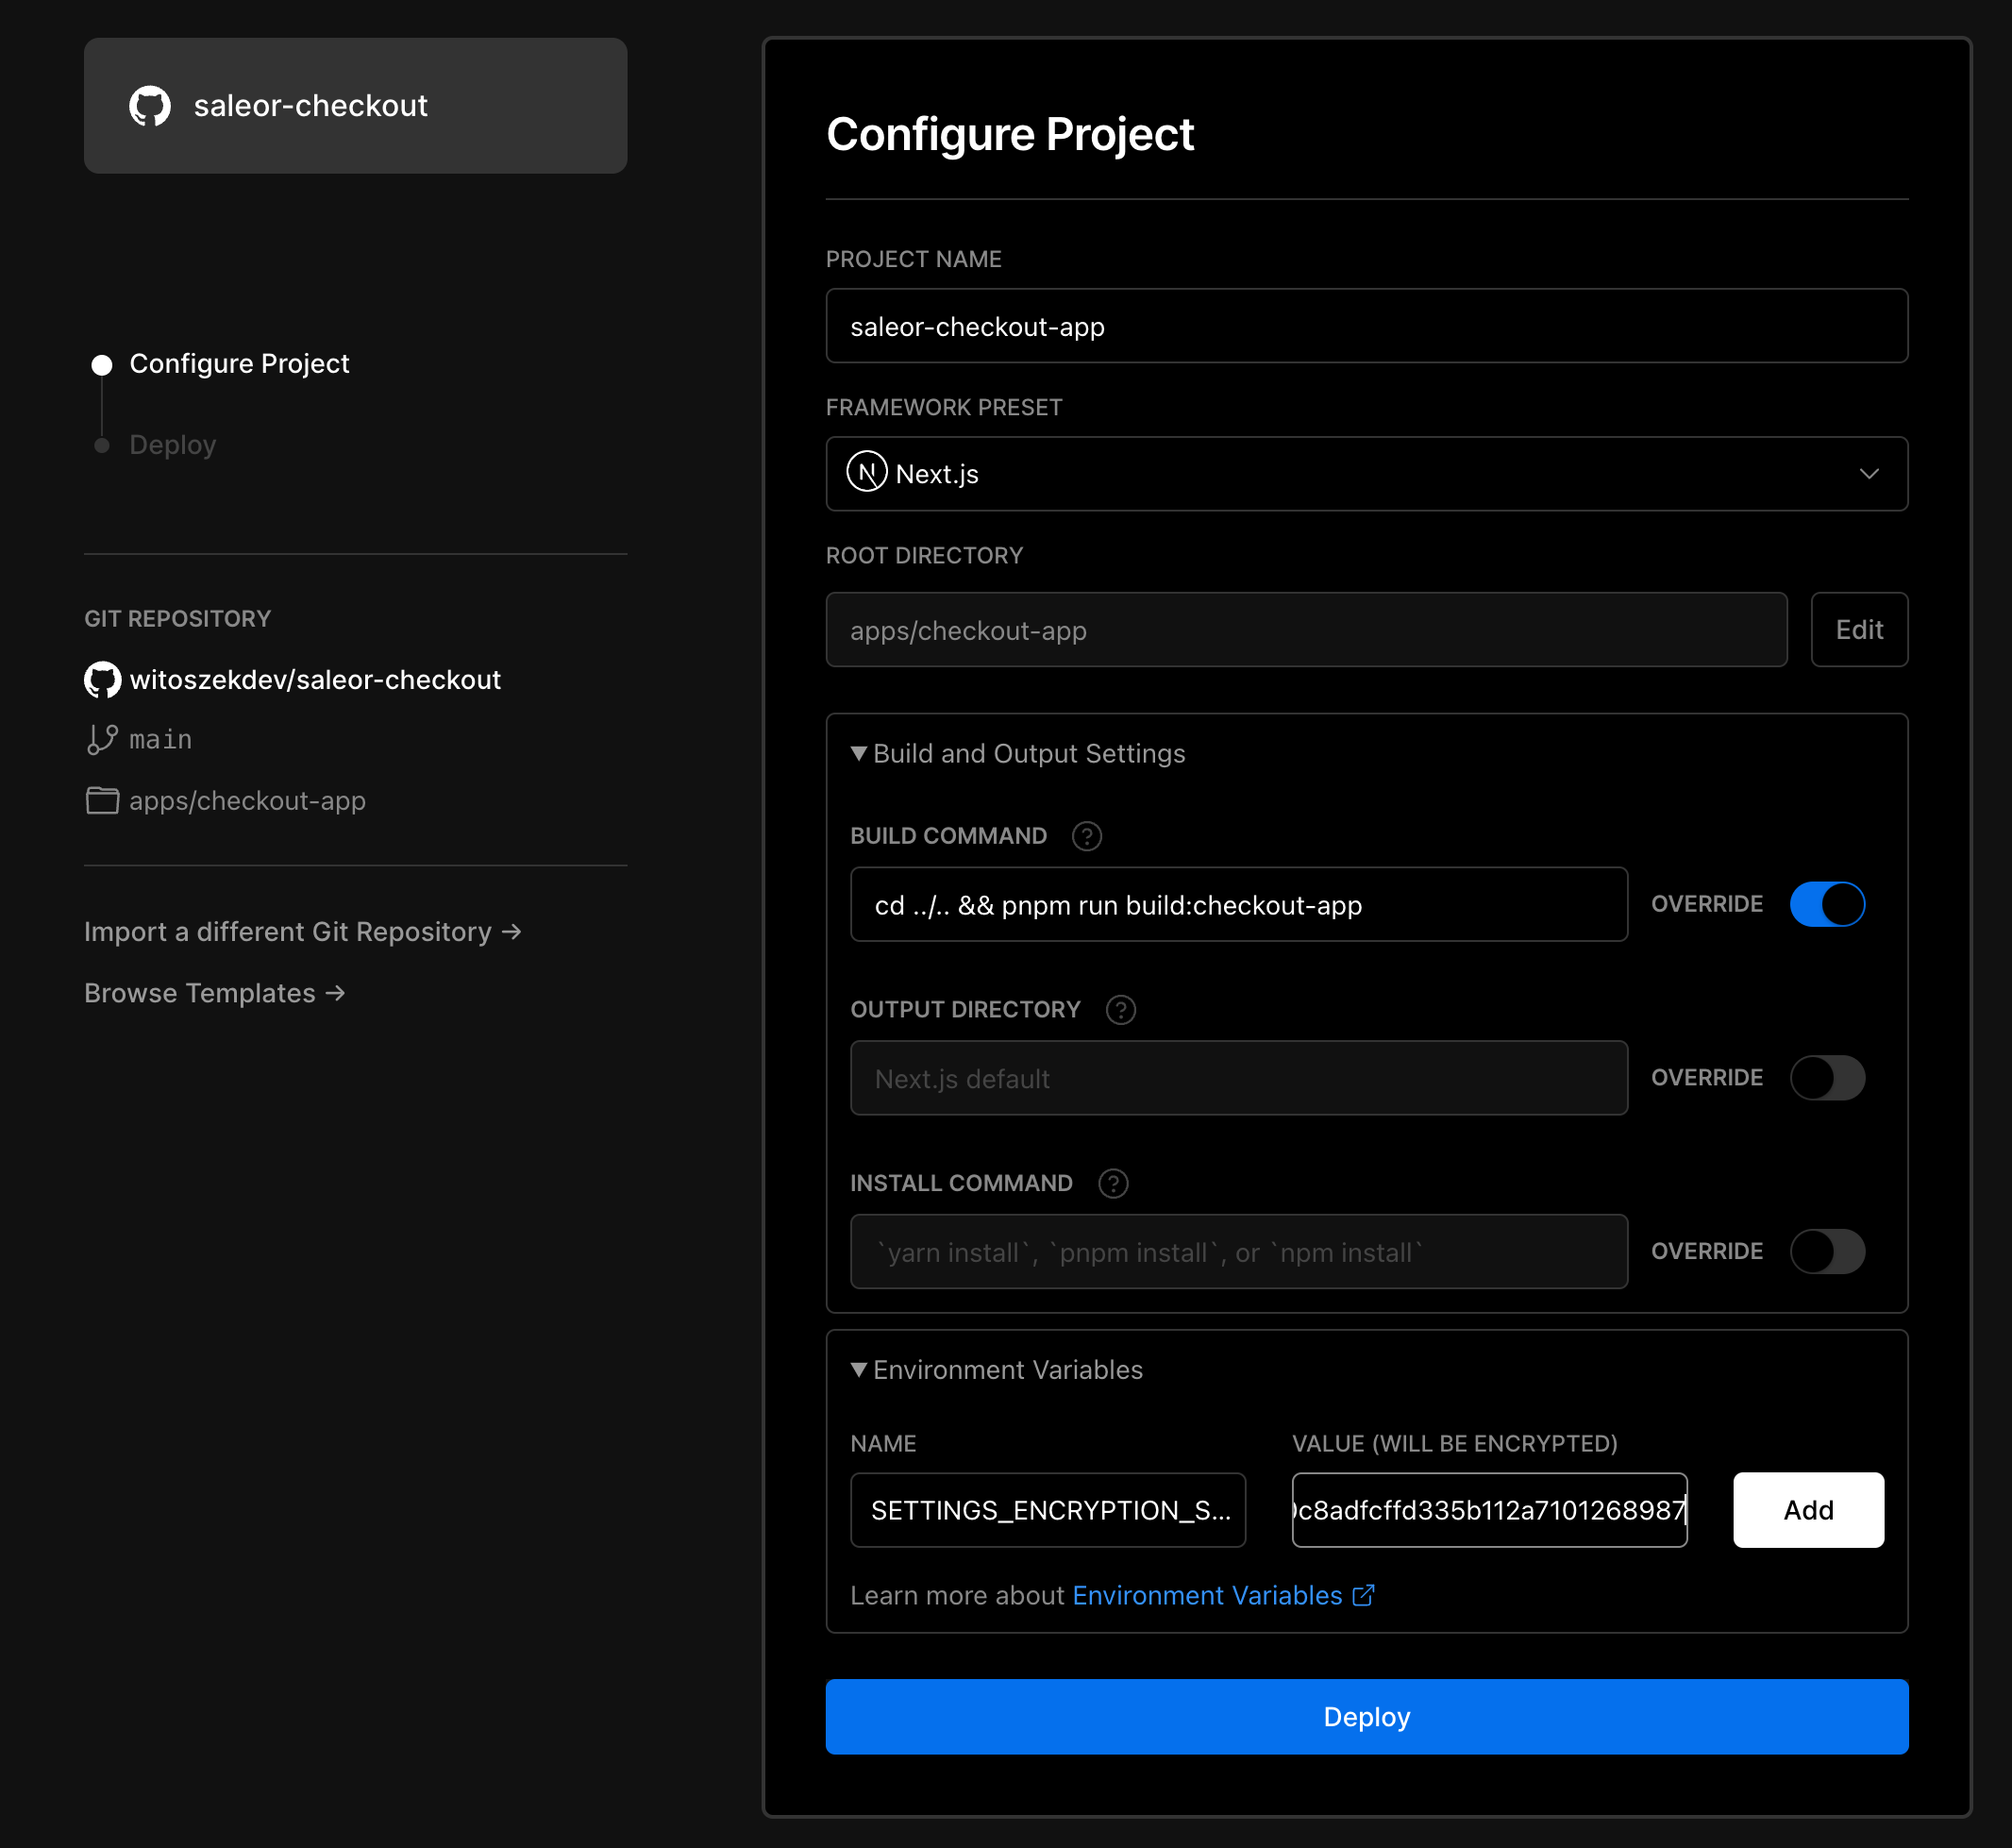
- From the configuration page:
- Provide your project name (for example
saleor-checkout-app) - Select framework to Next.js
- Choose the root directory to be
apps/checkout-app - Override the build command to:
cd ../.. && pnpm run build:checkout-app- Add environment variables:
SETTINGS_ENCRYPTION_SECRET— Random string used for encrypting apps configuration (you can generate it usingopenssl rand -hex 256)- Optional:
NEXT_PUBLIC_SALEOR_API_URL— if you want to override the value ofSALEOR_API_URLstored inside.envfile in the root of the repository
Here's the final result on configuration page:
Click deploy and wait until the app is deployed
- Update environment variables in repository
Update CHECKOUT_APP_URL in .env file located at the root of monorepo to be your deployment URL
Example:
https://saleor-checkout-app.vercel.app
- Install the app in Saleor
Grab the deployed app URL from Vercel and add /api/manifest. This URL points to the manifest file that is required for installing the app in Saleor
Example manifest URL:
https://saleor-checkout-xyz-myusername.vercel.app/api/manifest
You can install the app by using:
http://<YOUR_SALEOR_URL>/dashboard/apps/install?manifestUrl=<YOUR_MANIFEST_URL>
saleor app install
PROTIP 💡: If you want your app to automatically update whenever you push changes to the
mainbranch, make sure to use production domain from Vercel (not deployment domain) for your manifest URL.❌ Deployment domain (won't update app after push):
https://saleor-checkout-app-jluy793b2-myusername.vercel.app/api/manifest✅ Production domain:
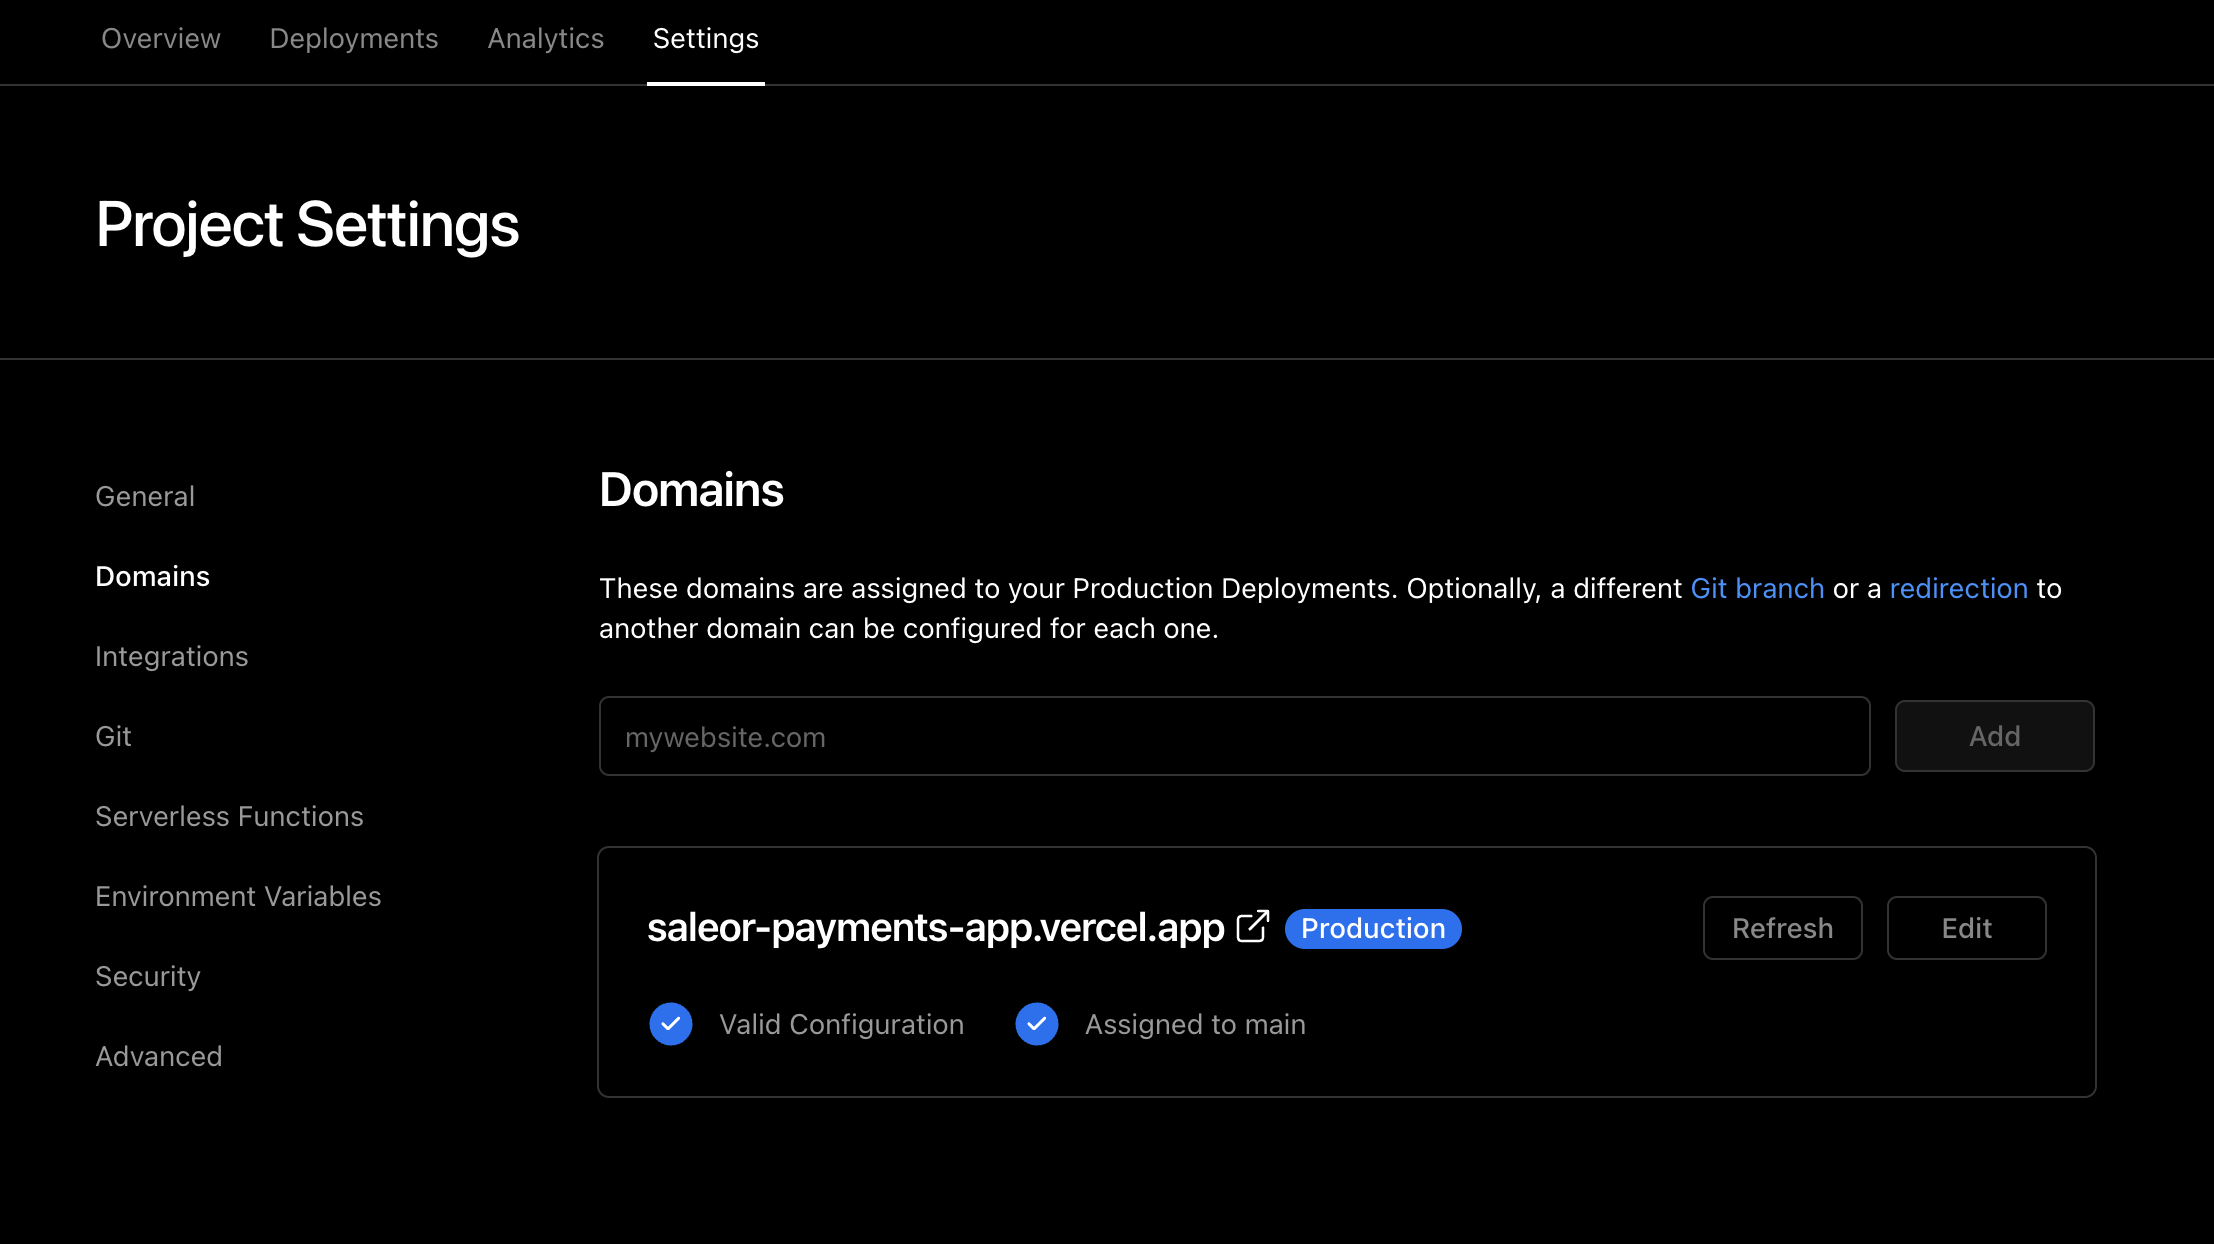
https://saleor-checkout-app.vercel.app/api/manifestTo see which domain is used for production go to Vercel Dashboard > Settings > Domains:
- Generate app token
After the app was installed, generate it's authToken
saleor app token
mutation {
  appTokenCreate(input: { name: "Vercel", app: "<MY_APP_ID>" }) {
    authToken
  }
}
Where <MY_APP_ID> is the app id. You can retrieve the id by using this GraphQL query:
query {
  apps(first: 10) {
    edges {
      node {
        id
        name
      }
    }
  }
}
outputs this:
{
  "data": {
    "apps": {
      "edges": [
        {
          "node": {
            "id": "QXBwOjQ=", // <- this is the app id
            "name": "Checkout"
          }
        }
      ]
    }
  }
}- Update environment variables in Vercel
You have to add additional environment variables for Checkout App in Vercel:
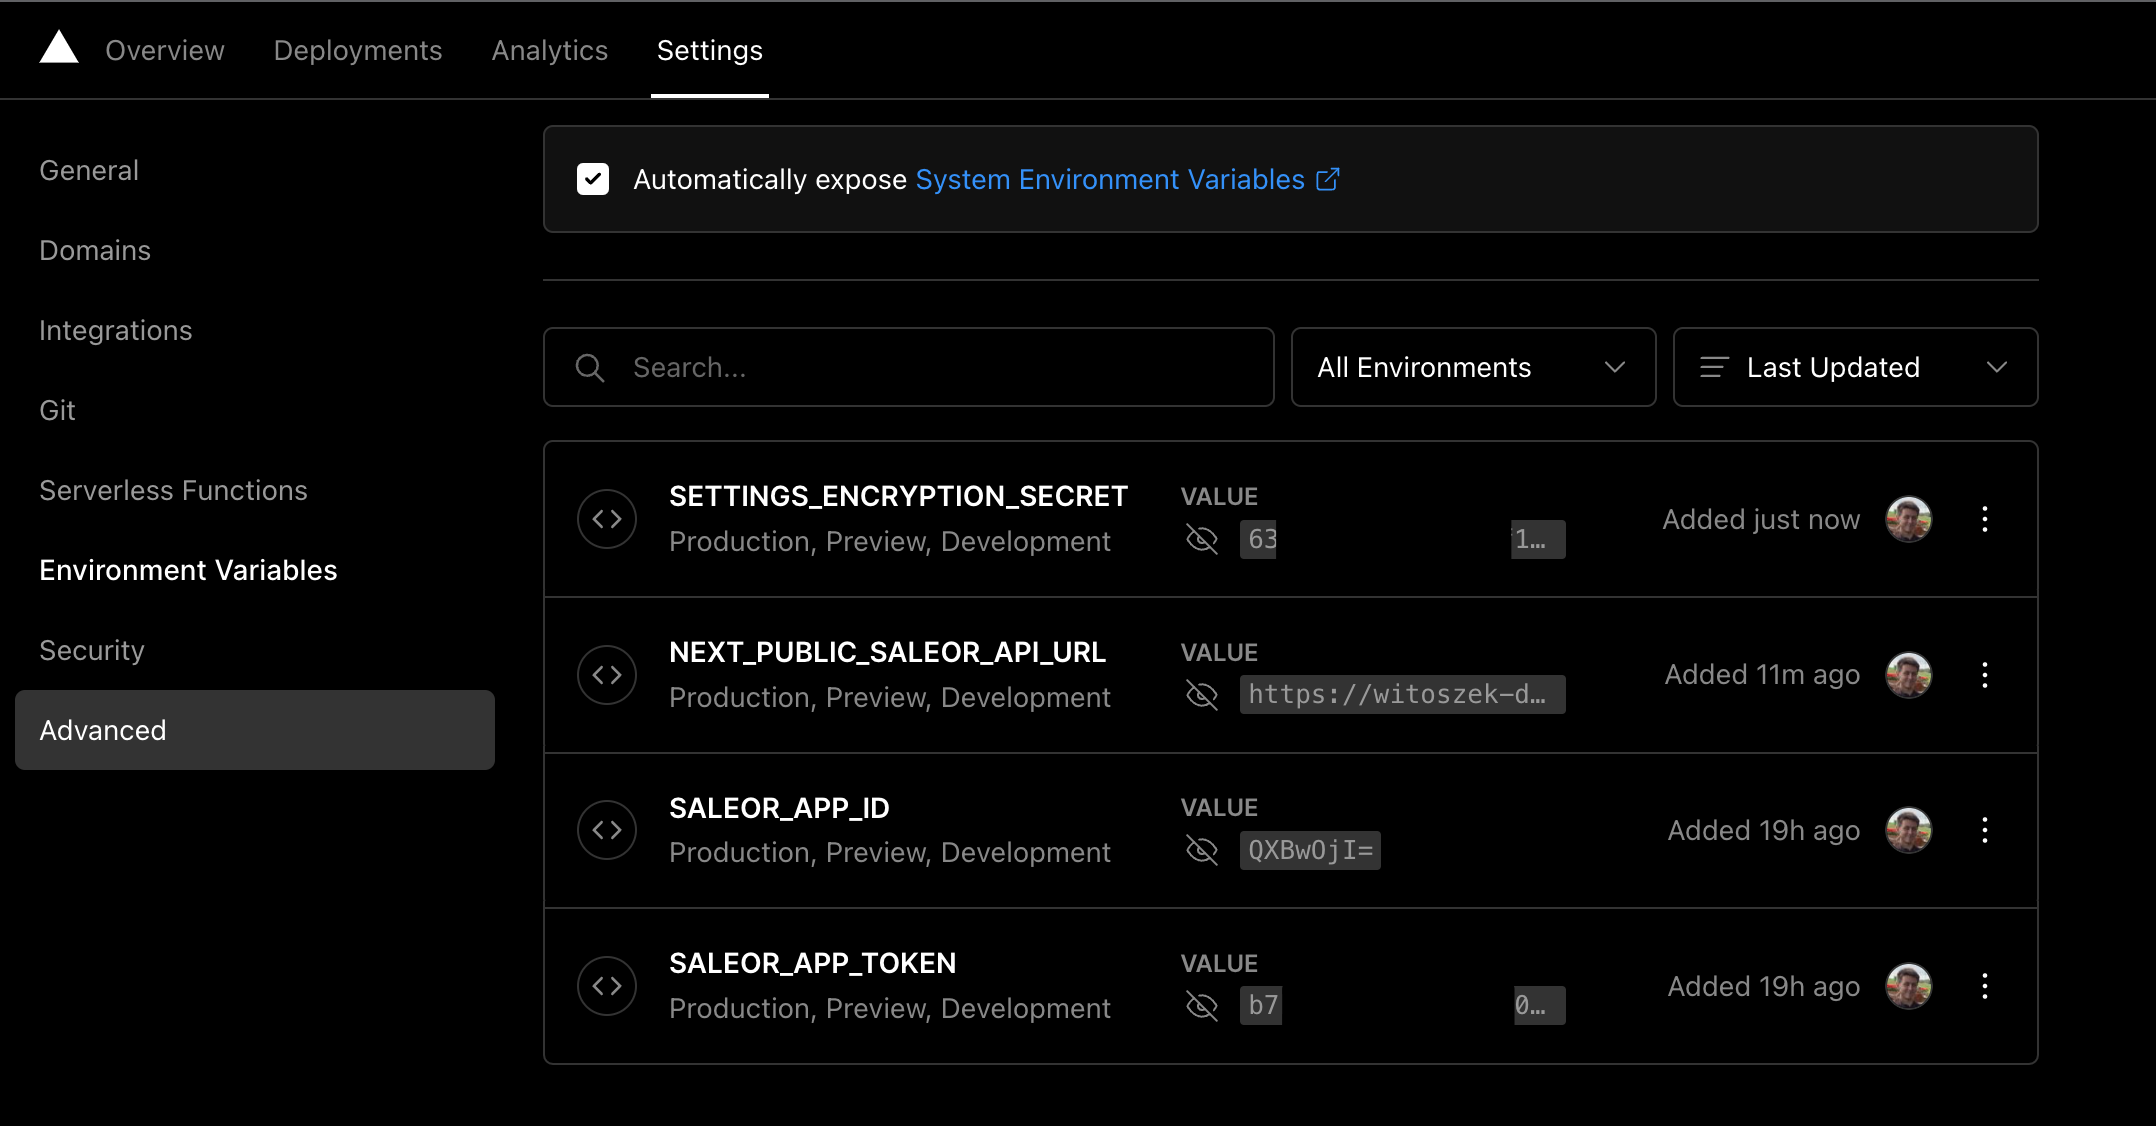
SALEOR_APP_ID— ID of the appSALEOR_APP_TOKEN— Token you've just generated
🚨 These values are secrets — don't store them inside your git repository
Make sure that you also have "Automatically expose System Environment Variables" selected
Here's how the configuration should look like in the end:
After you're done, re-deploy the app
⚠️ Make sure that you didn't select the "Redeploy with existing Build Cache." option
- 🥳 Congrats! Payment app is now ready to be used!
-
Start by creating another project on Vercel, just like we did in Checkout App setup, select the same repository
-
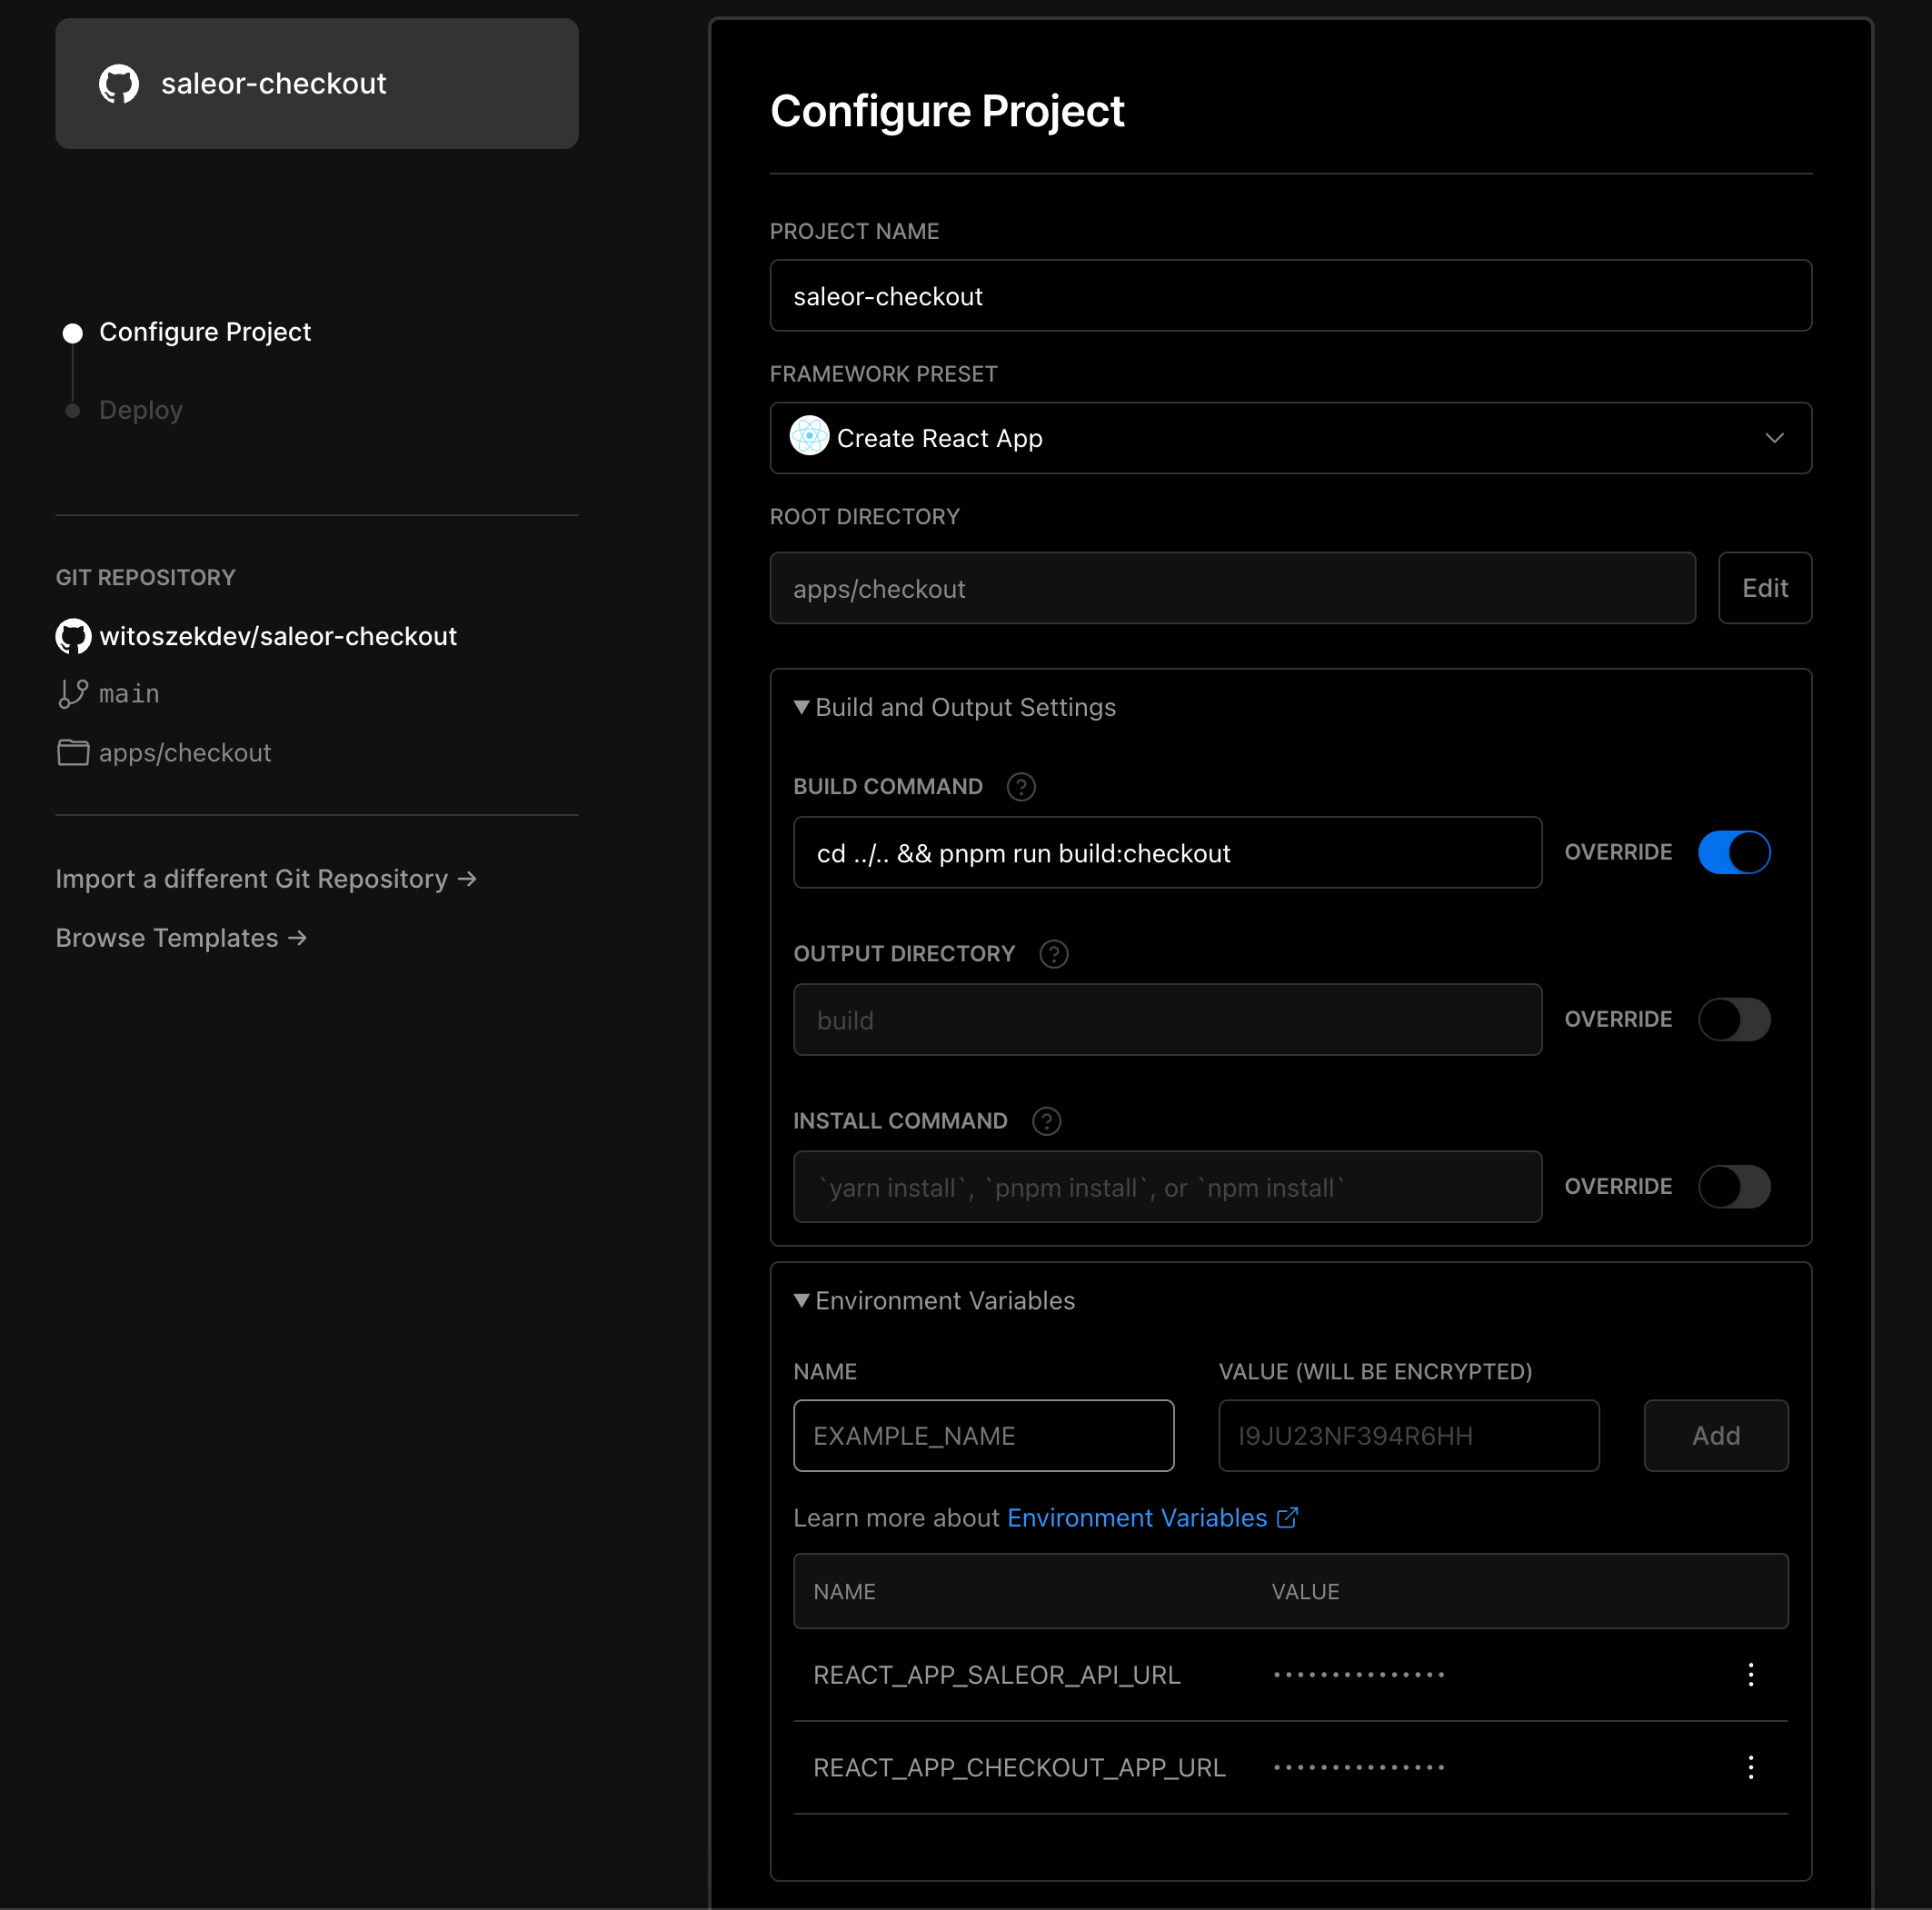
On the configuration page:
- Provide your project name (for example
saleor-checkout) - Select framework to Create React App
- Choose the root directory to be
apps/checkout - Override the build command to:
cd ../.. && pnpm run build:checkout- Optional: customise environment variables:
REACT_APP_CHECKOUT_APP_URL— URL of the deployed Checkout App.REACT_APP_SALEOR_API_URL— URL of Saleor GraphQL API endpoint
By default, those environment variables are taken from
.envfile in root of the monorepo. You don't need to provide env variables in Vercel if you want to use the values from.envfile.
Here's the final result on configuration page:
Click deploy and wait until the app is deployed
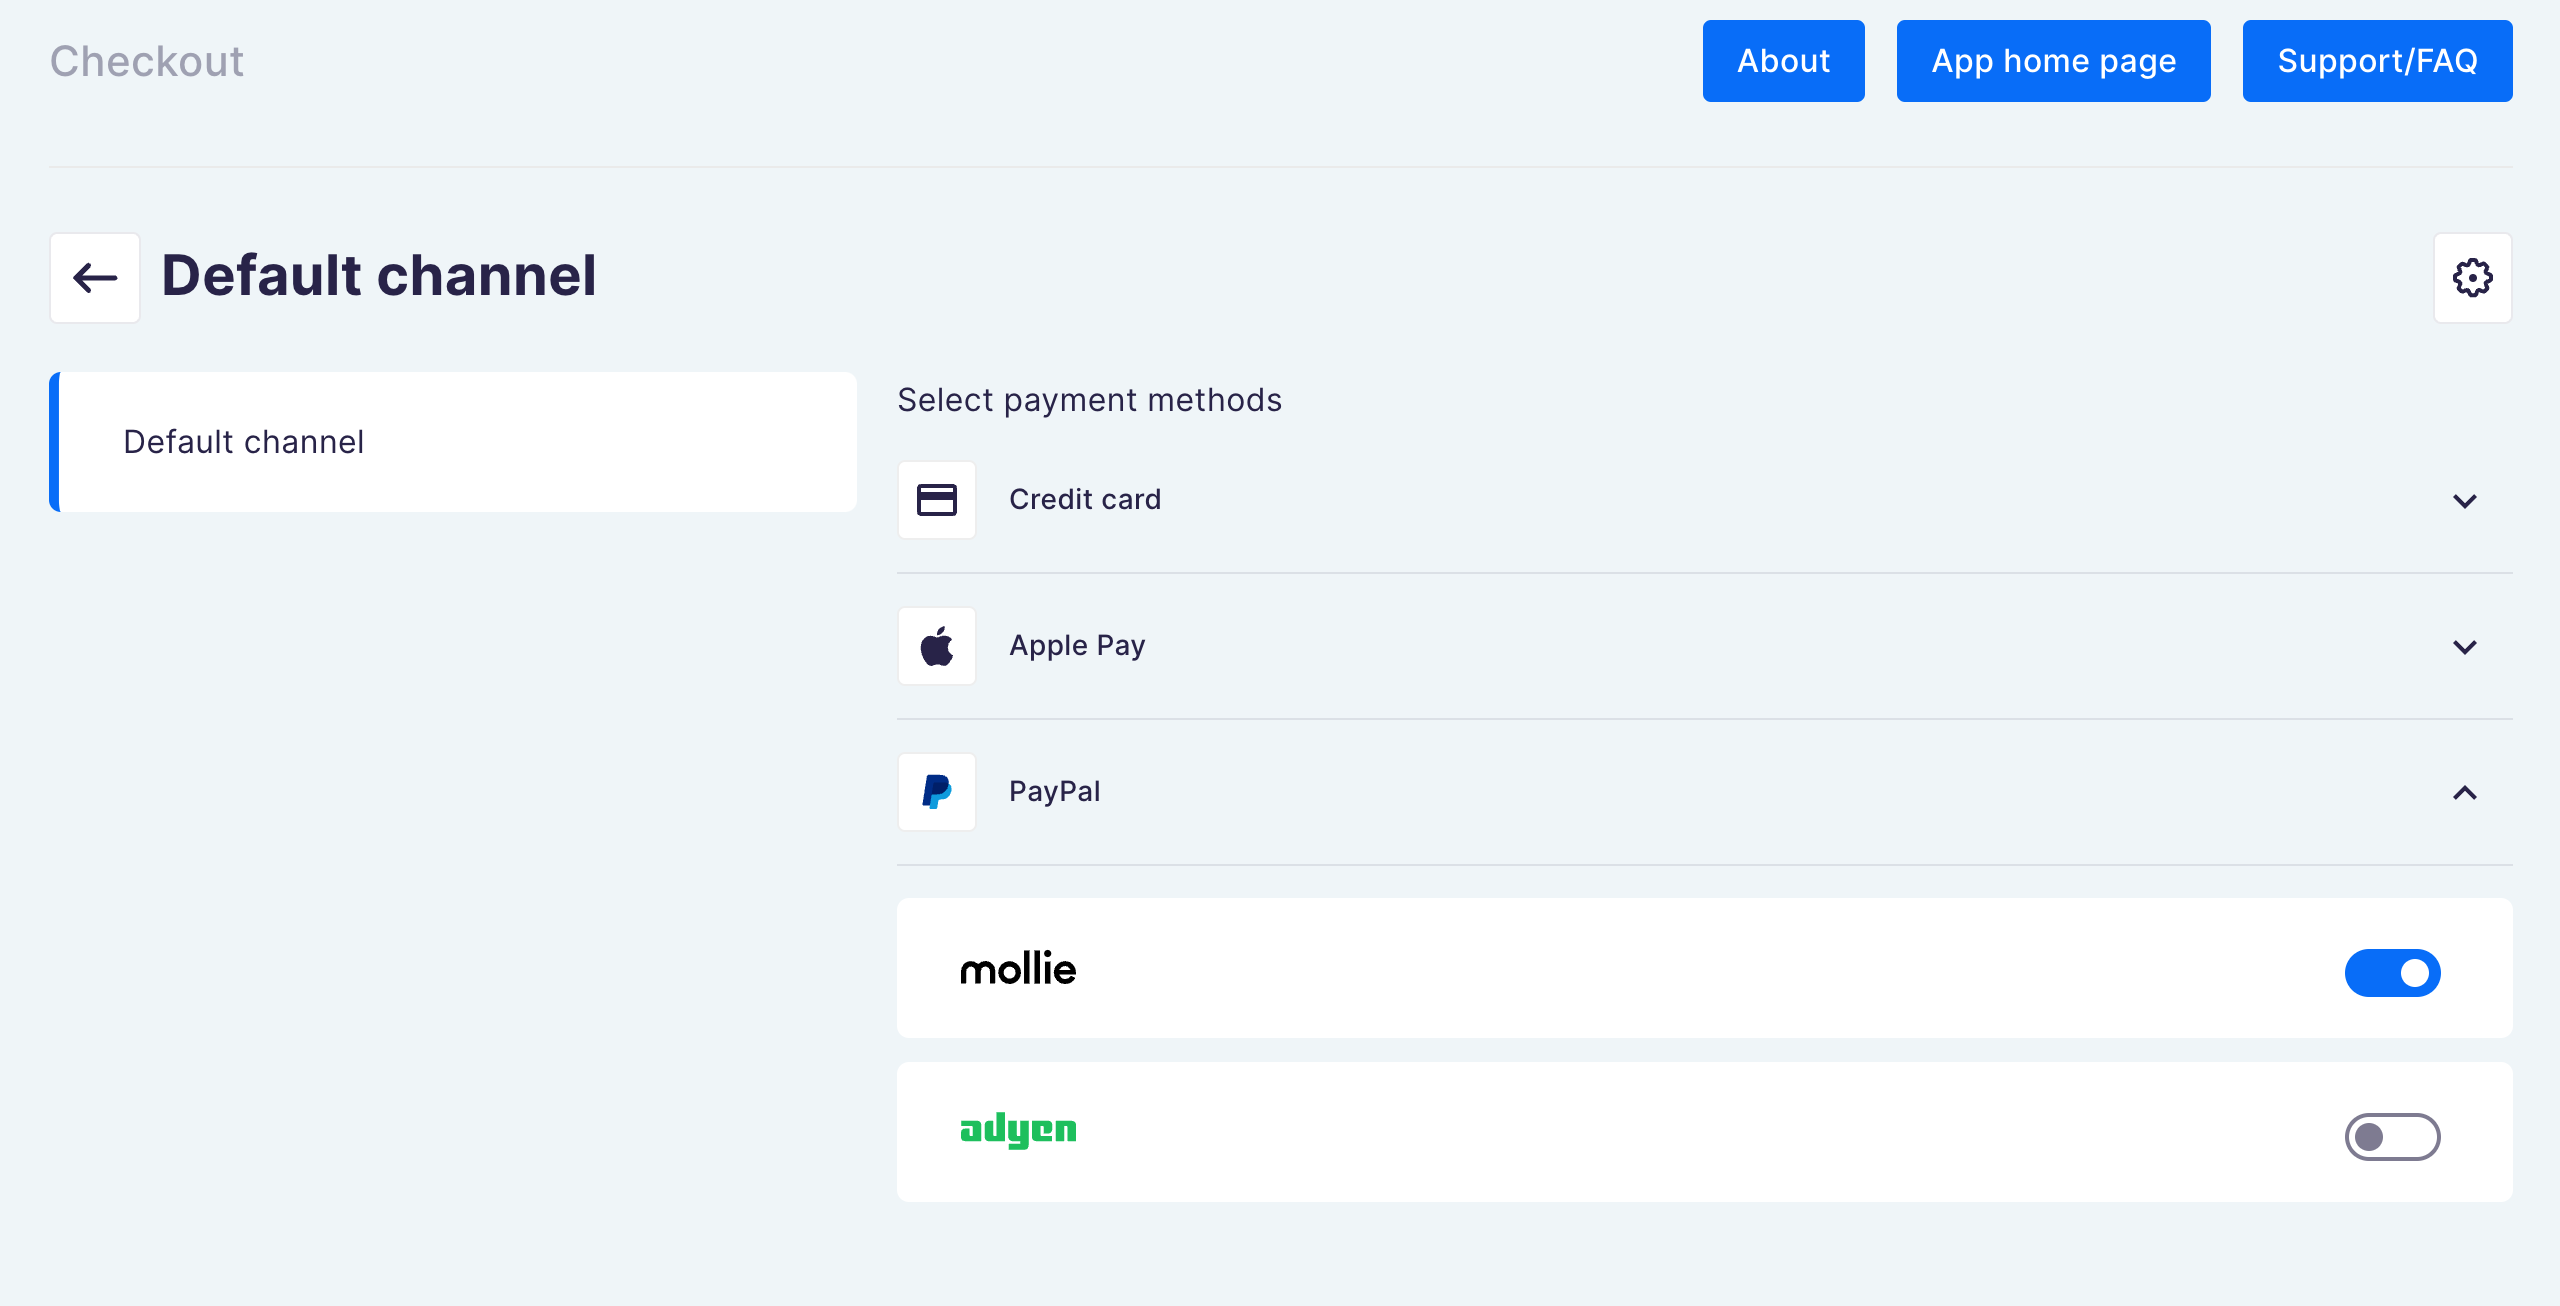
Checkout app supports two payment gateways that you can configure:
Payment gateways can be configured in the Checkout app inside Saleor dashboard. Go to Apps > Third party apps > Checkout.
You can toggle, which payment gateway handles each different payment options per channel:
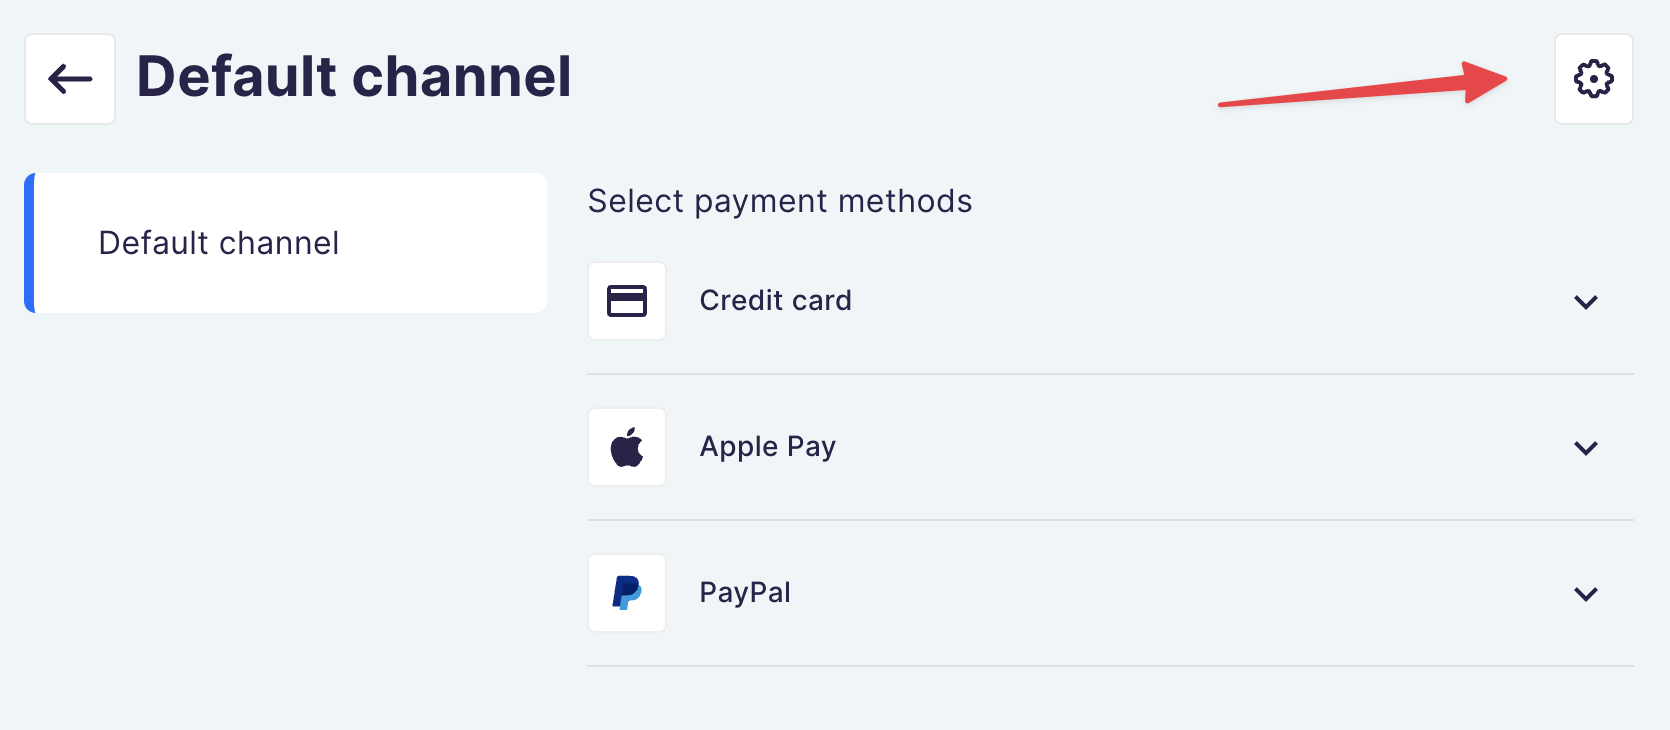
To use payment gateway, you need to provide its credentials. You can do that by clicking settings icon in channel configuration page
-
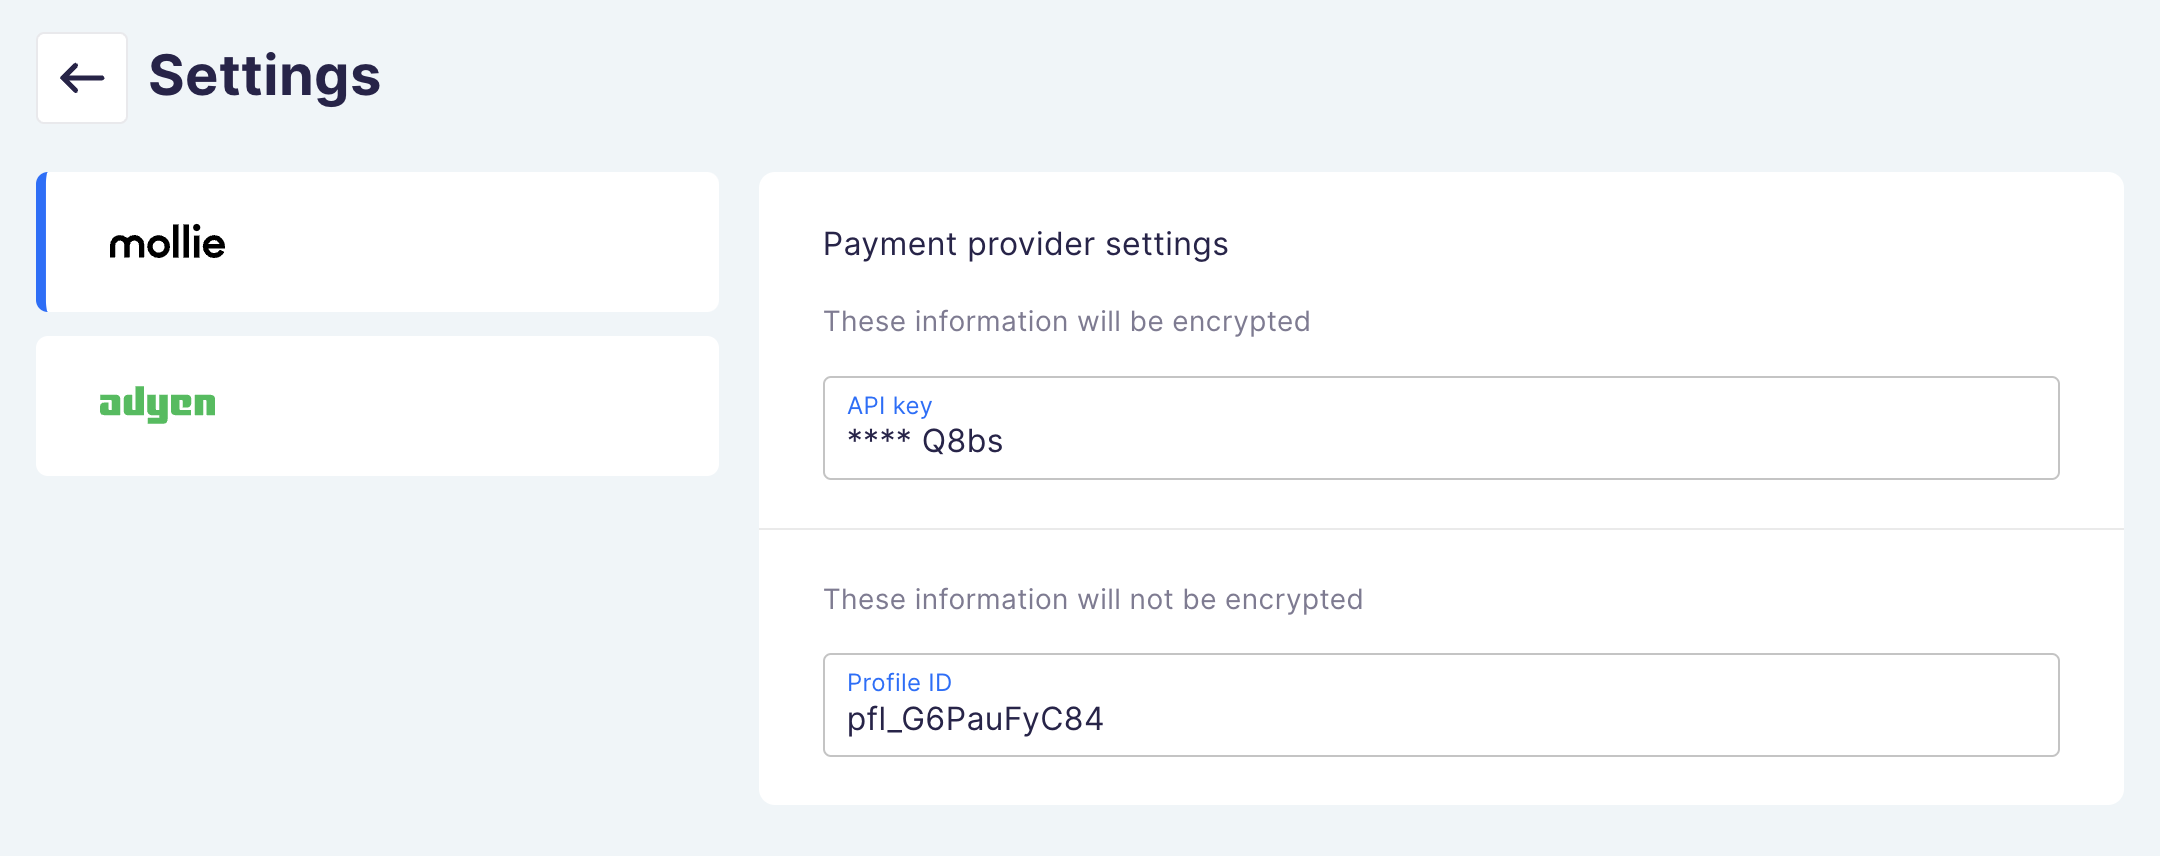
In your Mollie dashboard, select: Developers > API keys and copy API key and Profile ID
- Live API key - for production environment
- Test API key - for development environment
- In Checkout app configuration, enter the data you've just copied
- Enable
Payment methodsin your Mollie dashboard, select: Settings -> Website Profiles -> Payment methods
Saleor Checkout uses Adyen's Pay by Link flow
-
In test Customer Area create new merchant account
-
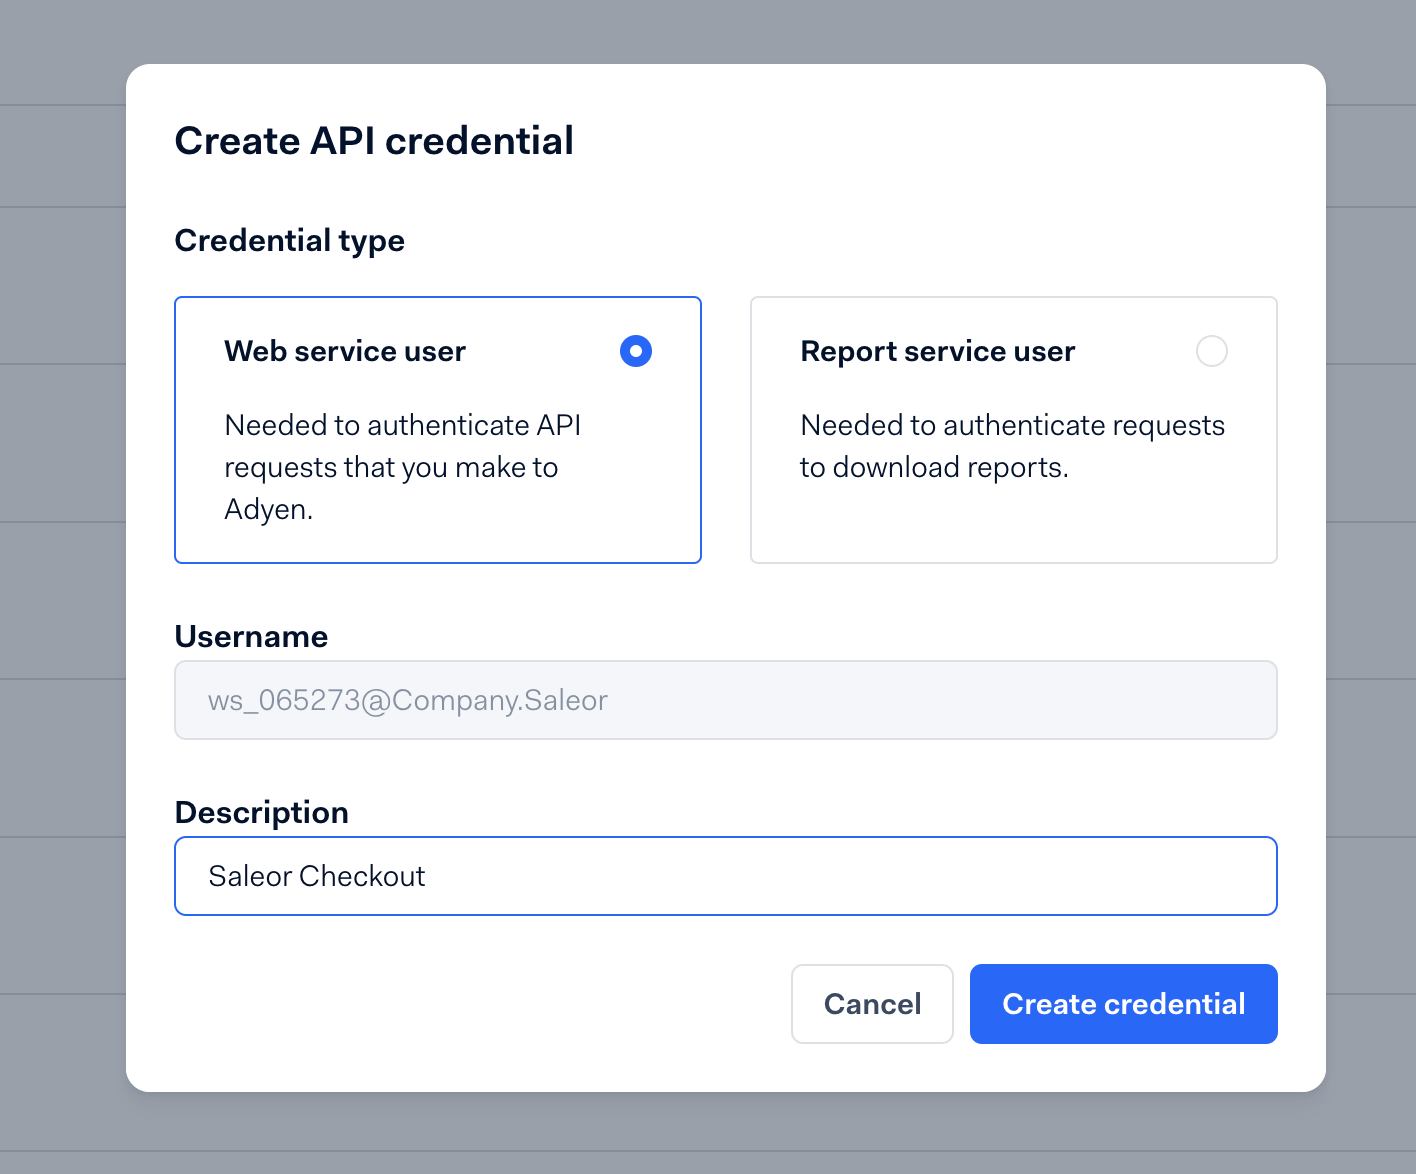
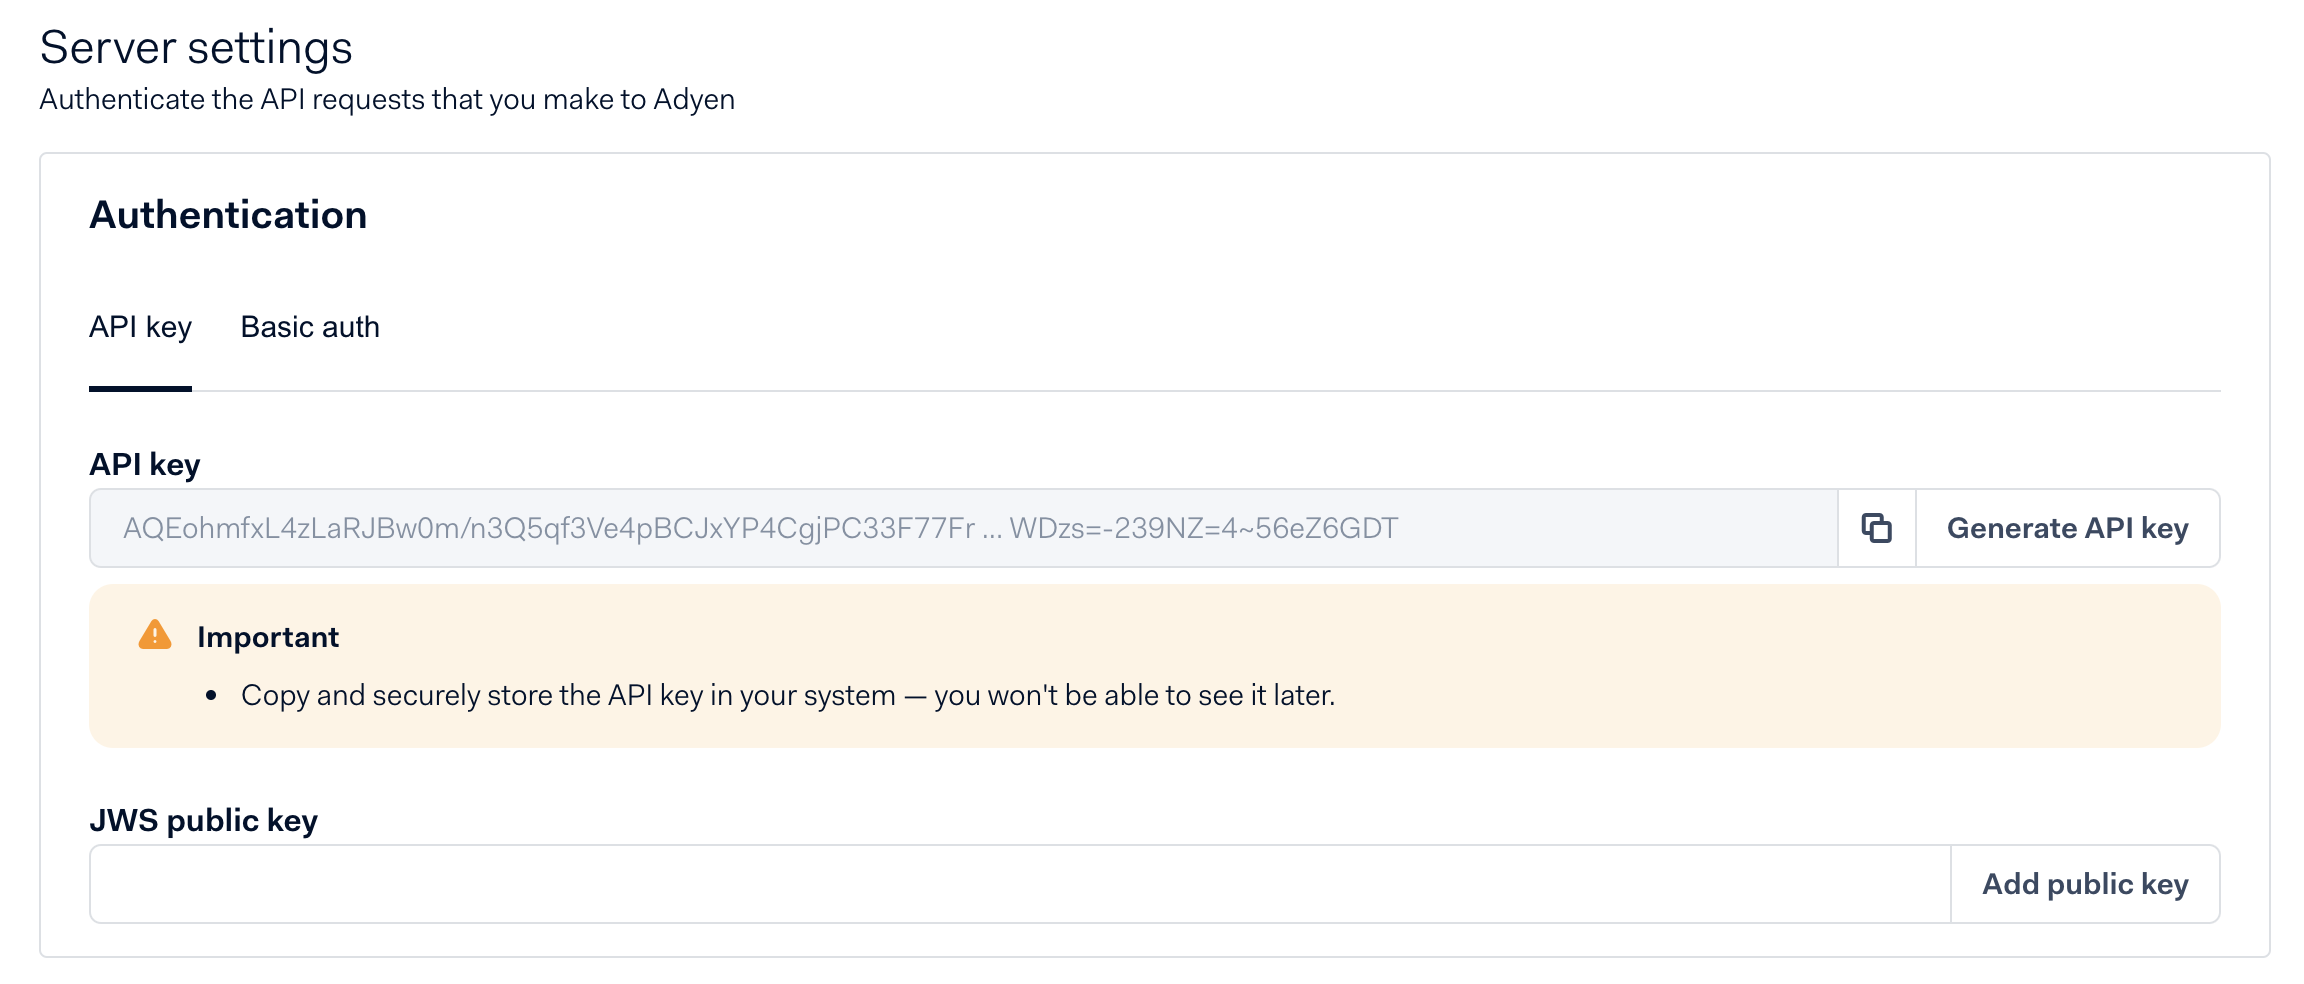
Create new API credentials. Go to Developers > API credentials > Create new credential
Select "Web service user" and enter some description (for example "Saleor Checkout")
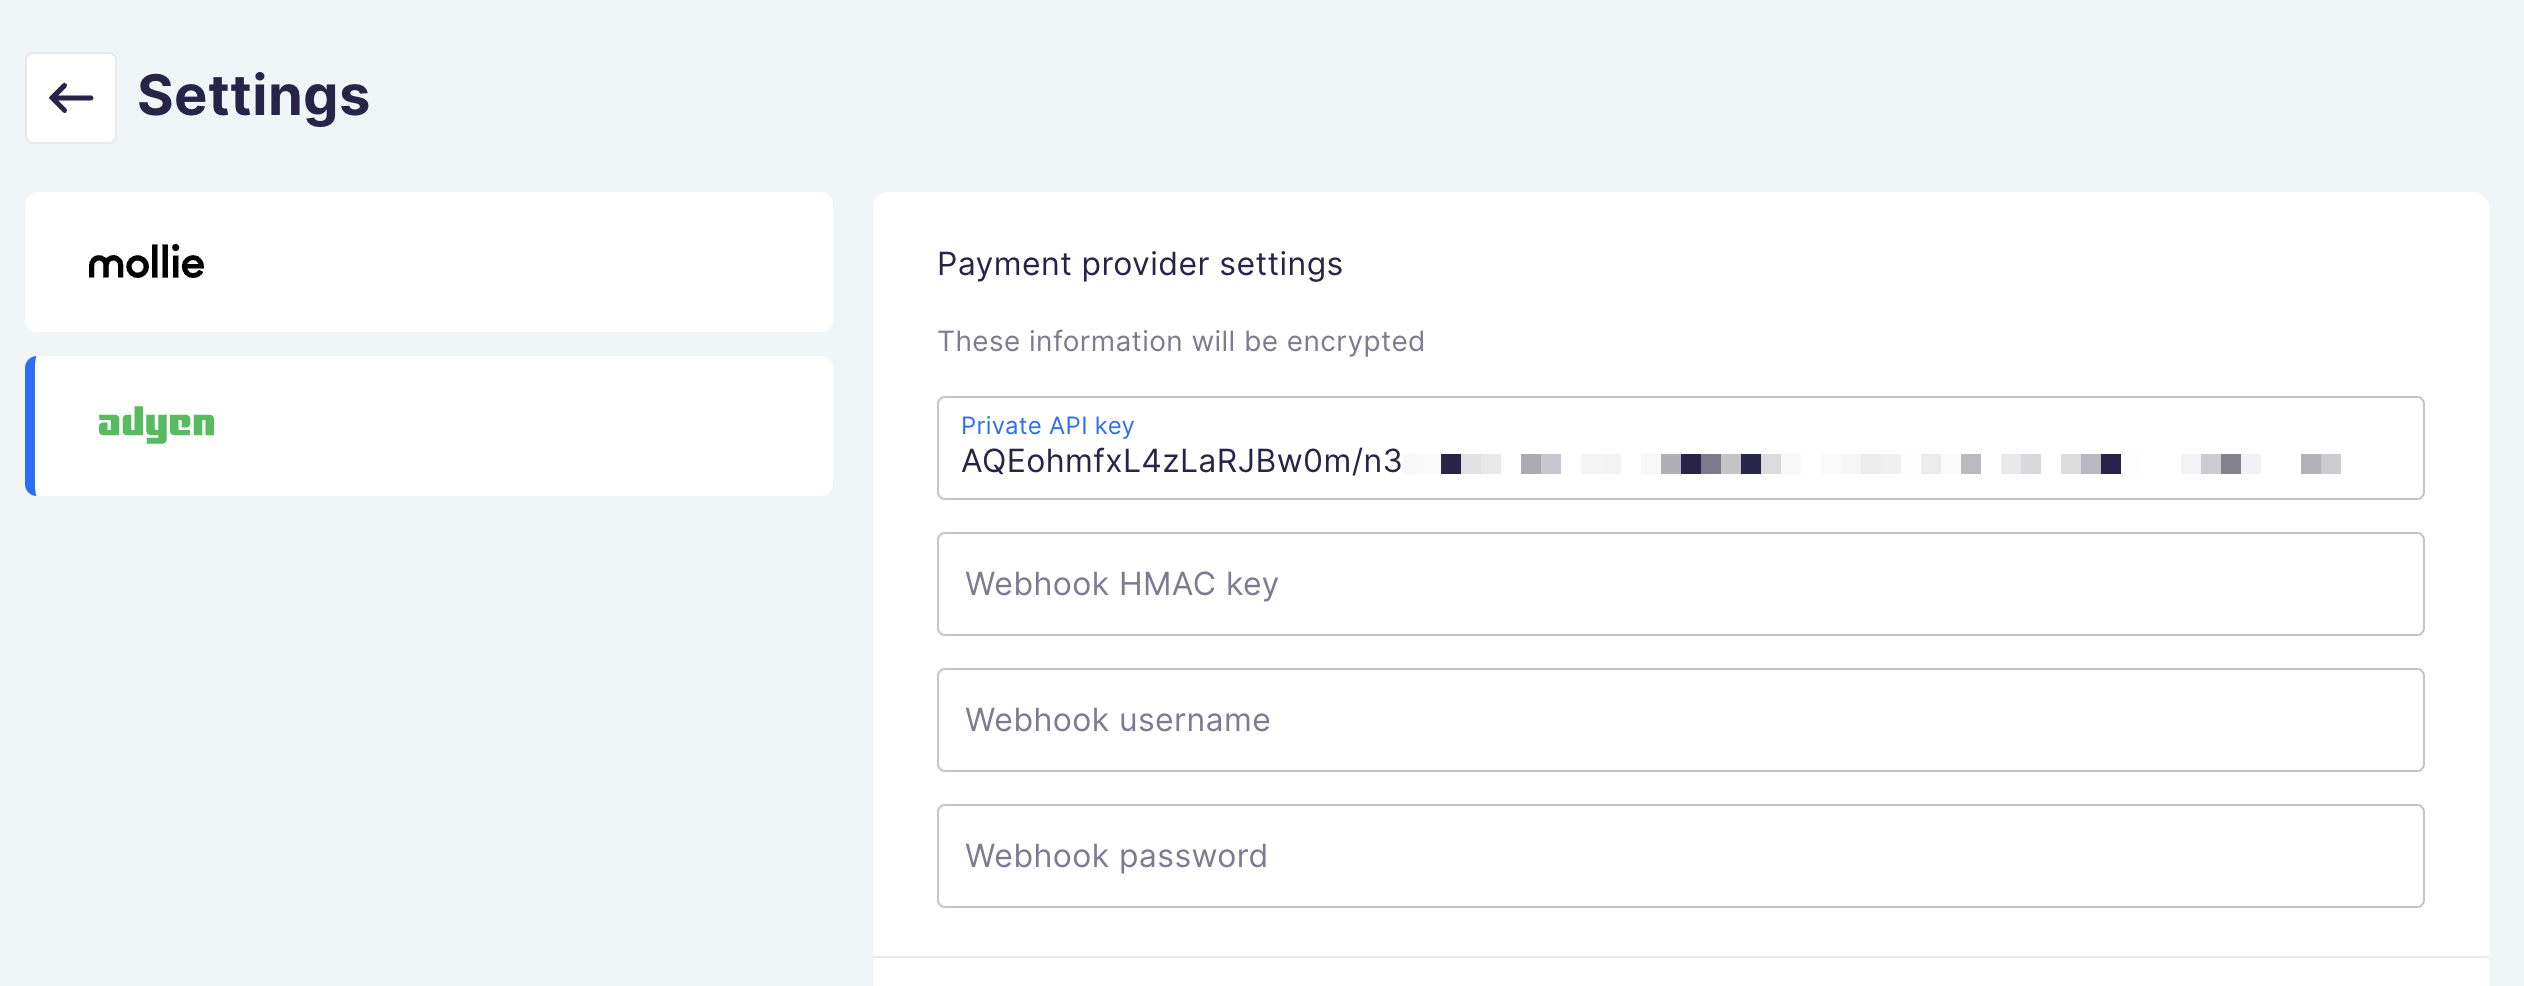
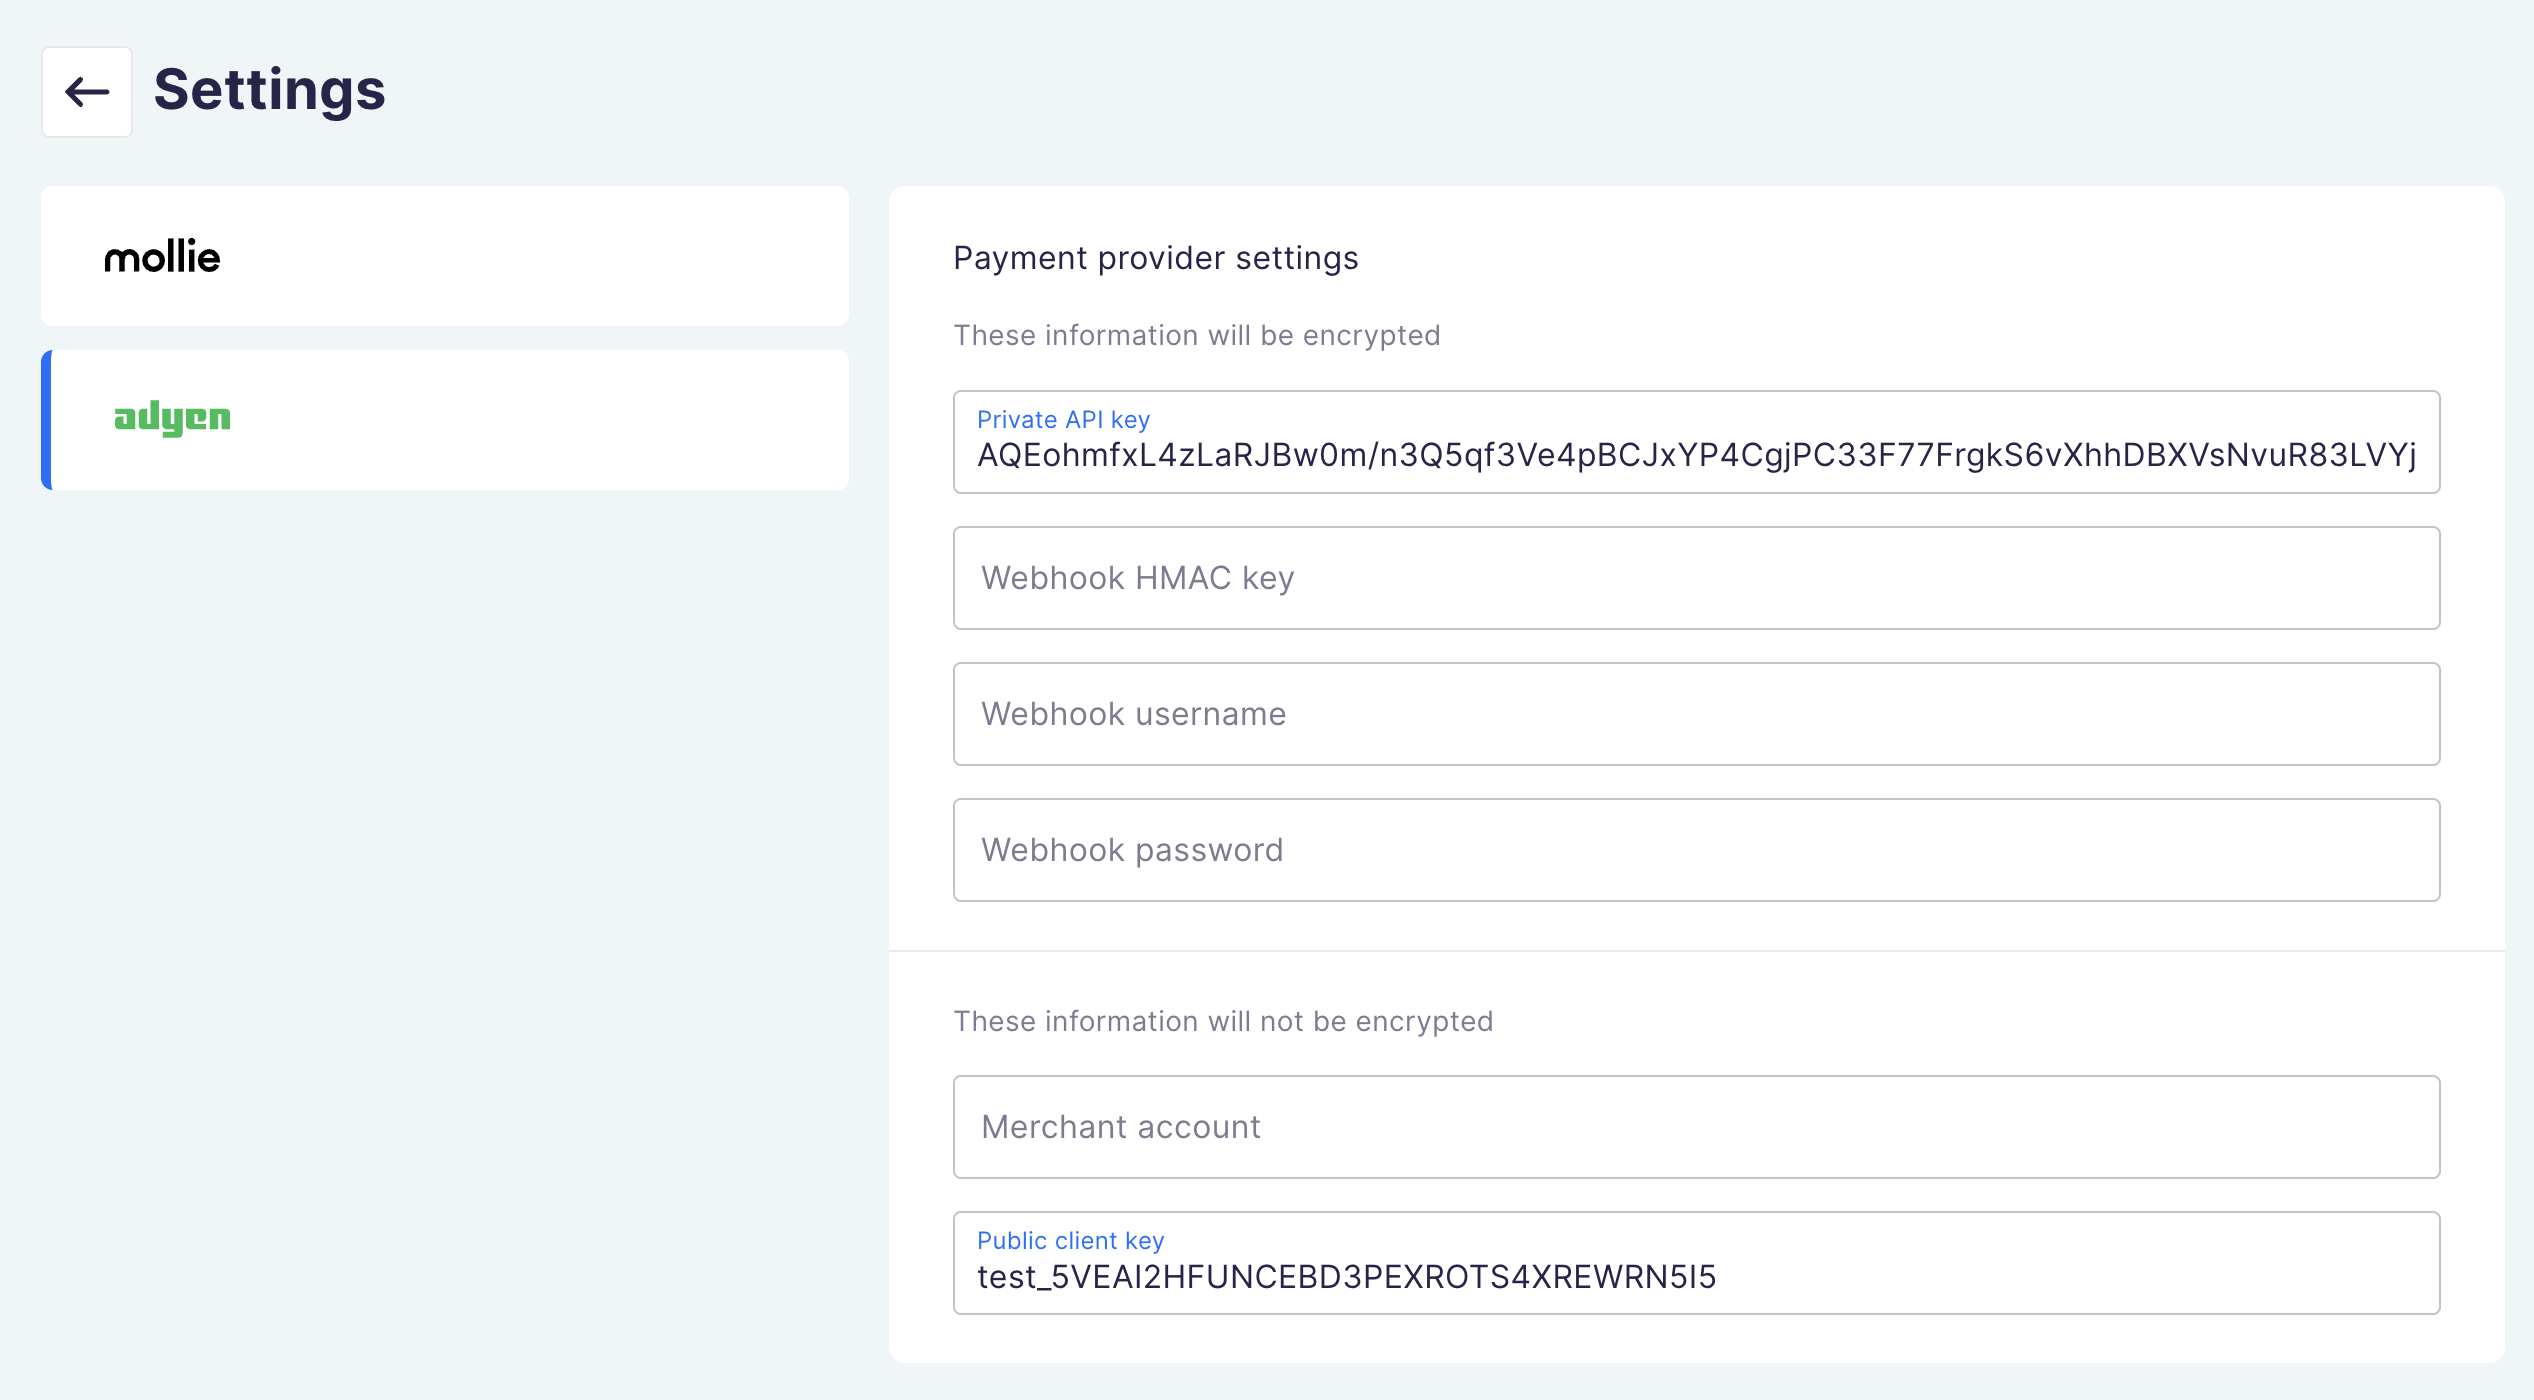
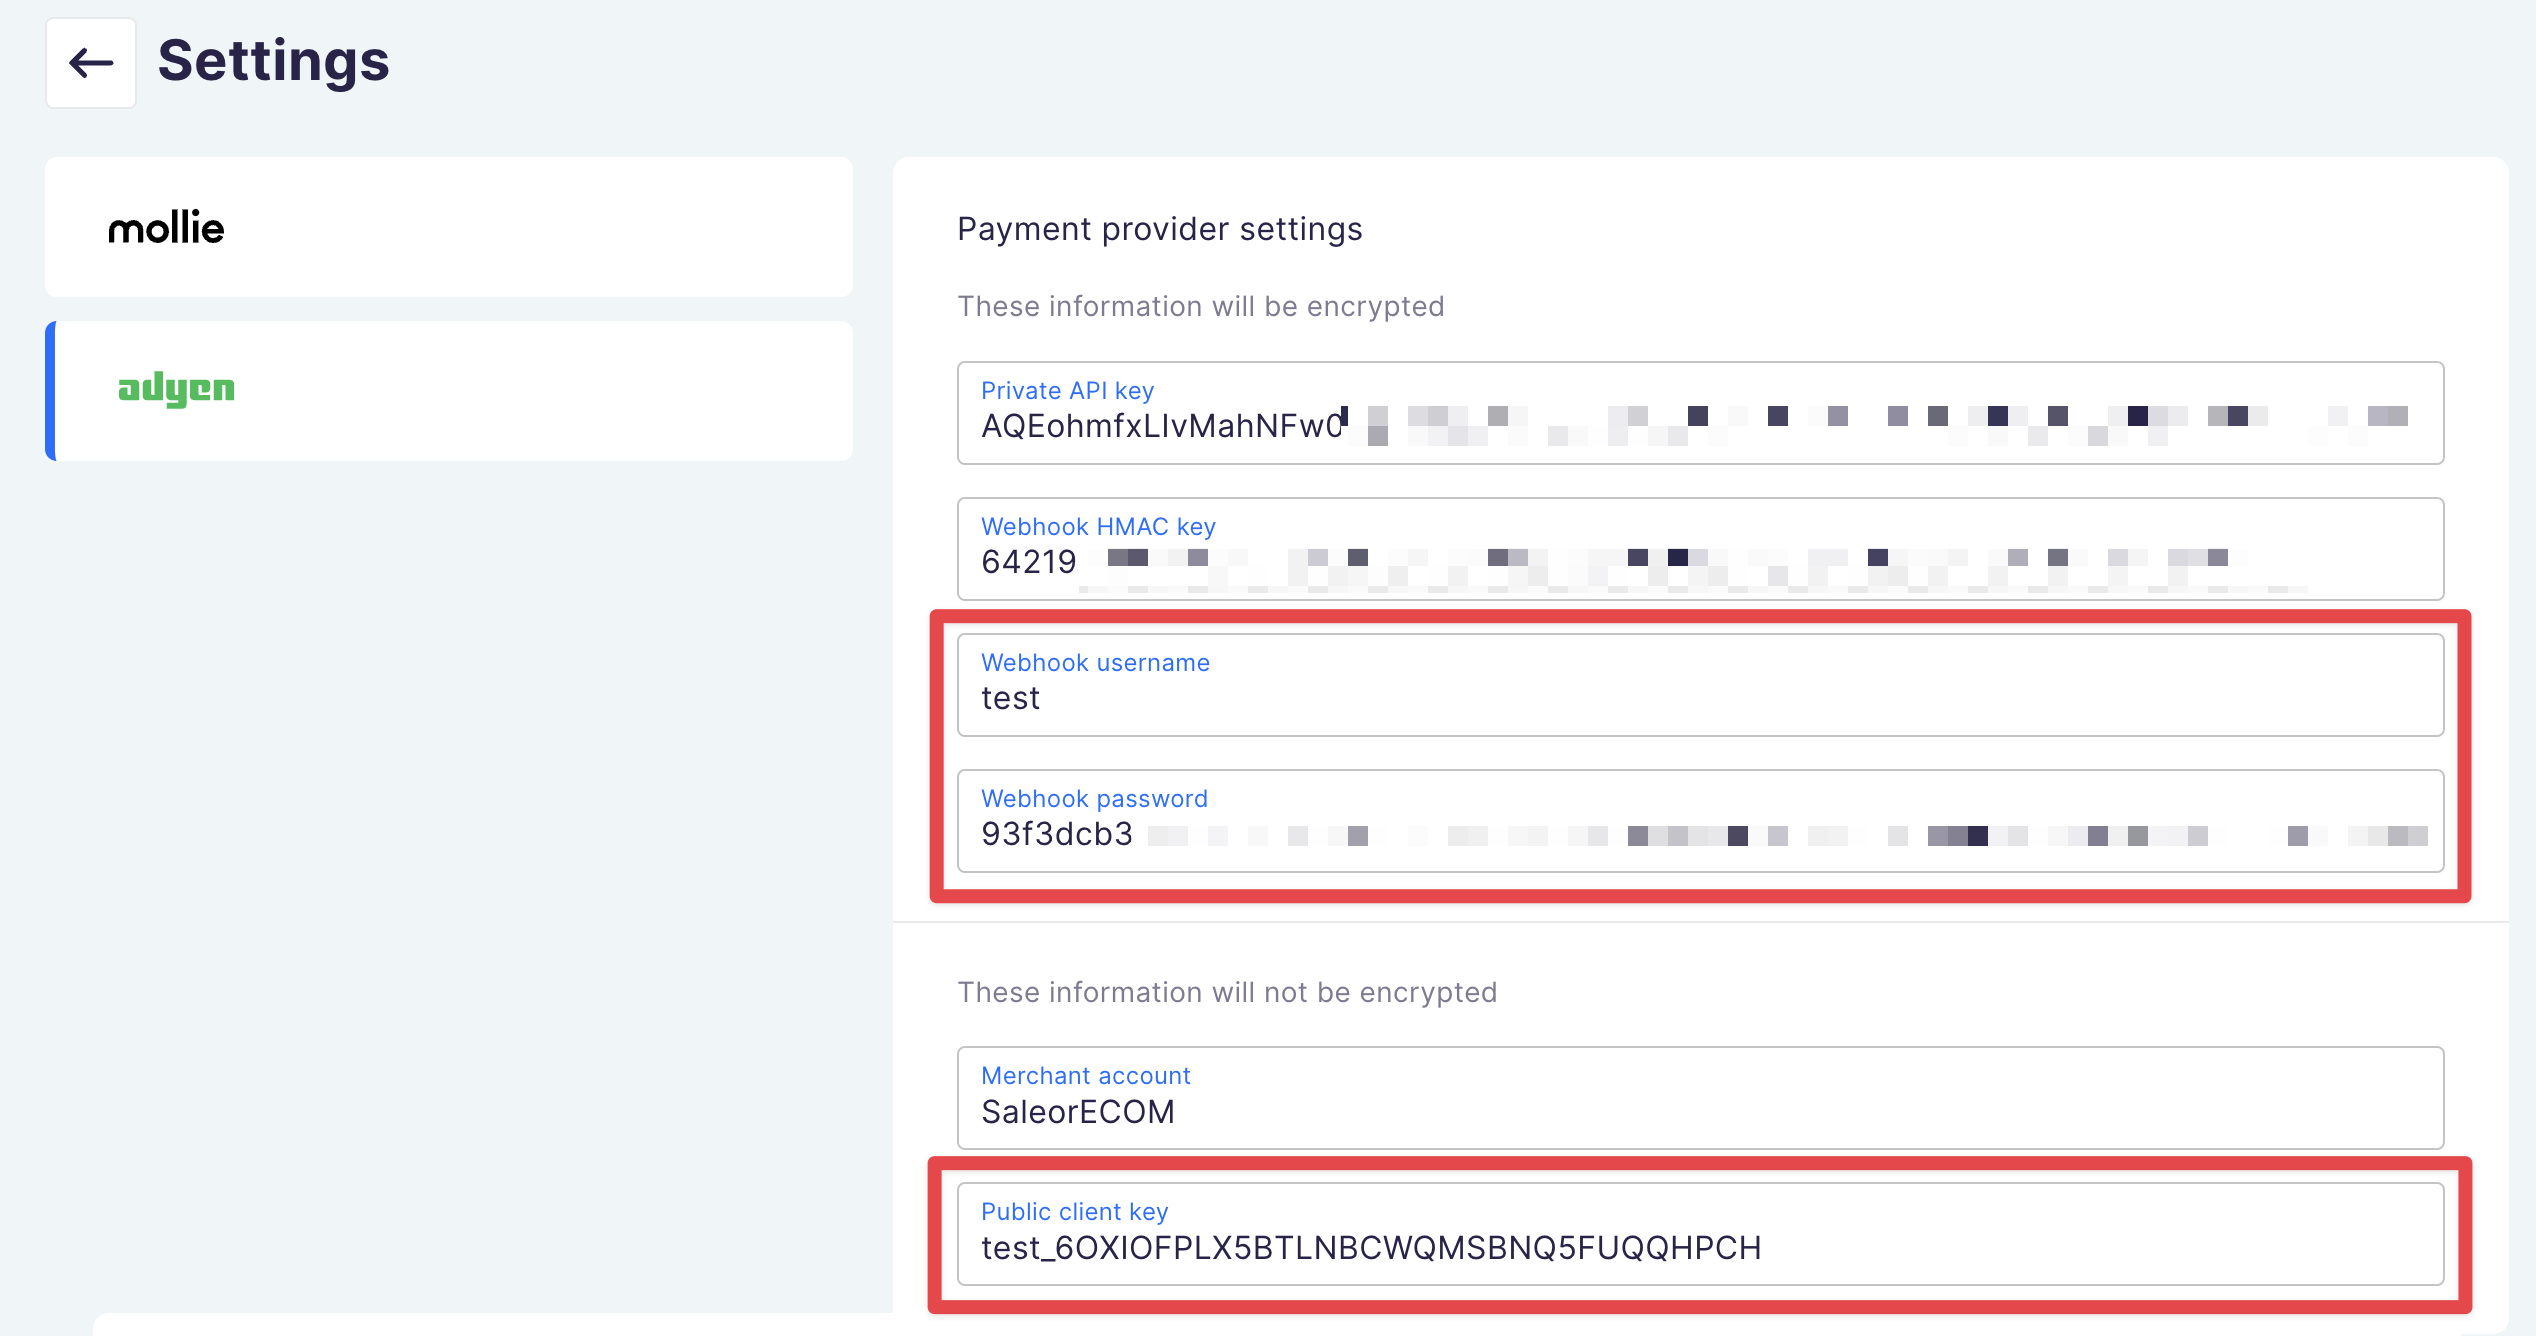
- Copy API key from newly generated API credentials and paste it in Checkout app configuration > Adyen > Private API key
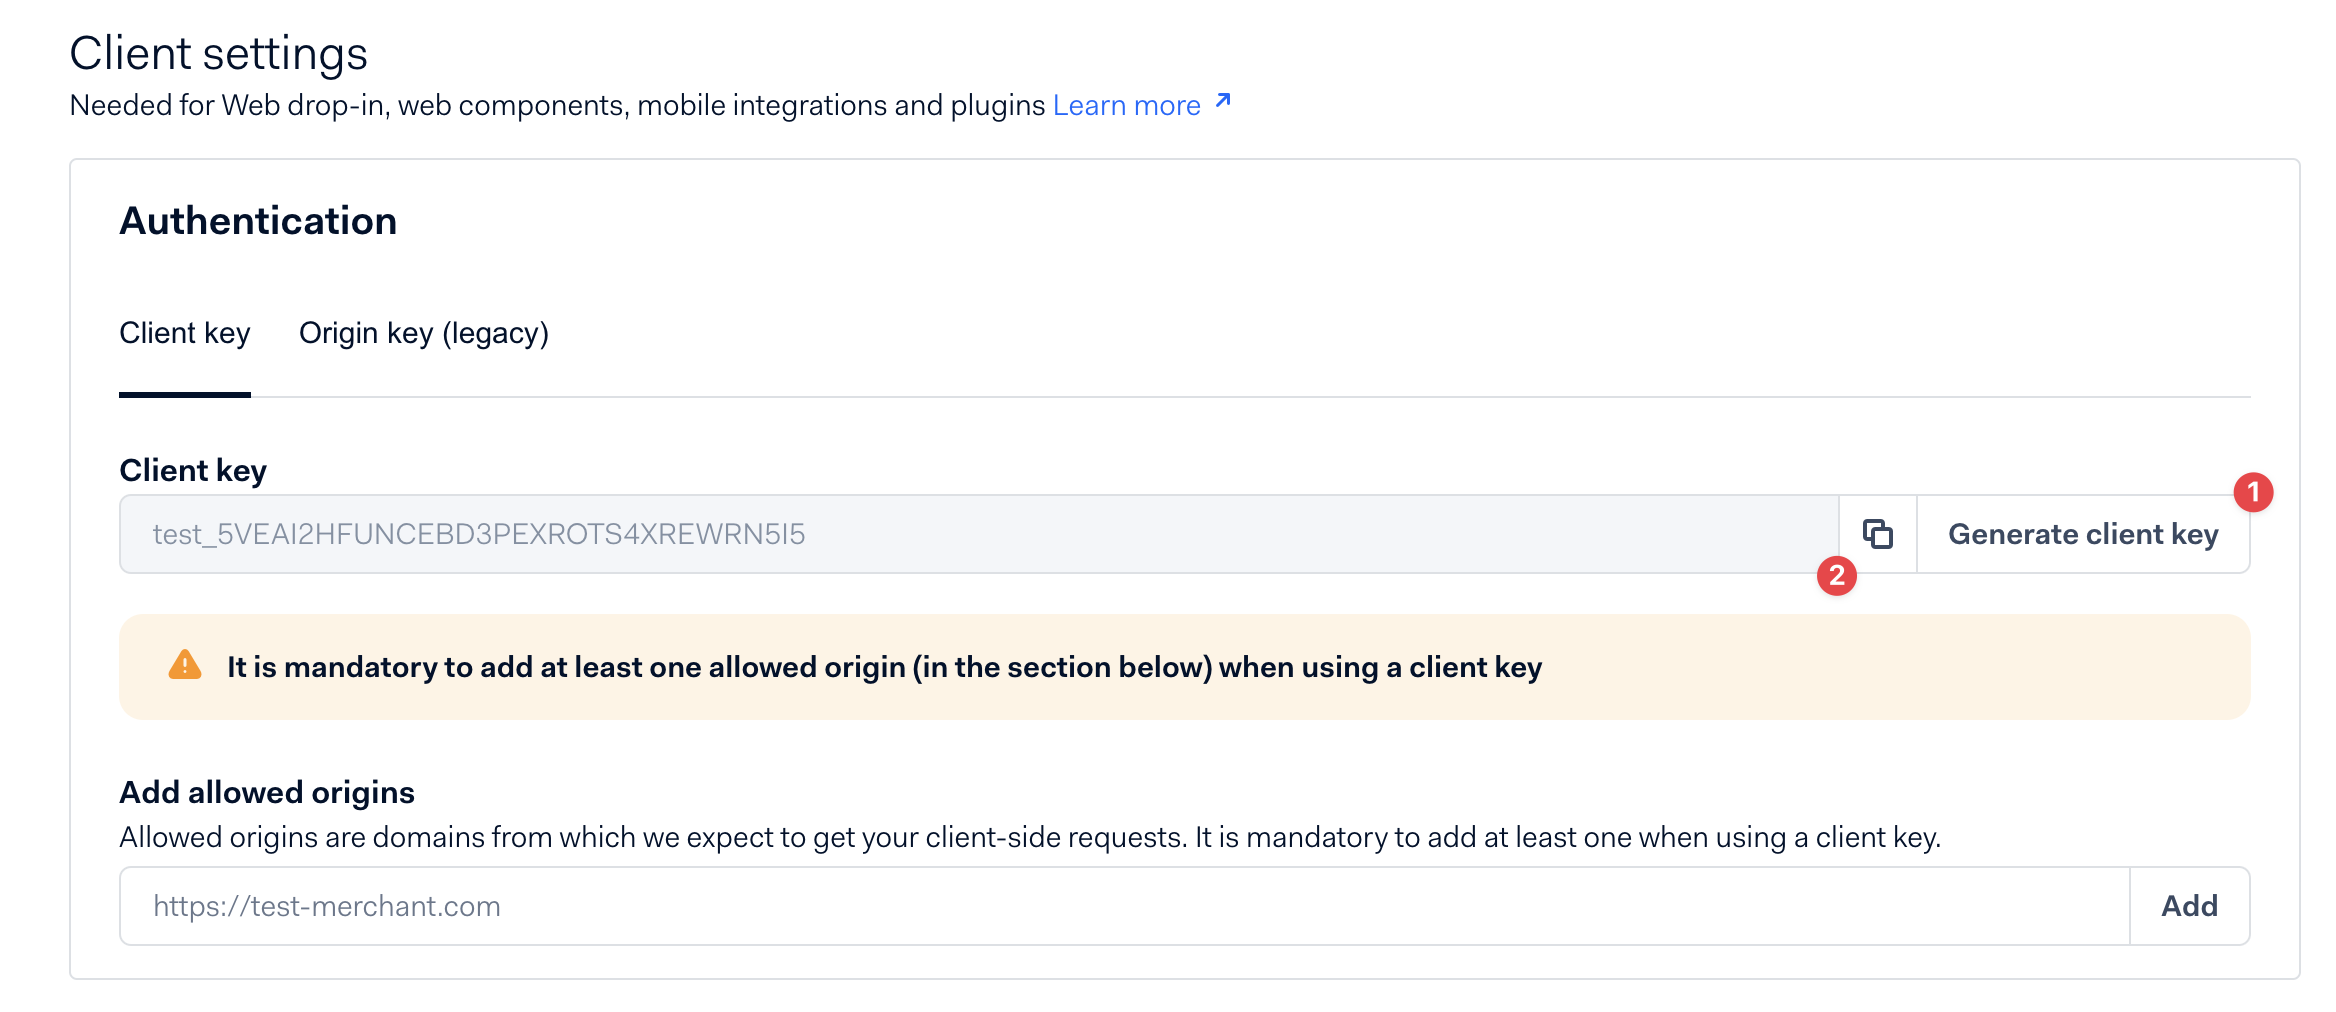
- Click "Generate client key" and copy it to clipboard, paste it in Checkout app configuration > Adyen > Public client key
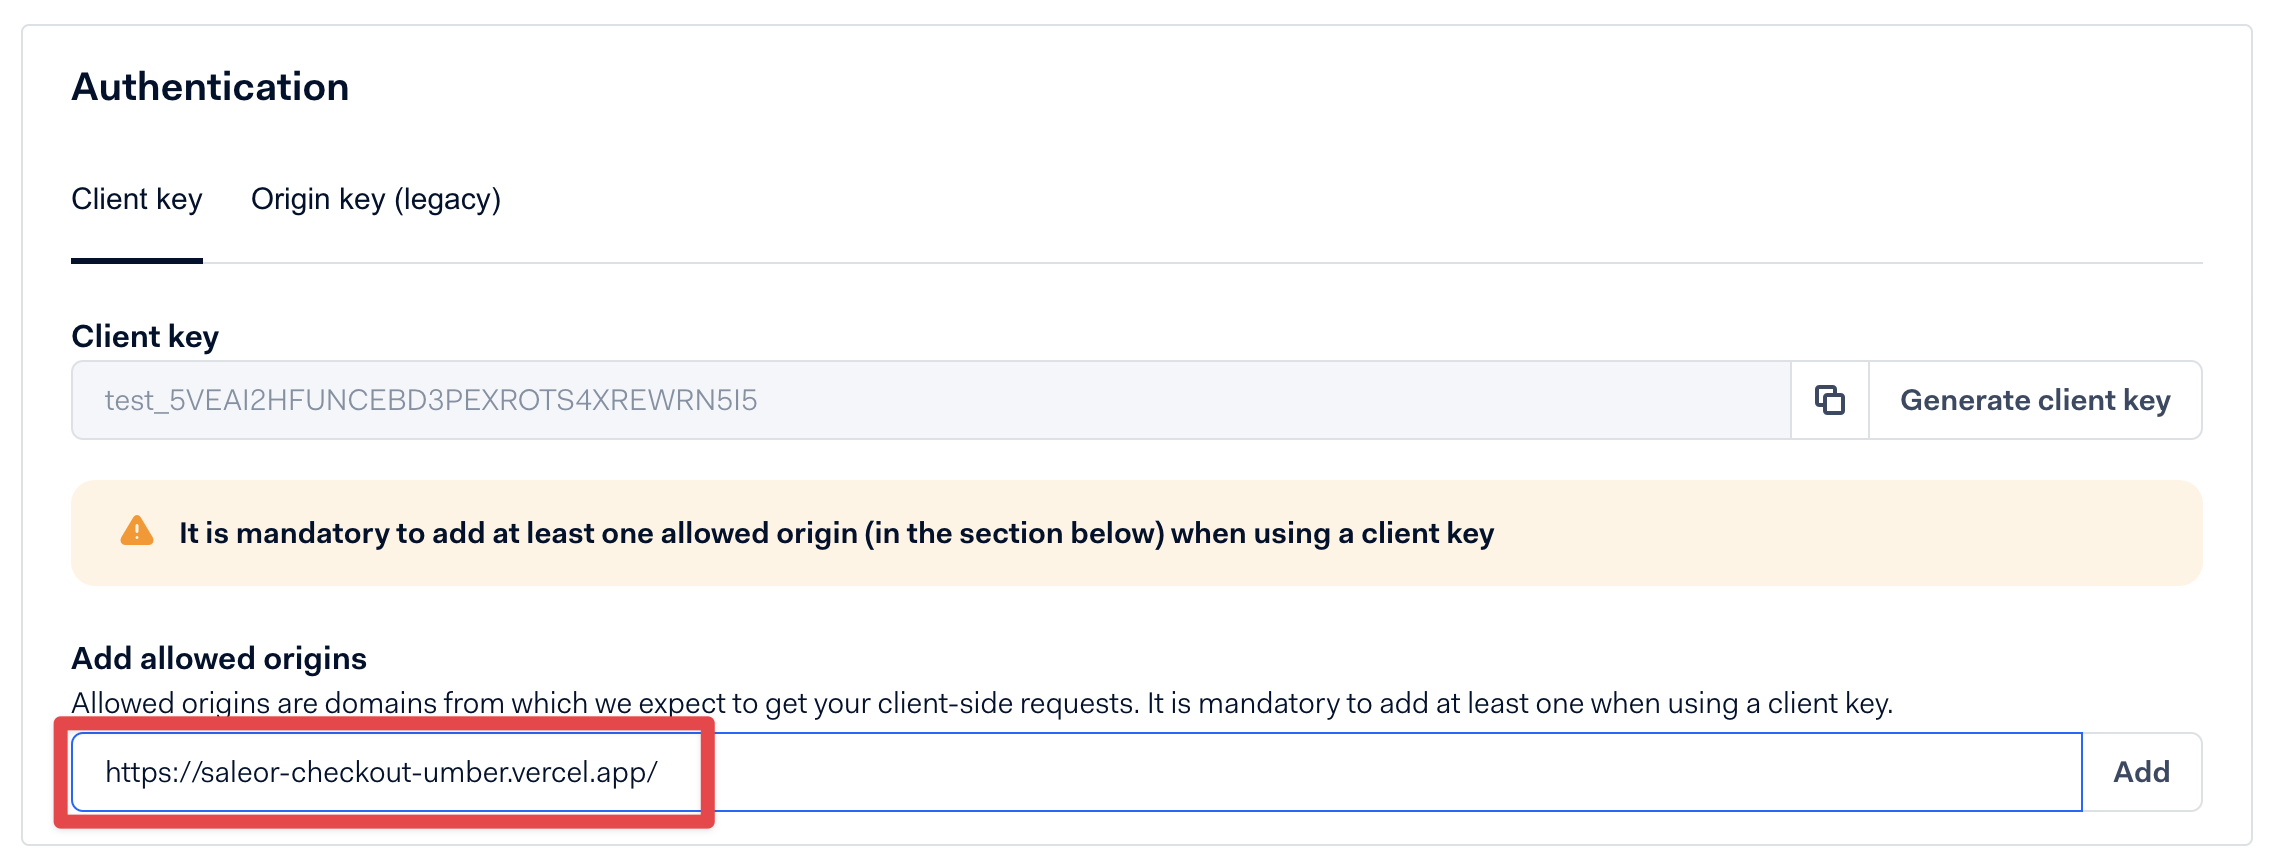
- Add allowed origin to your Client key, paste URL of your deployed Checkout SPA and click "Add"
-
Save changes you've made to API credential
-
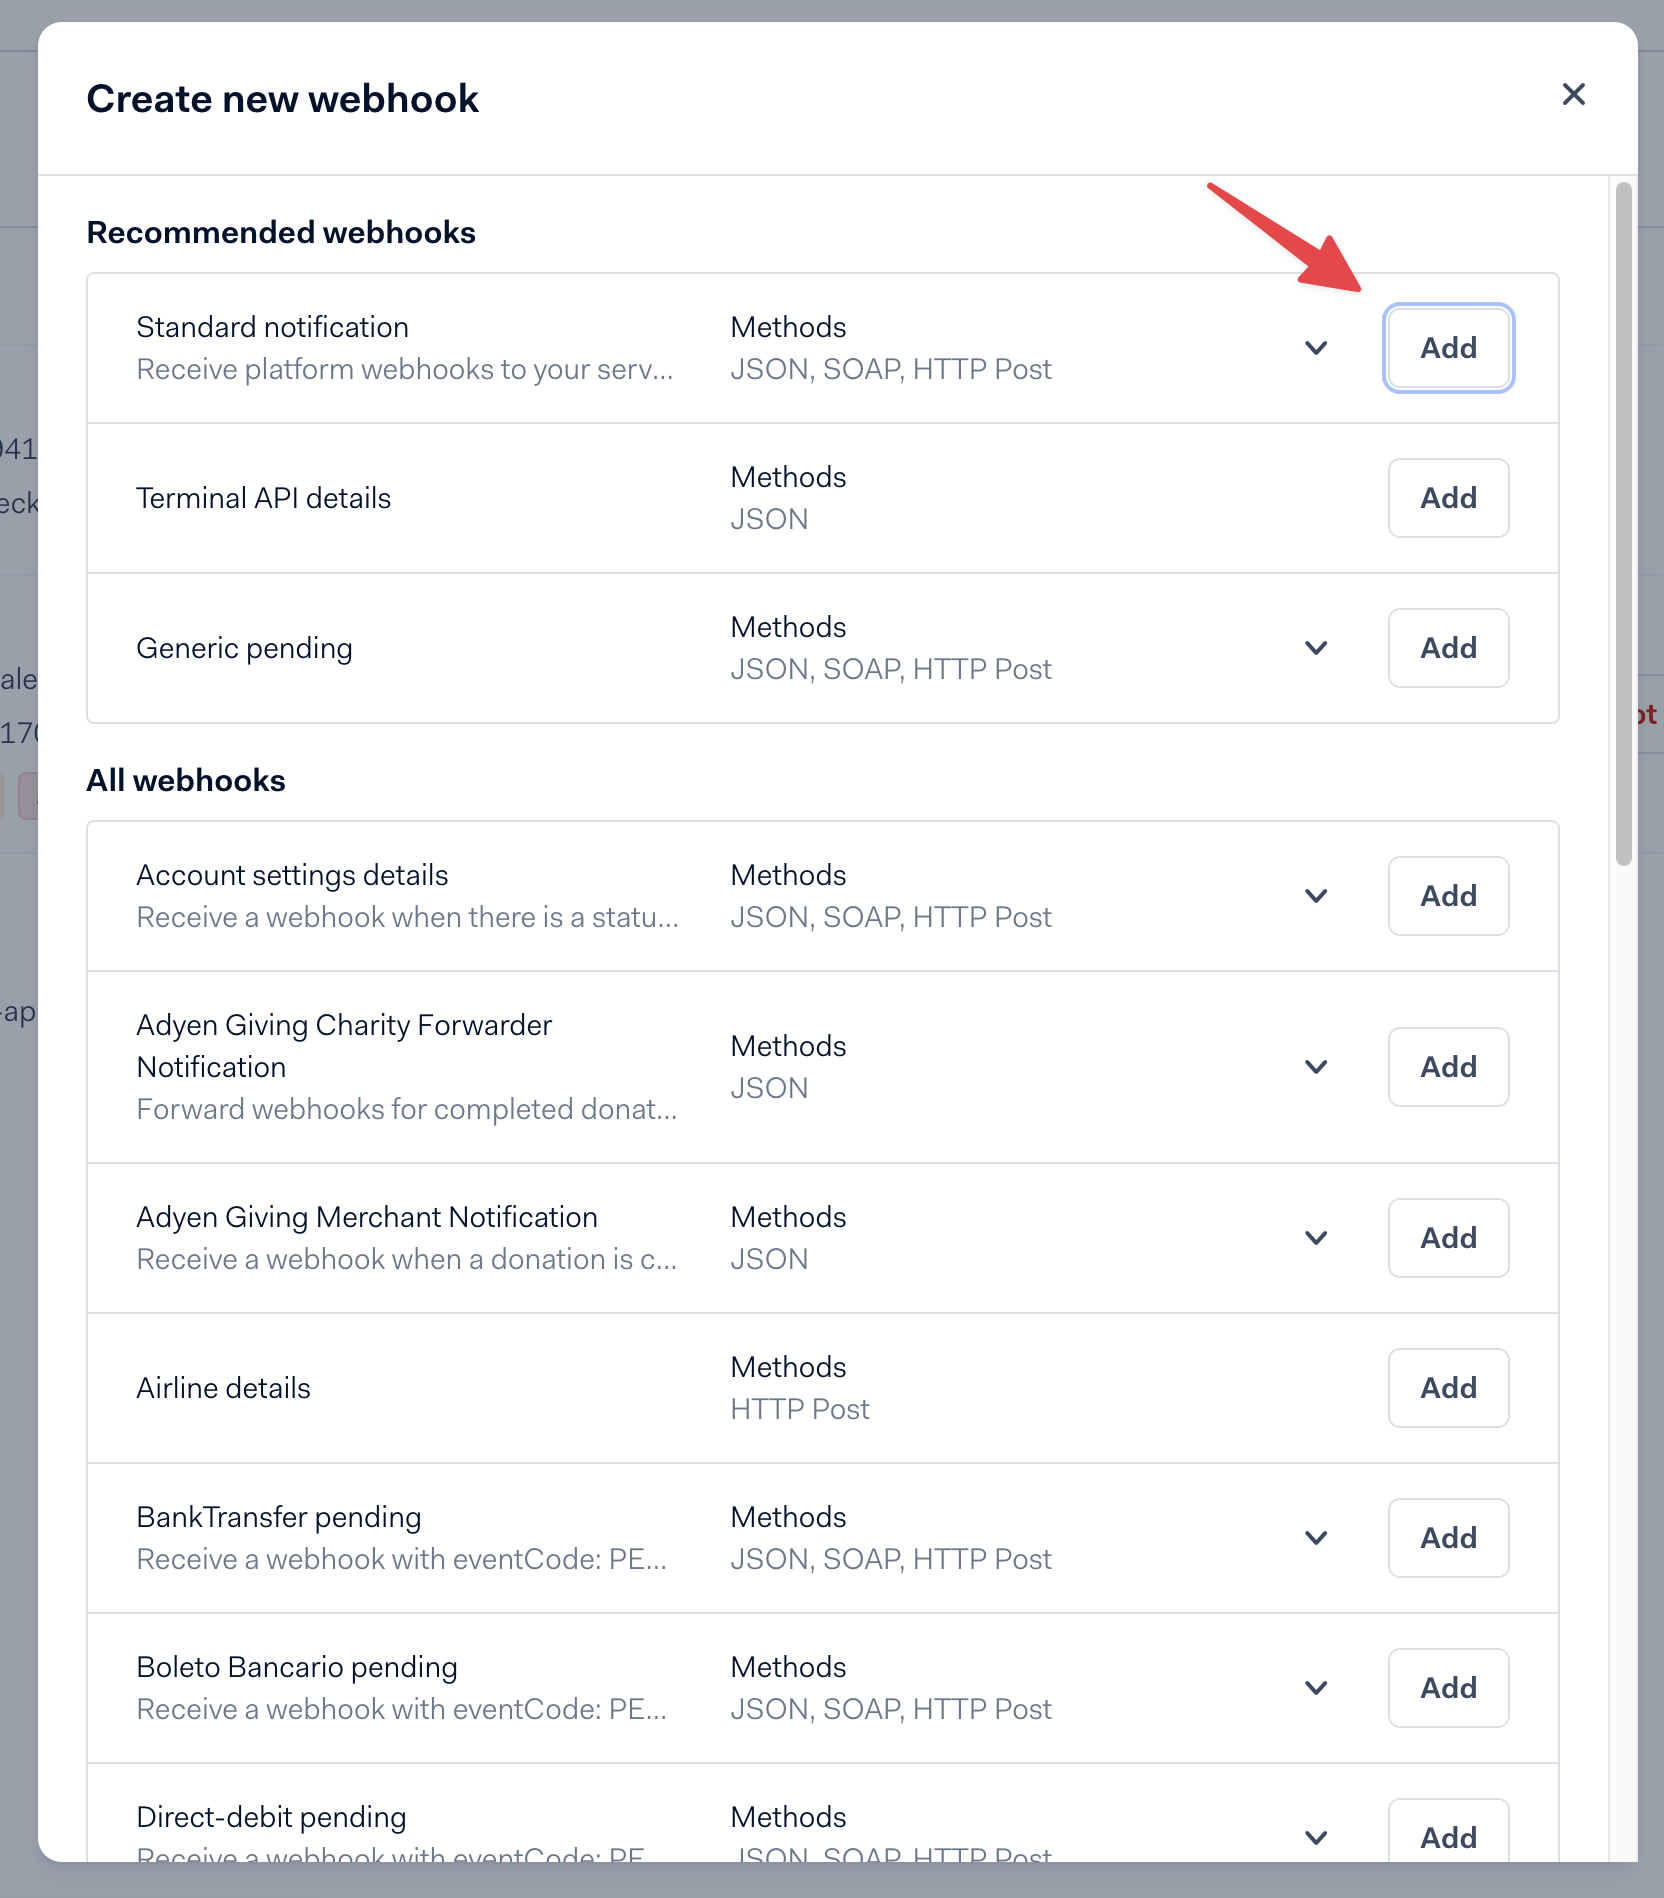
Create standard notification webhook. Go to Developers > Webhooks > "+ Webhook" > "Standard notification"
Fill out the webhook details:
- Description - enter some description for your webhook (ex. Saleor Checkout notifications)
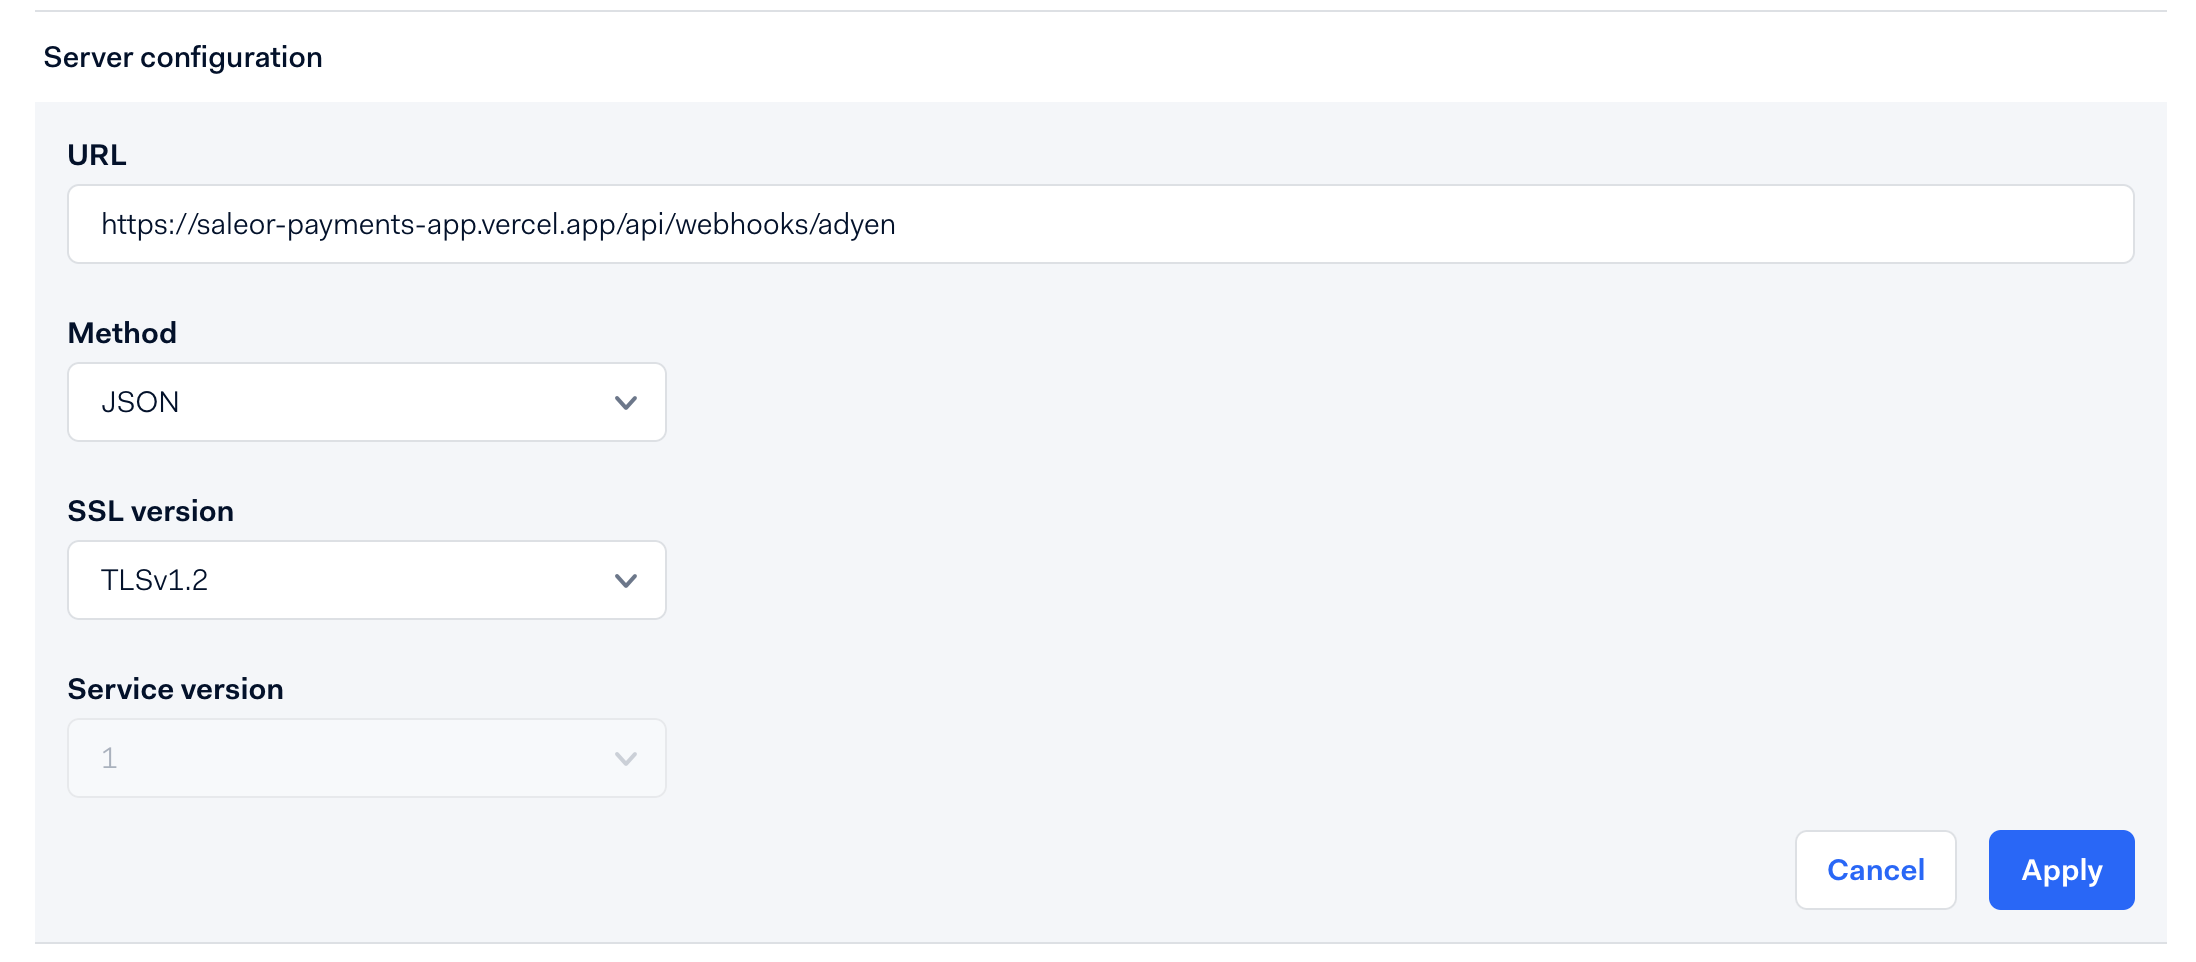
- Server configuration
- URL - URL of your deployed Checkout App +
/api/webhooks/adyen
- URL - URL of your deployed Checkout App +
<YOUR_CHECKOUT_APP_URL>/api/webhooks/adyen
- Other settings should be set to default:
- Method: JSON
- SSL version: TLSv1.2
- Service version - 1
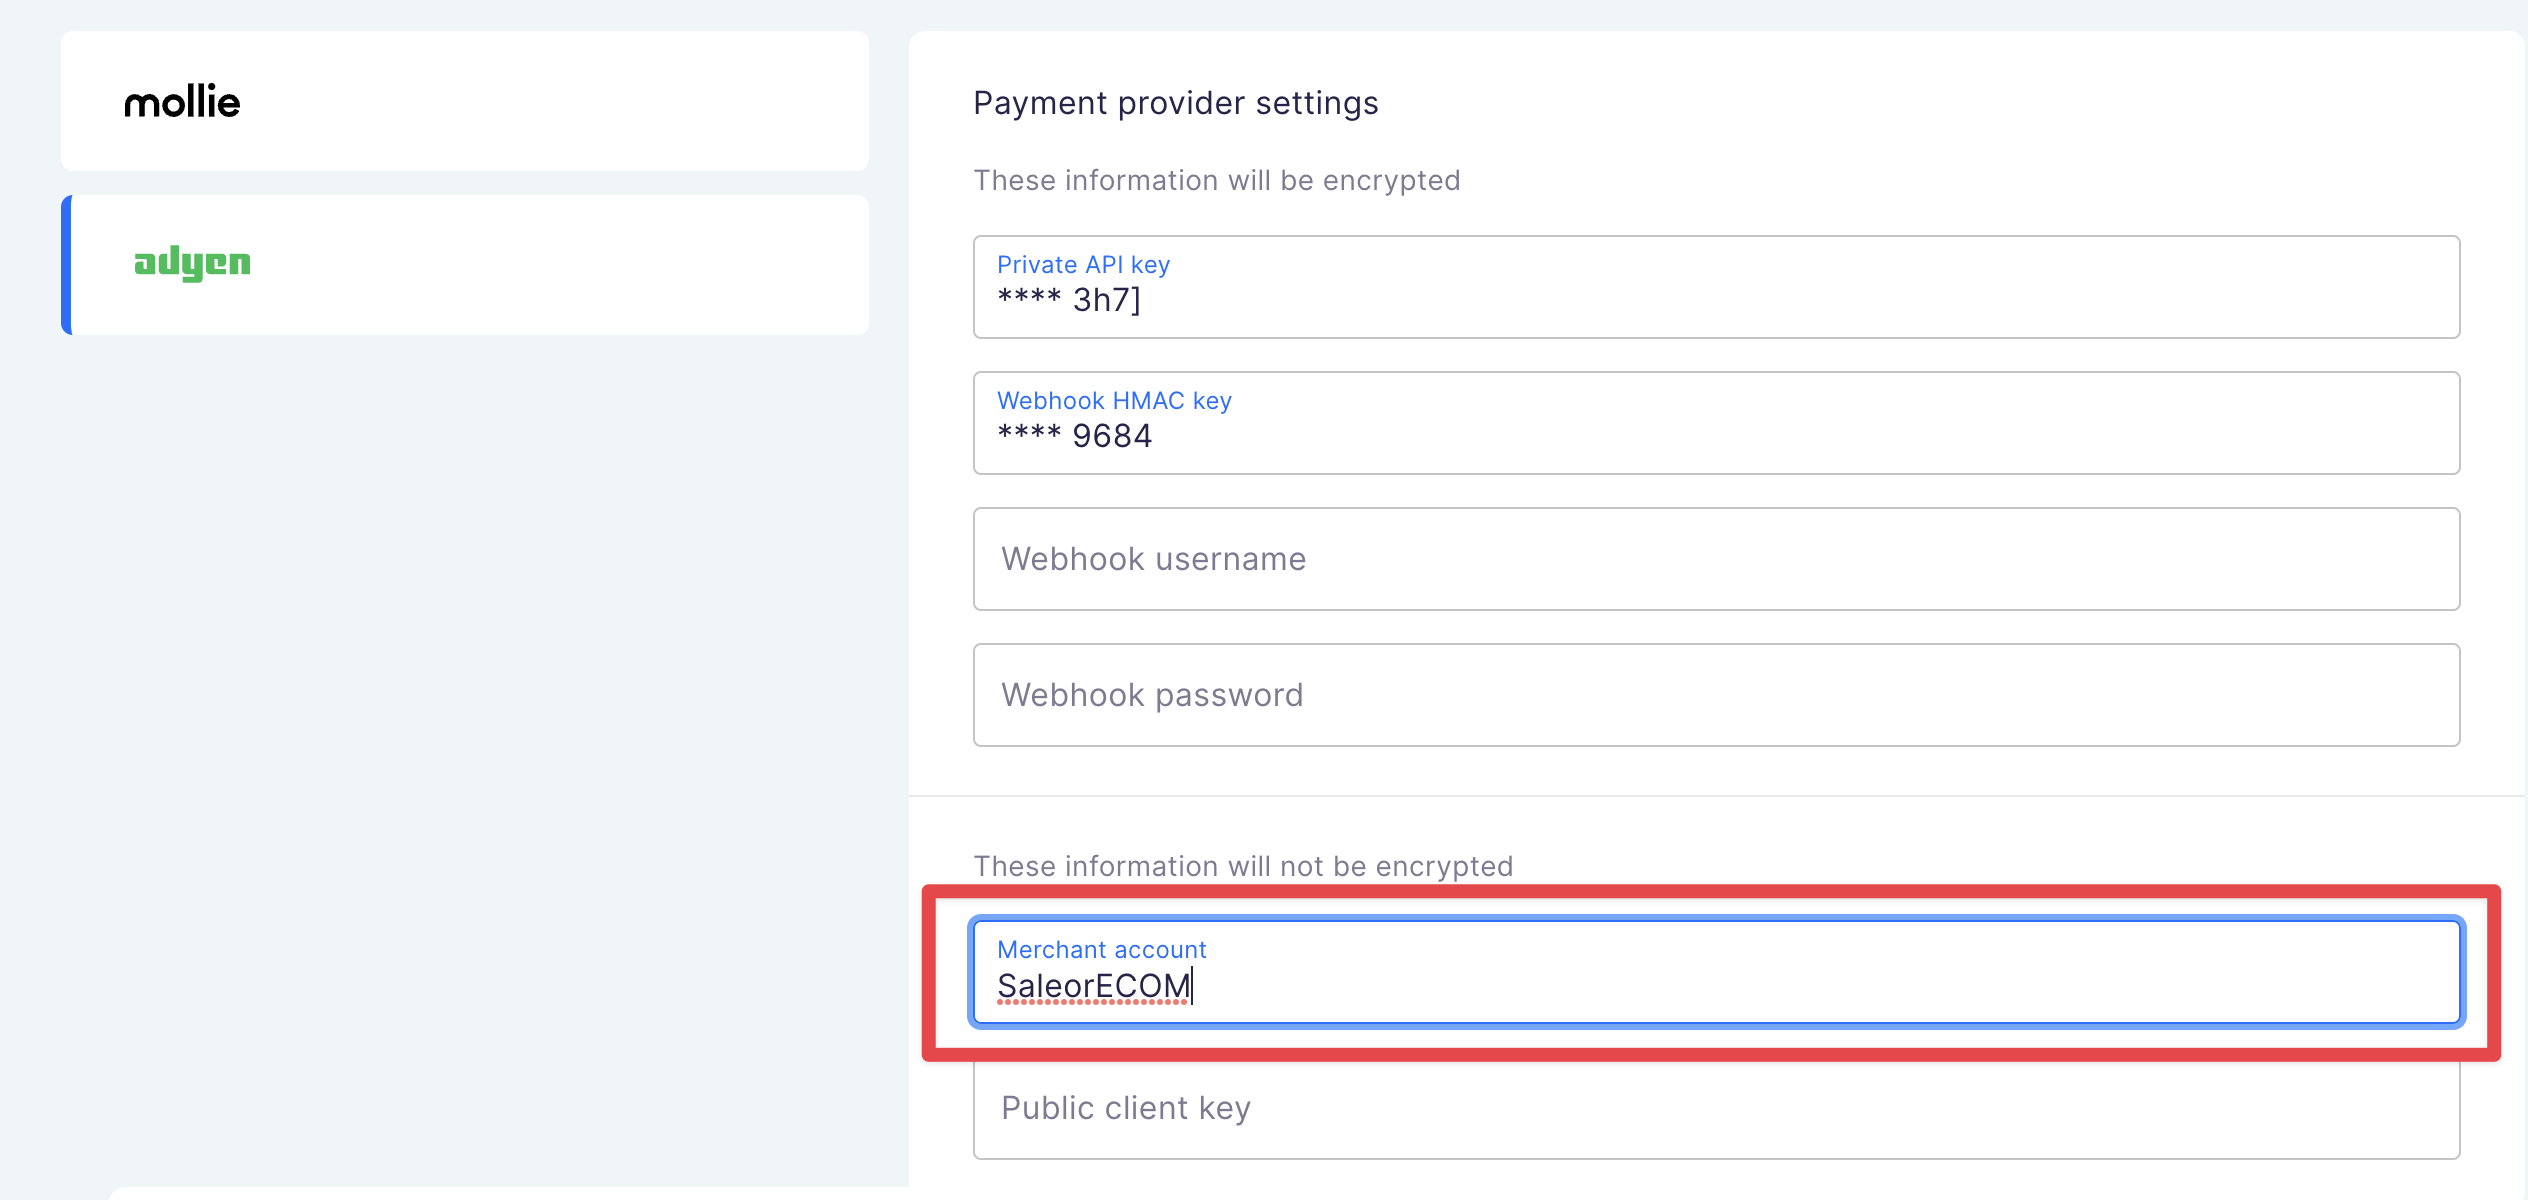
- Merchant accounts - choose "Include only specific merchant accounts" and select the merchant account you'll use for checkout, the name must be provided in Checkout App configuration
- Events - leave events selected by default
- Security
- Basic authentication - arbitrary username and password, you can use
openssl rand -hex 64to generate random password - HMAC Key - click "Generate" and copy the key
- Those 3 values:
username,passwordandHMAC Keymust be provided in Checkout App configuration
- Basic authentication - arbitrary username and password, you can use
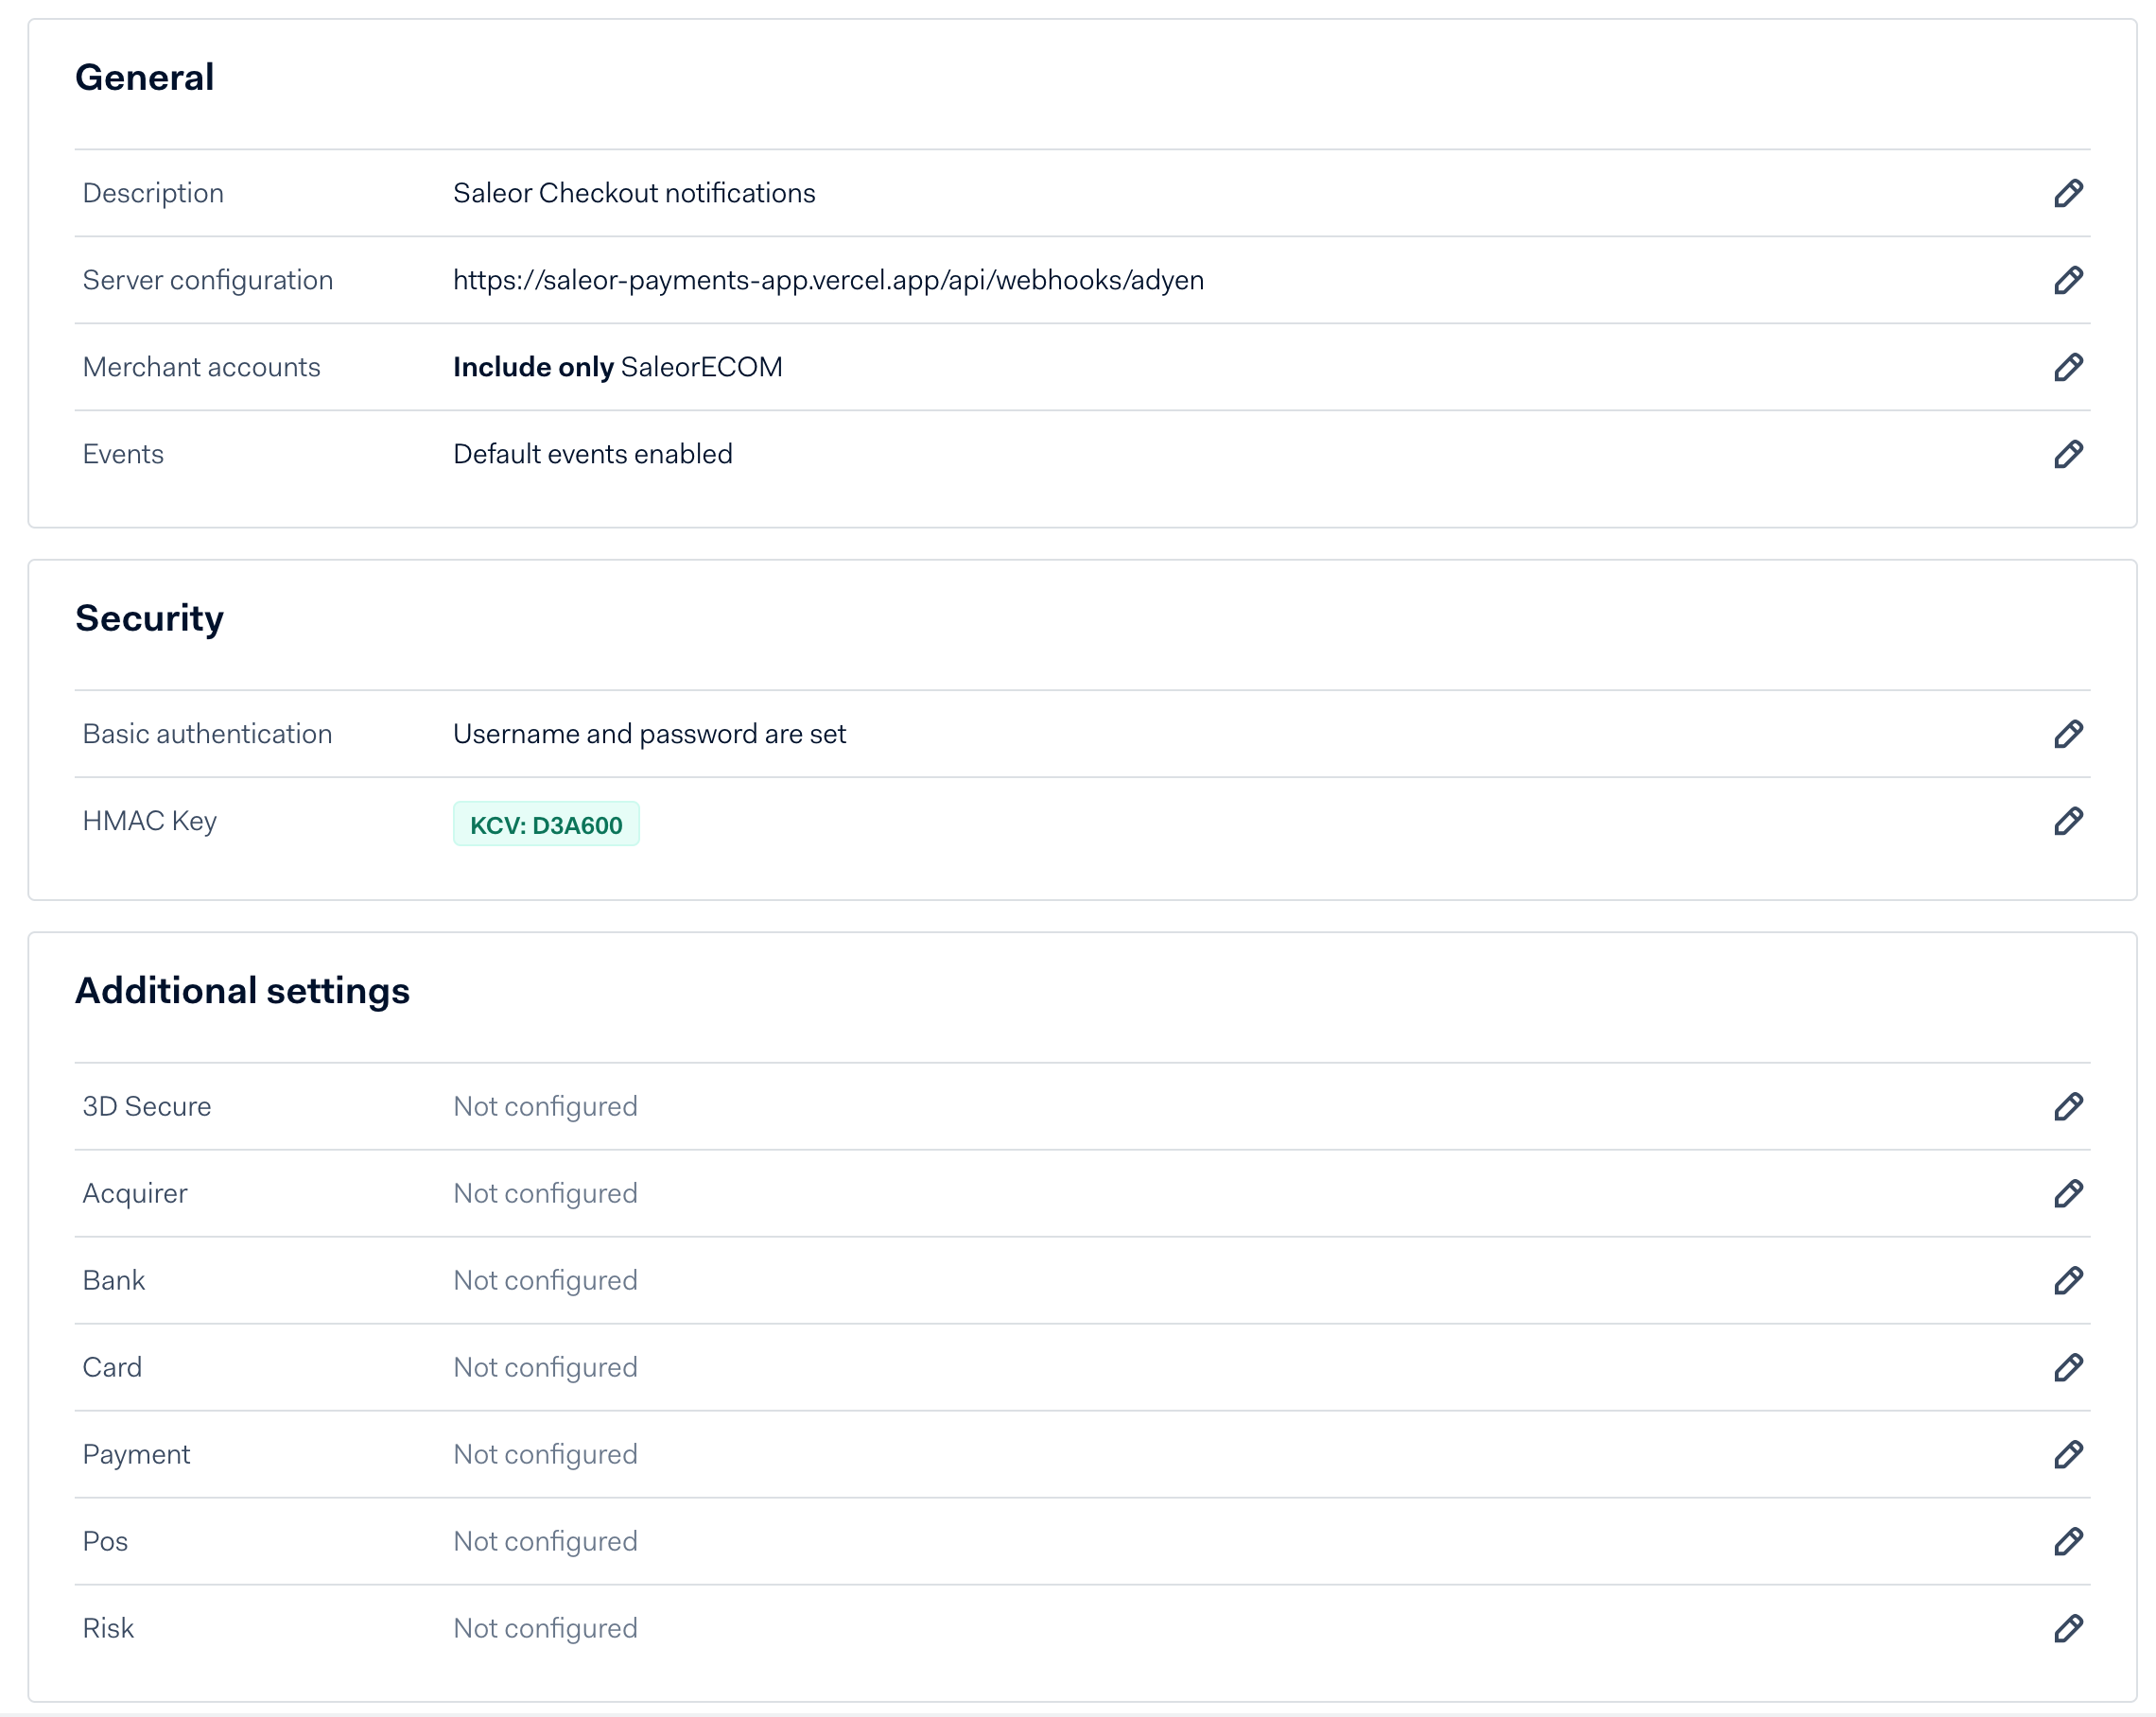
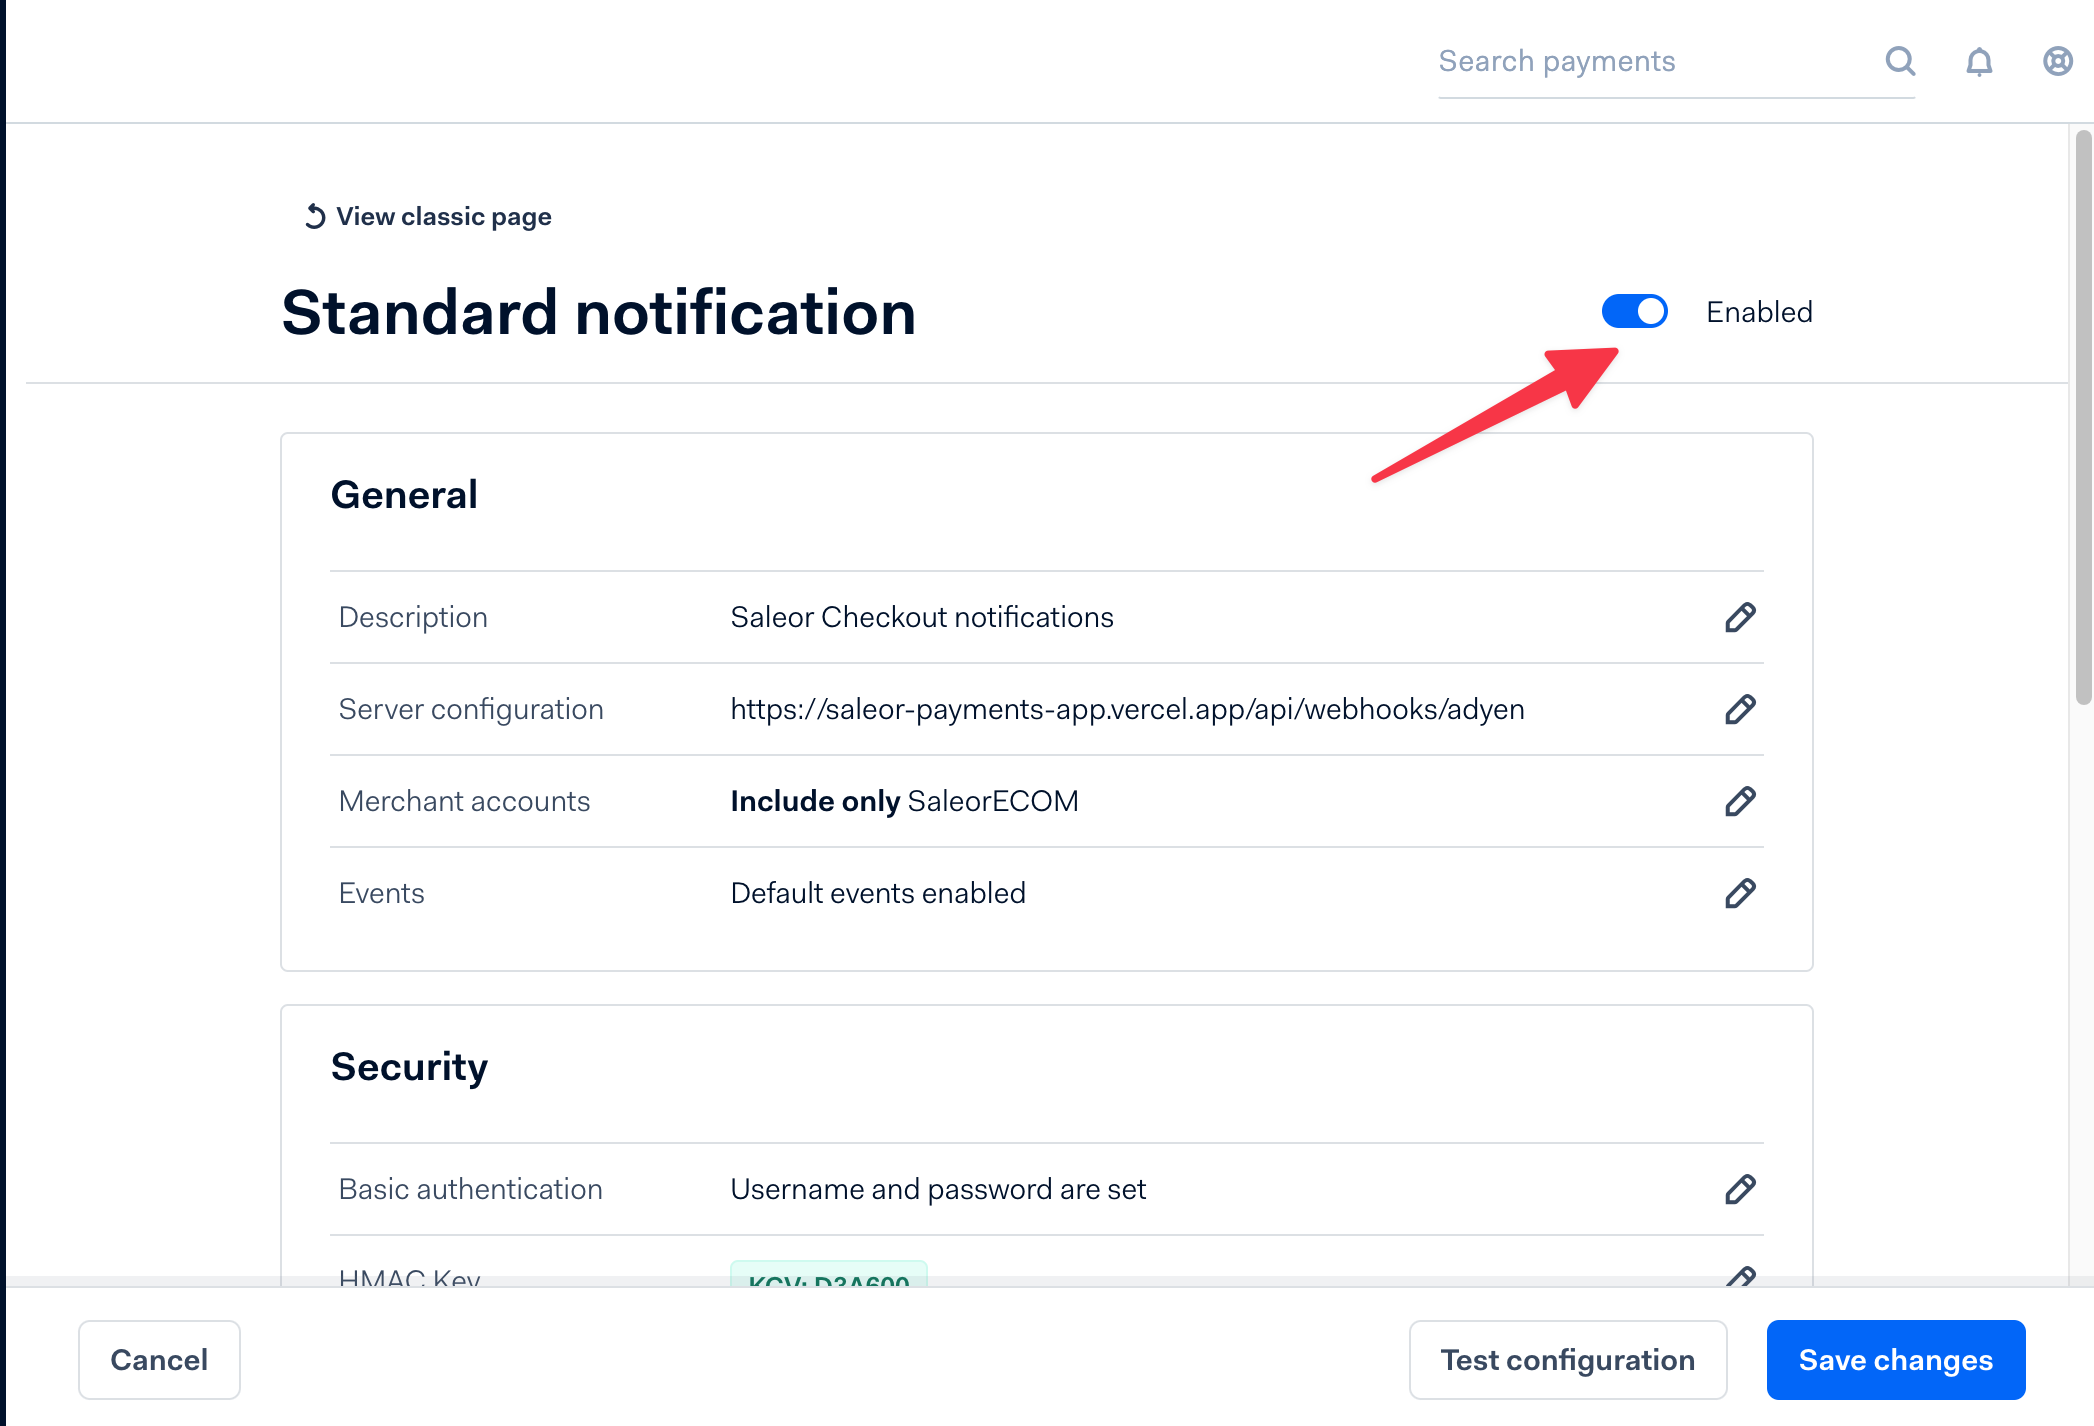
This is how your webhook configuration should look like in Adyen:
This is how your Checkout App configuration should look like in Saleor dashboard:
-
Save settings in Adyen and in Checkout App configuration
-
Test webhook configuration in Adyen
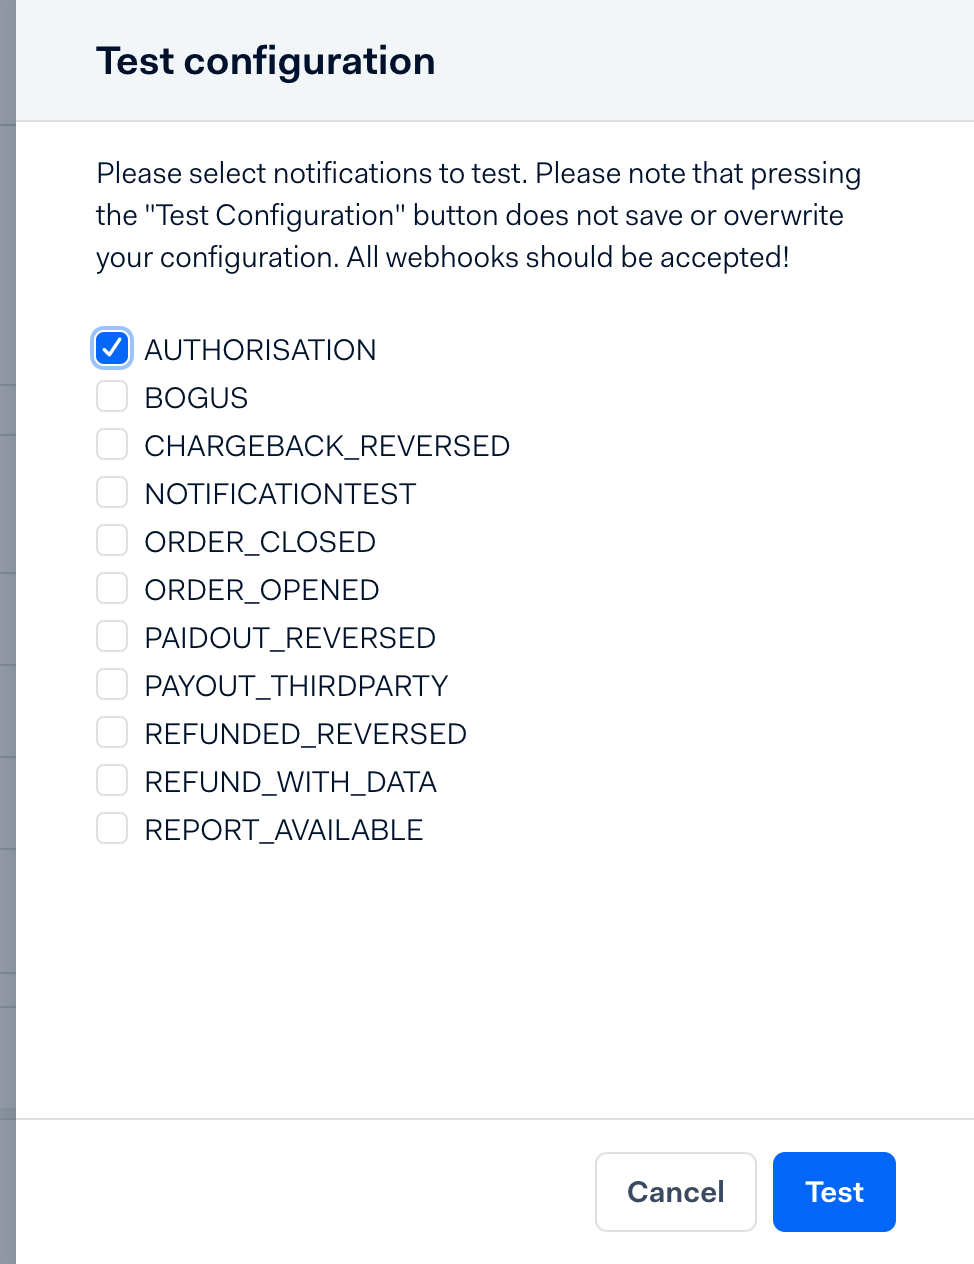
Click "Test configuration" button after you've saved the configuration.
Select "AUTHORISATION" from the list and click "Test"
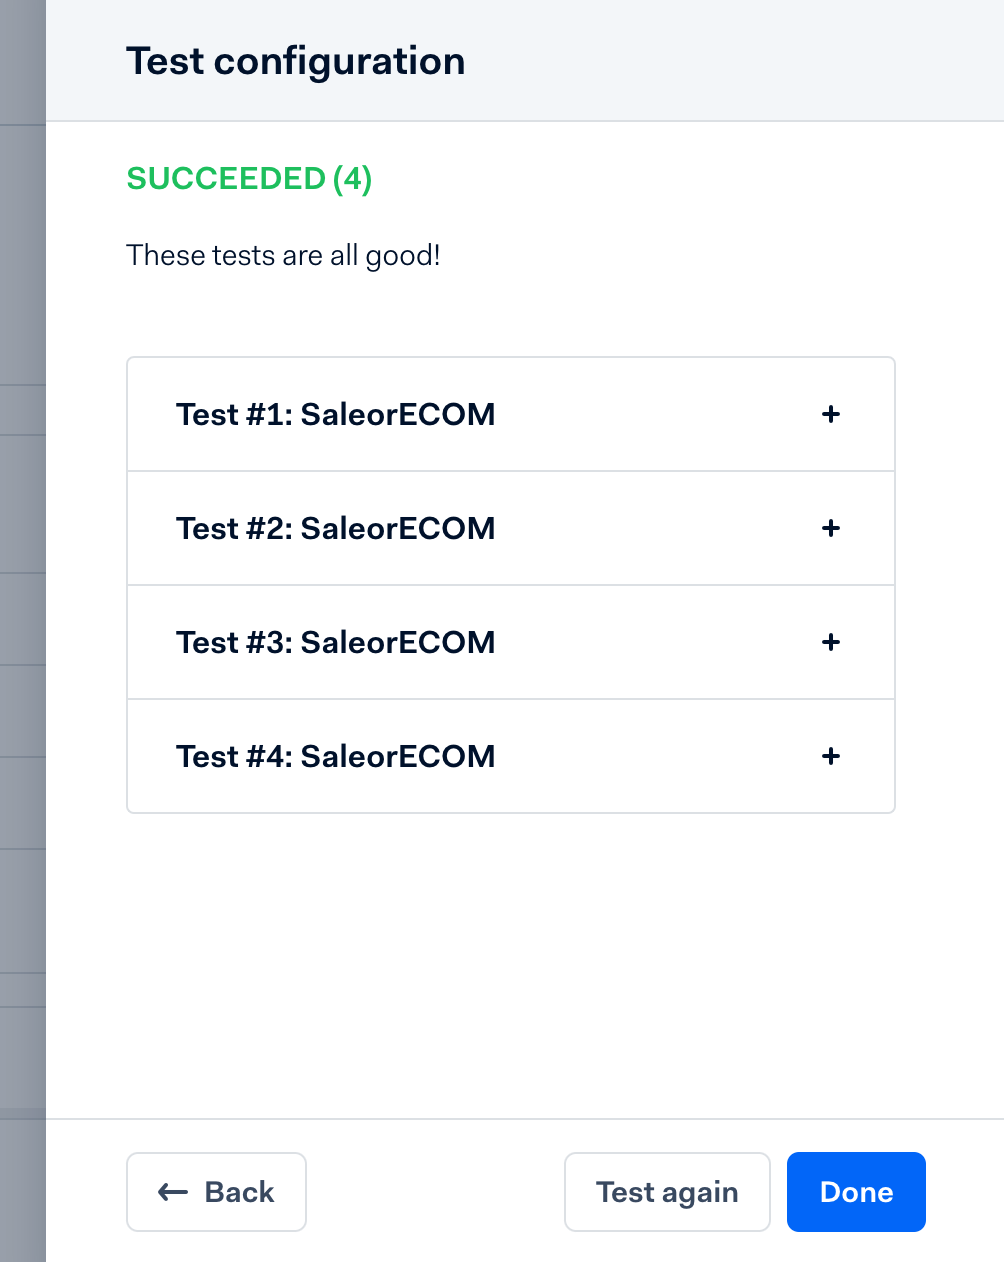
Adyen will make a call to your webhook. If everything is configured properly you'll see that the test was successful:
Note: It can take a while for your webhook configuration to propagate in Adyen after you save it. If the test failed, give it a few minutes before you try again
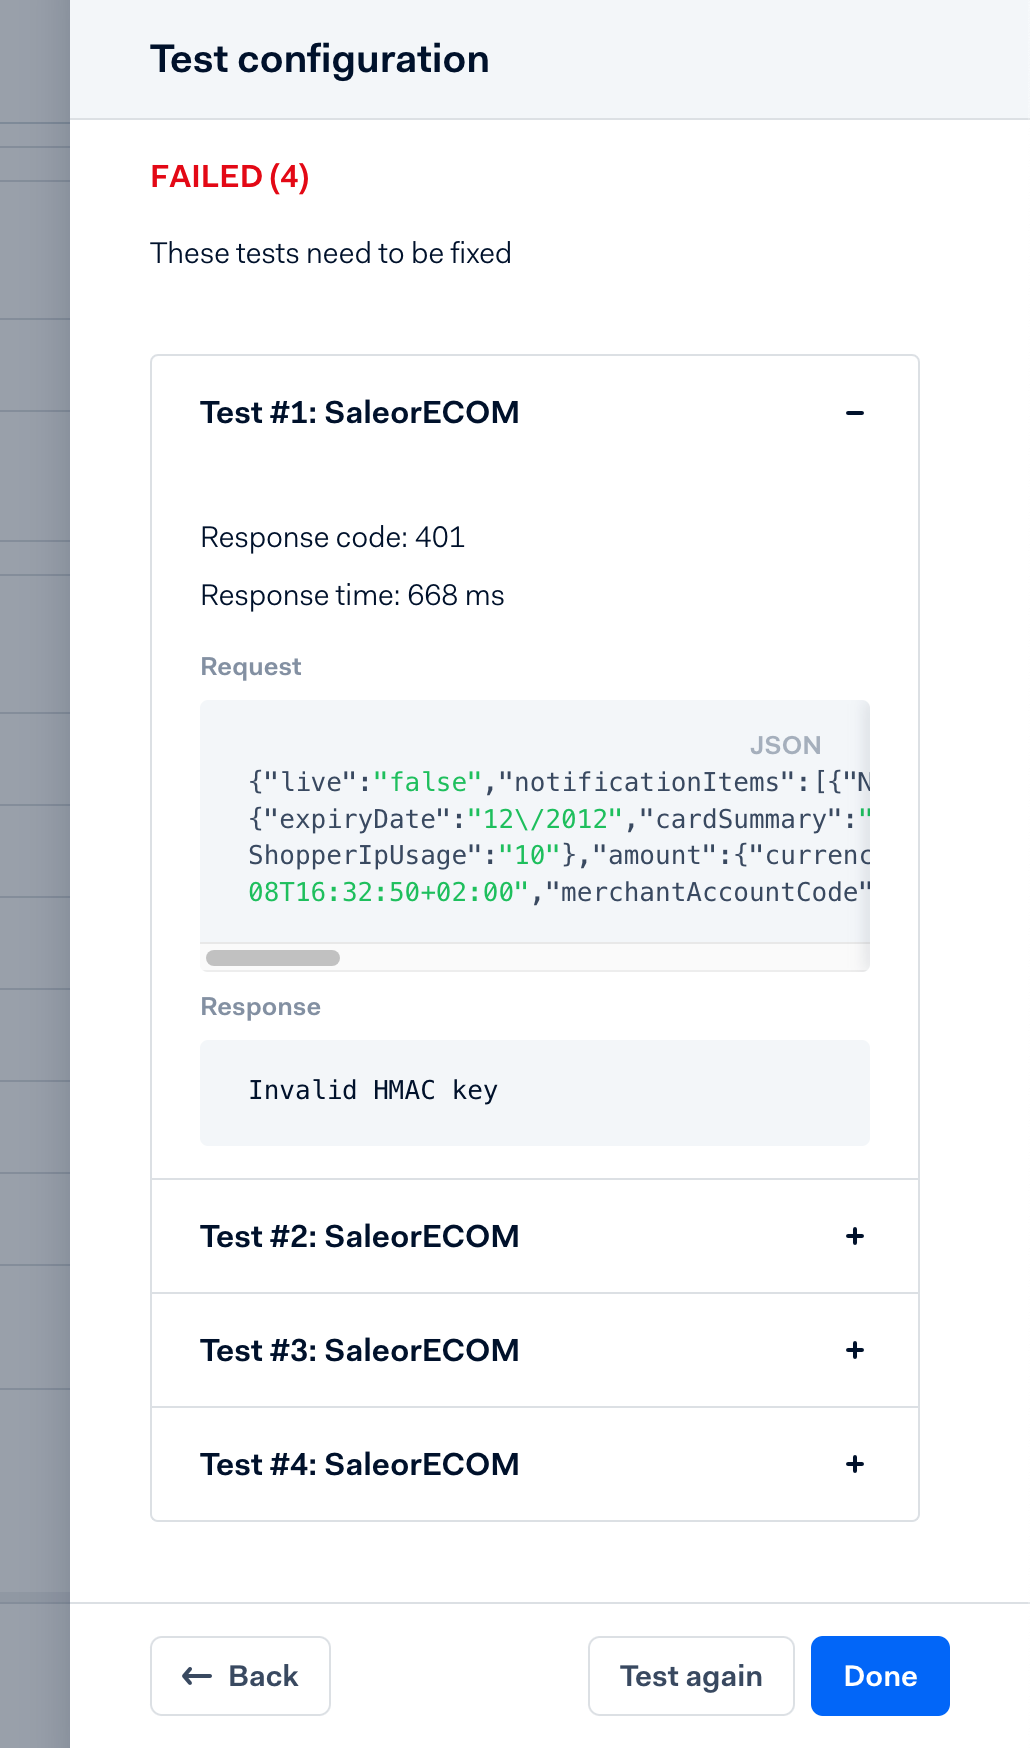
If the response failed because of invalid configuration in Adyen, Checkout App will return the reason in response:
- After you've tested your webhook, enable it, by clicking the toggle button
- 🥳 Congrats! You've finished configuration of Adyen payment gateway
