#
Webpack- touch index.html
// 举个例子🌰 demo-01
<div id='root'>
  <script src='./index.js'></script>
<div>- touch index.js
// 举个例子🌰 demo-01
const root = document.getElementById('id')
let El = document.creteateElement('div')
El.innerText = 'Peng Geng'
root.append(El)ES Module
- touch one.js
// 举个例子🌰 `demo-01`
function One() {
	const root = document.getElementById('root')
	let one = document.createElement('div')
	one.innerText = 'Peng Geng'
	root.append(one)
}
export default One- 修改原生写法 index.js
// 举个例子🌰
import one from './one.js'
new one()
CommonJS
自行做实验require 、module.exports
2. what’s webpack
什么是模块打包工具
打包工具有哪些
gulp、 grunt、 webapckwebpack 支持的模式
ES Module、CommonJS、AMD、CMD查看webpack版本信息
npx info webapcknpx webpack
index.js需要打包的入口
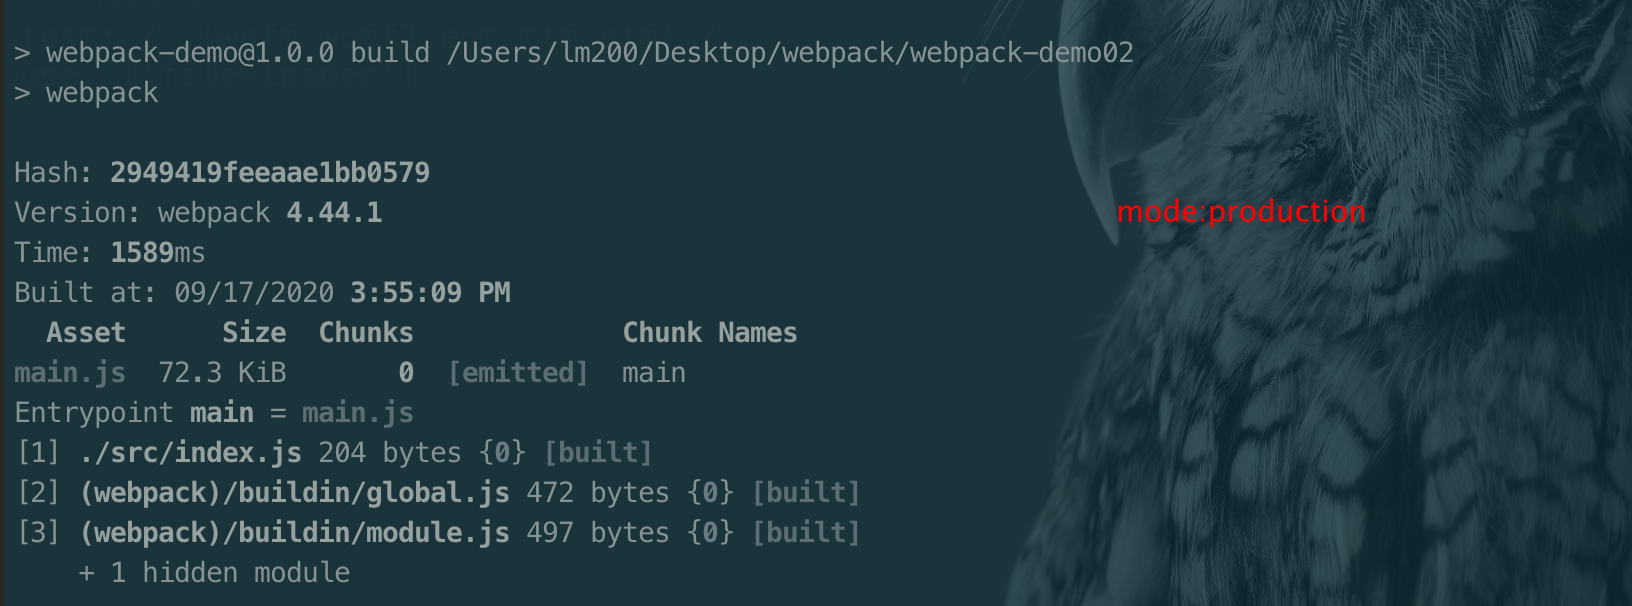
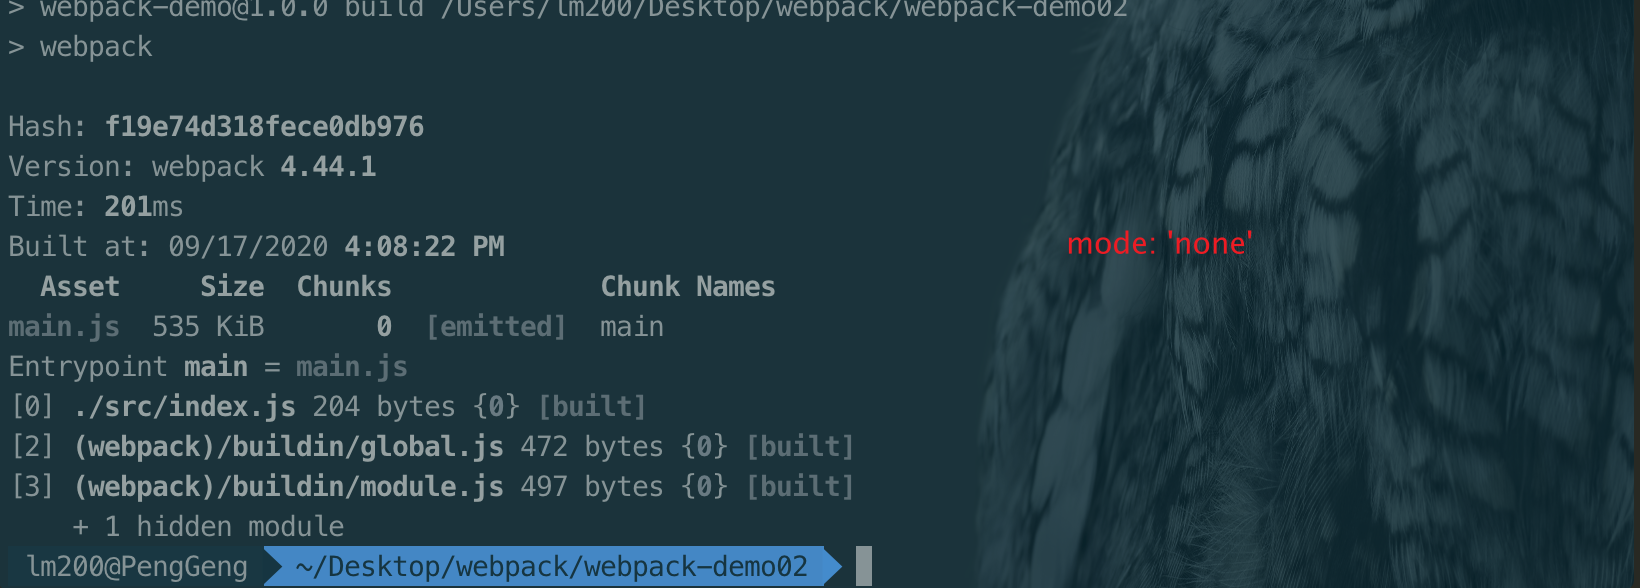
注:mode 在webpack4.x 的版本添加mode的属性
设置mode
// 举个例子🌰
module.export = {
  mode: 'production'
}
或者
运行命令
webpck --mode=production- 单入口语法
entry: string|Array<string>
// 举个例子🌰 `webapck-demo02`
module.exports = {
  entry: './index.js'
}

或者

module.exports = {
  entry: {
   main: './index.js'
 }
}- 对象语法
entry: {[entryChunkName: string]: string|Array<string>}
// 举个例子🌰
  module.exports = {
    entry: {
      main: './index.js',
      one: './one.js',
      two: './two.js'
    }
  }
注: webpack小于4.x的时候,一般抽离的vendor作为单独的包来添加到起点
entry的配置中,然后结合CommonsChunkPlugin一起使用;但在4.x的版本中优化了次选项配置,而是使用optimization.splitChunks选项,将vender和主入口配置分开,作为单独的一个文件。
publicPath
指定在浏览器中所引用的输出目录对应外部用户的公开URL
此选项在去加载一些绝对路径的协议是活着相对路径可能会用到
比如:资源托管到
CDN时,此时就必须要用到了
// 举个例子🌰 `webapck-demo02`
output: {
  publicPath: '/assets/',
  chunkFilename: '[name].chunk.js'
}
// 此时页面加载的资源(js/png/css)为
/assets/*.js
background-image: url(/assets/*.png);

CDN:
output: {
  publicPath: https://www.cdn.com/',
  chunkFilename: '[name].chunk.js'
}
// index.html script src='https://www.cdn.com/[name].chunk.js'
path
- 打包输出的路径 默认:当前路径下的
dist/
- 通常我们会设置打包路径为:
path.resolve(__dirname, 'dist')
// 举个例子🌰 `webapck-demo02`
const path = require('path')
module.exports = {
  output: {
    path: path.resolve(__dirname, 'dist')
  }
}filenamefilename配置
确定输出文件的每个bundle的名字,此时会打包到
output.path对应的目录下面对应单个入口的时候,此时
output.filename的值可以为静态名称一般项目的模块会很多,我们需要做动态的配置来使每个模块有对应的bundle名称
 // 举个例子🌰
 module.exports = {
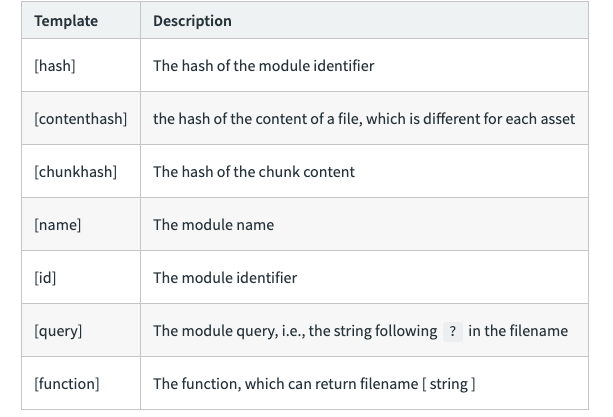
  filename: [name].[chunkhash:7].js
 }
chunkFilename
- 确定非入口文件输出的 chunk 文件名称
非 entry- 配置
[name].[contenthash].js可以监听文件的变化打包时可以改变hash,如果没有改变则hash不变,后面会具体讲到contenthash的作用
 // 举个例子🌰
 module.exports = {
  chunkFilename: [name].[contenthash:7].js
 }
决定如何处理项目中不同的类型的模块
module.rules创建模块时,匹配到的规则能够修改模块的创建方式。这些规则能够对模块(module)应用loader,或者修改解析器(parser)
Rule.test引用所有通过断言测试的模块, 通过test的正则做匹配合适的loader去做解析
Rule.use如果是需要多个loader来解析时,我们需要使用use以数组的形式表示如:use: ['style-loader', 'css-loader']; 如果匹配到的模块仅需要单个loader来解析时,可以直接使用loader: 'file-loader';注: Loaders 可以通过多个loaders已达到链式调用的效果,它们会从右到左被应用(从最后到最先配置)如:
style-loader<css-loader<less-loader/sass-loader<postcss-loader
Rule.exclude抛开一些不需要使用此loader解析的模块; 如:node-module
Rule.include指定设置一些需要使用此loader解析的模块; 如:a.js
注:options.modules=true
 // 举个例子🌰 `webpack-demo3`
module: {
  rules: [{
    test: '/\.css$/',
    use: ['style-loader', 'css-loader', 'postcss-loader']
  },
  {
    test: '/\.(png|gif|jpg|svg)/',
    loader: 'file-loader', // url-loader
    options: {
      name: [name]_[hash].[ext],
or
      name(file) {
        if(process.env.NODE_ENV === 'development') {
        	return '[path][name].[ext]'
        }
        return '[hash].[ext]'
      },
      outputPath: 'images/',
      limit: 1024*20
    }
  }]
}

// 针对css文件的导入另一个css文件,如果我们需要把引入的文件从下到上去用loader 解析需要修改配置 [importLoader]
 use: ['style-loader',
  {
   loader: 'css-loader',
   importLoaders: 1,
   options: {
     modules: true // 模块化样式,文件使用的样式不会有耦合的情况
   }
 } ,
 'postcss-loader']
style-loader 把翻译的css的文件挂在到HTML的header部分
css-loader 会分析我们css文件中的关系来合并css文件
scss-loader/less-loader/stylus-loader 把
*.sass/less的文件编译成css文件postcss-loader 浏览器的兼容 css-loader 是有执行顺序的 从下到上从右到左
注:
postcss-loader、autoprefixer此时需要在
webpack.config.js同级目录创建touchpostcss.config.js, 添加如下
// 举个例子🌰 `webpack-demo3`
// 需要 npm install autoprefixer -D
module.exports = {
  plugins: [
    require('autoprefixer')
  ]
}
// 有些浏览器比较新的还需要做些处理,才会显示
"browserslist": [
    "> 1%",
    "last 2 versions",
    "not ie <= 8"
  ]
- HtmlWebpackPlugin : 会自动在打包文件里生成一个index.html 文件,并把打包生成的文件自动引入到dist文件中;
index.html 文件是何时生成的?其实plugin在打包完成后会有一些生命周期函数的钩子,然后可以处理一些特定的事情。此时的index.html就在此时创建
// 举个例子🌰 `webpack-demo05`
const HtmlWebpackPlugin = require('html-webpack-plugin')
plugins:[
  new HtmlWebpackPlugin({
  	title: '你的title',
  	template: '你自己的模版' // './index.html'如果不填写 默认会自动生成index.html
  })
] // 此插件根据版本的变化会写法上会有一定的变化
// V3.0.0 如下:
const { CleanWebpackPlugin } = require('clean-webpack-plugin')
plugins: [
new CleanWebpackPlugin() // 默认会从你的oupu.path 来删除 在打包之前
]
// V1.0.0
const CleanWebpackPlugin = require('clean-webpack-plugin')
plugins: [
new CleanWebpackPlugin(path, options) // 【path】 clean 路径;【options】配置
]
- ExtractTextPlugin
- HotModuleReplacementPlugin
- SplitChunksPlugin
cheap: 提示错误文件在哪一行 反之则不会告诉你列
module: 增加错误的module 提示 比如使用的一些loader plugins
inline: 生成的映射文件包含在打包的chunk 文件中,反之单独生产[chunkname].map.js文件
eval: 是生产eval的执行文件,是最快的
source-map: 生成[chunkname].map.jschunk的映射文件deveplopment建议使用:
cheap-module-eval-source-map提示的错误比较全并且相对的打包速度比较快production 建议使用如果线上有遇到问题可以设置为:
cheap-module-souce-map或者直接不设置
//  举个例子🌰 `webpack-demo06`
module.exports = {
  // development
  devtool: 'cheap-moudle-eval-source-map'
  // production
  devtool: 'cheap-module-source-map' // 或者不填
}
- watch 此功能可以监听代码的改变,但是改变后的内容需要手动刷新页面才会生效
// 举个例子🌰 `webpack-demo07`
命令行使用: npx webpack --watch
or
package.json -> script -> watch: webpack --watch
- devServer 需要依赖webpack-dev-server; 使用 webpack-dev-server
 第一步: npm install webpack-dev-serve
 第二步: 在webpack.config.js 创建devServe的配置
 devServer: {
   contentBase: './dist',
   port: '9999',
   open: true,
   proxy: {
     'api/': 'http://localhost:1111'
   }
 }
 第三步: 在package.json文件中添加启动devServer的脚本
 start: 'webpack-dev-server --open'
middleware在早期的脚手架工具中由于webpack-dev-server不是很稳定,不太好用,然后自己使用webpack-dev-middleware 和 express/koa 来监听文件的变化// 具体例子 详情见: `webpack-demo07` 核心 server.js const express = require('express') const webpack = require('webpack') const webpackDevMiddleware = require('webpack-dev-middleware') const app = express() const config = require('./webpack.config.js') // 使用什么来编译 const compiler = webpack(config) // 通知 express 使用 webpack-dev-middleware来监听文件变化 // 把webpack.config.js 配置文件作为基础配置 app.use(webpackDevMiddleware(compiler, { publicPath: config.output.publicPath || '/' })) // 设置监听端口 app.listen(8888, function(){ console.log('port 8888 start success \n') })
const webpack = require('webpack')
new webpack.HotModuleReplacementPlugin()
// 举个例子🌰 `webpack-demo08`
 devServer: {
   hot: true,
   hotOnly: true
}
// 通过监听某一个模块的变化来达到模块的热更新
if(module.hot){
 module.hot.accept('./number', ()=> {
 	document.body.removeChild(document.getElementById('number'))
 	number()
 })
}
- 热更新js 为什么需要写
module.hot来做判断,而CSS不需要呢?
只支持ES Module 的引入模式,不支持commonJs的模式
Tree Shaking 值在
mode: 'development'模式是不生效的,tree shaking 只在mode: 'production'生效usedExports: true 针对未使用的文件来做TreeShaking
"sideEffects": false 针对把一些不需要TreeShaking的文件添加进来如
["*.css"];false是针对所有的东西做TreeShaking
// 举个例子🌰 `webpack-demo09`
// development
plugins: [
  optimization: {
   usedExports: true // 针对未使用的文件来做TreeShaking
  }
]
update: package.json 文件
"sideEffects": false // 针对把一些不需要TreeShaking的文件添加进来如 ["*.css"]; false 是针对所有的东西做TreeShaking
// production
update: package.json 文件
"sideEffects": false如何把 生产环境的配置和测试环境的配置单独分离出来
- 生产配置:
prodConfig// 举个例子🌰 `webpack-demo10` const prodConfig = { mode: 'production', devtool: 'cheap-module-source-map' }
- 测试配置:
devConfigmode: 'development', optimization: { usedExports: true }, devtool: 'cheap-module-eval-source-map', devServer: { // contentBase: path.join(__dirname, 'dist'), compress: true, port: 9999, hot: true }, plugins: [ // hot module replacement HMR new webpack.HotModuleReplacementPlugin() ]
webpack与 Code Splitting 不是耦合的。可以单独使用,webpack让code splitting的使用更加简单
- 第一种方式:
entry入口引入第三方库文件,做并行加载// eg: `webpack-codeSplitting` entry : { lodash: './src/lodash.js', app: './src/index.js' } touch lodash.js import _ from 'lodash' window._ = _;
- 第二种方式:Code Splitting
 // 此时这种方式可以自动的把引入的第三方模块抽离出单独作为一个chunk
 optizimation: {
  splitChunks: {
     chunks: 'all'
  }
}
- 第三种方式异步的加载: 老的webpack可能需要使用
babel-plugin-dynamic-import-webpack< webpack4.3的版本来做异步的分割function asyncComponent() { return import('lodash').then(({ default: _ }) => { const element = docuemnt.createElement('div') element.innerHTML = _.join(['Peng', 'Gent'], "--") return element }) } asyncComponent().then( el => { document.body.appendChild(el) })
- Since webpack v4, the
CommonsChunkPluginwas removed in favor ofoptimization.splitChunks.- This configuration object represents the default behavior of the
SplitChunksPlugin.
module.exports = {
  // eg: webpack-splitChunksPlugin
    optimization: {
    splitChunks: {
     chunks: 'async',  // 判断是否针对同步和异步的文件做单独打包 aysnc、all、initial
     minSize: 30000, // 判断包的体积大于多少才抽离单独打包 单位byte eg: 30kb
      maxSize: 0, // // 抽离的最大打包体积, eg:如果一个包有1MB,这里设置为 5000,拿它就会对此包做二次分割,一般没什么卵用
      minChunks: 1, // 模块的引用次数
      maxAsyncRequests: 5,
      maxInitialRequests: 3,
      automaticNameDelimiter: '~',
      automaticNameMaxLength: 30,
      name: true,
      cacheGroups: {
        vendors: {
          test: /[\\/]node_modules[\\/]/,  // 判断引入的库是否在node_modules 下面
          filename: 'vendors.js',  //(默认配置不包含这个) 匹配的条件打包出来的文件名字 chunks 必须为 initial 见图:
          priority: -10
        },
        default: {
          minChunks: 2,
          priority: -20,
          reuseExistingChunk: true
        }
      }
    }
  }
};
注:
cacheGroups.vendors.filename: 'vender.js'这里需要注意chunks:initial,如果是异步加载模块
详情见:例子🌰:
webpack-lazyLoading什么是chunk?
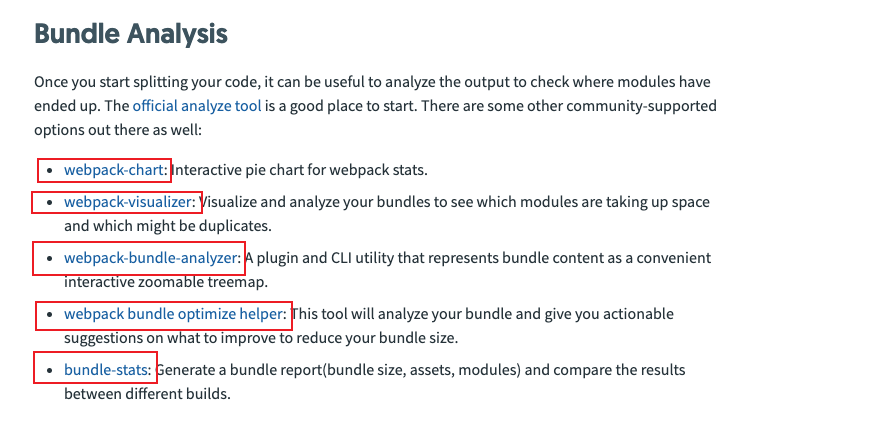
官方推荐: 打包工具分析
webpack --profile --json > stats.json
prefetch: resource is probably needed for some navigation in the future
preload: resource might be needed during the current navigation利用缓存带来的性能提升比较有限,如果让页面加载的js文件的利用率最高。比如:有些交互的动作出现的页面或者可以可以使用懒加载的方式来处理:coverage
/* webpackPreFethc: true */
npm install --save-dev mini-css-extract-plugin 链接
const MiniCssExtractPlugin = require('mini-css-extract-plugin')
plugins: [new MiniCssExtractPlugin()]
module.rules
module: {
 rules: [
	 test: \/*.css$\i,
    use: [MiniCssExtractPlugin.loader, 'css-loader']
 ]
}
如果import两个css文件此时打包出来的效果为:
- 对CSS进行压缩
npm install --save-dev optimize-css-assets-webpack-plugin文档链接// const OptimizeCssAssetsPlugin = require('optimize-css-assets-webpack-plugin'); optimization: { minimizer: [new OptimizeCSSAssetsPlugin({})] }
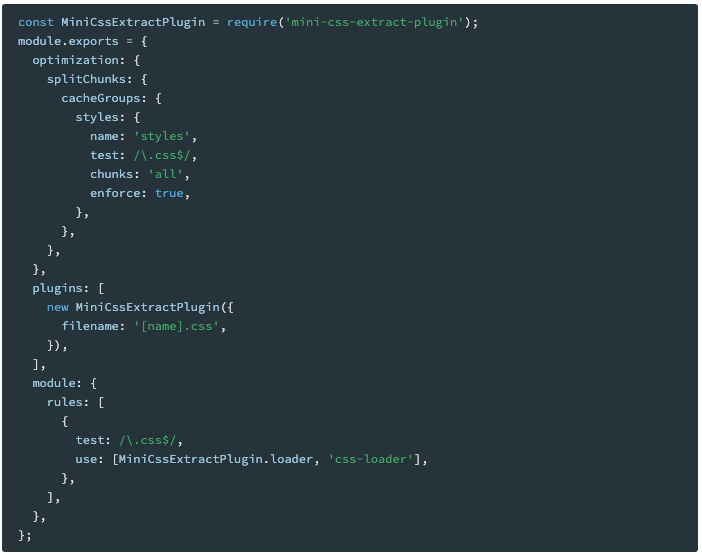
分模块对css打包 官网参考
-
注: 抽离css文件需要 修改
mode在production,packag.json->sideEffects: ["*.css"];mode在development不受影响可以正常抽离 -
注:
optimize-css-assets-webpack-plugin在测试环境mode : developmentcss 不做压缩;mode:production
// 举个例子🌰:webpack-MiniCssExtractPlugin
eg:
const OptimizeCssAssetsPlugin = require('optimize-css-assets-webpack-plugin')
const MiniCssExtractPlugin = require('mini-css-extract-plugin')
// 设置压缩css
optimization: {
		minimizer: [new OptimizeCssAssetsPlugin({})],
	}
//  提取css
new MiniCssExtractPlugin({
	 filename: '[name].css', // 同步走这里 在main.js 引入的的css
	 chunkFilename: '[id].css', // 异步走这里 被间接的引入css文件走这里
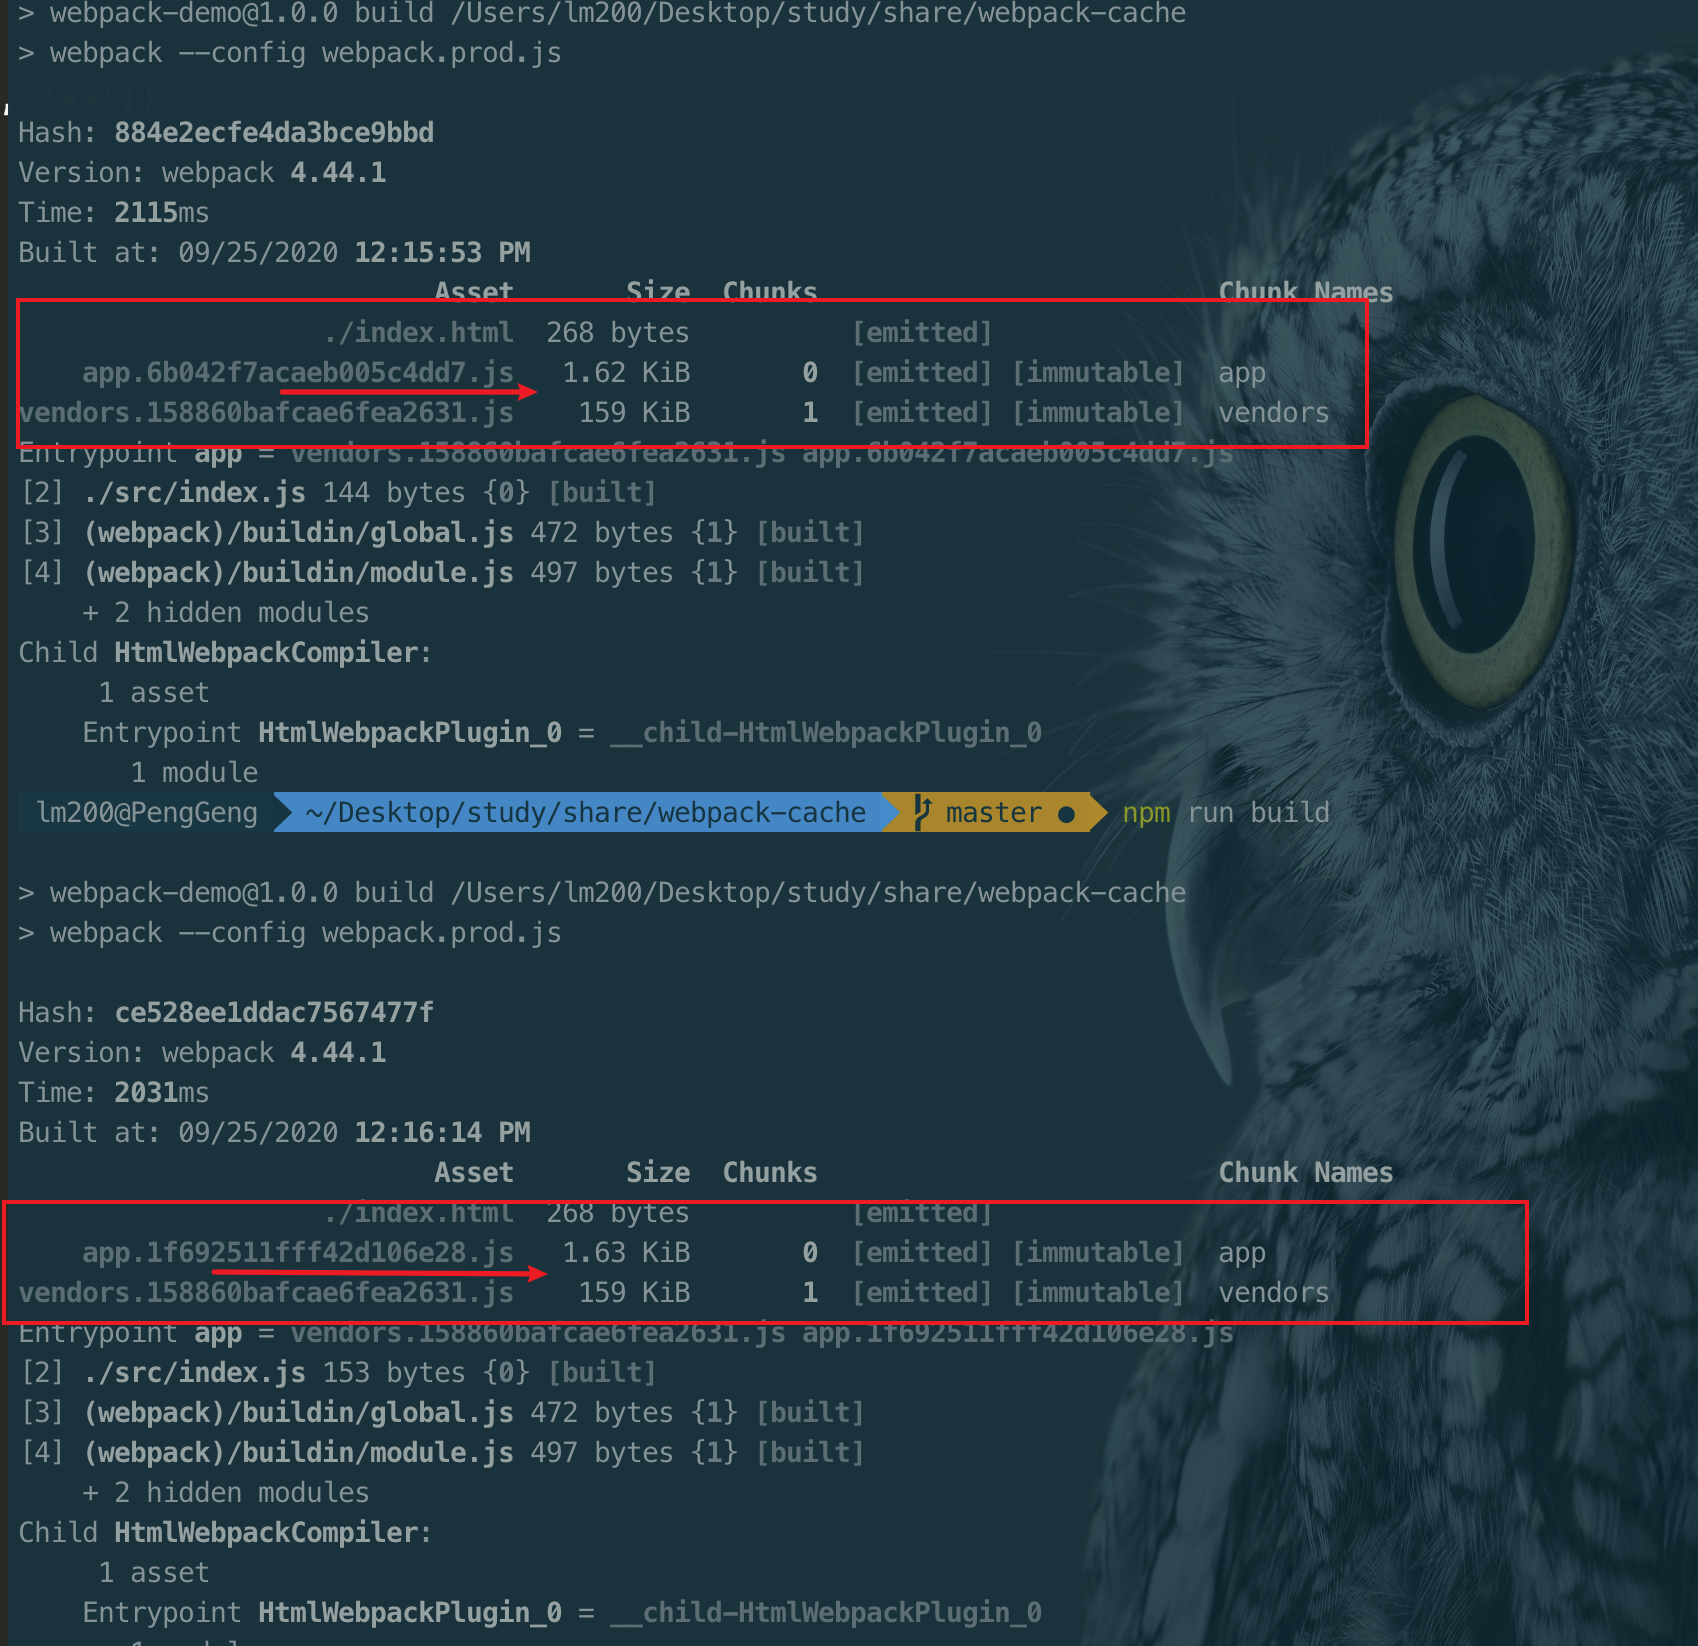
}) // 举个例子🌰: `webpack-cache`
// webpack.dev.js
output: {
path: path.resolve(__dirname, 'dist'),
filename: '[name].js',
chunkfilename: '[name].js'
}
// webpack.prod.js
output: {
path: path.resolve(__dirname, 'dist'),
filename: '[name].[contenthash].js',
chunkfilename: '[name].[contenthash].js'
}注:老版本的webpack会如果这样子配置vendors的hash值还是会有改变,因此需要做另外配置,此配置对新的webpack版本不会有影响 eg:
// 此时会多产生一个runtime的文件
optizimation: {
  runtimeChunk: {
    name: 'runtime'
  }
}
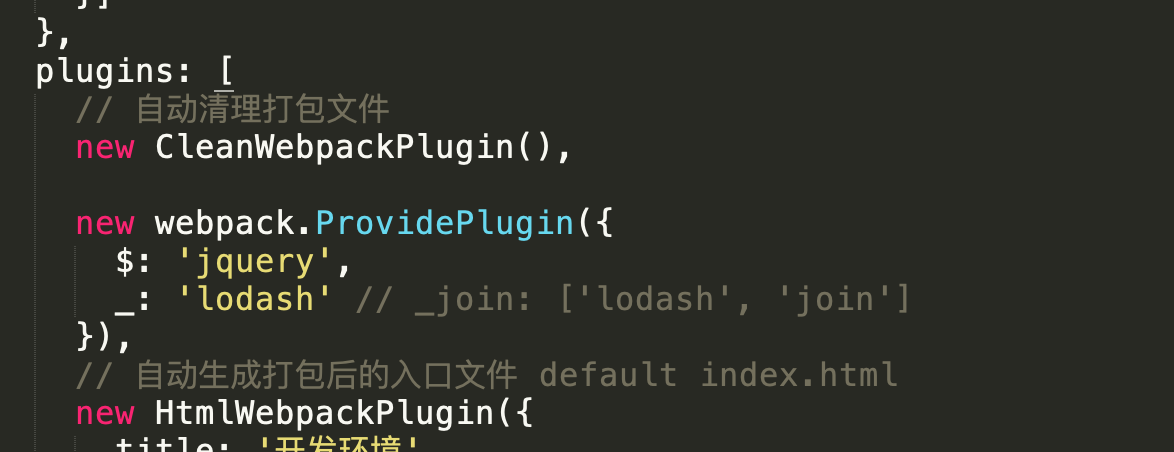
new webpack.ProvidePlugin()文档链接
详情例子🌰见:
webpack-shimming
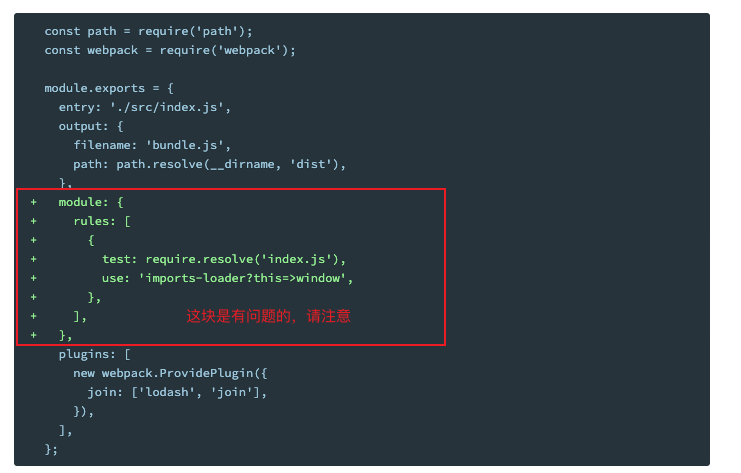
全局变量的定义 imports-loader 文档链接
module: {
  rules: [
   {
     test: require.resolve(path.resolve(_dirname, './index.js')) // 针对指定文件来做this的转换
     loader: 'imports-loader',
     options: {
       wrappre: true
     }
   }
  ]
}例子详情见: webpack-env
例如,--env.production 或 --env.NODE_ENV=local(NODE_ENV 通常约定用于定义环境类型,查看这里)
Babel 官网 Babel is a JavaScript compiler.
- npm install --save-dev babel-loader @babel/core
babel-loader:通过这个使Babel 和 webpack 做连接@babel/core:是babel的核心库, 它能够让babel识别js的内容,然后把js转化成AST的抽象语法树,然后再把js编译成新的语法出来,供浏览器识别;(他提供API)@babel/preset-env:实际是这个家伙把ES6的语法转换成了ES5 (语法转义)
// 举个例子🌰: `webpack-babel`
第一步: npm install --save-dev babel-loader @babel/core
第二步: 添加规则 module.rules
第三步: babel-loader 它是与webpack的沟通的桥梁,而不是来做编译的 因此
第四步: npm install @babel/preset-env --save-dev
第五步: 在业务代码中世**界 import "@babel/polyfill"; 通过这种方式 他会通过全局变量的形式来注入,因此会污染全局变量; 业务模块这种方式可适用
options: {
  "presets": ["@babel/preset-env"]
}

或者

第五步: 设置"usebuiltIns": 'usage' 按需编译
options: {
  "presets": [["@babel/preset-env", {
  	 "targets": {
       "chrome": "67",
       "safari": "11.1"
     },
    "useBuiltIns": "usage",
    "corejs": "3.6.4"
  }]]
}在开发一些 【库、类库、UI组件库、第三方模块】由于import "@babel/polyfill"的问题不适合,因此有了transform-runtime;
npm install --save-dev @babel/plugin-transform-runtime
npm install --save @babel/runtime
npm install --save @babel/runtime-corejs2
// 举个例子🌰 `webpack-babel`-> babel.config.js
"plugins": [["@babel/plugin-transform-runtime",{
  "absoluteRuntime": false,
  "corejs": 2,
  "helpers": true,
  "regenerator": true,
  "useESModules": false,
  "version": "7.0.0-beta.0"
}]]- 一般我们引入包文件或者组件等方法的常用方式有哪些:如下
// example: webpack-library
import Library from 'library'  // ES Module
const libray = require('library') // common.js
require(['library'], function(){}) // AMD
- output参数配置
- library 设置变量,配合libraryTarget使用
<script src='library.js'></script>
如:library.math
libraryTarget
[this、window、global、commonjs、commonjs2、umd]libraryExport
output: {
	path: path.resolve(__diranme, 'dist')
	filename: 'library.js'
	library: 'library'
	libraryTarget: 'umd'
  libraryExport: 'default'
}
- externals
type [String|Object|function|regex]
注:剔除引用的第三方包文件,避免重复引用externals: ['lodash'], or externals: { lodash: { root: '_', // 如果是通过全局的script标签引入进来的,那么给全局注册了一个'_'的变量 commonjs: 'lodash' // 使用require的模式引入 必须 const lodash = require('lodash') } }
- 上传到NPM
- 打开package.json 修改main的文件的目录 eg: './dist/index.js'
- 打开npm网址 注册账号
- npm adduser
- npm publish
- npm publish 时 需要先认证npm的邮箱,不然上传包就会失败
- 上传包之后就会有延迟,需要过一会才会在网站上体现
- 详情例子见: webpack-pwa
TypeScript 是js的一个超集,对js的一个扩展;Typed JavaScript at Any Scale
详情例子见:webpack-typescript
add:tsconfig.js的配置
{
  "compilerOptions": { // 编译的配置
	"outDir": "./dist/", // 文件目录
	"module": "es6", // 用什么方式 import 的模式
	"target": "es5", // 转为 es5的模式
	"allowJs": true // 允许ts 的文件引入 *.js的模块
   }
}
针对插件的校验 TypeSearch 如:
lodash、jquery等
加入TS后,主要事项:
import _ from 'lodash' // error
import * as _ from 'lodash' // good

_.join() // error
_.join(['hello', 'PengGeng'], ' ') // good详情见: DEVONthink->webpack知识记录
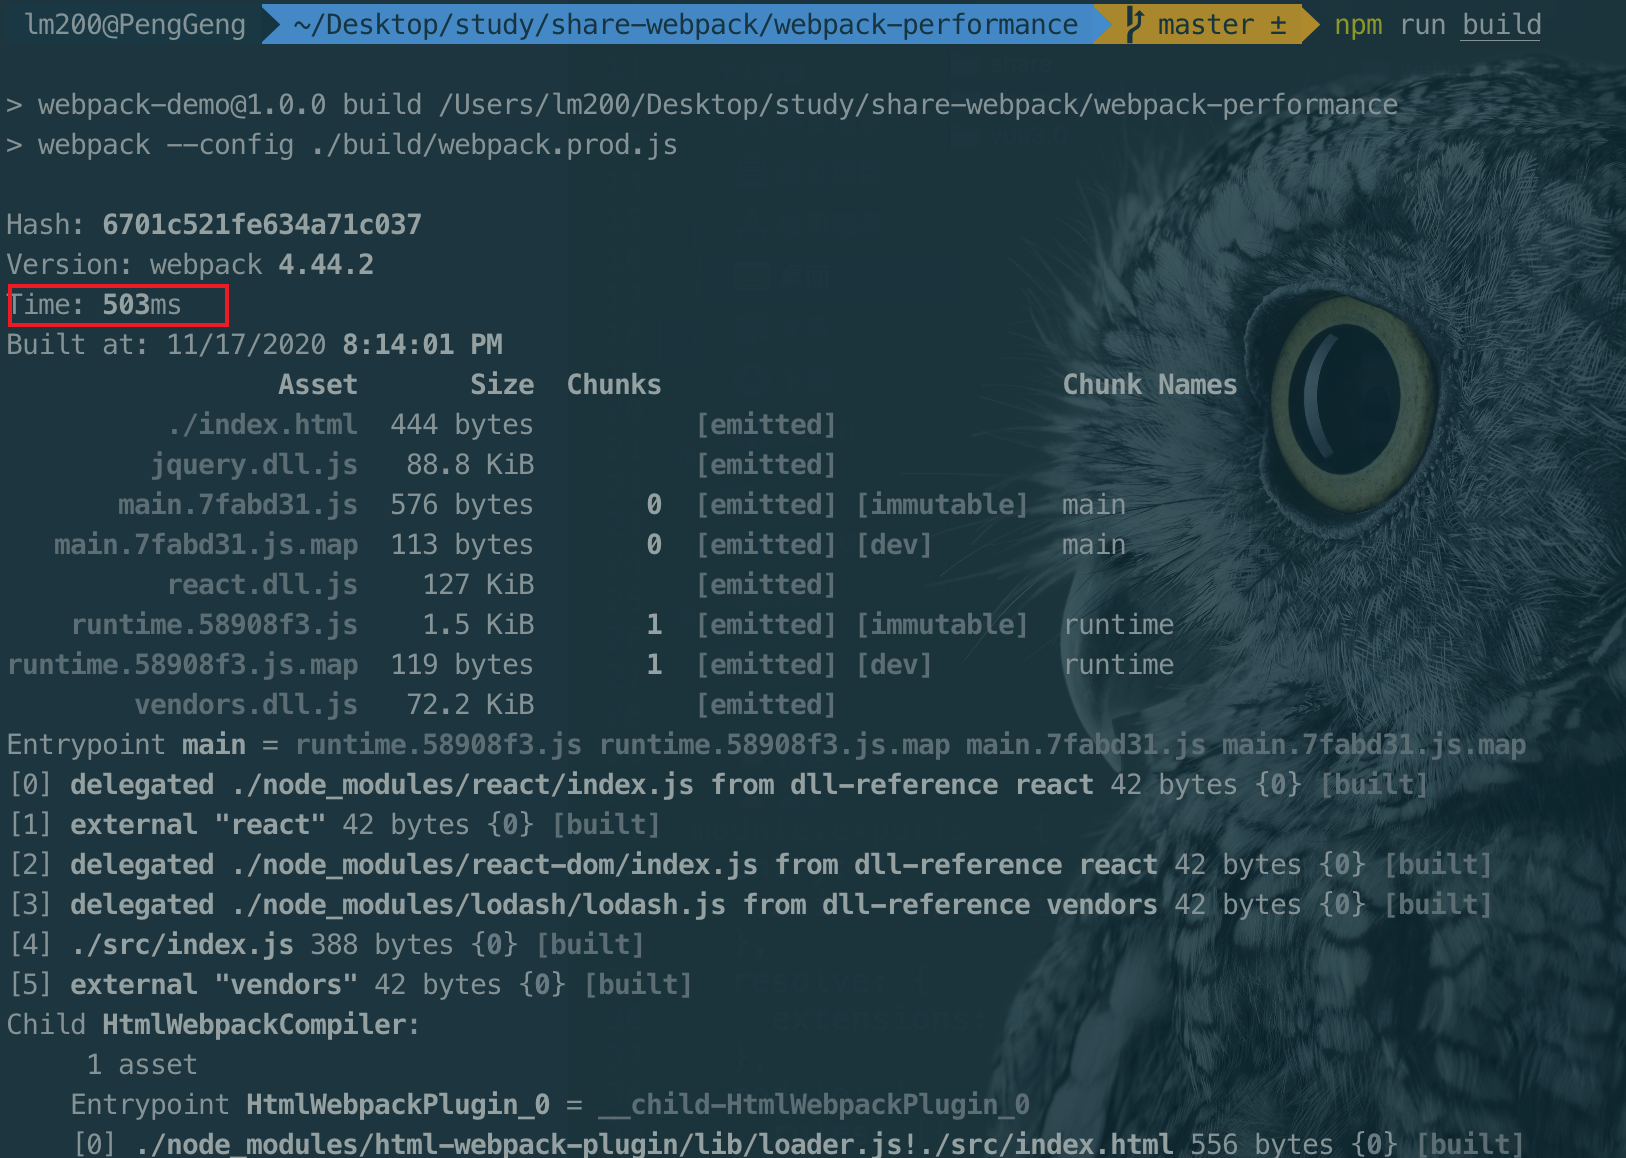
详情见例子demo:webpack-preformance
- 跟上版本的更新版本,尽量使用新版本的包
- 减少Loader的编译范围
- 尽量使用官方推荐或者社区推荐的plugin
resolve: {
	    // 忽略扩展名
	    extensions: ['.js', '.jsx', '.json', '.css', '.scss', '.png', '.jpg'] // error
	    or
	    extensions: ['.js', '.jsx']  // good
	    alias: {  // 别名
	    '@': '../src/'
	    'home': '../src/home'
    }
}-
DllPlugin
new webpack.DllPlugin(options)生成manifest文件 -
DllReferencePlugin
new webpack.DllReferencePlugin(options)关联manifest文件 -
AddAssetHtmlWebpackPlugin
add-asset-html-webpack-plugin往html的文件上增加一些静态资源,生成的dll文件会放到打包文件中如:dist
1.创建 webpack.dll.js 文件配置:
DllPlugin
new webpack.DllPlugin(options) 生成映射文件,共webpack打包使用
const path = require('path')
const webpack = require('webpack')

module.exports = {
	entry: {
		vendors: ['lodash'],
		react: ['react', 'react-dom'],
		jquery: ['jquery']
	},
	output: {
		filename: '[name].dll.js',
		path: path.resolve(__dirname, '../dll'),
		library: '[name]'
	},
	plugins: [
		new webpack.DllPlugin({
			name: '[name]',
			path: path.resolve(__dirname, '../dll/[name].manifest.json')
		})
	]
}
2.修改webpack.common.js:
const fs = require('fs')
const AddAssetHtmlWebpackPlugin = require('add-asset-html-webpack-plugin')

const plugins = [
	// 自动清理打包文件
	new CleanWebpackPlugin(),
	// 自动生成打包后的入口文件 default index.html
	new HtmlWebpackPlugin({
		title: '开发环境',
		filename: './index.html',
		template: 'src/index.html'
	})
]

const files = fs.readdirSync(path.resolve(__dirname, '../dll'))
files.forEach(file=>{
	if(/.*\.dll.js/.test(file)) {
		plugins.push(new AddAssetHtmlWebpackPlugin({
			filepath: path.resolve(__dirname, '../dll', file)
		}))
	}
	if(/.*\.manifest.json/.test(file)) {
		// 关联打包后的映射文件然后打包直接使用manifest
		plugins.push(new webpack.DllReferencePlugin({
			manifest: path.resolve(__dirname, '../dll', file)
		}))
	}
})
3.配置package.json&抽离三方组件库:
"build:dll": "webpack --config ./build/webpack.dll.js"
并且运行
npm run build:dll
完成后会生成dll文件夹,后面在index.html 引入
- 控制包的大小,一些用不到的包可以tree shaking 剔除一些不用的包 > 2. thread-loader、parallel-webpack(针对多页面打包)、happypack
- sourcemap的配置
- stats对包文件的分析
- 开发环境无需对插件剔除,打包优化主要是针对打包的速度和包的文件大小做分析,然后具体根据具体的loader的配置参数做一些精准配置,尽量精准的做loader解析
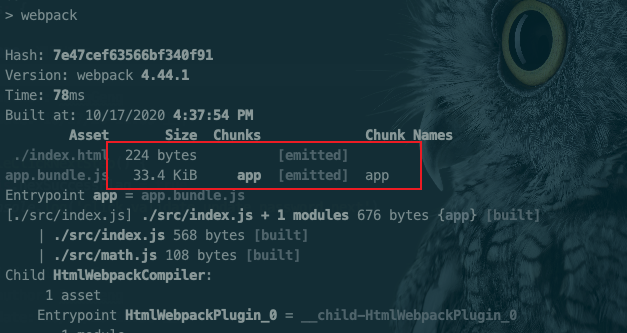
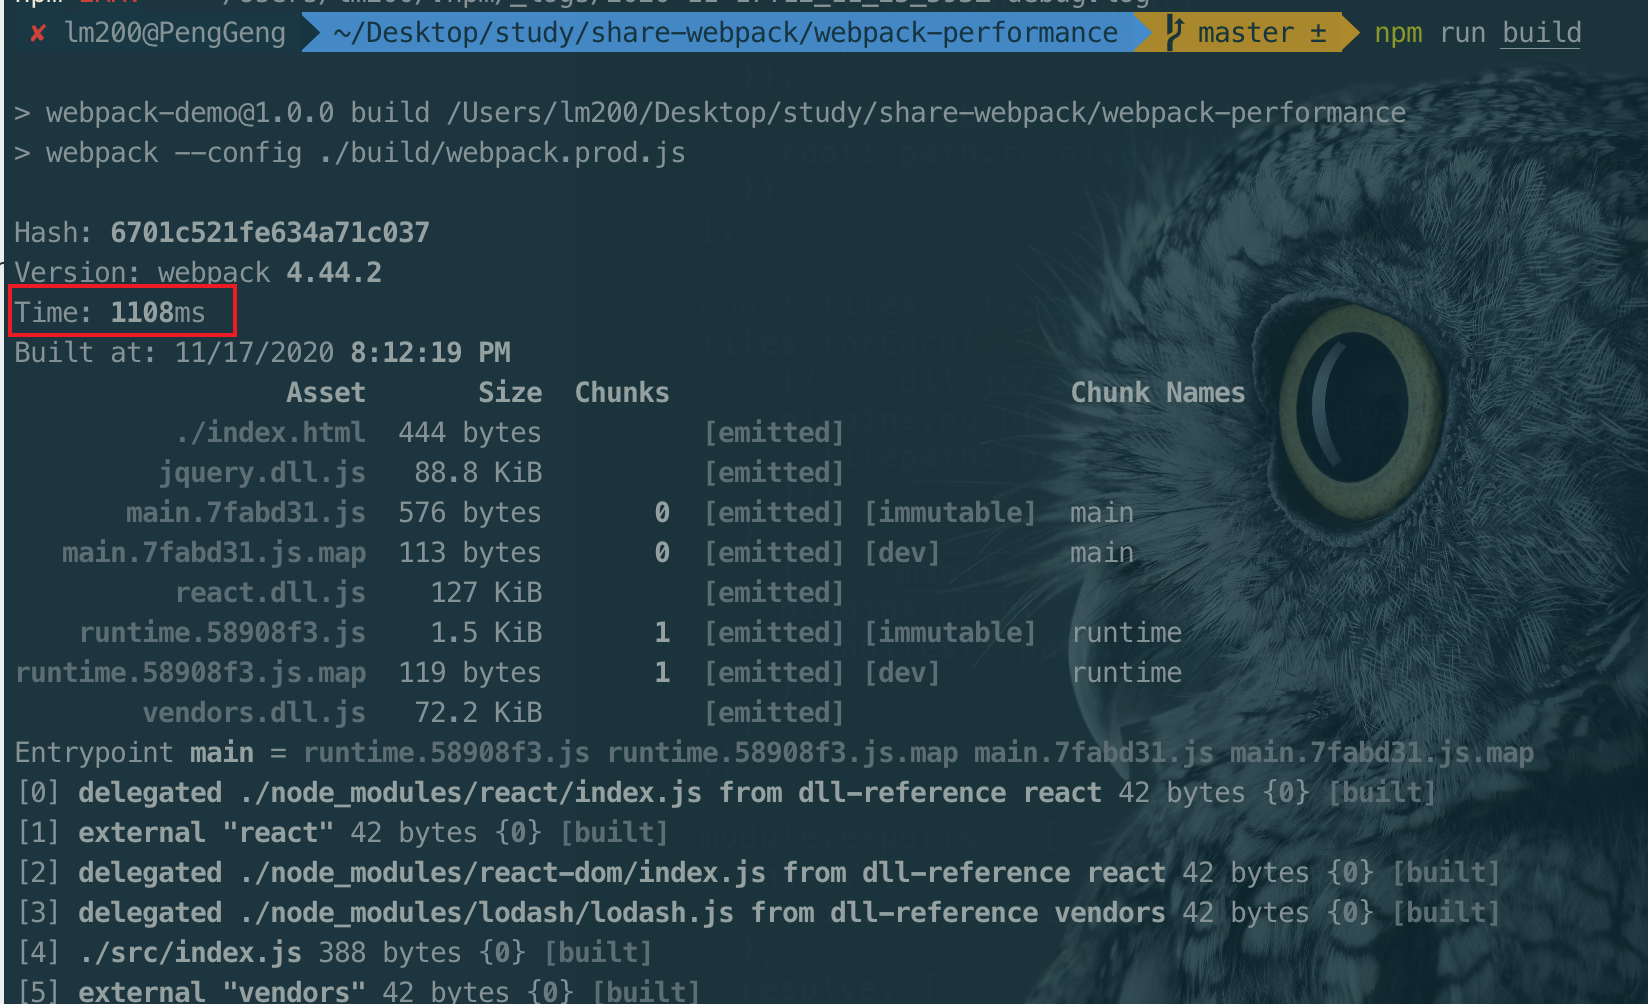
第一次打包:
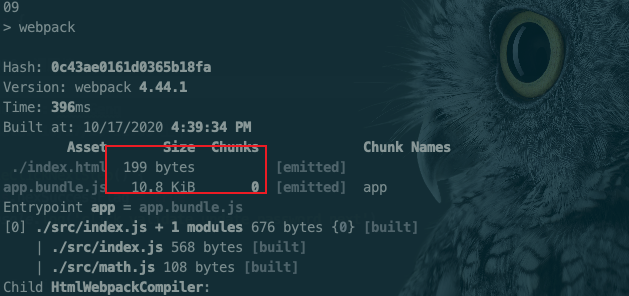
后面打包打包:
详情请查看demo: webpack-morePages
- entry 配置多个入口页根据实际场景来
- htmlWebpackPlugin 生成多个出口页** **
webpack.common.js
// 入口修改,有几个入口页就配置几个如:
entry: {
	main: './src/index.js',
	list: './src/list.js',
	detail: './src/detail.js',
	...
}
// plugins 编写
plugins: [
	new HtmlWebpackPlugin({
		title: 'Home--Page',
		filename: 'index.html',
		template: 'src/index.html',
		chunks: ['runtime', 'main', 'vendors']
	}),
	new HtmlWebpackPlugin({
		title: 'List--Page',
		filename: 'list.html',
		template: 'src/index.html',
		chunks: ['runtime', 'list', 'vendors']
	}),
	new HtmlWebpackPlugin({
		title: 'Detail--Page',
		filename: 'detail.html',
		template: 'src/index.html',
		chunks: ['runtime', 'detail', 'vendors']
	}),
	...
]// 优化plugins html-webpack-plugin
Object.keys(configs.entry).forEach( item => {
plugins.push(new HtmlWebpackPlugin({
title: `${item} page`,
filename: `${item}.html`,
template: 'src/index.html',
chunks: ['runtime', 'vendors', item]
}))
})例子: webpack-makeLoader
- 创建文件夹
mkdir loaders && touch repalceLoader- 编写具体的逻辑代码几种写法:
one:
module.exports = function(souce) {
 // source 是具体的引用了loader的具体代码
 return source.replace('PengGeng', 'kevin-chen')
}

// 引用自己编写的loader, webpack.config.js
module.exports = {
  ...//
  module: {
    rule: {
     test: /\.jsx?$/
    	use: [path.resolve(__dirname, '../loader/replaceLoader.js')]
    	// or
    	use: [{
   	  loader: path.resolve(__dirname, '../loader/replaceLoader.js'),
    	  options: {
    	  	name: 'hello world'
    	  }
    	}]
    }
  }
}
- 如果需要获取
loader>options的参数, 我们可以使用 在自己编写的loader里面使用this.query.namereturn source.replace('PengGeng', this.query.name)
- 提供 loader-utils 能更方便的获取参数
const loaderUtils = require('loader-utils')
module.exports = function(source) {
  const options = loaderUtils.getOptions(this)
  return source.repace('PengGeng', options.name)
}
- callback
// this.callback(
//   err: Error | null,
//   content: string | Buffer,
//   sourceMap?: SourceMap,
//   meta?: any
// );
const result = source.replace('PengGeng', options.name)
this.callback(null, result)
- async 异步
// 需要做异步处理
const callback = this.async()
setTimeout(() => {
  const result = source.replace('PengGeng', options.name)
  // this.callback(null, result)
  callback(null, result)
}, 1000)
- 快捷读取loader地址
resolveLoader: {
 	modules: ['node_modules', 'loaders'] // 查找loader的插件路径
 }
- 详情例子见:
webpack-makeLoader => removeConsole.js
-
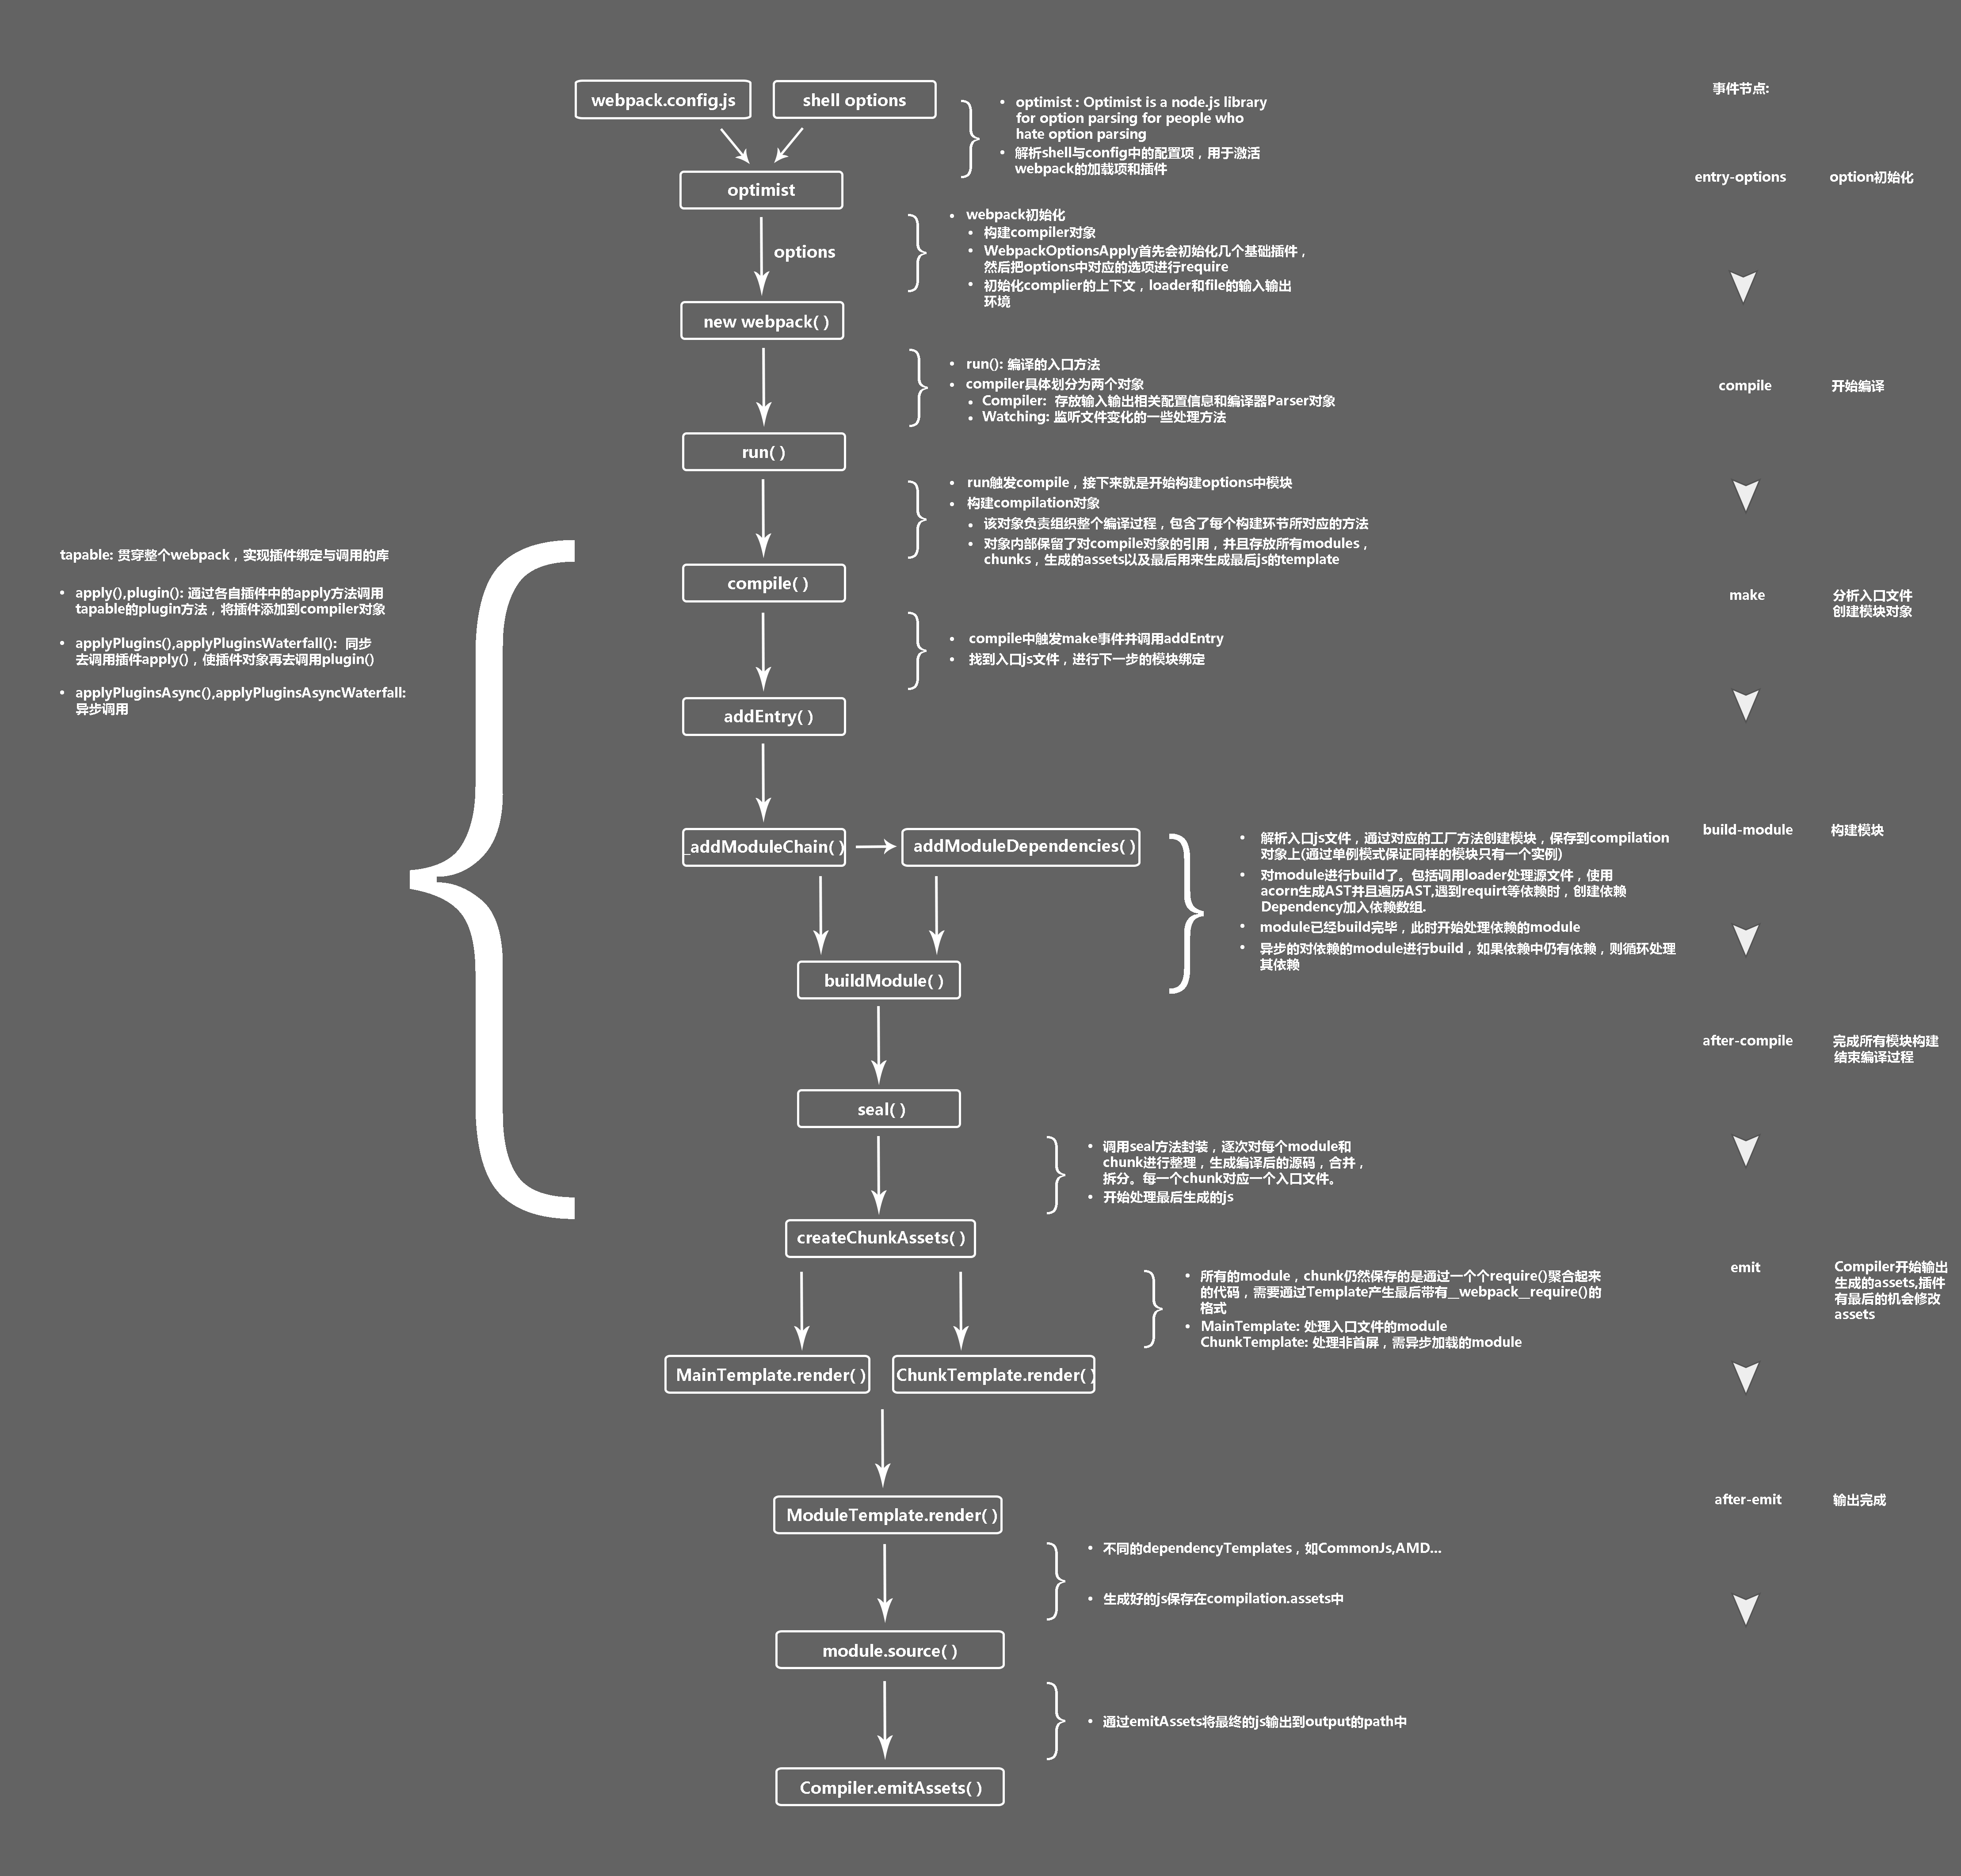
Tapable 这个是一个webpack的核心库文件,webpack的许多对象都是继承它,并且他向外暴露了
tap、tapAsync、tapPromise等方法来供使用自定义的构建步骤 -
compiler webpack的主要引擎
-
webpack流程图
详情例子: webpack-plugin
class myPlugin {
	// constructor() {
	// 	console.log('开始plugin编写。。。。。')
	// }
	apply(compiler) {

		// compiler 是webpack的实例,里面包含webpack的各种配置文件,并包含一些hooks
		// compiler 存放了我们配置里的所有类容,和打包相关的类容
		// compilation 是存放的是这一次的打包类容相关的类容
		compiler.hooks.compile.tap('MyPlugin', (compilation) => {
			console.log('todo .....compilation')
		})
		// tapAsync(pluginName, function)
		// 输出到	dist 目录之前
		compiler.hooks.emit.tapAsync('MyPlugin', (compilation, cb) => {
			console.log('tapAsync.......')
			compilation.assets['copyright.txt'] = {
				source: function() {
					return 'copyright by PengGeng'
				},
				size: function() {
					return 21
				}
			}
			cb()
		})
		// promise
		compiler.hooks.run.tapPromise('promiesAsync', (compilation, cb) => {
			return new Promise( resolve => {
				return setTimeout(resolve, 1000)
			}).then(() => {
				console.log('promise......')
			})
		})
		// 在webpack中 entry被处理过后调用
		compiler.hooks.entryOption.tap('MyPlugin', (context, entry) => {
	  	/* ... */
	  	console.log(entry)
		});
	}
}
module.exports = myPlugin-
移除webpack打包后的大量注释: 撸一个插件可参考
举个例子: webpack-bundle
- 对文件分析的步骤
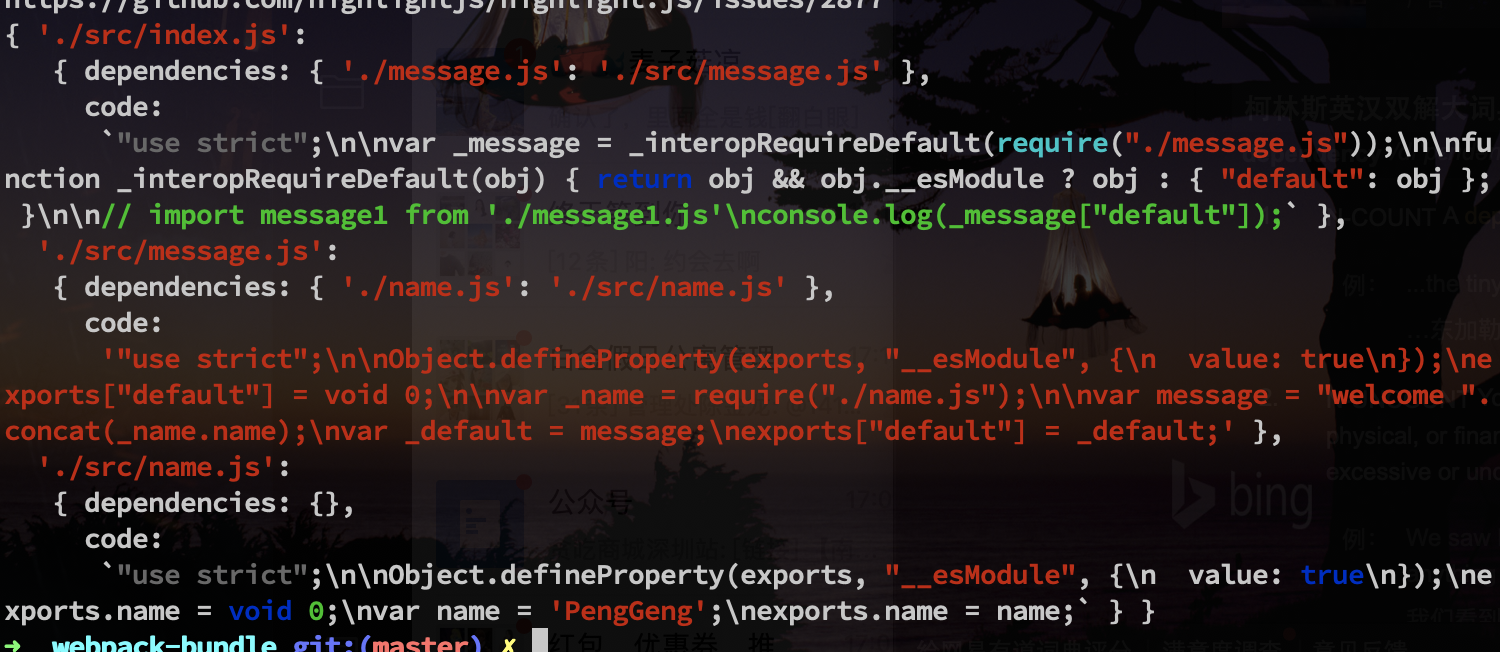
- 拿到需要分析的文件, 依赖
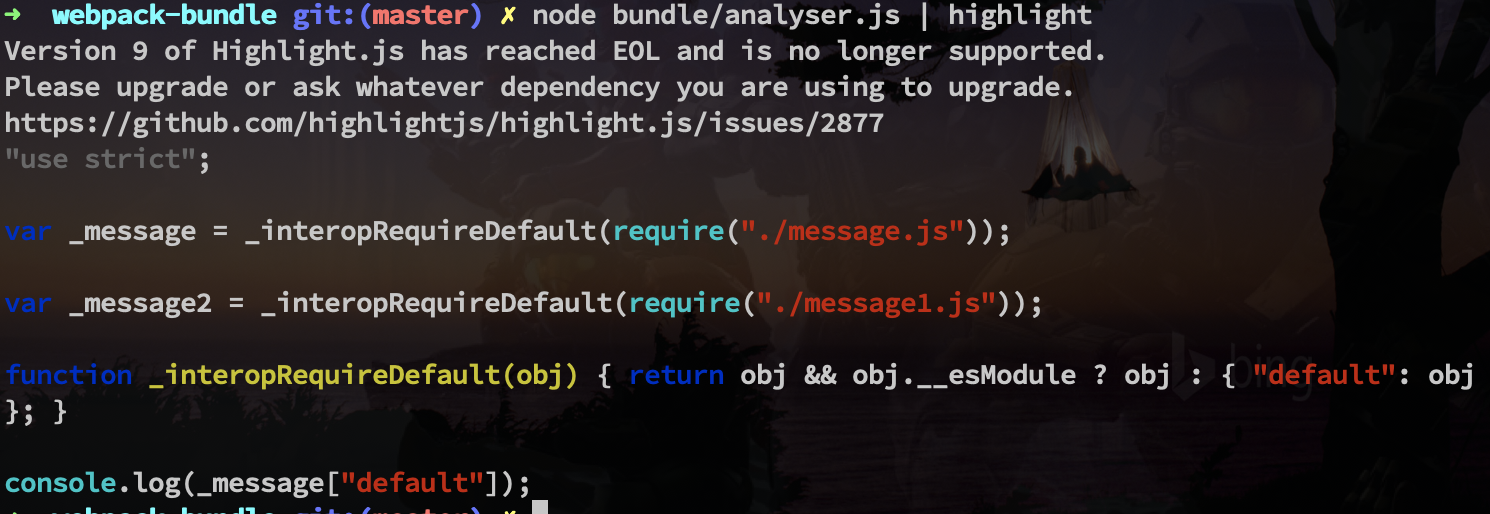
node fs- 对文件的读取并转化为AST语法树做分析
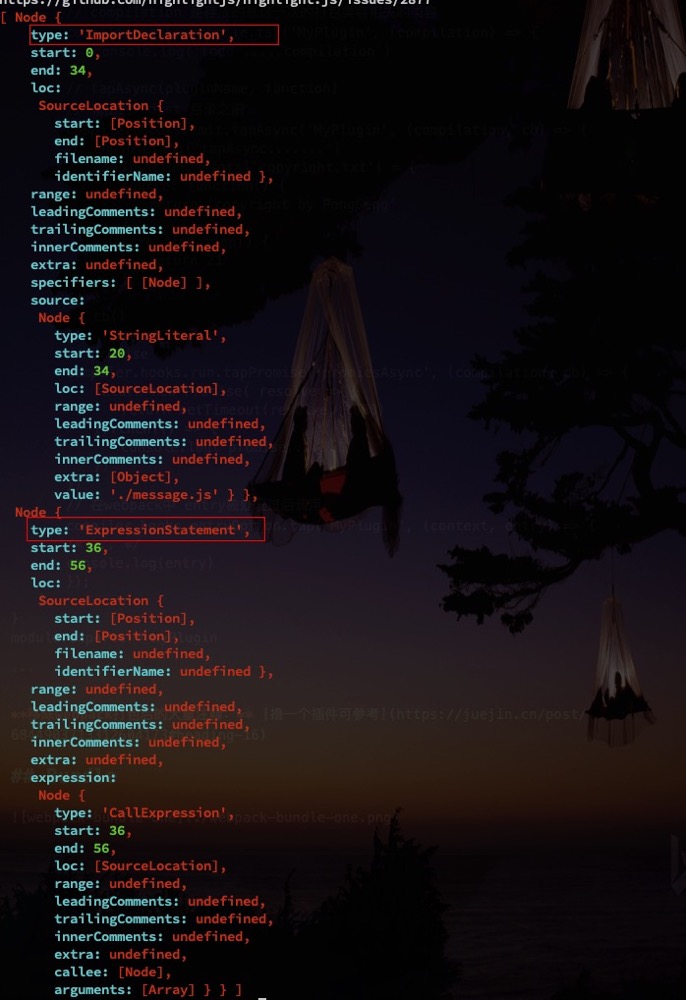
npm install @babel/parser- 分析抽象语法树,找到对应的节点(Node:
ImportDeclaration)npm install @babel/traverse --save- 路径组装,作为可适用于的打包识别的路径
node path- 转换AST的语法树可作为浏览器识别的语法
npm install @babel/core --save- 针对浏览器的低版本做ES6的兼容
npm install --save-dev @babel/preset-env- 涉及到多个模块的引入,需要对所有模块的遍历及递归
create function: makeDependenciesGraph
const path = require('path');
const fs = require('fs');
const babelParser = require('@babel/parser');
const traverse = require("@babel/traverse").default;
const core = require("@babel/core");

// 对单个依赖模块的分析
const moduleAnalyser = (filename) => {
	const content = fs.readFileSync(filename, 'utf-8')
	const ast = babelParser.parse(content, {
		sourceType: 'module' // 可支持 ES Module的模式
	})
	// console.log(ast.program.body)
	let dependencies = {} // 需要存储对象,所以需要类型为{}
	traverse(ast, {
		// 找到 ImportDeclaration类型的node 节点
		ImportDeclaration({ node }) {
			// node 节点下有source节点,节点下有个value的值对应的模块名字
			// console.log(node)
			const dirname = path.dirname(filename)
			console.log(dirname)
			// path.join(dirname, node.source.value) =》 src/message.js
			// 需要增加当前的路径 './'
			const newFilePath = './' + path.join(dirname, node.source.value)
			// console.log(newFilePath)
			// dependencies.push(node.source.value)
			dependencies[node.source.value] = newFilePath
		}
	});
	// console.log(dependencies)
	const { code } = core.transformFromAst(ast, null, {
		presets: ["@babel/preset-env"]
	})
	// console.log(code)
	return {
		filename,
		dependencies,
		code
	}
}

// 多个文件的循环分析
const makeDependenciesGraphBeta = entry => {
	const graph = {}
	const analyser = entry => {
		const { filename, dependencies, code } = moduleAnalyser(entry)
		graph[filename] = {
			dependencies,
			code
		}
		if(Object.getOwnPropertyNames(dependencies).length) {
			for(let i in dependencies) {
				if(!graph[dependencies[i]]) {
					analyser(dependencies[i])
				}
			}
		}
	}
	analyser(entry)
	return graph
}

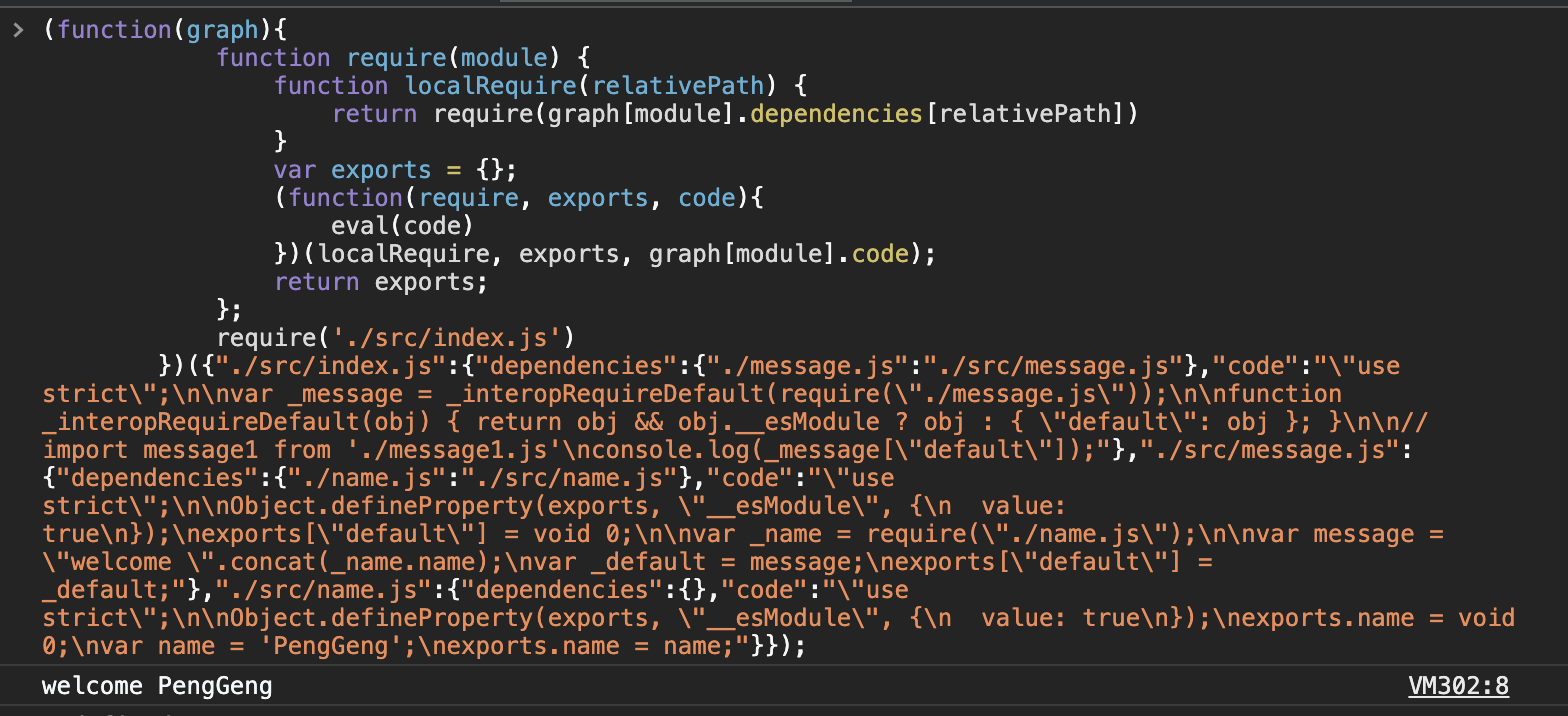
// 生成浏览器可运行的代码 函数的构造
// 分析打包出来的文件:browserSourceCode.js
// 1. 没有require() 函数,我们需要构造一个
// 2. 查看code的内容后,会执行一个require('./message.js')的类容,因此我们需要去查找此内容,并执行
// 3. 根据传入的module,找到对应对象的获取属性key: dependdencies的key的内容
// 4. 返回 require(graph[module].dependencies[relativePath])
// 5. 闭包返回三个参数 require [function]; export [Object]; code [String]
// 6. 输出代码直接在控制台运行
const generateCode = (entry) => {
	const graph = JSON.stringify(makeDependenciesGraph(entry))
	return `
		(function(graph){
			function require(module) {
				function localRequire(relativePath) {
					return require(graph[module].dependencies[relativePath])
				}
				var exports = {};
				(function(require, exports, code){
					eval(code)
				})(localRequire, exports, graph[module].code);

				return exports;
			};
			require('${entry}')
		})(${graph});
	`
}
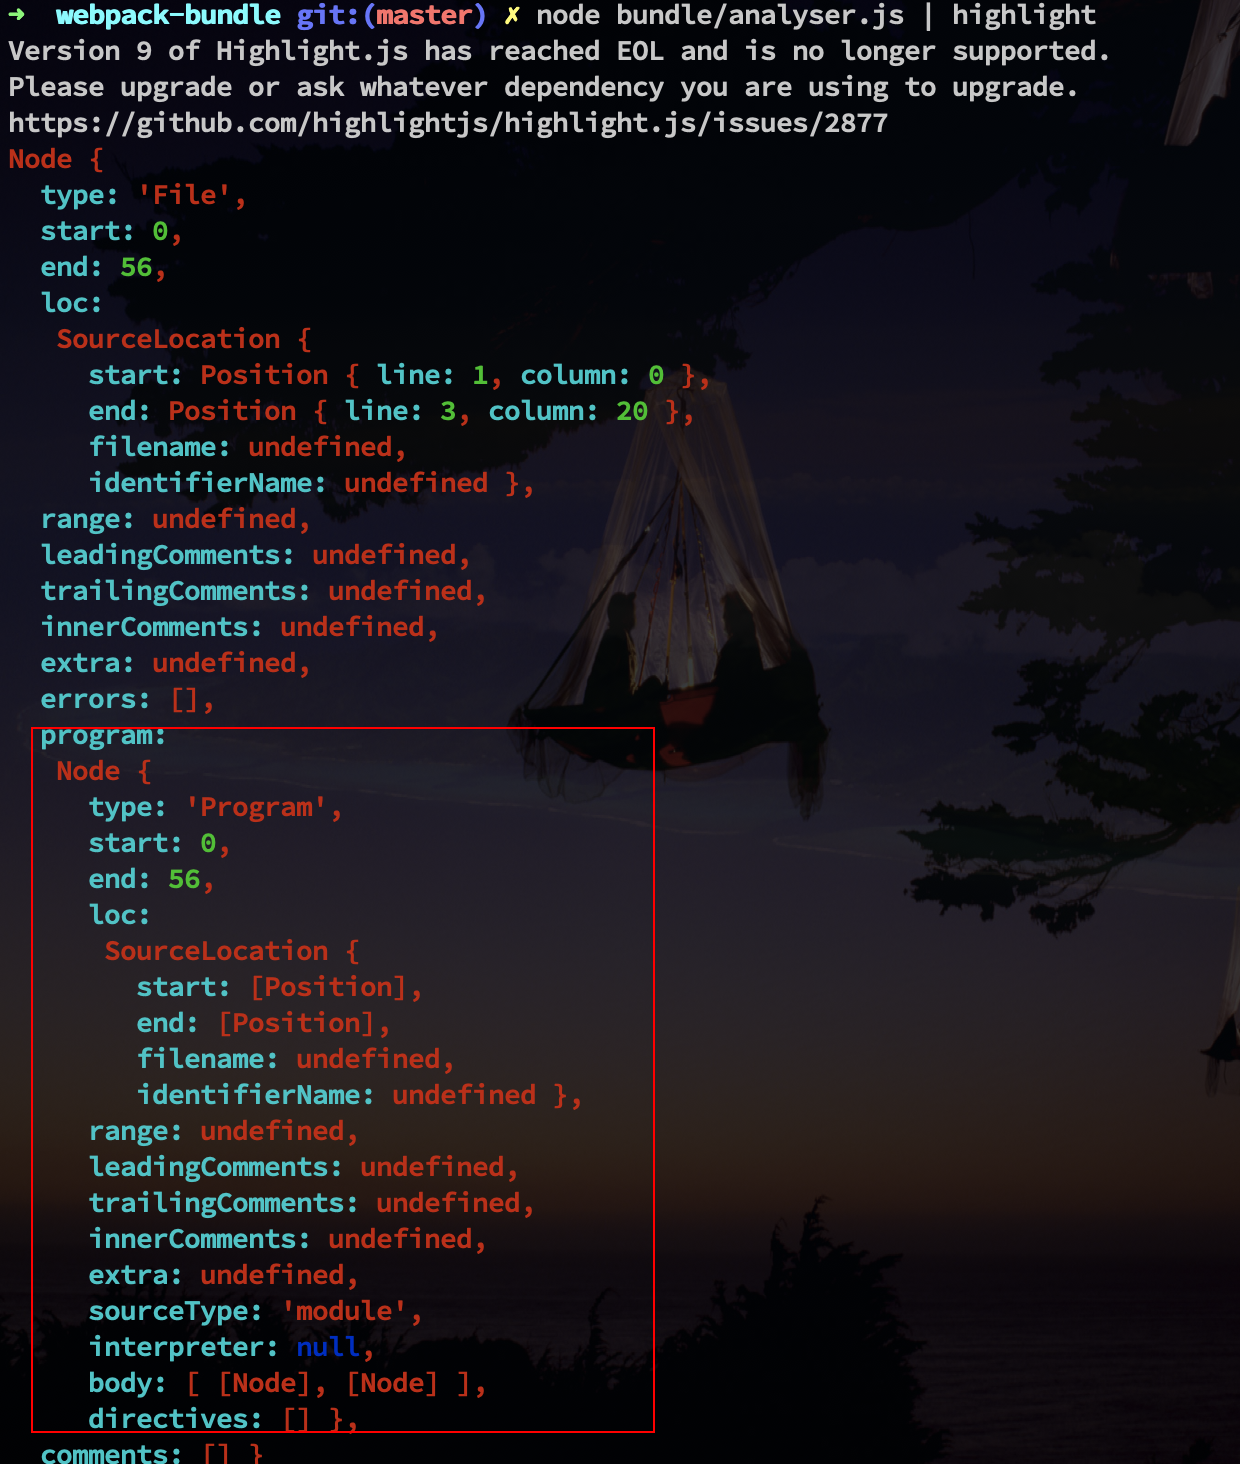
const code = generateCode('./src/index.js')- 整个模块的ast
- 具体代码的body
- 绝对路径
- ast 转换为 浏览器识别的语法,对
index.js模块打包后的代码
- 对多个文件分析,生成依赖树图谱 (dependenciesGraph)
- 打包出通用的代码,可在浏览器上运行
