
This exercise allows you to practice and apply the concepts and techniques taught in class.
Upon completion of this exercise, you will be able to:
- Use the
useStatehook to create state variables and add state to React components. - Use state variable setter functions to update state and trigger component re-render.
- Create event handler functions to handle user interactions and browser events.
In this exercise, you will practice working with the state and responding to events in React. The state is a crucial part of React as it enables you to store data within your components.
You will use the useState hook to create state variables, update the state, and trigger re-renders of your components by updating the state. To update the state, you will need events and handler functions that respond to browser events like clicks. This exercise is designed to help you practice both of these concepts. So, let's dive in!
- Fork this repo
- Clone this repo
cd lab-react-props-training
npm install
npm run dev-
Upon completion, run the following commands:
git add . git commit -m "done" git push origin master -
Create a Pull Request and submit your assignment.
Inside of the src/ folder, create a new folder named components.
Use the components folder to store all the components that you create in the following iterations.
Create a LikeButton component that has a state and displays a button with the initial text "0 Likes". With each click, the number of Likes should increase.
Example:
<LikeButton />Expected Output:

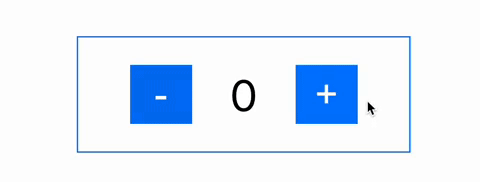
Create a Counter component that displays the initial counter value of 0. The component should have two buttons + and -.
- The + button should increment the counter when clicked.
- The - button should decrement the counter when clicked.
Additionally, implement a check to make sure that the counter value never goes below 0.
Example:
<Counter />Expected Output:
Create a ClickablePicture component that displays a picture. On each click, the picture should toggle between the two images. You can find the images in the assets/ folder.
Example:
<ClickablePicture />Expected Output:

PS: If you want to use your picture instead, you can create it using this picture: http://www.stickpng.com/assets/images/584999937b7d4d76317f5ffd.png 😎
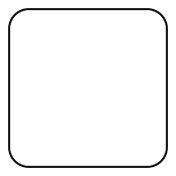
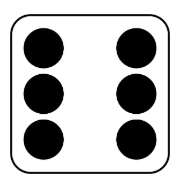
Create a Dice component that displays a picture with the random dice value (example: '../assets/images/dice3.png').
Every time the user clicks on the component, it should:
- First, display an empty picture (
'../assets/images/dice-empty.png') - 1 second later, display a new random picture (example:
'../assets/images/dice6.png').
Example:
<Dice />Expected Output before the click:

Expected Output immediately after the click:
Expected Output 1 second after the click:
In this iteration, you will continue building on the LikeButton component created in the previous iteration.
Create a DiscoButton component that displays a button with the initial text "0 Likes". Same as with the LikeButton component created earlier, with each click, the number of Likes should increase.
Additionally, the background color of the button should change with each click. You can use the following array of colors: ["purple", "blue", "green", "yellow", "orange", "red"]
Example:
<DiscoButton />Expected Output:

Create a Carousel component that displays an image and two buttons (Left and Right), which change the picture on each click, respectively.
The component should take 1 prop:
images: An array of strings. Each string should be an image URL.
Example:
<Carousel
  images={[
    "https://randomuser.me/api/portraits/women/1.jpg",
    "https://randomuser.me/api/portraits/men/1.jpg",
    "https://randomuser.me/api/portraits/women/2.jpg",
    "https://randomuser.me/api/portraits/men/2.jpg"
  ]}
/>
Expected Output:

Happy coding! 💙