My moonlander keyboard layout. There are 7 layers currently.
Notes
- Auto shift is turned on.
- Default QWERTY layout
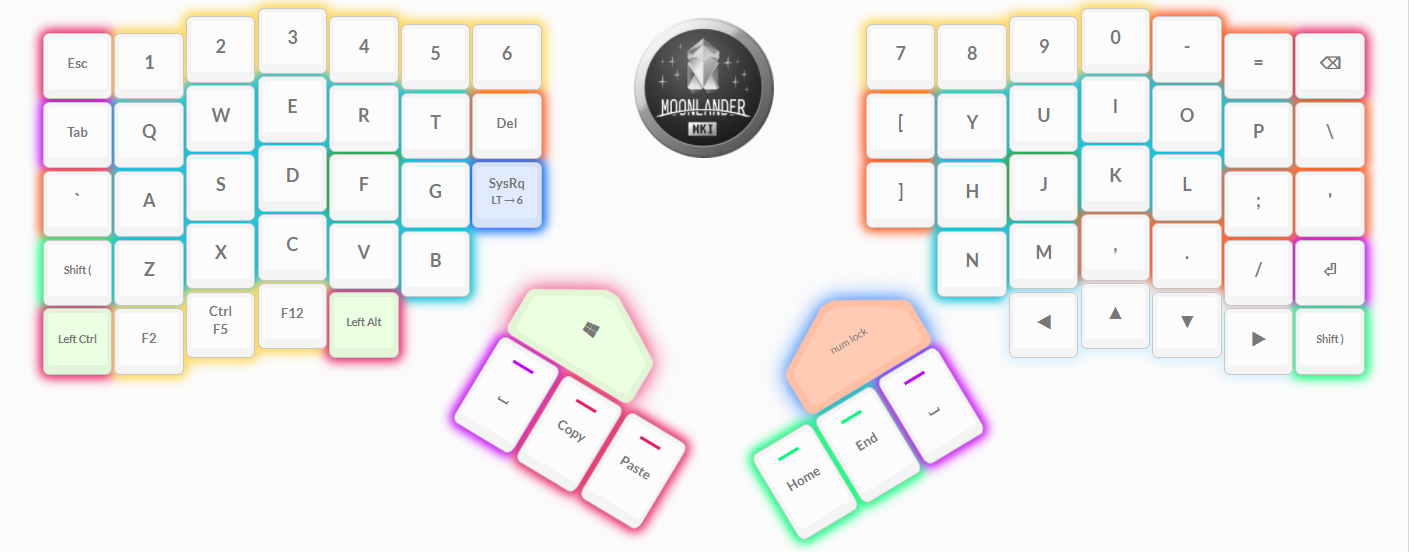
- Notes
- Left and right
shiftkeys use theSpace Cadetoption. Holding the key acts as a shift, tapping works as the corresponding round bracket. - I use the 3 function keys on the bottom left a lot, the
F5key has the Ctrl modifier. Delkey exists on this layer, and also on the mod layer.SysRqis a combo, on tap it is Print Screen, hold activates the mod layer.- The right trigger key moves to layer 1 "Number pad".
- Left and right
- Notes
- Number pad and LED control
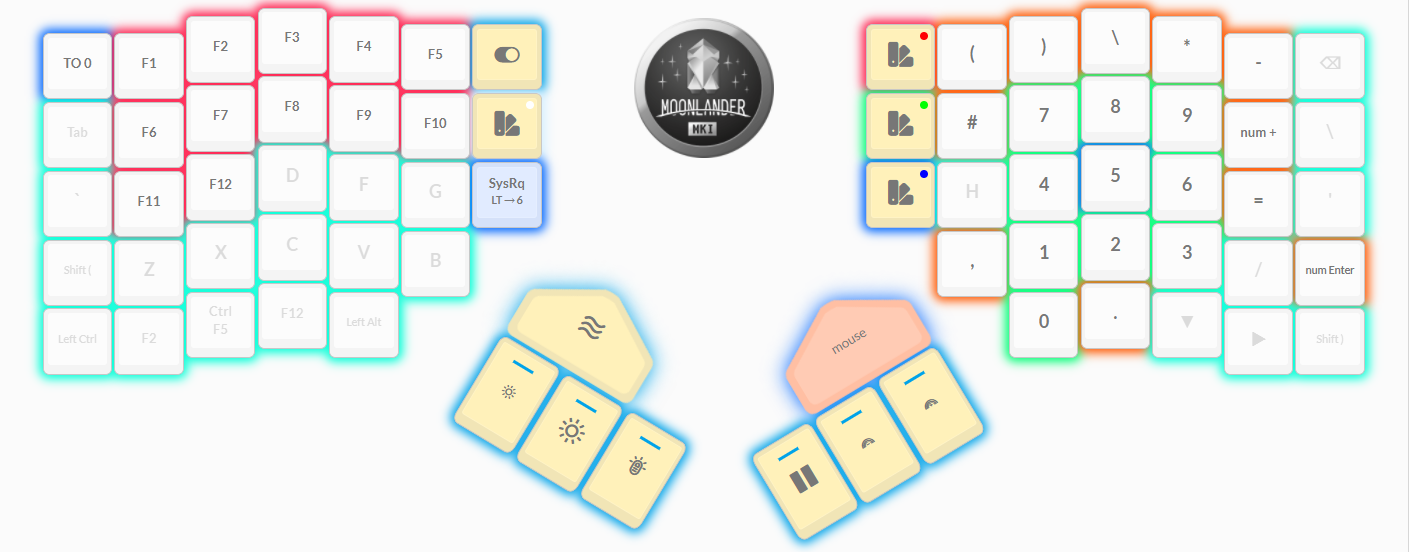
- Notes
- This layer may change, some of the arithmetic keys are odd.
- Basic LED color controls on this layer, mostly just for demos. May remove them in the future.
Esckey goes directly back to layer 0.
- Notes
- Mouse control
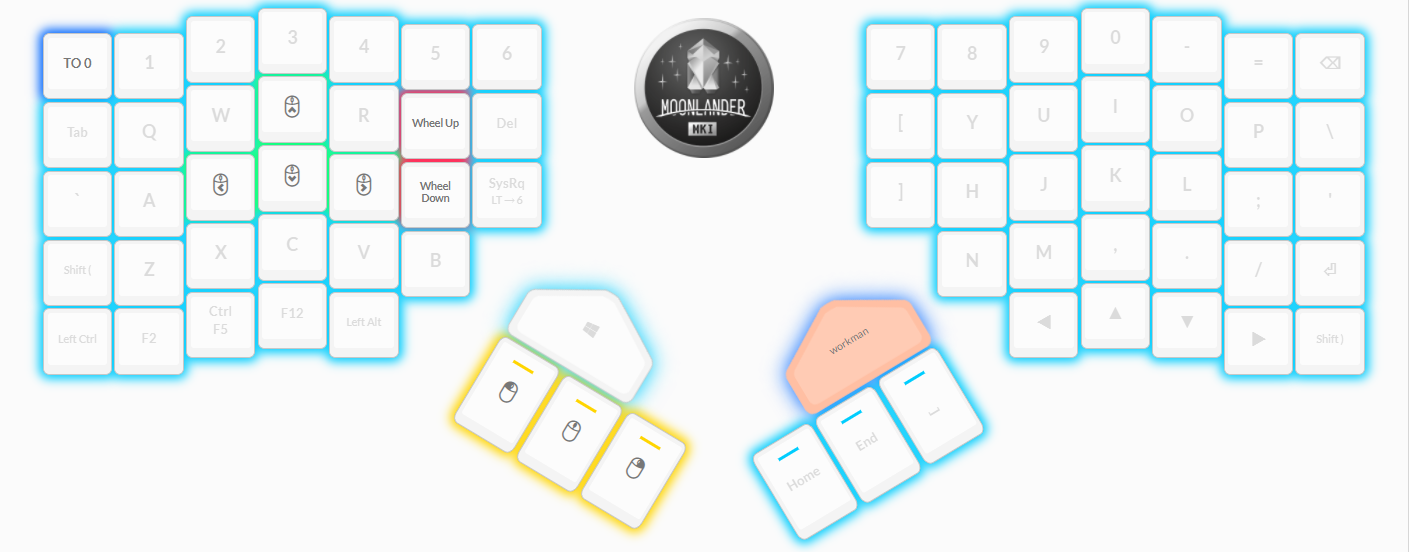
- Notes
- Mouse movement and button keys. Haven't used this as it isn't as precise as I need. May remove in the future.
Esckey goes directly back to layer 0.
- Notes
- Workman layout
- Notes
- Slowly switching to this layout, will swap with QWERTY at some point.
Esckey goes directly back to layer 0.
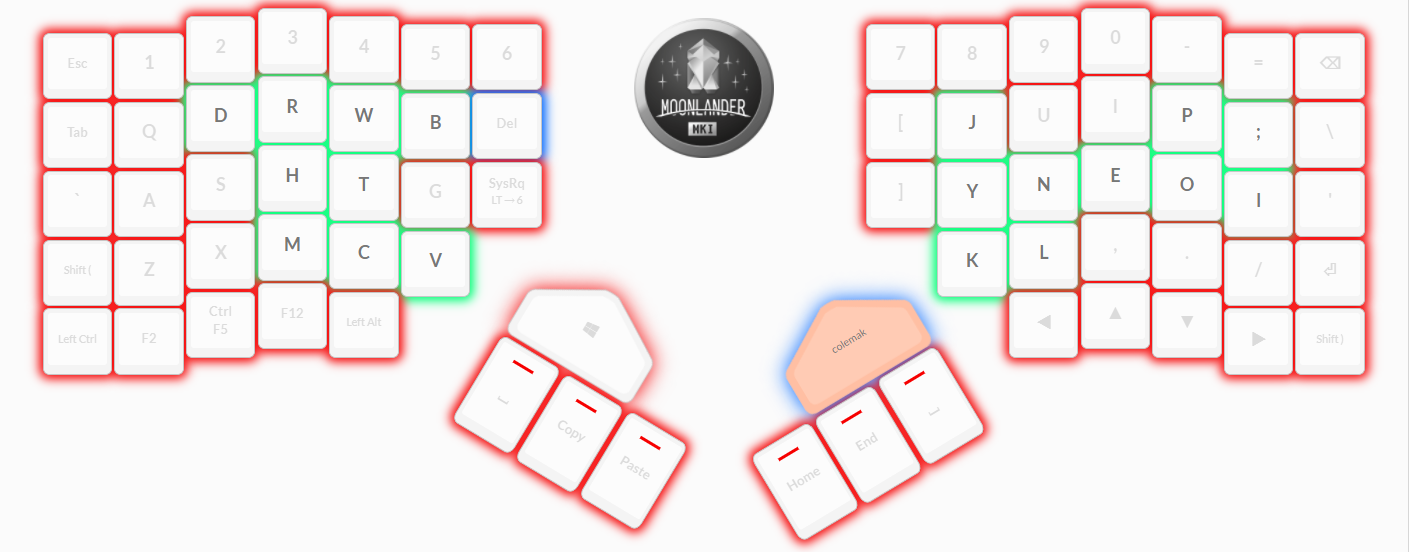
- Notes
- Colemak layout
- Notes
- This is here as a trial, workman seems better for now.
Esckey goes directly back to layer 0.
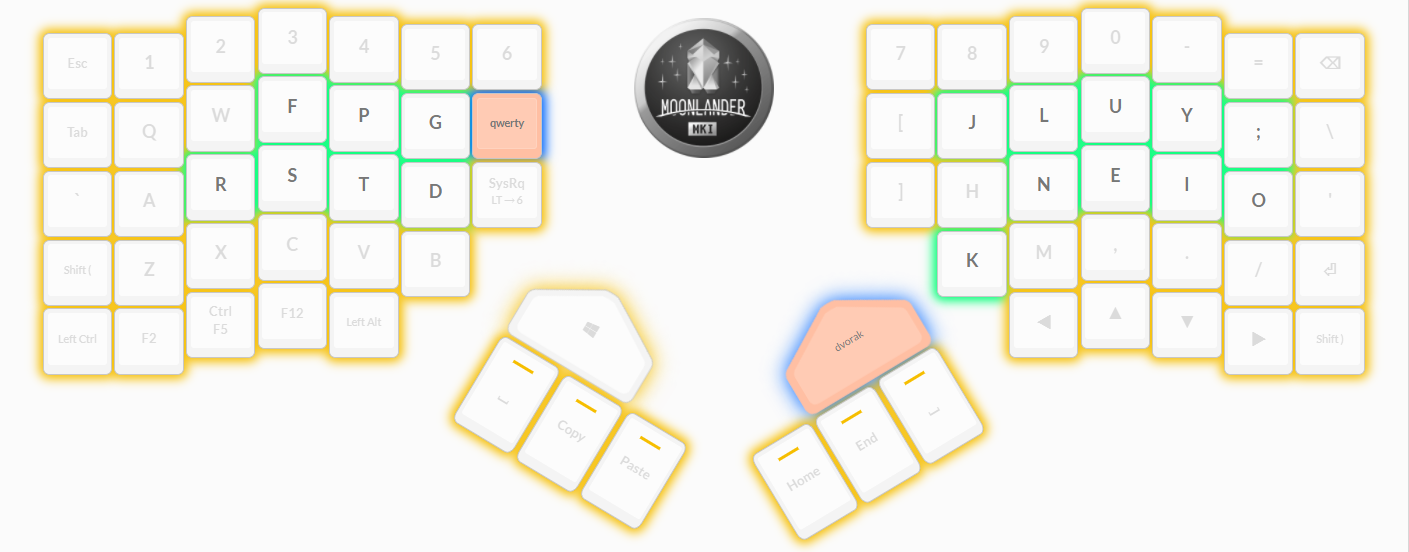
- Notes
- Dvorak layout
- Notes
- This is here as a trial, workman seems better for now.
Esckey goes directly back to layer 0.
- Notes
- Modifiers, shortcuts, and Codium commands
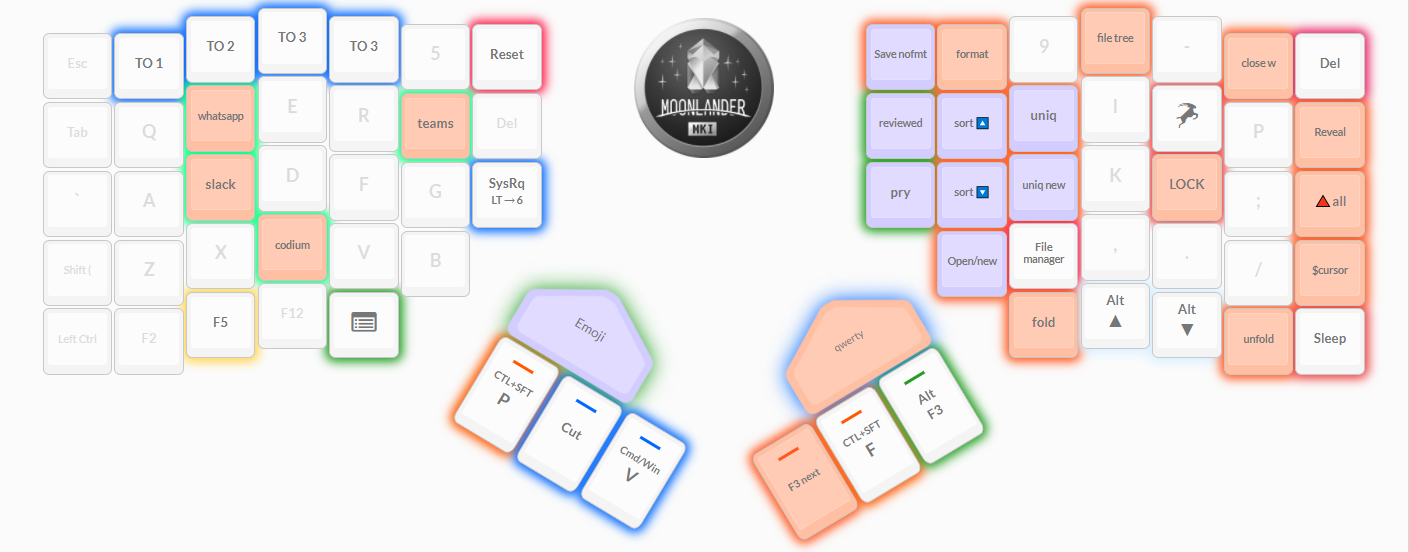
- Notes
- Quick links to the different layers. It is a bit awkward to hit the shortcuts on the left hand side unless using your thumb on the modifier key.
- Left hand is for shortcuts to apps that I regularly open but don't always want running constantly.
F5here is without the Ctrl modifier.- Orange highlighted keys are for Codium (VSCode).
Resetis for resetting the keyboard when flashing new layouts.Sleepis to put the computer to sleep.- The up and down arrow keys on this layer have the Alt modifier.
Esckey goes directly back to layer 0.
- Notes


- Files in the wally folder are for use with the a wally app.
- TODO: Add the script to convert from the keymap.c to a json file for use with the QMK UI tool.
- Use the documentation to set up your environment for building your firmware.
- Build your layout against our QMK fork instead of qmk/qmk_firmware. This is what Oryx (the graphical configurator) uses, so it's guaranteed to work.
- Create a folder with a simple name (no spaces!) for your layout inside the qmk_firmware/keyboards/planck/keymaps/ folder.
- Copy the contents of the *_source folder (in the .zip you downloaded from Oryx) into this folder.
- Make sure you've set up your environment per the QMK docs so compilation would actually work.
- From your shell, make sure your working directory is qmk*firmware, then enter the command
make planck/ez:_layout_, substituting the name of the folder you created for "layout". - You can always get back to your original layout from Oryx.