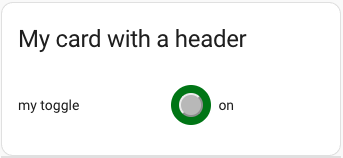
Basic card functionality without a full development stack (and without a shadow dom)
- @published: May 2023
- @author: Elmar Hinz
- @workspace:
conf/www/tutor - @name:
toggle-card-vanilla-js - @id/prefix:
tcvj
You learn:
- how to do a card with plain vanilla javascript
- how to create a helper entity toggle
- a system to organize the class
- encapsulation of CSS by use of a prefix (BEM inspired)
- the full hass cycle of
- reading and writing a state
- how to bind the current context to the event callback
- tutorial 03: Hello world card plus
- you know how to reload
card.jsand dashboard after editing - you know how to add a resource and a card
In doubt revisit tutorial 02.
Take the same steps as in the previous tutorials.
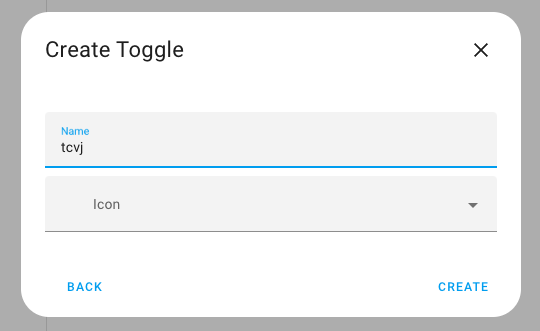
As the entity to toggle create a helper entity of the type input_boolean. To
do so go to Settings > Devices > Helpers. Click Add Helper and select
Toggle from the dropdown. What the form calls Name becomes the name as well
as part of the Entity ID. Set tcvj as the name. This will create the Entity
ID input_boolean.tcvj.
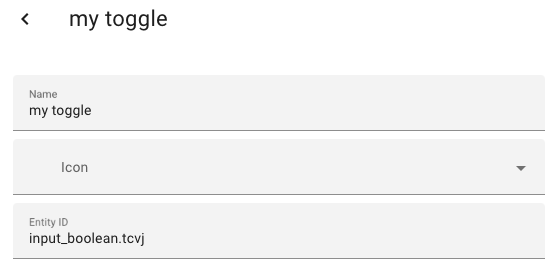
You can select the newly created toggle from the list of helpers to edit it.
Change the name to my toggle or another choice. This will be the name, that
shows up as the label in the card.
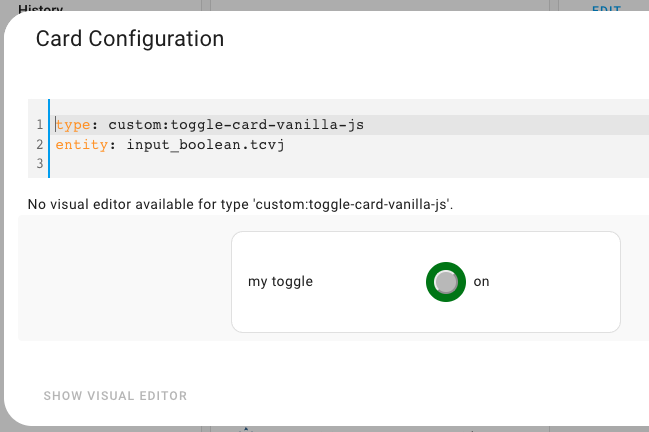
After registering the card as a resource you add it to the dashboard.
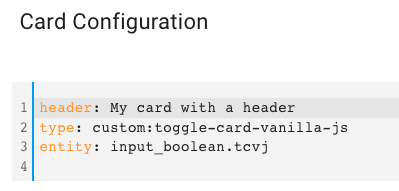
You can set a header, too.
Find the code in the file named card.js alongside with this README.
The class is divided into five sections, private properties, lifecycle, accessors, jobs and configuration defaults.
The lifecyle functions are entry points that are triggered by lifecyle events.
They log to console to enable us to observe the order of the lifecyle events.
Remove in production code!
The accessor functions organize access to data and state. They are called by the jobs. The main purpose is to make the jobs more readable and clean.
The jobs are called by the lifecyle functions to get the job done.
The configuration defaults are related to the configuration. See previous tutorial.
To keep the learning curve flat in this tutorial I go without a shadow dom.
Not using a shadow dom has the downside that the CSS is not encapsulated. So I
use a prefix tcvj- to separate the CSS. In the next tutorial I will show how
to replace prefixes by a shadow dom.
The handling of the prefix is inspired by BEM methodology (block, element,
modifier). The prefix is the equivalent to the block. Done in doStyle():
    .tcvj-error {
        text-color: red;
    }
    .tcvj-error--hidden {
        display: none;
    }
    .tcvj-dl {
        display: grid;
        grid-template-columns: repeat(2, minmax(0, 1fr));
    }
    .tcvj-dl--hidden {
        display: none;
    }
The outer tag ha-card and the class .card-content are required to style the
outer frames correctly.
For reasons of semantics I decided to use a definition list to describe the relation of label and value.
    doCard() {
        this._elements.card = document.createElement("ha-card");
        this._elements.card.innerHTML = `
                <div class="card-content">
                    <p class="tcvj-error tcvj-error--hidden">
                    <dl class="tcvj-dl">
                        <dt class="tcvj-dt"></dt>
                        <dd class="tcvj-dd">
                            <span class="tcvj-toggle">
                                <span class="tcvj-button"></span>
                            </span>
                            <span class="tcvj-value">
                            </span>
                        </dd>
                    </dl>
                </div>
        `;
}The hass()trigger is called multiple times, but setConfig() can also be
called multiple times, especially inside the card editor. setConfig() is
related to the configuration of the card while hass() gives access to the
runtime values of your home assistant system.
Our idea is to do the heavy loading of DOM creation only once. Then to trigger
tiny updates upon the lifecycle events setConfig() and hass().
Unfortunately we are not allowed to add child elements directly within the
constructor. The lifecycle trigger connectedCallback() would be a typical
point to do it. But setConfig() and hass() are even called before it and we
already need access to the child elements here. That's why I place the
attachment of the child elements into setConfig(). I use a flag _isAttached
to run it only once.
    constructor() {
        super();
        console.log("ToggleCardVanillaJs.constructor()")
        this.doStyle();
        this.doCard();
    }

    setConfig(config) {
        console.log("ToggleCardVanillaJs.setConfig()")
        this._config = config;
        if (!this._isAttached) {
            this.doAttach();
            this.doQueryElements();
            this.doListen();
            this._isAttached = true;
        }
        this.doCheckConfig();
        this.doUpdateConfig();
    }
The issue itself gets resolved by using a shadow dom within the next tutorial. The shadow dom takes child elements already within the constructor.
The hass() trigger is straight forward.
    set hass(hass) {
        console.log("ToggleCardVanillaJs.hass()")
        this._hass = hass;
        this.doUpdateHass()
    }
The next member of the lifecyle is the callback of the click event onClicked.
This name is freely chosen by me. It calls the job doToggle which toggles the
entity. It does not update the card directly. The update of the card happens
because toggling changes the hass object.
    onClicked() {
        console.log("ToggleCardVanillaJs.onClicked()");
        this.doToggle();
} doAttach() {
this.append(this._elements.style, this._elements.card);
}During the initial setup we also register the click listener onClicked. This
is done in the job doListen. We bind it to the whole definition list to get a
larger area to touch.
Now a critical aspect. When the listener onClicked is called sometimes in the
future it needs access to the status/context of our card. This connection is
created by binding the card (this) to the callback.
    doListen() {
        this.status.dl.addEventListener("click", this.onClicked.bind(this),false);
    }
You can think of this syntax as syntactical sugar disguising a closure.
The callService function of the hass object is the magic key to update
entities of home assistant. We need to use this for all typical interactive
cards.
    doToggle() {
        this.status.hass.callService('input_boolean', 'toggle', {
            entity_id: this.getEntityID()
        });
} getHeader() {
return this.status.config.header;
} if (this.getHeader()) {
card.setAttribute("header", this.getHeader());
}You can set a header during the configuration of the card. If one is available it will be prepended to the card as usual.
Finally we display an error message if the state of the entity is not available when the hass object has been set. This is just an example of error feedback. Error feedback becomes more important if you plan to publish the card.
You can also throw an error. We do this in doCheckConfig. The difference is
when to do it. Throwing is fine for errors related to the card setup. Runtime
errors may be handled more user friendly.


