< Previous Module - Home - Next Module >
- An Azure account with an active subscription.
- An Azure Azure Purview account (see module 01).
A glossary is an important tool for maintaining and organizing your catalog. You build your glossary by defining new terms or importing a term list and then applying those terms to your assets.
- Create a Term in the Glossary using the System Default Term Template.
- Create a Term in the Glossary using a Custom Term Template.
- Bulk Import Terms into the Glossary via a CSV file.
- Bulk Export Terms from the Glossary into a CSV file.
- Assign a Term to an Asset in the Data Catalog.
- Update an existing Term with Related Terms and Contacts.
- Create a Term (System Default Term Template)
- Create a Term (Custom Term Template)
- Bulk Import Terms
- Bulk Export Terms
- Assign a Term to an Asset
- Update an Existing Term
-
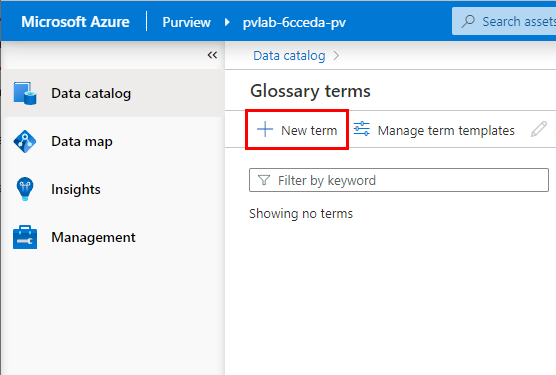
Open Purview Studio and from the Data catalog, click Manage glossary.
-
Click New term.
-
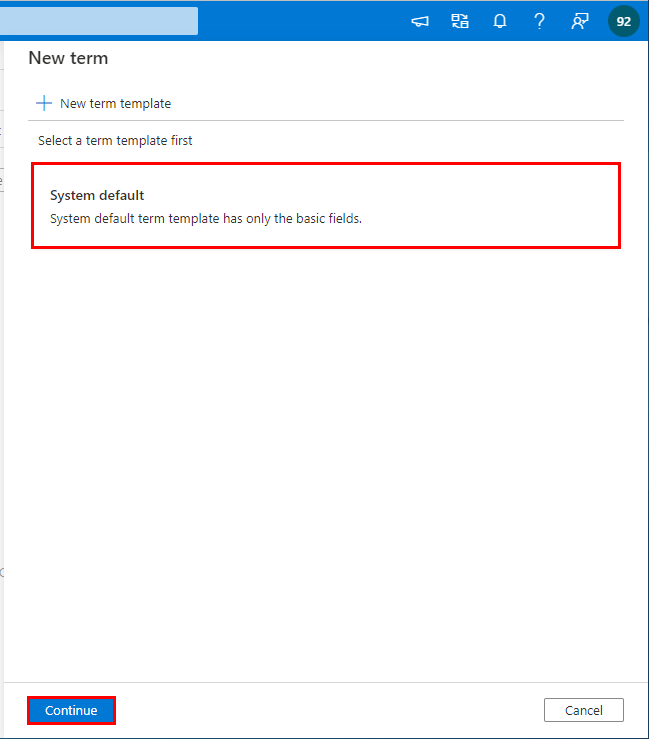
Select the System default term template and click Continue.
💡 Did you know?
A Term Template determines the attributes for a term. The System default term template has basic fields only (e.g. Name, Definition, Status, etc). Custom term templates on the other hand, can be used to capture additional custom attributes. For more information, check out How to manage term templates for business glossary.
-
Change the Status of the term to
Approvedand then copy and paste the values below into the appropriate field, then click Create.Status
ApprovedName
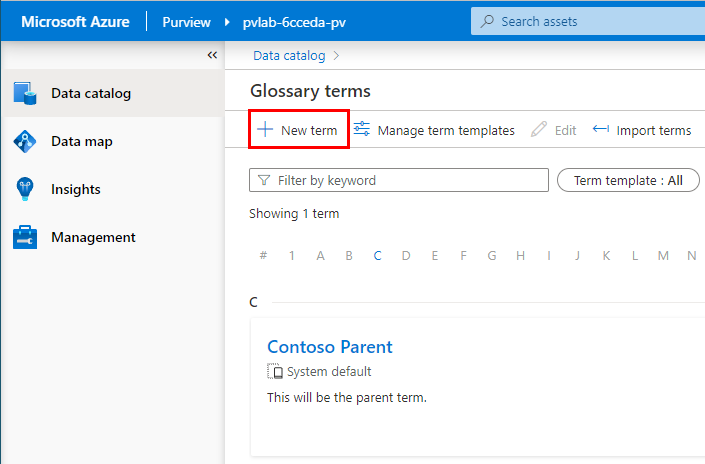
Contoso ParentDefinition
This will be the parent term.Acronym
CPResource Name
Azure PurviewResource Link
https://aka.ms/Azure-Purview
-
Open Purview Studio and from the Data catalog, click Manage glossary.
-
Click New term.
-
Click New term template.
-
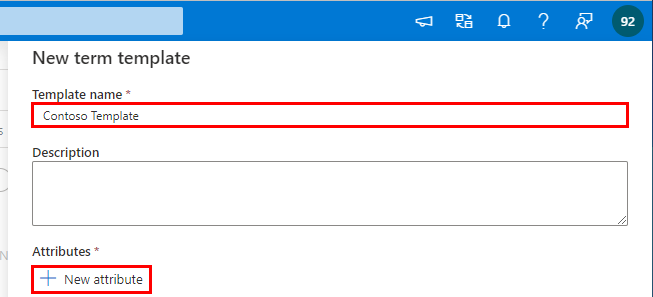
Provide the Term Template a Name (e.g.
Contoso Template) and click New attribute. -
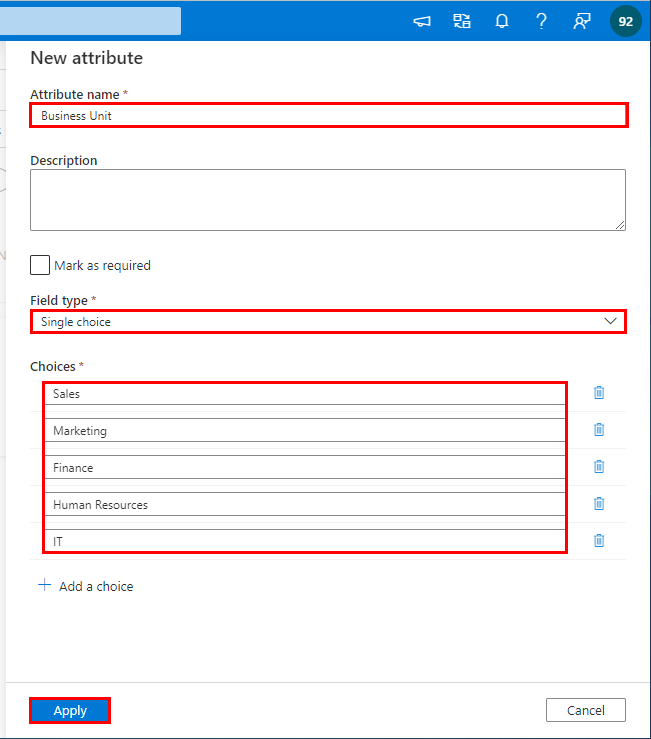
Populate the attribute fields as per the examples below and click Apply.
Field Example Value Attribute name Business UnitField type Single choiceChoices Sales,Marketing,Finance,Human Resources,IT, -
Click Create.
-
Select Contoso Template and click Continue.
-
Change the Status of the term to
Approvedand then copy and paste the values below into the appropriate field, then click Create.Name
Contoso ChildDefinition
This will be the long description for the child glossary term.Parent
Contoso ParentBusiness Unit
Marketing -
From the Glossary screen, change the view to Hierarchical view to see the hierarchical glossary.
-
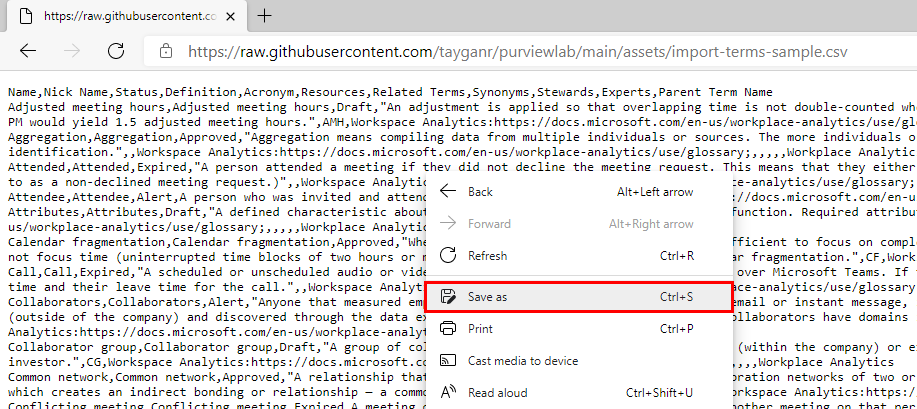
Download a copy of import-terms-sample.csv to your local machine by opening the link in a new tab, right-click within the body of the content, click Save as .
-
From the Glossary screen, click Import terms.
-
Select the System default term template and click Continue.
-
Click Browse and open the local copy of import-terms-sample.csv.
-
Click OK.
-
Once complete, you should see 50 additional terms beneath the parent (Workplace Analytics). Tip: You can quickly find specific types of terms using the filters at the top (e.g. Status = Approved).
-
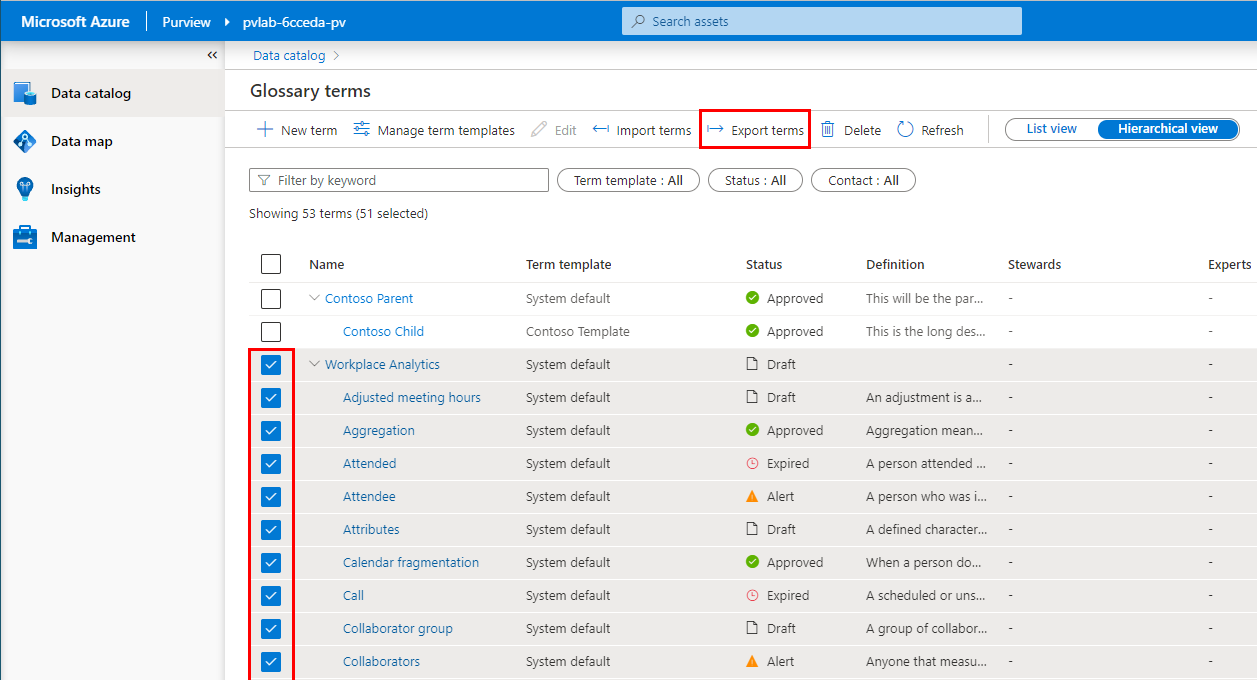
From the Glossary screen, we want to select ALL terms (top check box) and then de-select terms that do not belong to Workplace Analytics (i.e. Contoso Parent, Contoso Child). All Workplace Analytics terms should be selected. Click Export terms. Note: You can not export terms from different term templates.
💡 Did you know?
When using Purview Studio to Export terms, all terms selected for the export must use the same Term template. Selecting terms from different term templates will result in the Export terms button being greyed out.
-
If the export was successful, you should find a CSV file has been copied to your local machine (e.g. Downloads).
-
Perform a wildcard search by typing asterisk (*) into the search bar and hitting the Enter key to submit the query. Click on an asset title (e.g.
QueriesByState) to view the details. -
Click Edit.
-
Open the Glossary terms drop-down menu and select a glossary term (e.g.
Contoso Child). Click Save. -
Click on the hyperlinked term name to view the glossary term details.
-
Click Refresh to view the Catalog assets the term is assigned to.
-
From the Glossary screen, open an existing term (e.g.
Aggregation). -
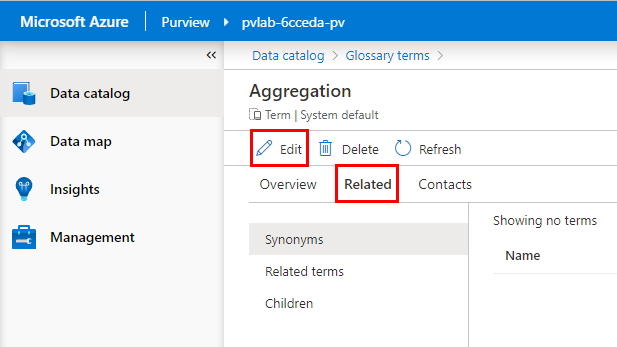
Navigate to the Related tab and click Edit.
-
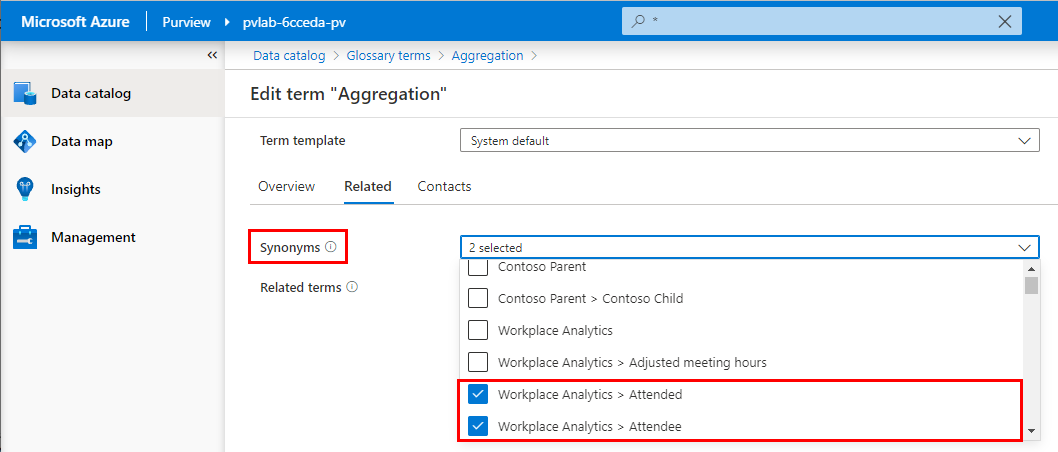
Use the drop-down menu to assign two glossary terms as Synonyms.
💡 Did you know?
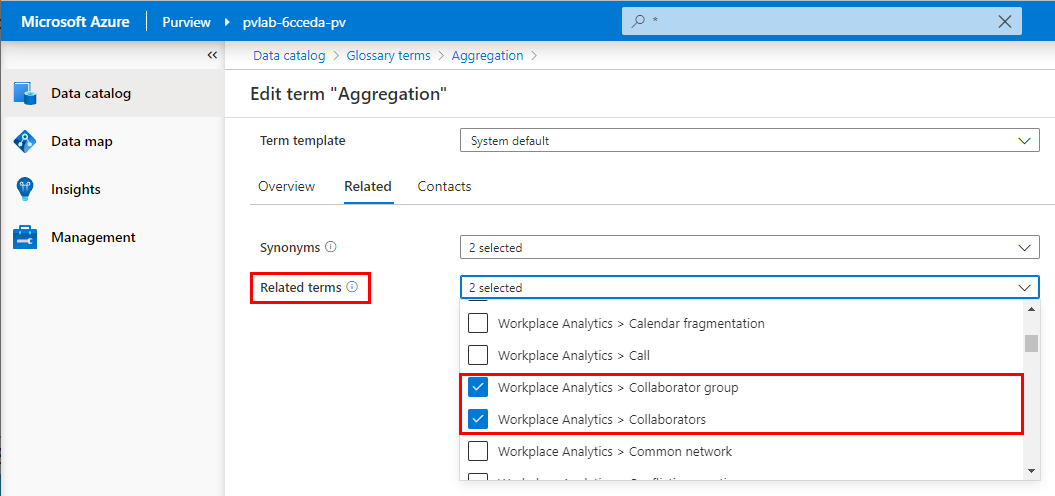
Synonyms are other terms with the same or similar definitions. Where as Related terms are other terms that are related but have different definitions.
-
Use the drop-down menu to assign two glossary terms as Related terms.
-
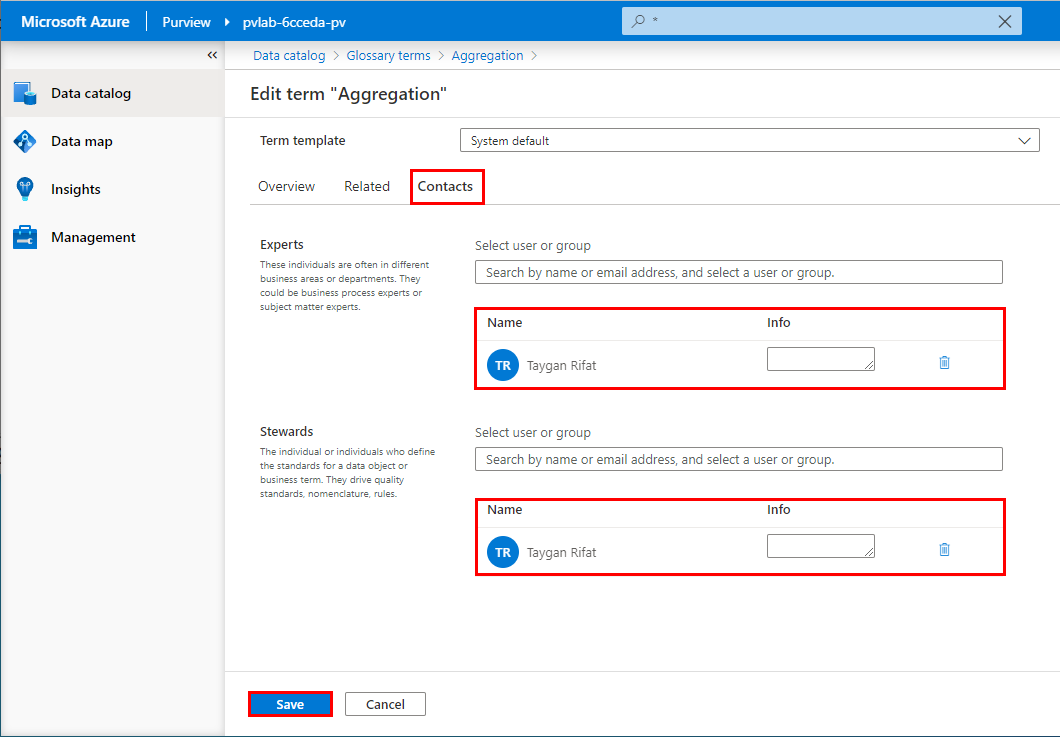
Navigate to the Contacts tab and assign an Expert and a Steward. Click Save.
💡 Did you know?
Glossary terms can be related to two different types of contacts. Experts are typically business process or subject matter experts. Where as Stewards define the standards for a data object or business term. They drive quality standards, nomenclature, rules.
-
Glossary terms with the same name but different descriptions can exist under the same parent term?
A ) True
B ) False -
Glossary terms can be related to other terms in the glossary. Which of the following is not a valid glossary term relationship type?
A ) Synonyms
B ) Antonyms
C ) Related terms -
Glossary terms created using different term templates can be exported together using the Purview Studio (UI) glossary "Export terms" functionality?
A ) True
B ) False
This module provided an overview of how to create, export, and import terms into the Azure Purview glossary.

