JENKINS TEST
An environment in terms of programming is a location where we would deploy the code. There can be several different environments.
- Development environment - developers machine
- Testing environment – using a virtual machine
- Production environment – using a virtual machine
Amazon Web Services is a cloud computing platform provides an array of cloud services. We can define AWS (Amazon Web Services) as a secured cloud services platform that offers:
- Compute power
- Database storage
- Content delivery
- various other functionalities.
Aws is the infrastructure as a service, One key thing it provides is a global infrastructure. Allows us to rent infrastructure per second.
- IAM - Identity access management (where you can create or destroy users)
- Ec2 – elastic computing 2
- Security groups
- VPCS
- Deployment
- Other services
Now we can select the VM we want to create. In my case I choose the Ubuntu machine as it was the closest to my testing environment
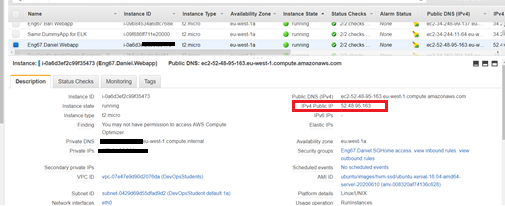
Once the E2 Instance has been created we can see a variety of information. I am after the ipv4 address located in the red
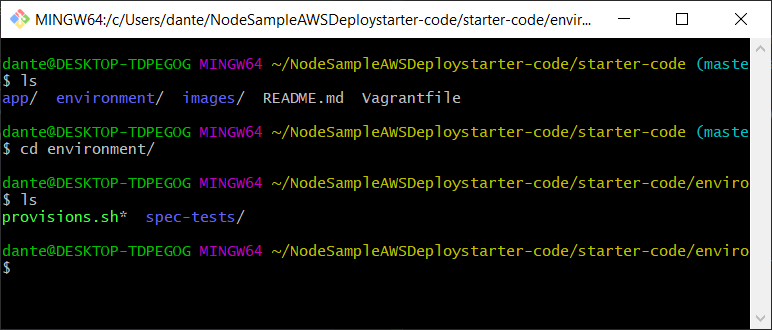
- Direct inside the directory use the
lscommand to confirm your location - use the
cd environmentcommand to enter the directory - Create a provisions.sh file or enter your file using
nano provisions.sh
sudo unlink /etc/nginx/sites-enabled/default
cd /etc/nginx/sites-available
sudo touch reverse-proxy.conf
sudo chmod 666 reverse-proxy.conf
echo "server{
  listen 80;
  location / {
      proxy_pass http://192.168.10.100:3000;
  }
}" >> reverse-proxy.conf
sudo ln -s /etc/nginx/sites-available/reverse-proxy.conf /etc/nginx/sites-enabled/reverse-proxy.conf
sudo service nginx restart

#### installing git
sudo apt-get install git -y

#### installing nodejs
sudo apt-get install python-software-properties
curl -sL https://deb.nodesource.com/setup_12.x | sudo -E bash -
sudo apt-get install nodejs -y

#### installing pm2
sudo npm install pm2 -g


#### App set up
export DB_HOST="mongodb://192.168.10.150:27017/posts"
cd /home/ubuntu/app
sudo su
npm install
Provisions allow for the automation of the following:
- Installing packages
- Configuring files
- Syncing files
- Provisioning folders
- Provisioning a machine
- Environment variables
This provisions file automates th installation, configuration and upgrading of Nginx, npm, git, pm2 and nodejs
Secure copy protocol (SCP) is a means of securely transferring computer files between a local host and a remote host or between two remote hosts. It is based on the Secure Shell (SSH) protocol.
To sync directorys from your OS to your VM you mut know the VMs IP adress and the directory name of which you want to sync. use the following command:
scp -i ~/.ssh/DevOpsStudents.pem -r app/ [email protected]:~/app/
Now we sync the environments directory as our provision.sh file is inside:
scp -i ~/.ssh/DevOpsStudents.pem -r environment/ [email protected]:~/env/
If an error occurs when trying to sinc use the following command:
scp -o "IdentitiesOnly yes" -i ~/.ssh/DevOpsStudents.pem -r app/ [email protected]:~/app/
Onced the correct directorys have been synced use the following command to enter the vm:
ssh -i ~/.ssh/DevOpsStudents.pem [email protected]
Once the provision and app directorys have been moved into the VM. inside the VM we can run node app.js
If successfull the server listening on port 3000
Once the connection has been succesful you should be able to access the webpage through your ipv4 address created using a E2 instance on AWS.
The webpage is available through the e2 instances IP adress using the port 3000
The second webpage is also available
Security group is a firewall. It contains a list of IPs that are allowed to access the webpage. The app will only be working on the IP adress of the VM. To Allow access to other users we add security groups. Go into your instance and click actions > Networking > change security groups
Then select the security group you would like to add for access.


