Still in Development!
⚡ Are you trying to create a web Extension but still looking for a starting point?
⚡ Do you want your extension to run in both Firefox and Chrome?
⚡ Are you tired of repeteadly reloading your extension after every small change you make?
⚡ Do you want to develop your exetension using modern technologies like React, Webpack, Jest?
We have a solution!
React Extension Boilerplate is a modern web extension template for building Mozilla and Chrome extensions using ReactJS.
Allows smooth and fast development of extension using on-the-go loading, building, packaging and publishing on the most common browsers Chrome and Firefox.
Make changes to the source code and watch the extension implement these changes live in the browser.
Implements all the best Javascript practises with ESLint, Jest, React-StoryBook, Webpack and lots more.
Installing this boilerplate is as simple as cloning this repo in a new folder and start editing the source folder.
Before you begin installing this project you need NodeJS and npm installed on your machine. Make sure to install the latest version of node.
# clone the git repo
$ git clone https://github.com/kryptokinght/react-extension-boilerplate.git

# Install dependencies
$ npm install- Run script
# build files to './dev'
# and launches the web ext in a new chrome instance, watches for changes and updates
$ npm run start:chrome
# launches in firefox
$ npm run start:firefox
# runs storybook
$ npm run storybook
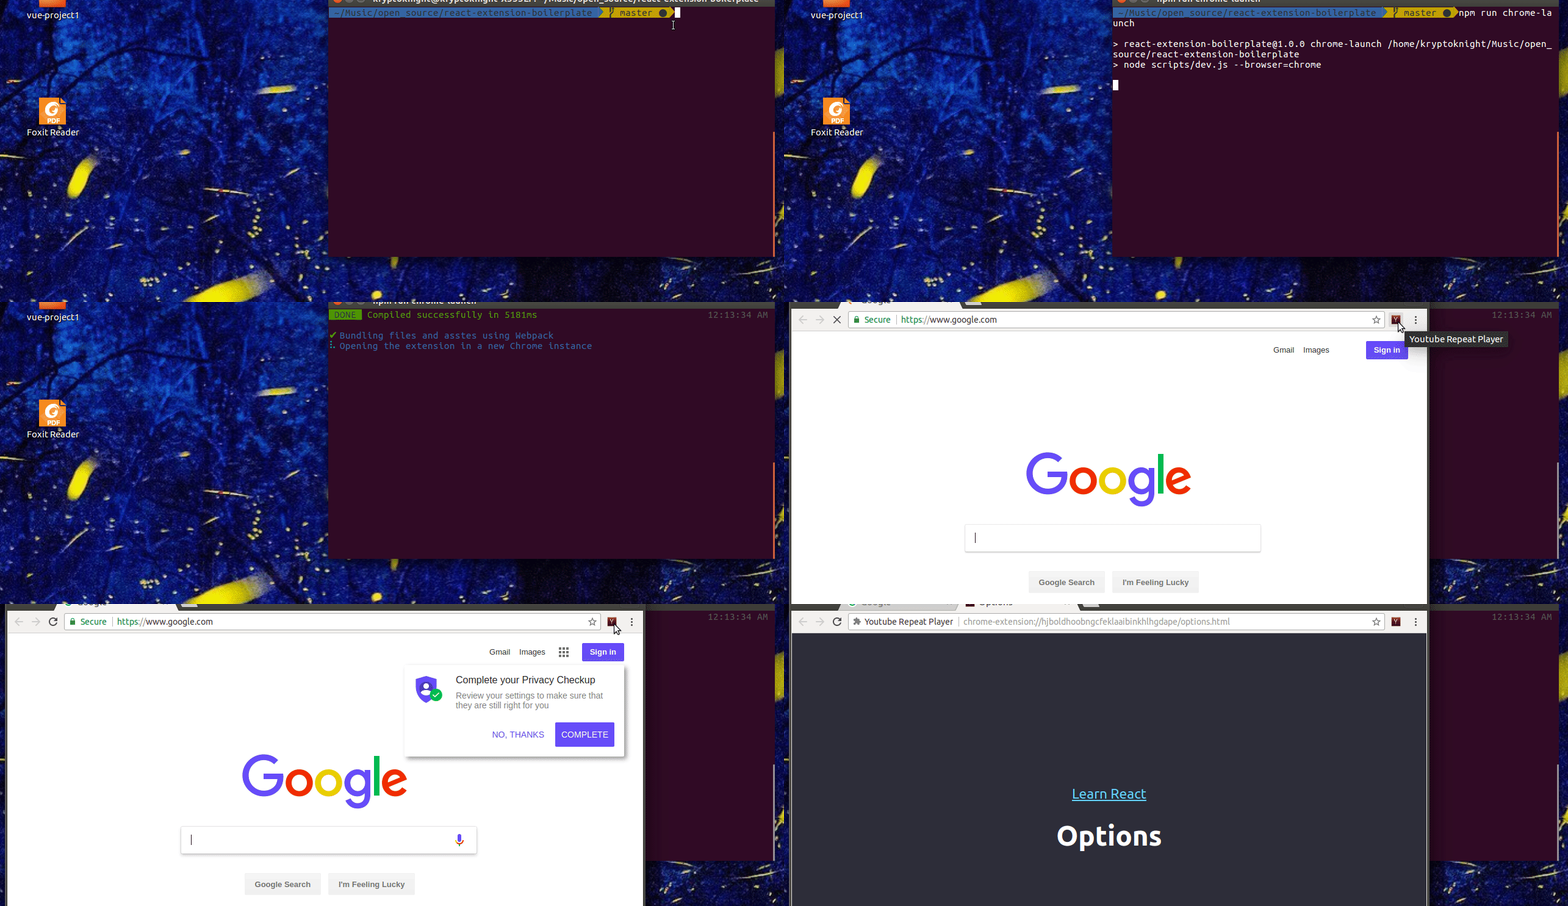
npm run chrome-launch in action:

- If you want to load your unpacked extension by yourself, then run
npm run dev. This will create the extension inside an dev folder indevelopmentmode and will watch thesrcfolder for changes. - Load unpacked extensions with
./devfolder. Though you have to reload the extension by yourself every time the./devfolder updates.
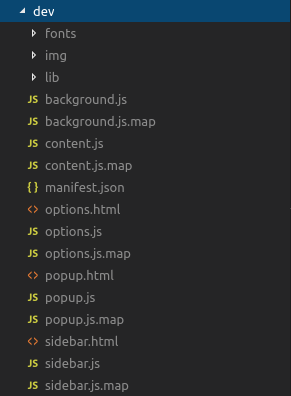
Screenshot of the development folder:

Go to the project folder and run the following commands:
The CODETOUR.md gives an overview of the project structure.
The only folder important to you is the source folder. The /src contains the different components of the extension like content_scripts, background, options, popup, sidebar.
Any component which you not require, suppose you don't need sidebar, you can simply delete that component from the src folder and it will not be included inside your build.
Suppose you don't want to use React in your popup to develop UI. You can delete all the files inside the popup folder only leaving the [template.html] inside it.
You can use this template.html as your popup.html. BUT any scripts or CSS files referenced inside this template.html should be put inside the src/lib folder.
Separate folders have been provided to store these static assets.
/src/img/src/fonts
These assets are copied as it is to the build folder, just like the /src/lib folder.
Files like CODETOUR.md, CONTRIBTUING.md, README.md, LICENSE in case they are not relavant to your project. Once the CLI tool is build, it will help you scaffold the extension without including these unnecessary files.
If you need any further help regarding feel free to ask on our Gitter community or create an issue.
# build files to './extension'
$ npm run build
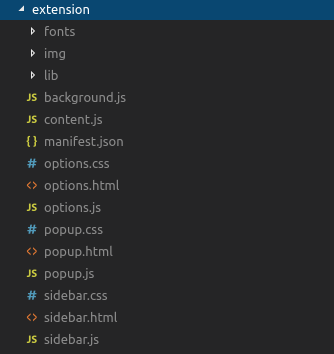
Once created here's what the extension folder looks like:

# compress build folder to {manifest.name}.zip and crx
$ npm run build
$ npm run compress -- [options]If you want to build crx file (auto update), please provide options, and add update.xml file url in [manifest.json](https://developer.chrome.com/extensions/autoupdate#update_url manifest.json).
- --app-id: your extension id (can be get it when you first release extension)
- --key: your private key path (default: './key.pem')
you can usenpm run compress-keygento generate private key./key.pem - --codebase: your
crxfile url
See autoupdate guide for more information.
To get an idea about the structure of the project, read here. Contributions are highly welcome. Please take some time to read the guidelines mentioned here contribute.
The code is available under the MIT license.


