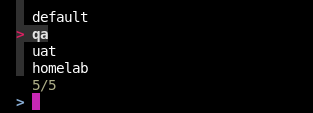
Faster way to switch between Nomad clusters and namespaces. Inspired from kubectx.
If you're operating multiple Nomad clusters, switching between these clusters is a cumbersome task of exporting variables in shell. Ideally nomad, should use a file similar to ~/.kube/config for authenticating against multiple clusters as described in this issue. Since this feature isn't available as of yet, I've created nomctx which can emit the environment-variables required by nomad CLI for authentication.
- Binaries: Releases.
- Go:
go install github.com/mr-karan/nomctx@latest
To run:
$ nomctxBy default nomctx searches for the file in ~/.nomctx/config.hcl but you can override that with --config=</path/to/config.hcl> flag.
NAME:
   nomctx - Faster way to switch across multiple Nomad clusters and namespaces

USAGE:
   nomctx [global options] command [command options]

VERSION:
   v0.2.3 (Commit: 2023-12-05 13:09:16 +0530 (ff9fe08), Build: 2024-01-30 21:06:48 +0530)

COMMANDS:
   list-clusters     List all clusters
   list-namespaces   List all namespaces
   set-cluster       Set the current cluster context
   set-namespace     Set namespace
   switch-cluster    Switch cluster
   switch-namespace  Switch namespace
   current-context   Display the current context
   login             Login to a cluster
   add-cluster       Add a new cluster to the config
   help, h           Shows a list of commands or help for one command

GLOBAL OPTIONS:
   --config value  Path to a config file to load. (default: "/Users/karan/.nomctx/config.hcl")
   --help, -h      show help
--version, -v print the versionIf you have fzf installed, the tool will show an interactive prompt for switching clusters or namespace.
If you've configured authentication with SSO, you can use login command to login to a cluster. This will open a browser window where you can authenticate with your SSO provider.
By default, nomctx will login to the active cluster set in the config file. If you want to login to a specific cluster, use --cluster=<cluster-name> flag.
# Login to the active cluster
nomctx login
# or specify a cluster
nomctx login --cluster=dev

# Persist the session token to a file in `~/.nomctx/<cluster>.env`
nomctx login --cluster=dev --persist
See Persist variables section for more details on how to persist the Nomad session tokens to a file.
If you don't have fzf, you can use switch manually with set-cluster=<> and set-namespace=<> commands.
nomctx list-clusters
local
bangalore
tokyo
paris
singaporenomctx list-namespaces
homelab
uat
qa
defaultnomctx set-cluster bangalore
export NOMAD_ADDR=http://10.0.0.1:4646
export NOMAD_TOKEN=f8cb5774-749a-4548-acc9-054df3b52e83
export NOMAD_HTTP_AUTH=user:pass
export NOMAD_NAMESPACE=pinknomctx set-namespace=uat
export NOMAD_NAMESPACE=uat$ nomctx current-context
Cluster: local
Namespace: defaultnomctx add-cluster --cluster=<name> [--addr=<address>] [--token=<token>] [--namespace=<namespace>] [--region=<region>] [--auth-method=<method>]The add-cluster command allows you to add a new cluster configuration to your nomctx setup. This command is useful for managing multiple Nomad clusters, enabling you to switch between them easily.
--cluster: (Required) Name of the new cluster.--addr: (Required) Address of the cluster (e.g.,http://127.0.0.1:4646).--token: (Optional) Access token for the cluster.--namespace: (Optional) Default namespace for the cluster.--region: (Optional) Region of the cluster.--auth-method: (Optional) Authentication method for the cluster (e.g.,"github").
Add a new cluster named my-cluster:
nomctx add-cluster --cluster="my-cluster" --addr="http://10.0.0.5:4646"Add a new cluster with complete details:
nomctx add-cluster --cluster="my-cluster" --addr="http://10.0.0.5:4646" --token="abcd1234" --namespace="default" --region="us-west" --auth-method="github"- The new cluster configuration is appended to the existing
~/.nomctx/config.hclfile. - Ensure the cluster name is unique to avoid conflicts in the configuration.
With --persist flag, you can persist the environment variables to a file. This is useful if you want to use the variables in a script.
The variables are written to ~/.nomctx/<cluster>.env file.
nomctx set-cluster --persist dev

# You can see the env variables are written to the file.
cat ~/.nomctx/dev.env
NOMAD_ADDR=http://127.0.0.1:4646
NOMAD_NAMESPACE=defaultYou can use eval to directly set the environment variables on shell. This works with both the interactive and non-interactive modes.
For eg, to switch a cluster in interactive mode and set the env vars on shell:
eval $(nomctx)

# You can see the env variables are automatically exported on shell.
env | grep NOMAD_
NOMAD_ADDR=http://10.0.0.1:4646
NOMAD_TOKEN=c0a7d714-46df-4c6e-954a-269578c3804d
NOMAD_NAMESPACE=pink
NOMAD_HTTP_AUTH=user:pass
NOMAD_REGION=parisHere's a sample config file which shows 2 clusters: dev and prod:
cluster "dev" {
  address   = "http://127.0.0.1:4646"
  namespace = "default"
}

cluster "uat" {
  address = "https://nomad.hashicorp.rocks"
  auth {
    method   = "gitlab"
    provider = "nomad"
  }
}

cluster "prod" {
  address   = "http://10.0.0.3:4646"
  namespace = "blue"
  region    = "blr"
  token     = "f8cb5774-749a-4548-acc9-054df3b52e83"
}See LICENSE


