A polyphonic wavetable synthesizer made for the Raspberry Pi
SynthPi is an open source Realtime Wavetable Synthesizer which runs on Raspberry Pi. It is made for the Realtime Embedded Programming course as part of our Master of Engineering in Electronics with Music at the University of Glasgow (year 2022).
- Polyphonic (user definable number of voices) wavetable oscillator
- Switchable 12/24 dB/oct lowpass filter with frequency and resonance controls
- Visual feedback provided via an 8-digit 7-segment display
- Standard MIDI control interface
Authors: Noe Heuclin and Aaron Collins.
Credits are due to former students from the DrumPi project as well as Nick Bailey and his team of old students for their SmurdyGurdy Project. Our code is based and adapted from several files belonging to both projects. Likewise, we used Nigel Redmon's ADSR library as a basis to make our own envelope.
This code also make use of the following libraries without any modification :
- Adam Stark's AudioFile library, used to load in wavetable to our DSP engine.
- Dimtass' DSP CPP Filters library, used to implement the SynthPi's lowpass filter.
- Nlohmann JSON, used to read the config file on program startup
- Raspberry Pi
- ZeroSeg 8-digit 7-segment display
- IQaudIO I2S audio interface
- Any MIDI keyboard or Sequencer with USB MIDI (if your controller does not have USB MIDI, you can use an adaptor such as this)
An installation video is available here
Before downloading and installing SynthPi's software on your Raspberry Pi, perform the following steps:
First, run the following in a terminal:
sudo apt-get install git cmake libjack-jackd2-dev qjackctl libasound-dev libboost-dev
sudo adduser $(whoami) input
sudo adduser $(whoami) audio
sudo adduser $(whoami) spi
Reboot the system before continuing.
To enable the SPI interface, run the following in a terminal:
sudo raspi-config
Navigate to Interface Options -> SPI.
Enable SPI interface.
To download and build the SynthPi program, run the following in a terminal:
git clone https://github.com/nheuclin/SynthPi.git
cd SynthPi
chmod a+x ./install
./install
To then edit the json config file to your MIDI controller, first note down which client your controller is connected to with:
aconnect -l
Then run the following and move the controls you want to map to the program's parameters and note down their control number:
aseqdump -p client:port
You can then run the following to edit the config file to your controller. You also need to make sure that the number of bank you input in the config file is the same as the number of banks you put in the audio folder:
nano config.json
Once you've edited the file press ctrl+x and then Y to save the config file. You are now ready to run SynthPi !
To start the program, enter:
./SynthPi
in a terminal from the SynthPi directory.
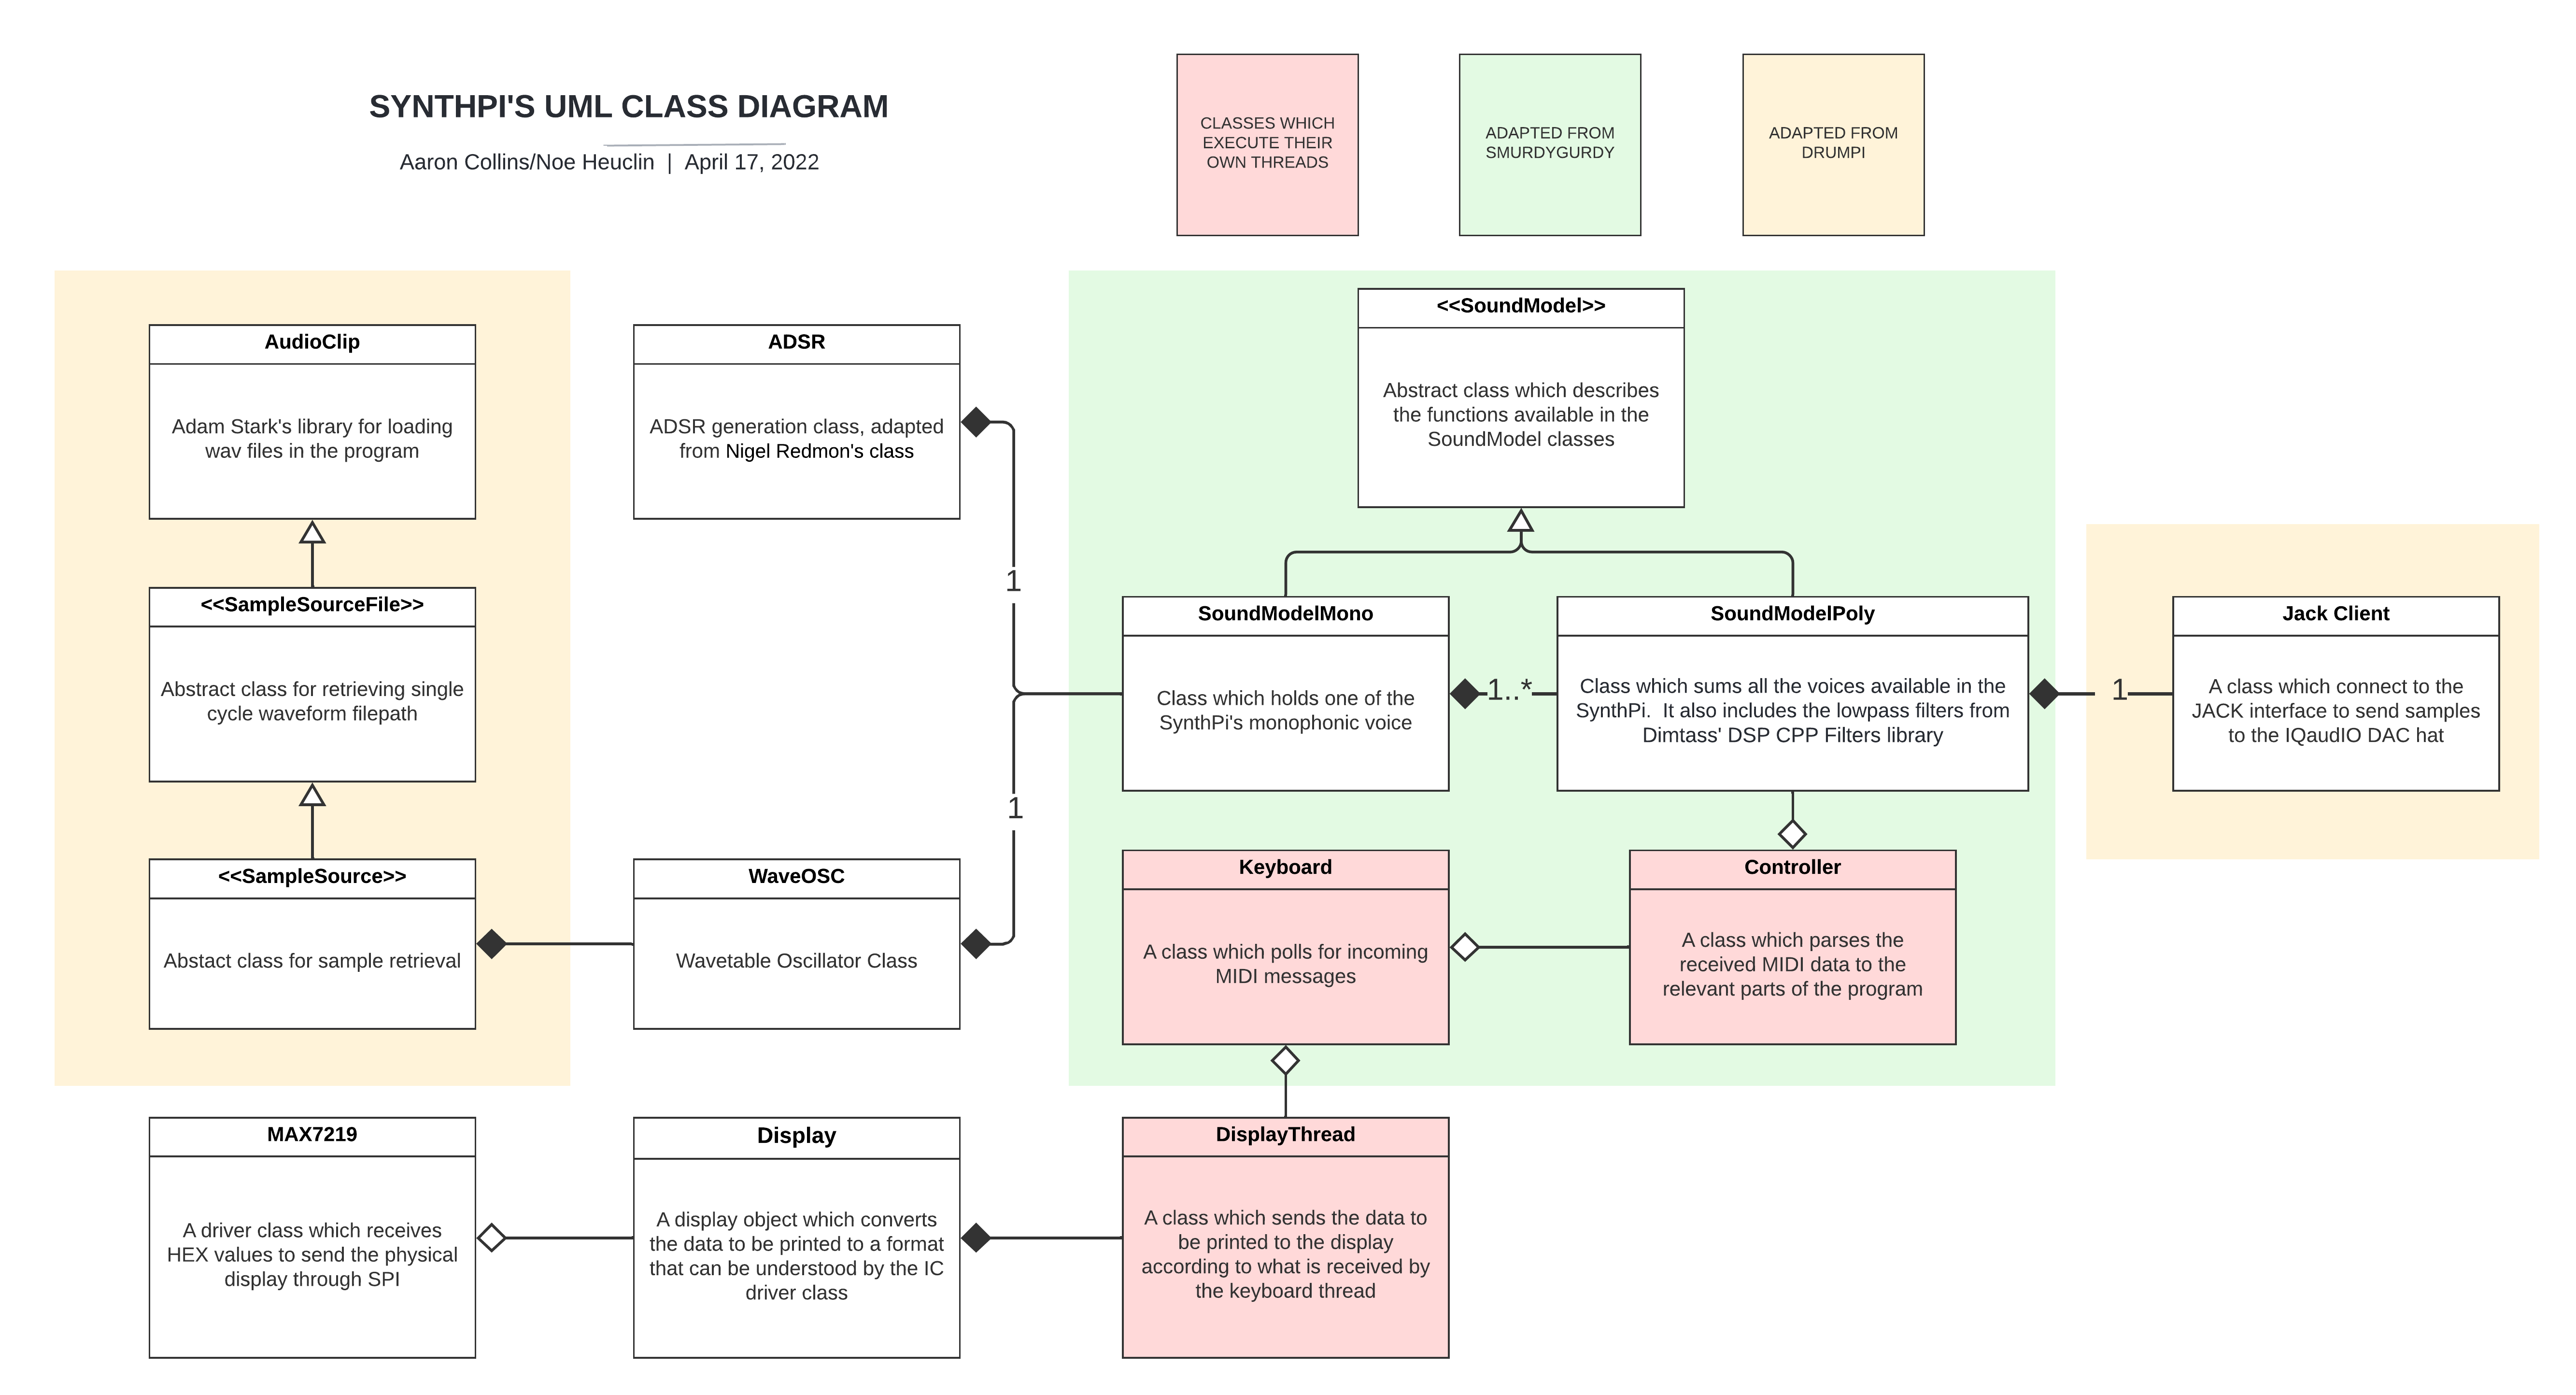
Below is the UML class diagram of the SynthPi. You can follow the link for more information about the inner working of each class.
- Add a second oscillator per voice with detune option with regard to the first oscillator
- Add pitchbend wheel control
- Add more filter types (high-pass/band-pass/notch)
- Adding LFOs
- Allow mapping of the ADSR and LFOs to modulate all of the SynthPi's parameters


