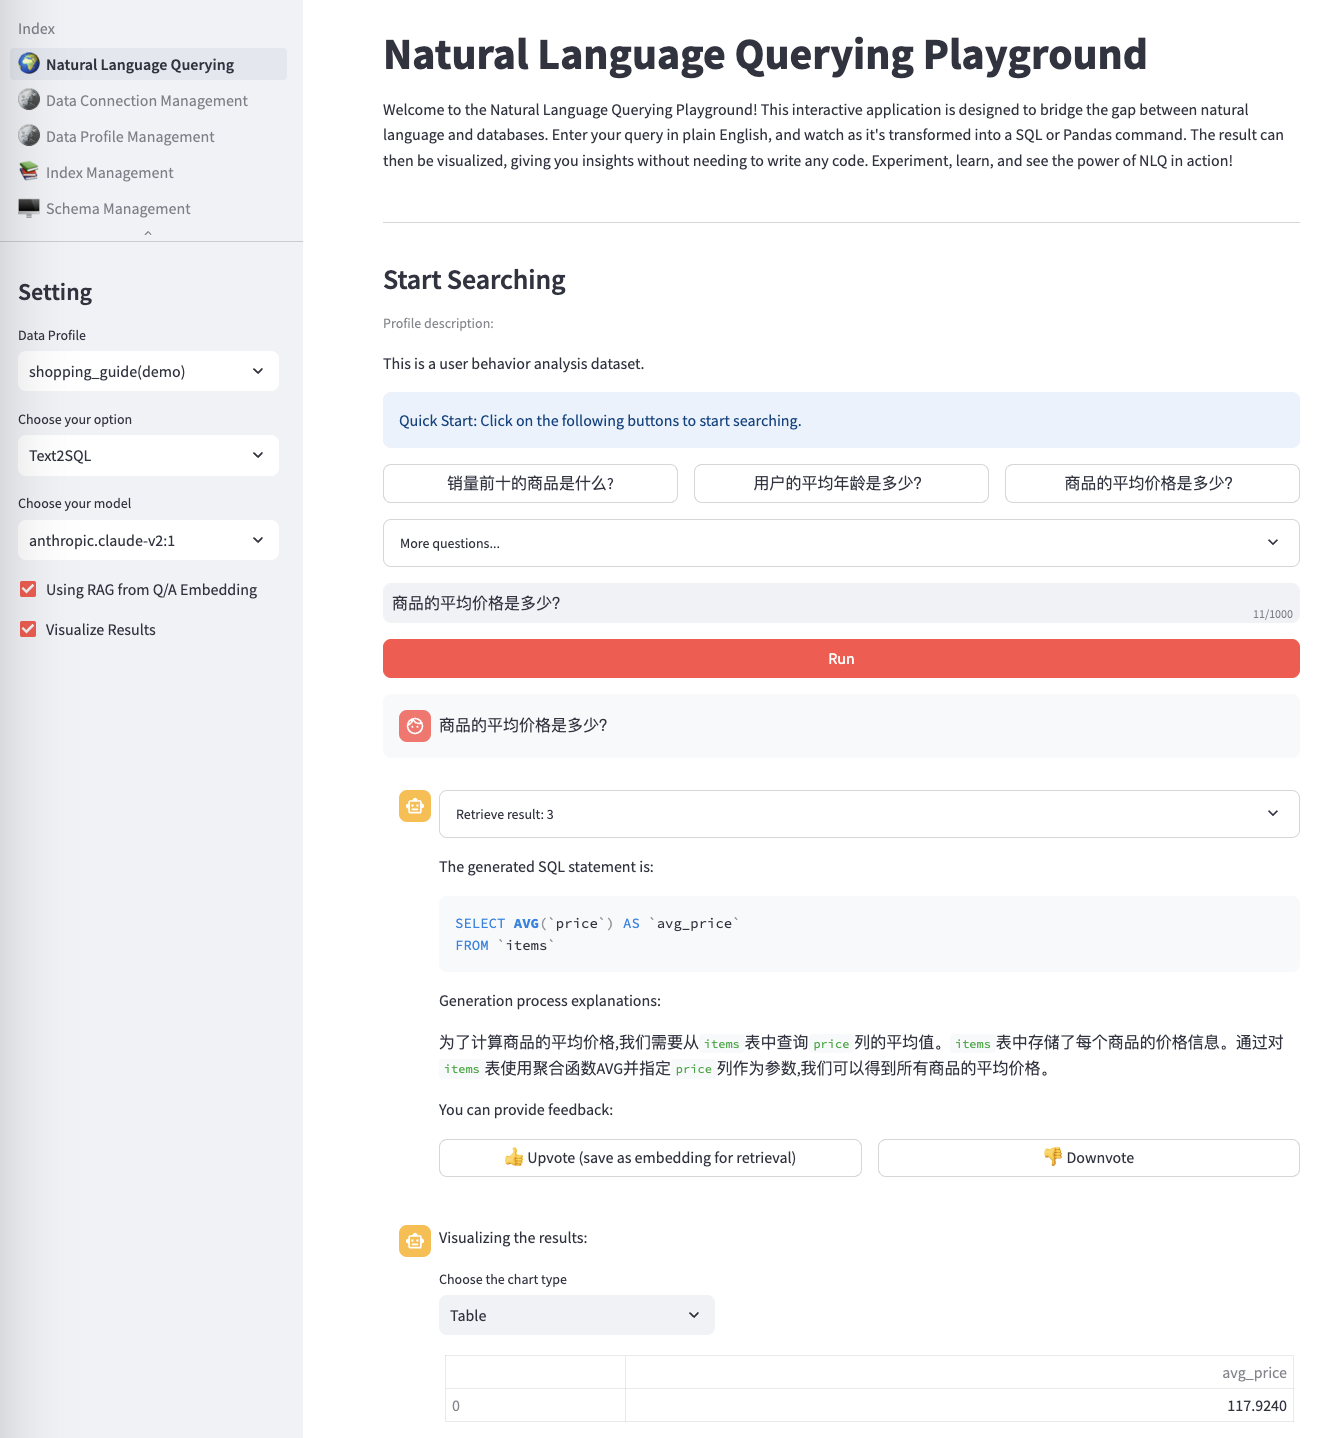
This is a comprehensive framework designed to enable Generative BI capabilities on customized data sources (RDS/Redshift) hosted on AWS. It offers the following key features:
- Text-to-SQL functionality for querying customized data sources using natural language.
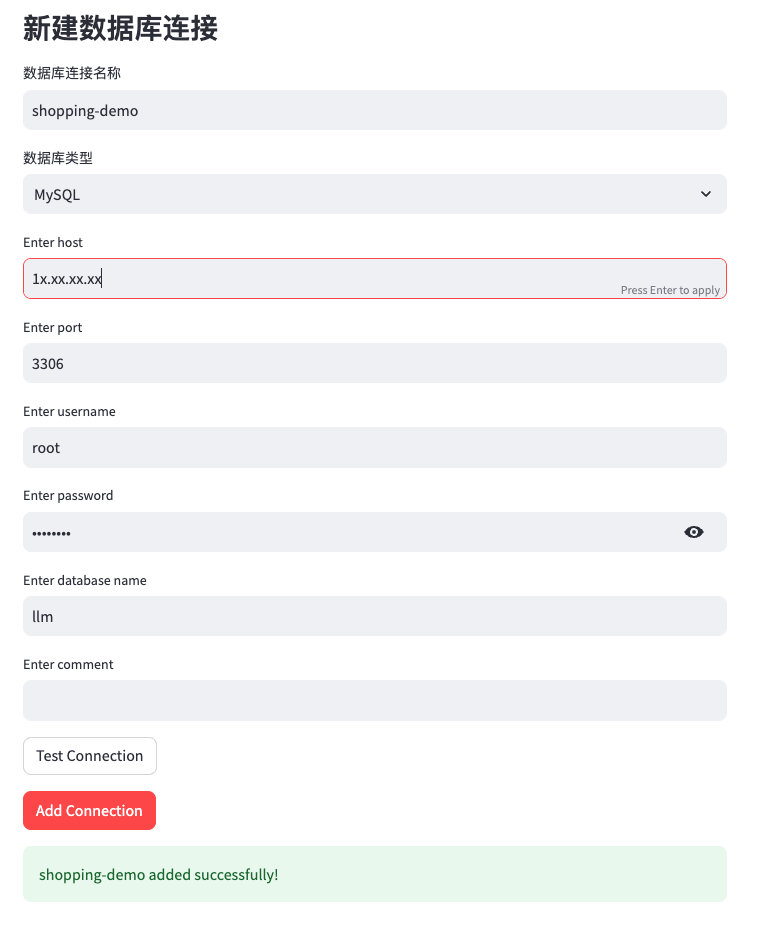
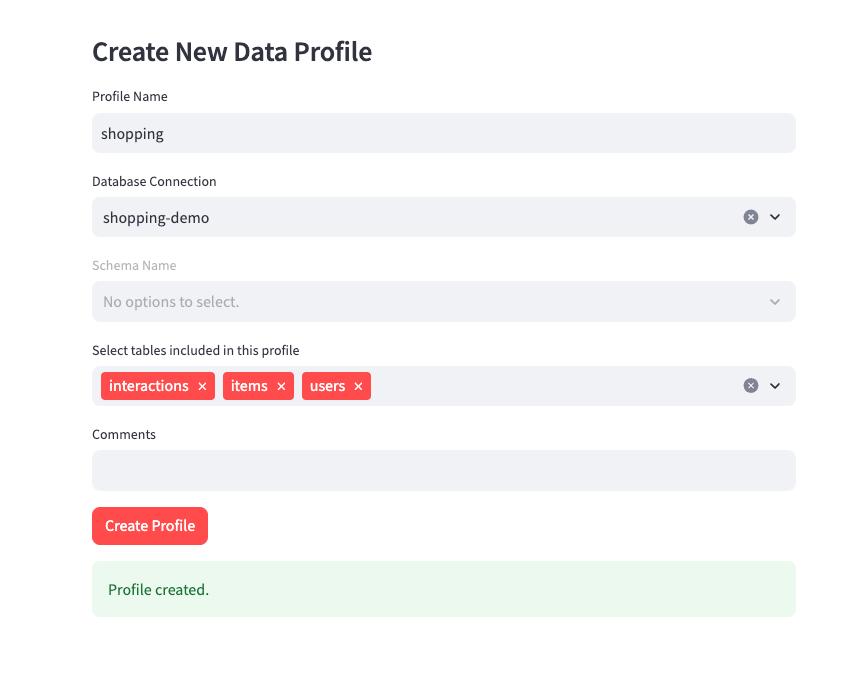
- User-friendly interface for adding, editing, and managing data sources, tables, and column descriptions.
- Performance enhancement through the integration of historical question-answer ranking and entity recognition.
- Customize business information, including entity information, formulas, SQL samples, and analysis ideas for complex business problems.
- Add agent task splitting function to handle complex attribution analysis problems.
- Intuitive question-answering UI that provides insights into the underlying Text-to-SQL mechanism.
- Simple agent design interface for handling complex queries through a conversational approach.
A NLQ(Natural Language Query) demo using Amazon Bedrock, Amazon OpenSearch with RAG technique.
Create an EC2 with following configuration:
- OS Image (AMI): Amazon Linux 2023, Amazon Linux 2(AL2 End of Life is 2025-06-30)
- Instance type: t3.large or higher
- VPC: use default one and choose a public subnet
- Security group: Allow access to 22, 80, 8000 port from anywhere (Select "Allow SSH traffic from Anywhere" and "Allow HTTP traffic from the internet")
- Storage (volumes): 1 GP3 volume(s) - 30 GiB
2.1 IAM Role's permission
Create a new IAM role with name genbirag-service-role and settings below:
- Trusted entity type: AWS Service
- Service: EC2
- Use Case: EC2 - Allows EC2 instances to call AWS services on your behalf.
Skip "Add permission" and create this role first.
After the role is created, and then add permission by creating inline policy as below:
{
    "Version": "2012-10-17",
    "Statement": [
        {
            "Sid": "VisualEditor0",
            "Effect": "Allow",
            "Action": [
                "bedrock:InvokeModel",
                "bedrock:InvokeModelWithResponseStream",
                "dynamodb:*Table",
                "dynamodb:*Item",
                "dynamodb:Scan",
                "dynamodb:Query"
            ],
            "Resource": [
                "arn:aws:bedrock:us-west-2::foundation-model/*",
                "arn:aws:dynamodb:us-west-2:**YOURACCOUNTID**:table/Nlq*"
            ]
        }
    ]
}
Finally, Bind this IAM instance profile (IAM Role) to your EC2 instance.
2.2 Amazon Bedrock's Model Permission
Make sure you have enabled model access in AWS Console in us-west-2 (Oregon) region for Anthropic Claude model and Amazon Titan embedding model.

Log in to the EC2 instance using SSH command as the ec2-user user or use the AWS EC2 Instance Connect feature in the EC2 console to log in to the command line.
In the session, execute the following commands. Note: Execute each command one line at a time.
If you are not this user, you can switch with the following command:
sudo su - ec2-user# Install components
sudo yum install docker python3-pip git -y && pip3 install -U awscli && pip3 install docker-compose
# For Amazon Linux 2,use yum to replace dnf
sudo yum install docker python3-pip git -y && pip3 install -U awscli && sudo pip3 install docker-compose
# Fix docker python wrapper 7.0 SSL version issue
pip3 install docker==6.1.3
# Configure components
sudo systemctl enable docker && sudo systemctl start docker && sudo usermod -aG docker $USER
# Exit the terminal
exitReopen a terminal session and continue executing the following commands:
Note: Execute each command one line at a time.
# Log in as user ec2-user

# Configure OpenSearch server parameters
sudo sh -c "echo 'vm.max_map_count=262144' > /etc/sysctl.conf" && sudo sysctl -p

# Clone the code
git clone https://github.com/aws-samples/generative-bi-using-rag.git

# Config the Environment Variable in .env file, modify AWS_DEFAULT_REGION to the region same as the EC2 instance.
cd generative-bi-using-rag/application && cp .env.template .env

# Build docker images locally
docker-compose build

# Start all services
docker-compose up -d

# Wait 3 minutes for MySQL and OpenSearch to initialize
sleep 180In the terminal, continue executing the following commands:
cd initial_data && wget https://github.com/fengxu1211/generative-bi-using-rag/raw/demo_data/application/initial_data/init_mysql_db.sql.zip

unzip init_mysql_db.sql.zip && cd ..

docker exec nlq-mysql sh -c "mysql -u root -ppassword -D llm < /opt/data/init_mysql_db.sql" 6.1 Initialize the index for the sample data by creating a new index:
docker exec nlq-webserver python opensearch_deploy.pyIf the command fails due to any errors, delete the index and rerun the previous command:
curl -XDELETE -k -u admin:admin "https://localhost:9200/uba"6.2 (Optional) Bulk import custom QA data by appending to an existing index:
docker exec nlq-webserver python opensearch_deploy.py custom falseOpen in your browser: http://<your-ec2-public-ip>
Note: Use HTTP instead of HTTPS.
Open in your browser: http://<your-ec2-public-ip>:8000
Note: Use HTTP instead of HTTPS.
the default account is
username: admin
password: # Please set the password following instructions below
if you want change the password or add username, you can change the
application/config_files/stauth_config.yaml
for example
credentials:
  usernames:
    jsmith:
      email: [email protected]
      name: John Smith
      password: abc # To be replaced with hashed password
    rbriggs:
      email: [email protected]
      name: Rebecca Briggs
      password: def # To be replaced with hashed password
cookie:
  expiry_days: 30
  key: random_signature_key # Must be string
  name: random_cookie_name
preauthorized:
  emails:
  - [email protected]
change the password to hashed password
from streamlit_authenticator.utilities.hasher import Hasher
hashed_passwords = Hasher(['abc', 'def']).generate()Please follow the instructions in the CDK Workshop to install the CDK toolkit.
Before deploying the CDK stack, you need to prepare the SageMaker model assets in the S3 bucket.
cd generative-bi-using-rag/source/model
bash prepare_model.sh -s <s3_bucket_name>For global regions, execute the following commands:
cd generative-bi-using-rag/source/resources
npm install
npx cdk deploy
For China regions, execute the following commands:
cd generative-bi-using-rag/source/resources
npm install
npx cdk deploy --parameters S3ModelAssetsBucket=<s3_bucket_name>After the CDK stack is deployed, wait around 10 minutes for the initialization to complete. Then, open the Streamlit Web UI in your browser: http://<your-ec2-public-ip>
Note: Use HTTP instead of HTTPS.
- First create the corresponding Data Profile in Data Connection Management and Data Profile Management.
- After selecting the Data Profile, start asking questions. For simple questions, the LLM can directly generate the correct SQL. If the generated SQL is incorrect, try adding more annotations to the Schema.
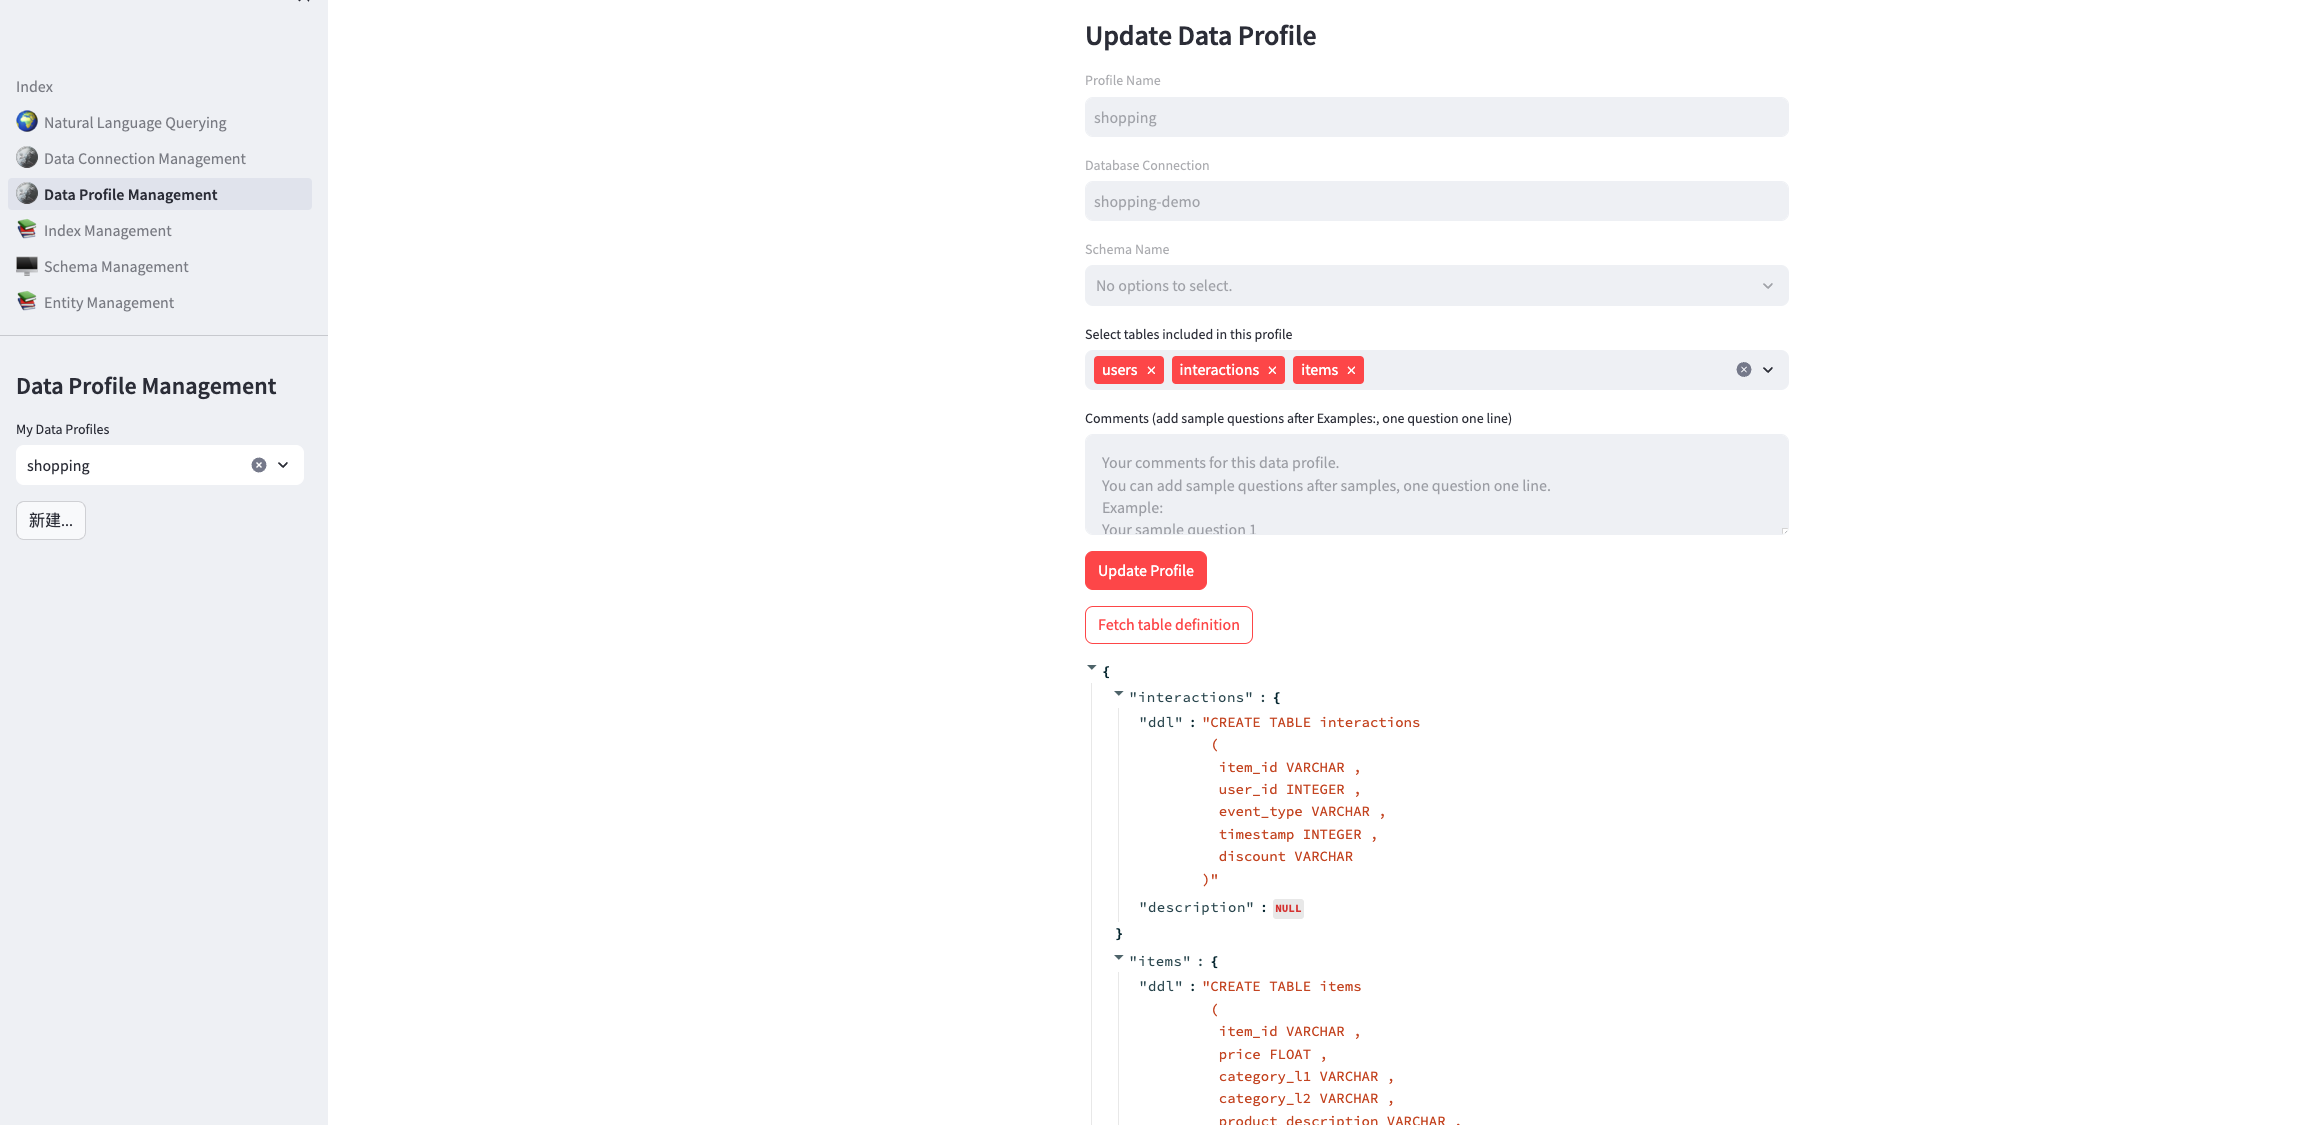
Then Refresh This Webpage, Click Fetch table definition
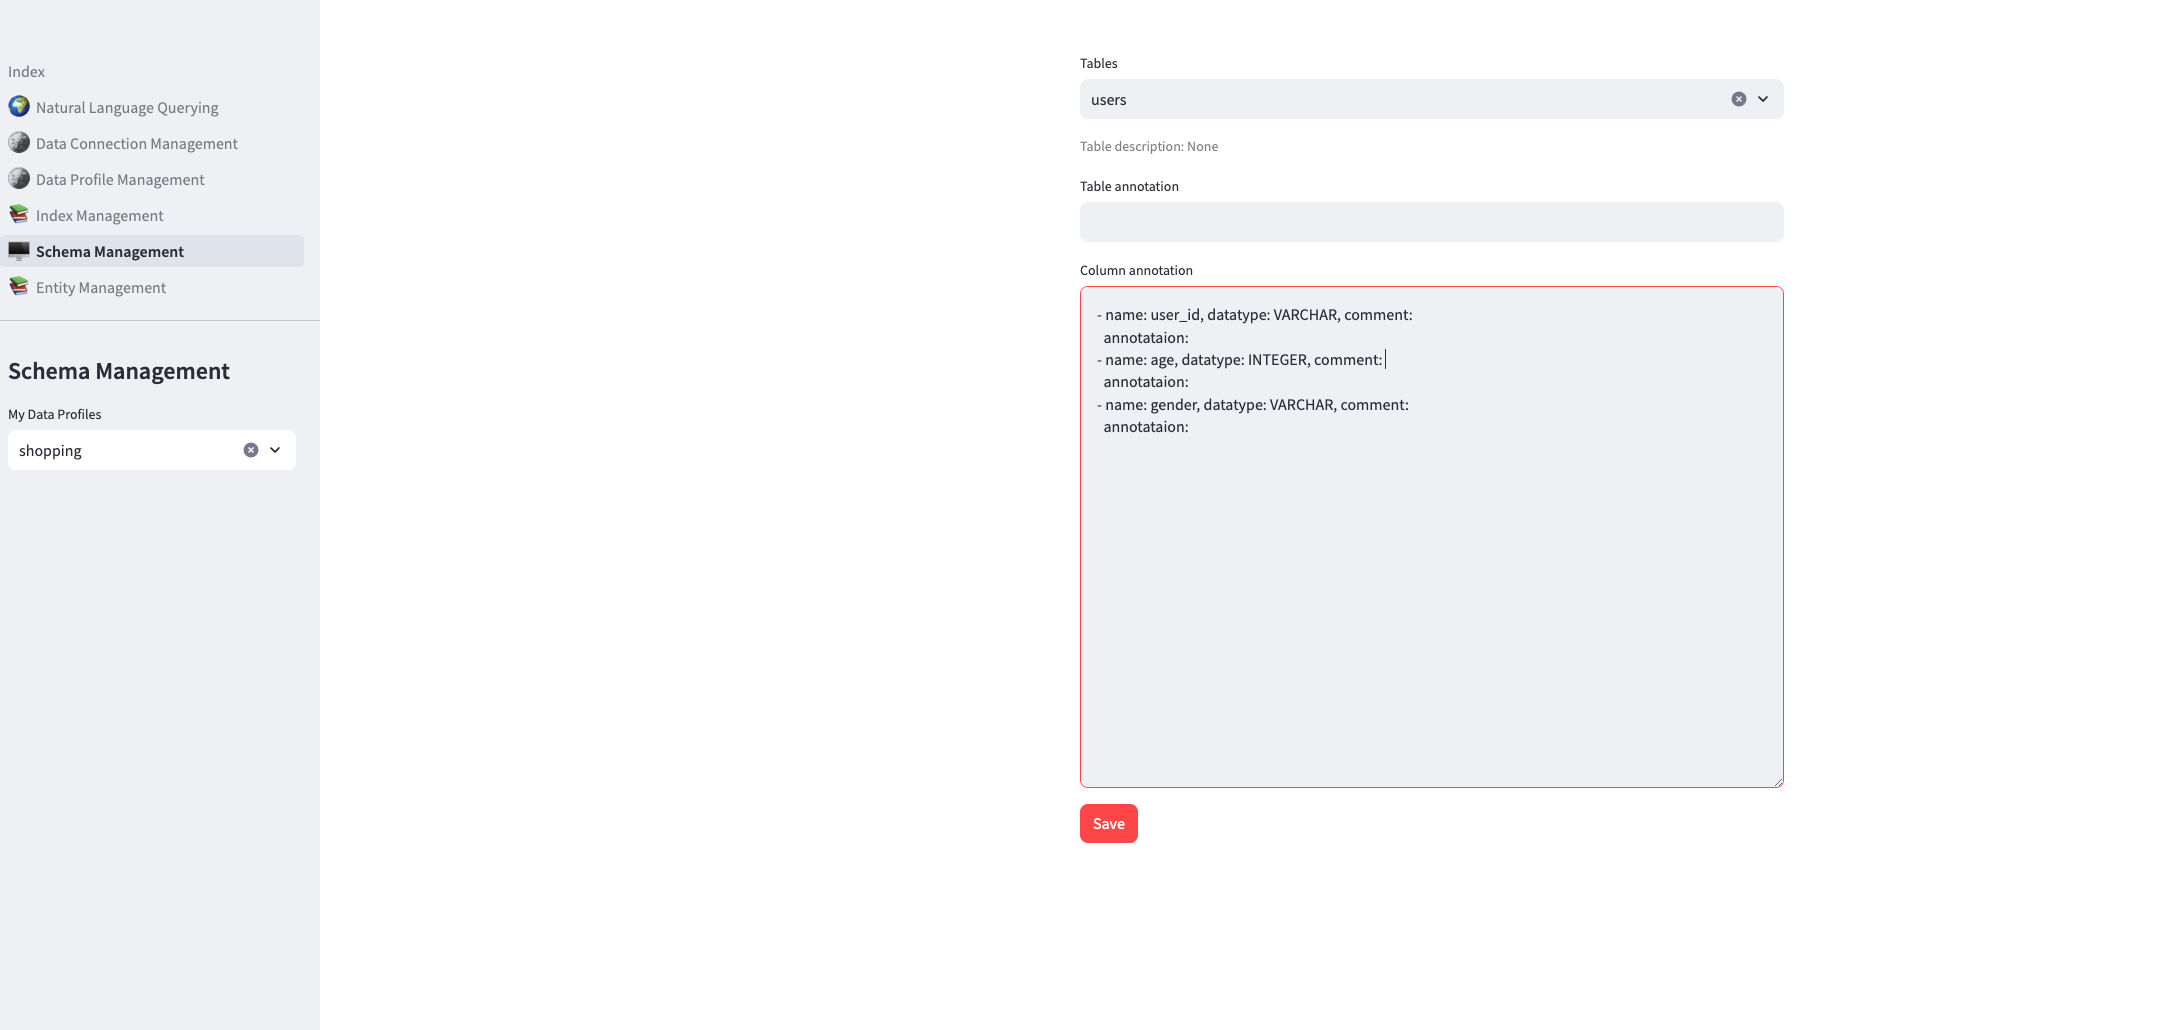
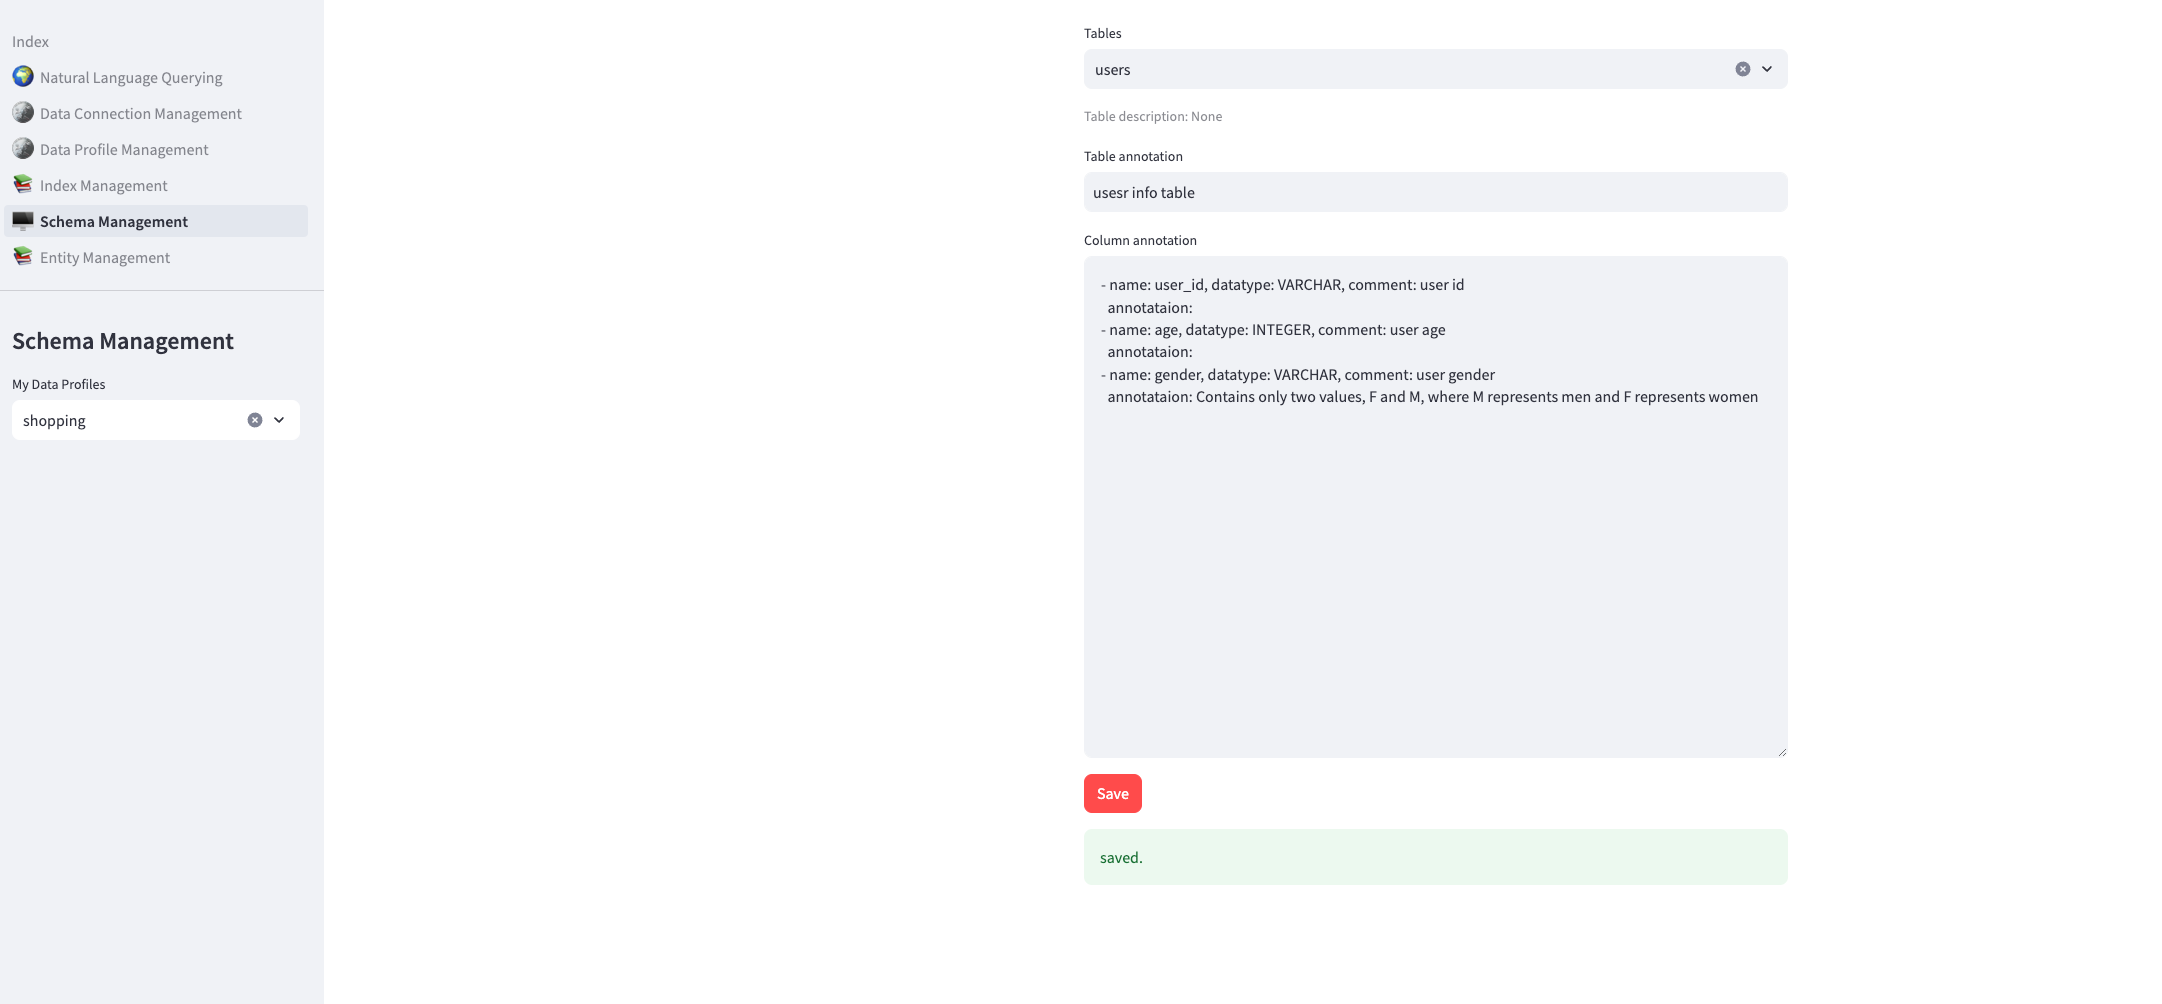
- Use the Schema Management page, select the Data Profile, and add comments to the tables and fields. These comments will be included in the prompt sent to the LLM. (1) For some fields, add values to the Annotation attribute, e.g. "Values: Y|N", "Values: Shanghai|Jiangsu". (2) For table comments, add domain knowledge to help answer business questions.
- Ask the question again. If still unable to generate the correct SQL, add Sample QA pairs to OpenSearch. (1) Using the Index Management page, select the Data Profile then you can add, view and delete QA pairs.
- Ask again. In theory, the RAG approach (PE uses Few shots) should now be able to generate the correct SQL.
See CONTRIBUTING for more information.
This library is licensed under the MIT-0 License. See the LICENSE file.
