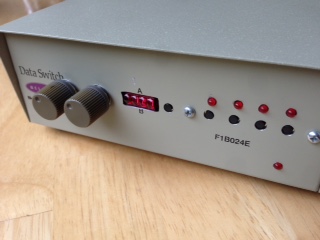
MIDI controller with 2 encoders, a 4 segment display, 5 buttons and 4 LEDs. Four of the buttons toggle specific CC messages and a corresponding LED. The encoders can be used to select a CC number and value to send with the fifth button (encode send button). One encoder has an alternate function as well to set the midi channel. The display shows the midi channel on startup and the encoder values when editing or when pushed.
Built on Teensy 3.1.
Pin 1: Midi out
Pin 2: Encoder send button
Pins 3-6: CC toggle buttons
Pins 7-10: CC LEDs
Pins 11-12 + 14-23: Display
Pins 26-28: Encoder 1 (button, left, right)
Pins 29-31: Encoder 2 (button, left, right)
Here are some of the components I used. Most are also available from other vendors. I bought from these vendors because despite my lack of hardware knowledge their websites made it easy to browse and understand what I was getting. They all ship fast and for a rate that keeps small orders affordable. Thank you to these folks, I'm happy to support them.
- PJRC Teensy 3.1
- Sparkfun 7 segment bubble display
- Sparkfun Mini Pushbutton
- Adafruit Rotary Encoders
- Adafruit Diffused Red 3mm LED
And URS Electronics brick and mortar store in Portland, Oregon.
This was built for toggling parameters of an Arturia Minibrute. When used with a Minbrute, the four buttons toggle Local On/Off, Arpeggiator Hold, LFO Retrigger and Envelope Legato. The CC number and values for each button can be changed in cc_controller.ino. The above hardware configuration leaves room on the Teensy for a couple more buttons. To add more consider a shift register.
The encoders can be used to set any valid CC number and value combination to provide some flexibility beyond the four hardcoded buttons.
There is no midi in. No midi data is read from the connected device. The state of the LEDs displayed may not match the state of the device when first connected. Toggle through the buttons to ensure they are reset and accurate.
Midi channel changes are saved and reloaded when powered on.
When powered on the display shows the midi channel to be used for sending messages. This is either the default [1] or whatever channel was last set before shut down.
Push a dedicated CC button to send a midi message to toggle its value and toggle the corresponding LED.
The encoders and encoder send button have two modes. To enter the alternate mode press and hold the encoder send button for more than two seconds.
In default mode, Encoder 1 selects the CC number to be sent. Encoder 2 selects the value to set for that number. Each has a range of 0 to 127. The encoders are also buttons. Press them to display their current value.
Press the encoder send button to send the midi message with the current number and value pair of the encoders.
In alternate mode, Encoder 1 selects the midi channel to send messages on. It has a range of 1 to 16. Press the encoder send button to set the midi channel and exit the alternate mode. The last midi channel used will be remembered between power cycles.
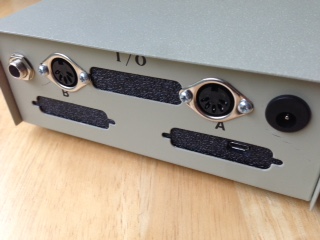
The extra jacks and led are for a
Dtronics midi to trigger kit.

