This repository contains a bare-bones example Stripe Connect application. It's purpose is to demonstrate the various pieces needed to get up and running with your own application.
This application is not meant to be used as a starting point or run in production!
This application currently uses the following Stripe API version: 2015-04-07
This application is based on Rails 4.2 and running on Ruby 2.1 (with
bundler). It will probably work fine with versions after
these, and I will endeavour to keep it up to date.
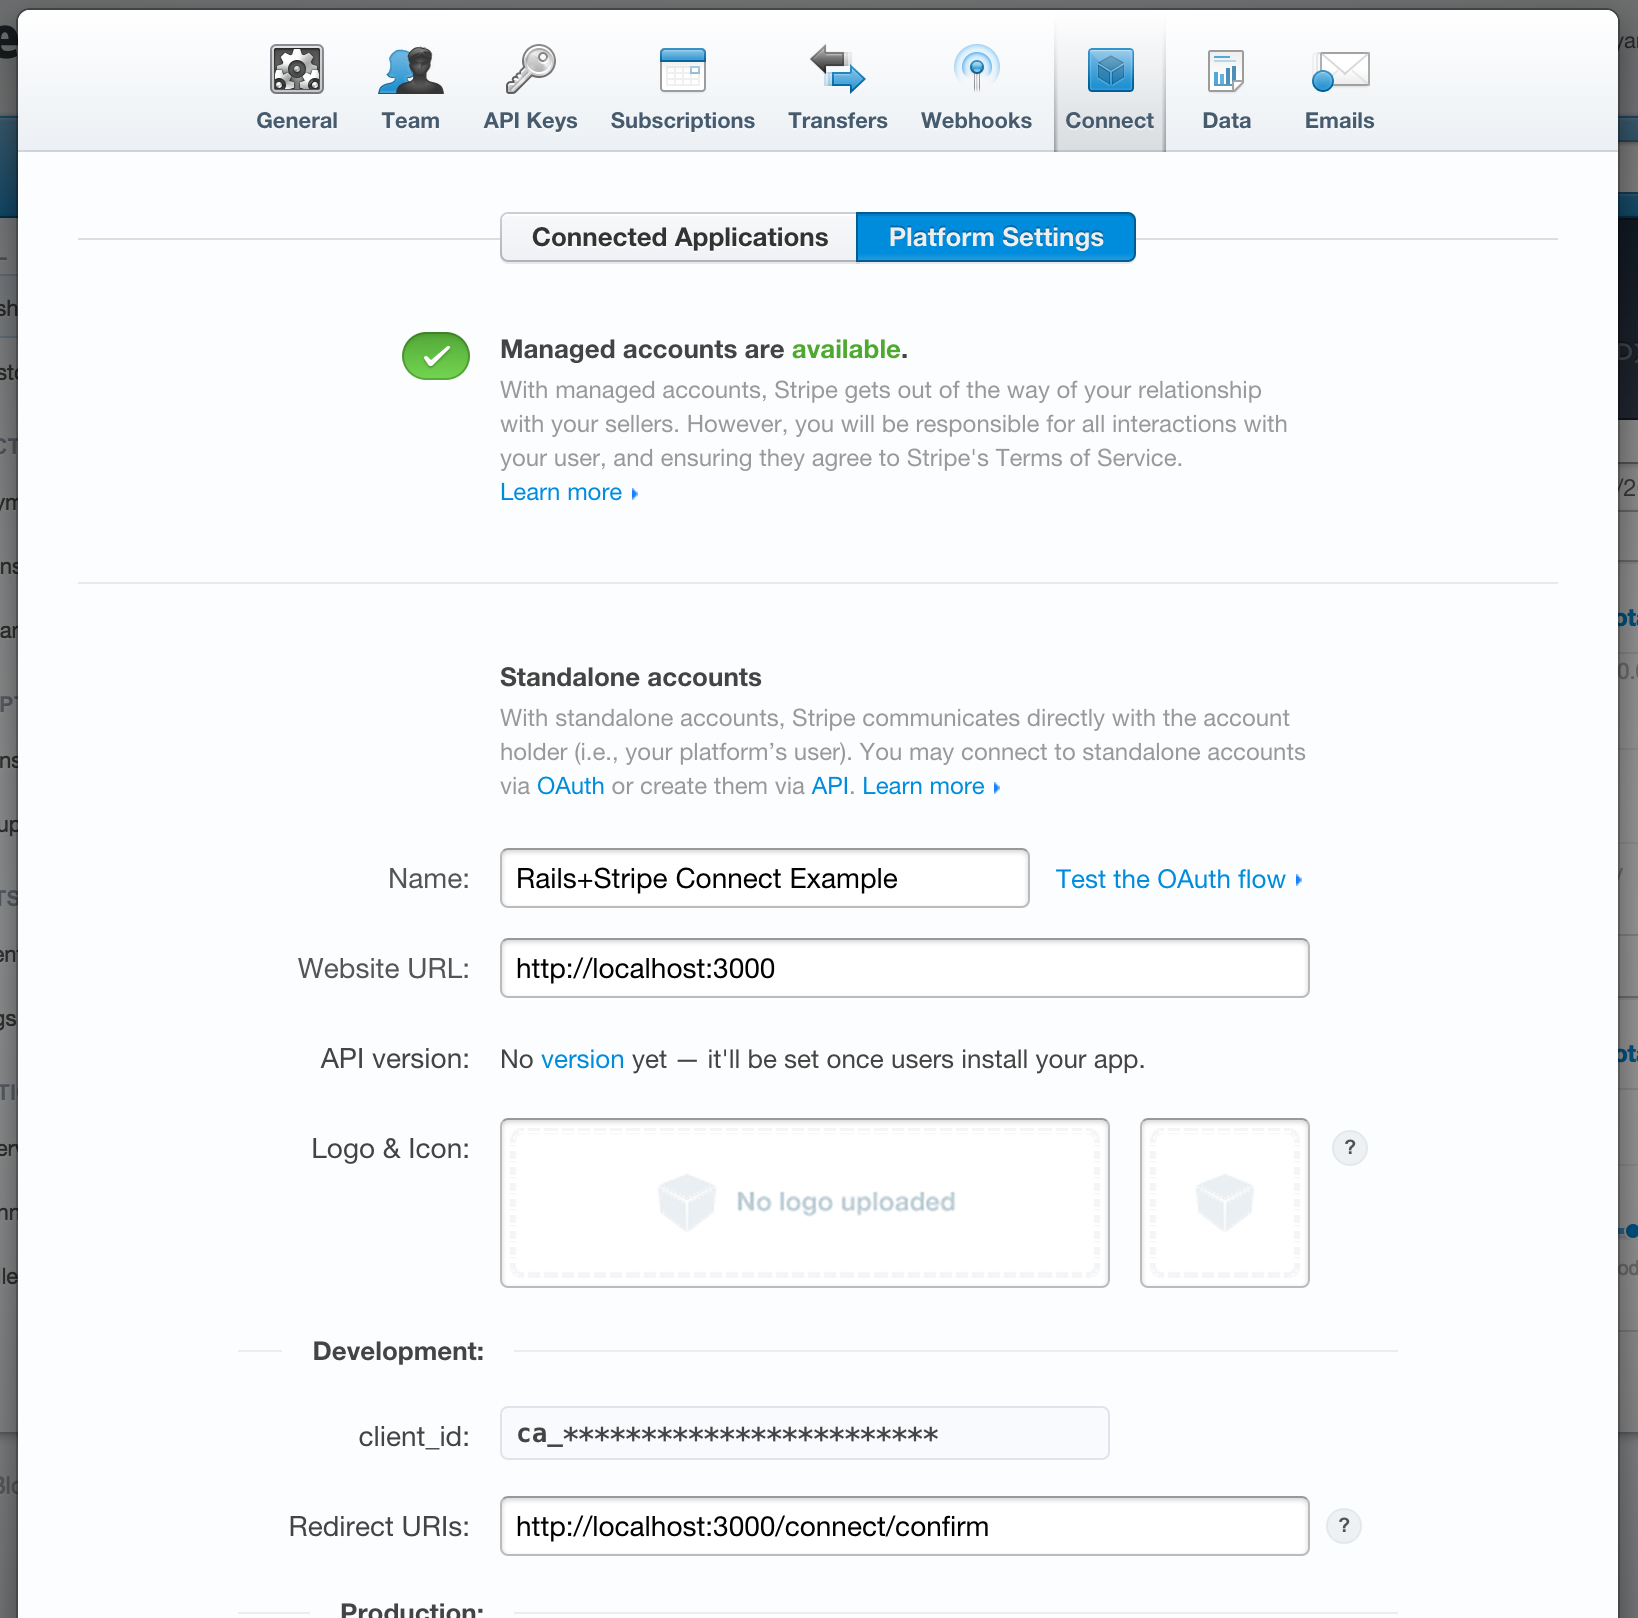
You need a Stripe account configured with a Connect application. That can be setup in your Account Settings under 'Apps'. Here's what it should look like configured:
Note the 'Redirect URIs' setting.
You'll also need the regular API keys for the same account, which you can also get in Account Settings under 'API Keys'.
To get started, first clone this repo and install dependencies:
git clone [email protected]:rfunduk/rails-stripe-connect-example.git
cd rails-stripe-connect-example
bundle install
Next we need to run the setup script that will put your various Stripe credentials in the appropriate place. Since this will be asking for API keys, you probably want to read it over first to be confident nothing nefarious is being done with your API keys :)
bin/rake app:setup
Once you get through that, your keys will be in config/secrets.yml and
picked up by Rails when you start it.
Now load the schema into the database:
bin/rake db:schema:load
And start up the server:
bin/rails s
Then as usual visit http://localhost:3000 in your browser of choice.
Optionally, if you want webhooks to work, signup for ngrok (and donate!). Then run:
ngrok -authtoken=NGROK_TOKEN -subdomain=a-name 3000
Then configure your Stripe Connect application's 'Webhook URL' on the
application settings page
to be http://a-name.ngrok.com/hooks/stripe.
The account.application.deauthorized webhook will do the right
things, but to see others you'll want to just look at the Rails request log.
If you want to try out a subscription with Stripe Connect, add some plans to your application's account on the dashboard.
Visit the app and click 'Get Started'. You'll be prompted to create a user account. This app has a basic user login/cookie-based session system.
Connect to Stripe. You'll have the option of 3 different types of connection:
Create an account or connect to an existing account via an OAuth flow.
You may want to do this in an incognito window or similar so that you don't accidentally connect your platform/main account to itself which will be very confusing.
It's probably best to make another Stripe account with a test email
address (eg, with Gmail you can do things like [email protected]
to make this easier), or you can just use the 'Create New Account...'
option in the menu at the top right of your Stripe dashboard.
When you click 'Connect', look for the development mode bar at the top of the page:
...and click Skip this account form... if you aren't activated yet.
This account + Stripe connection becomes the 'seller'.
You can create a standalone Stripe account via the API, which doesn't require the user to leave your site at all.
Doing this is a simple matter of choosing a country and clicking 'Create'
This account + Stripe connection becomes the 'seller'.
You can create an entirely managed-by-you Stripe account via the API. With this method the user will have the least interaction with Stripe.
Doing this is a simple matter of choosing a country, agreeing to the Stripe Terms of Service, and clicking 'Create'.
Currently managed accounts are in beta and only available to US or Canadian platform accounts.
This account + Stripe connection becomes the 'seller'.
Now log out of the example app and signup again for another account. This time don't bother connecting to Stripe (although you can if you want).
This account becomes the 'buyer'.
Purchase something from the seller as the buyer! Visit http://localhost:3000/users and choose the connected/seller account. And make a payment or subscribe to a plan.
Go through the code! I've tried to heavily comment the relevant and most important parts of the code. Let me know if anything is unclear or broken by opening an issue or sending me an email.
I suggest perusing the Connect docs before trying to dig into the code.


