PhageSnake is a basic automated bacteriophage(phage) genome analysis workflow, coded by Snakemake. PhageSnake runs on Linux platform. Phagesnkae was designed to make phage genome analysis easy by creating an all-in-one workflow.
The light release is recommand to use.
Or the whole git is available to download by git clone https://github.com/rockNhu/phagesnake.git
It was easier to rebuild an environment by CONDA.
Used software was listed in ./envs/phagesnake.yaml.
cd phagesnake
conda create -n phagesnake -f ./envs/phagesnake.yamlThe database would download from INPHARED.
The location of the download database is set in config.yaml, and an absolute path is recommended.
The "db_prefix" parameter was the time INPHARED database updated, e.g. 1Sep2024.
Also, the 1Sep2024 database and pre-alignment is available at Database of PhageSnake
gunzip Database/*Or the database could be updated by hand use the setup.smk.
And the setup.smk is to autonomous download use the "db_prefix" in config.yaml.
conda activate phagesnake
snakemake -s scripts/database_install/setup.smk --cores 40conda activate phagesnake
download_eggnog_data.py --data-dir DatabaseR options(repos=c(CRAN="https://cloud.r-project.org/"))
install.packages("stringr")
install.packages("magrittr")
install.packages("dplyr")
install.packages("tibble")
install.packages("purrr")
install.packages("tidyr")
install.packages("ggplot2")
install.packages("DT")
install.packages("shiny")
install.packages("shinyjs")
install.packages("shinyWidgets")
install.packages("shinythemes")
install.packages("seqinr")
install.packages("BiocManager")
BiocManager::install("IRanges")
install.packages("reshape2")
install.packages("pheatmap")
install.packages("fastcluster")
install.packages("parallelDist")
install.packages("furrr")
install.packages("future")
BiocManager::install("ComplexHeatmap")All the input files were phage nucleotide genome assemblies in FASTA type, them will be put in fna_files in default setting.
They would be copied into a new folder, default input directory was set as fna_files, it could be changed in config.yaml.
When all configs were correct, the workflow could run easily.
conda activate phagesnake
snakemake -s phagesnake.smk --cores 6
If Cluster Server was available, the workflow also could run as follow:
conda activate phagesnake
snakemake -s phagesnake.smk --cluster 'qsub -d . -e error.log -o output.log' -j 4
The Directed Acyclic Graph(DAG) plot of PhageSnake:
The common used Directed Acyclic Graph(DAG) plot of PhageSnake:
You can change the corresponding settings in config.yaml
This sub-workflow part present as annotations in the DAG plot.
- To find Open Reading Frames(ORFs), Prodigal was used with
-coption, only to save closed ORFs. - To get protein alignments, the accelerated NCBI BLAST+ tool DIAMOND with INPHARED database was used.
- For more annotation(KEGG, GO, EC, Pfam, etc.), EggNOG with its database was used.
- Finally, comprehensively considered the protein annotations in alignments, using Biopython to make the final annotated genome:
.gbk. - The genome visualization was plotted using Dna Features Viewer. In the genome plot, the colors of ORFs mean different functions of phage:
- To check drug resistance genes and viral factors in the genome, ABRicate was used to align the genome to its database. Finally, output
abr_check.tsv. Ifabr_check.tsvis empty, the genome was safe for humans.
| Color | Function |
|---|---|
|
|
Hypothetical |
|
|
DNA metabolism |
|
|
Lytic |
|
|
Package |
|
|
Structure |
|
|
Host dependent |
This sub-workflow was present as genome_stat in the DAG plot.
- Statistic GC%, scaffolds number, length, and ORFs number, only Python was used.
| Statistics | Description |
|---|---|
| GC% | (G+C)% in whole genome |
| scaffolds number | Scaffolds of genome, to check the genome quality |
| length | How many base pairs in genome |
| ORFs number | Predict Open Reading Frames number in genome |
This sub-workflow part present as nucl_align in the DAG plot. It is a taxonomy-related workflow. Align to the neibour genomes could show what species it is.
- MMseqs2 was used to align the phage genome with the INPHARED database. The output in this step is
blastn.tsv. - The
blastn.tsvwas filtered by identity > 75% and coverage > 75%(The coarse genus range) of alignment, and the output file wasblastn.list, it recorded NCBI genome accession ids. - Using the "acc." ids to catch the sequence and calculate Average Nucleotide Identity(ANI).
- ANI was calculated by VIRIDIC, the final output file were all in
viridic_output.
This sub-workflow was present as terL_tree in the DAG plot.
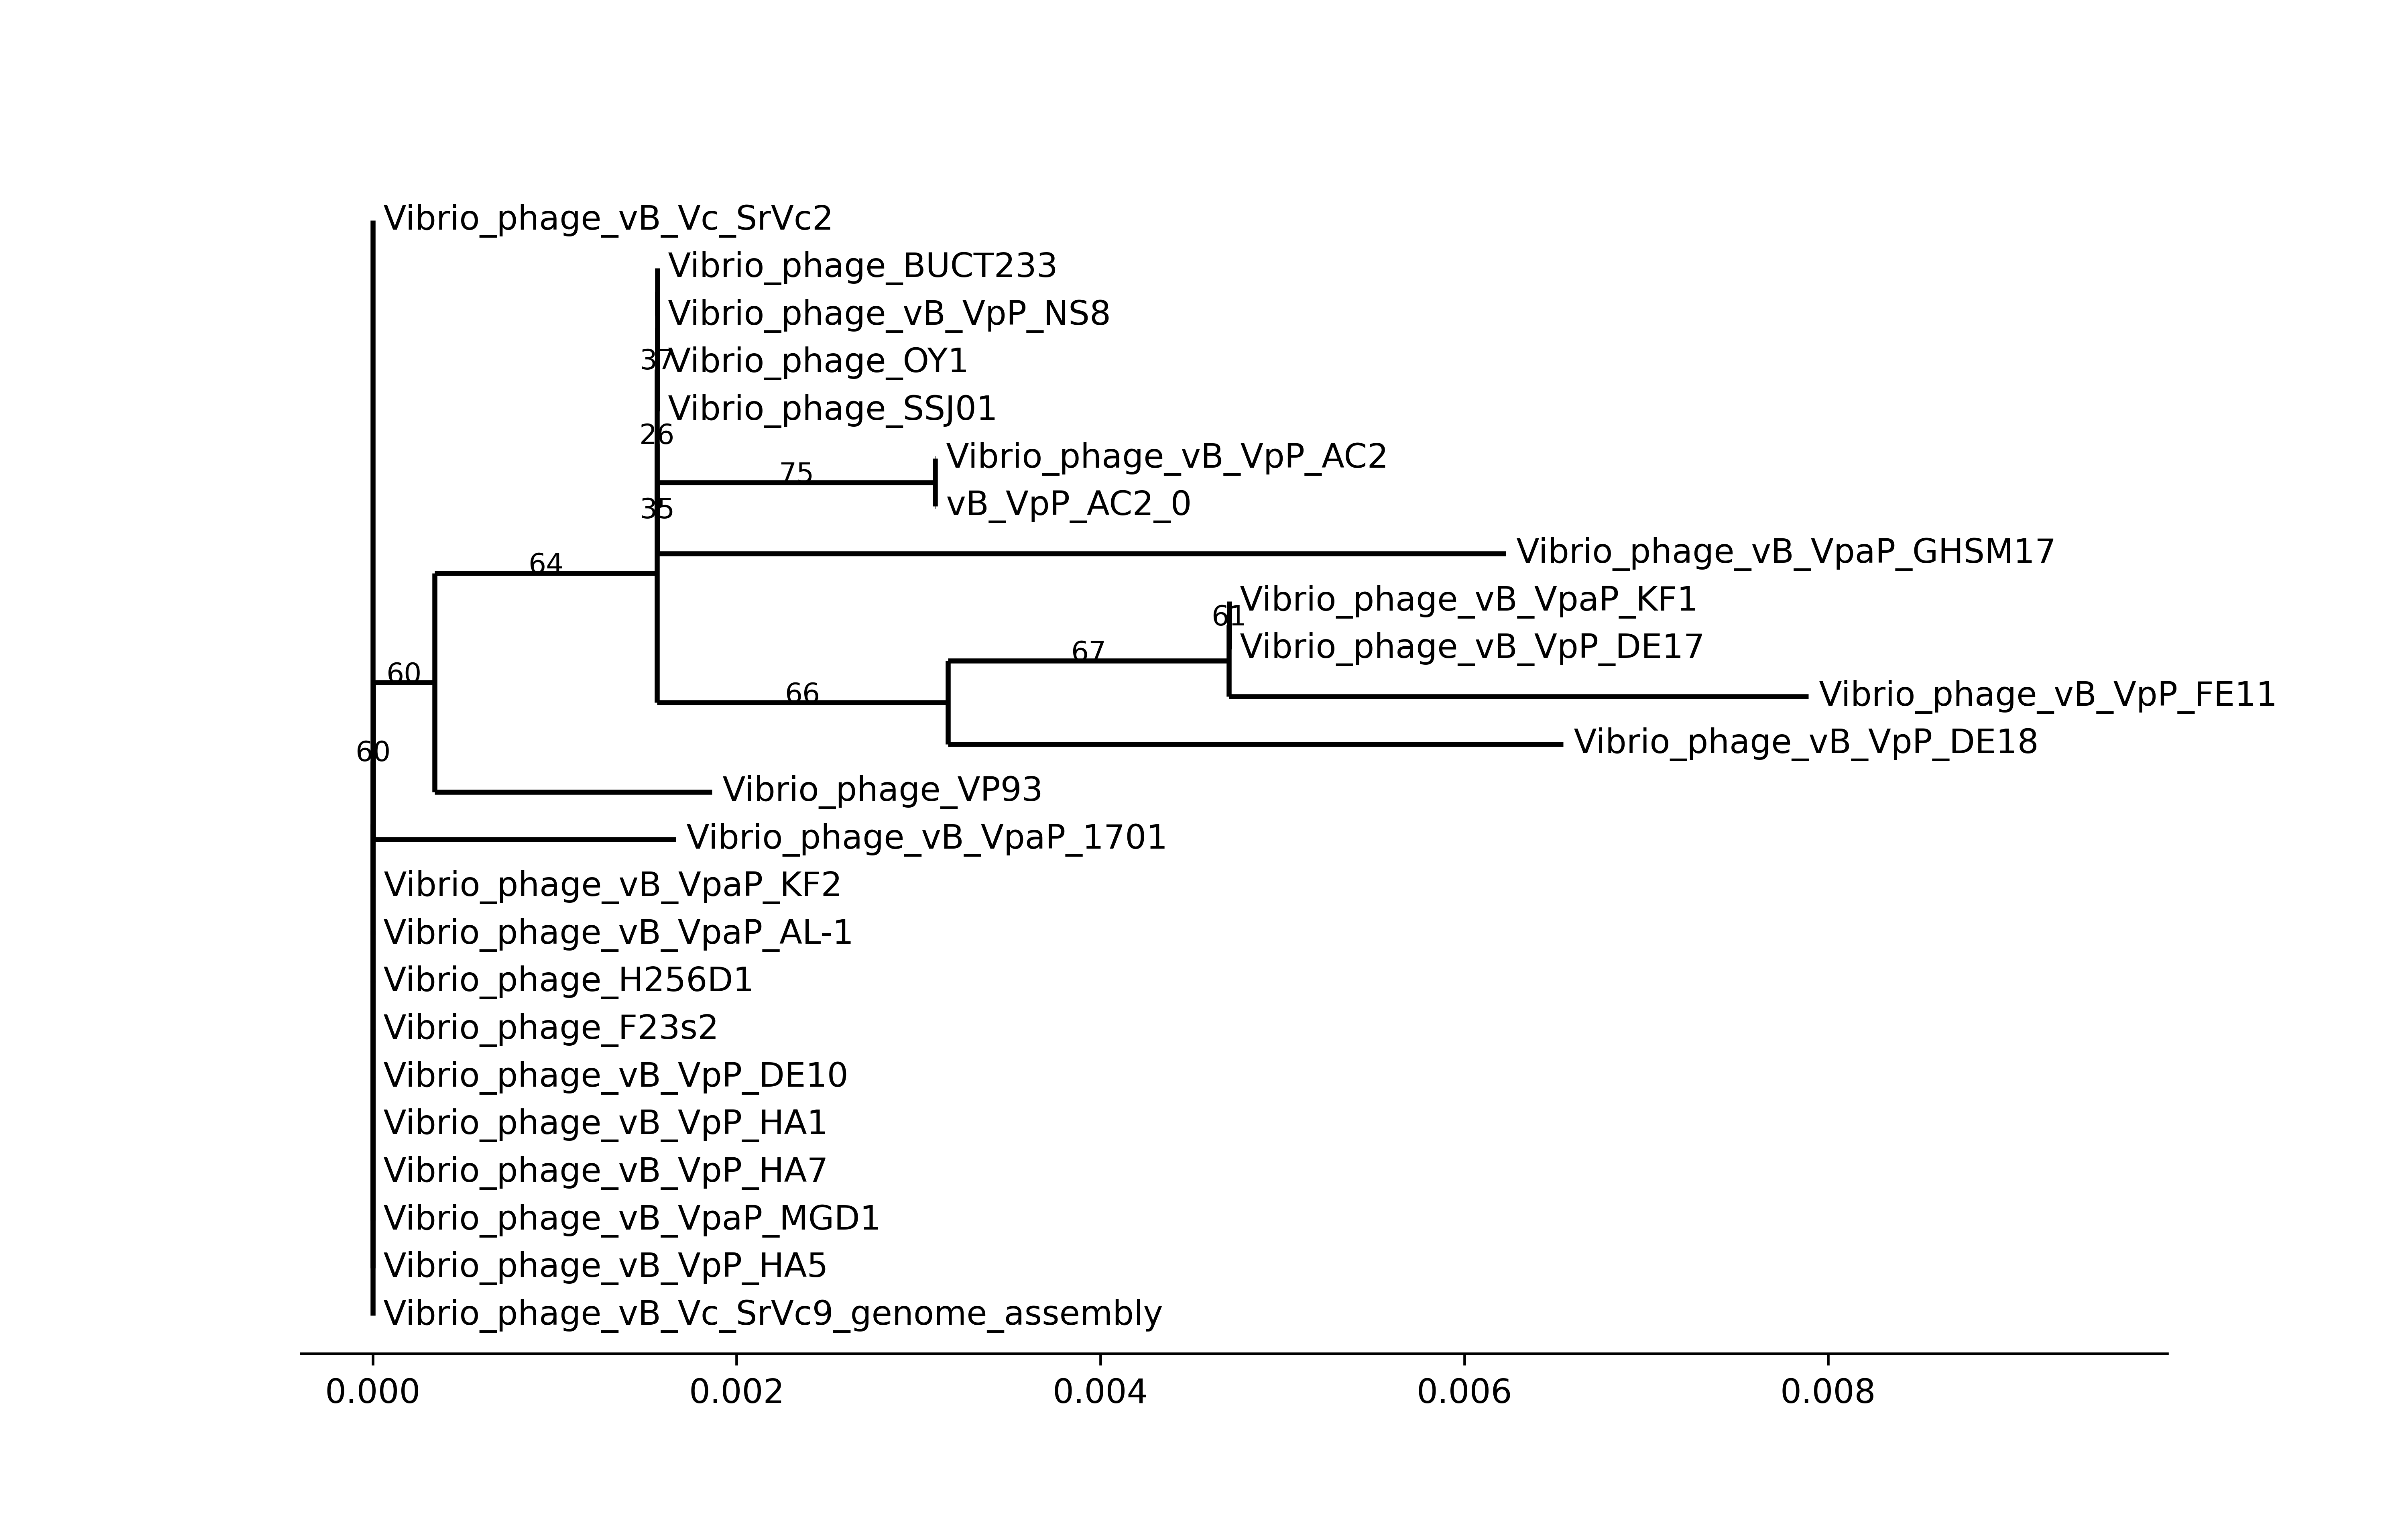
Terminase Large subunit(TerL) was a common gene in DNA phages(but not in every phage), so it was always used for phylogenetic analysis.
- First, prepare for analysis. To get TerL, used alignment output from the Annotation workflow. The TerL of the phage was found in annotations of it, and others were found in protein alignment.
- Then, MAFFT was used to align all TerLs and IQ-Tree to build a phylogenetic tree.
- Finally, visualization of the tree was plotted by the
Phylopackage of Biopython
This sub-workflow was present as run_vConTACT in the DAG plot.
- First, input files of vConTACT were also collected from the Annotation workflow.
- Then, an accelerated method from MetaPhage was used in this workflow.
- Finally, visualization of the network was plotted by graphanalyzer, it was also recommended in the article provided accelerated method. This step is in beta.
The accelerated method was successful, but would also be taken a very long time in vConTACT calculation. So, this part was optional. It meant the phages were novel enough and it was necessary to get taxonomy around the genus level, this part was recommended.
If this part was necessary, set run_vConTACT as True in config.yaml (default was False).
The example data were in fna_files. All the examples were downloaded from NCBI Genbank database.
- The assembly only had 1 contig was the best. In example data,
vB_VpP_AC2.fastahad a complete genome. - Sometimes, the phage genome assembly had multiple genomes. Each contig of assembly should be considered a separate genome. In the default PhageSnake workflow, it would be divided into contigs and analyzed one by one. If any length of contig was lower than 5000 bp, it would be skipped.
All results were in output.
PhageSnake also have a convient scripts called outzip.sh to zip the import output files.
bash outzip.shThe protein annotation of genome, using arrow plot with .gbk.

