
The officially unofficial public-facing website for RAiD.
Explore the docs and repo »
View Site
·
Report Bug
·
Request Feature
Table of Contents
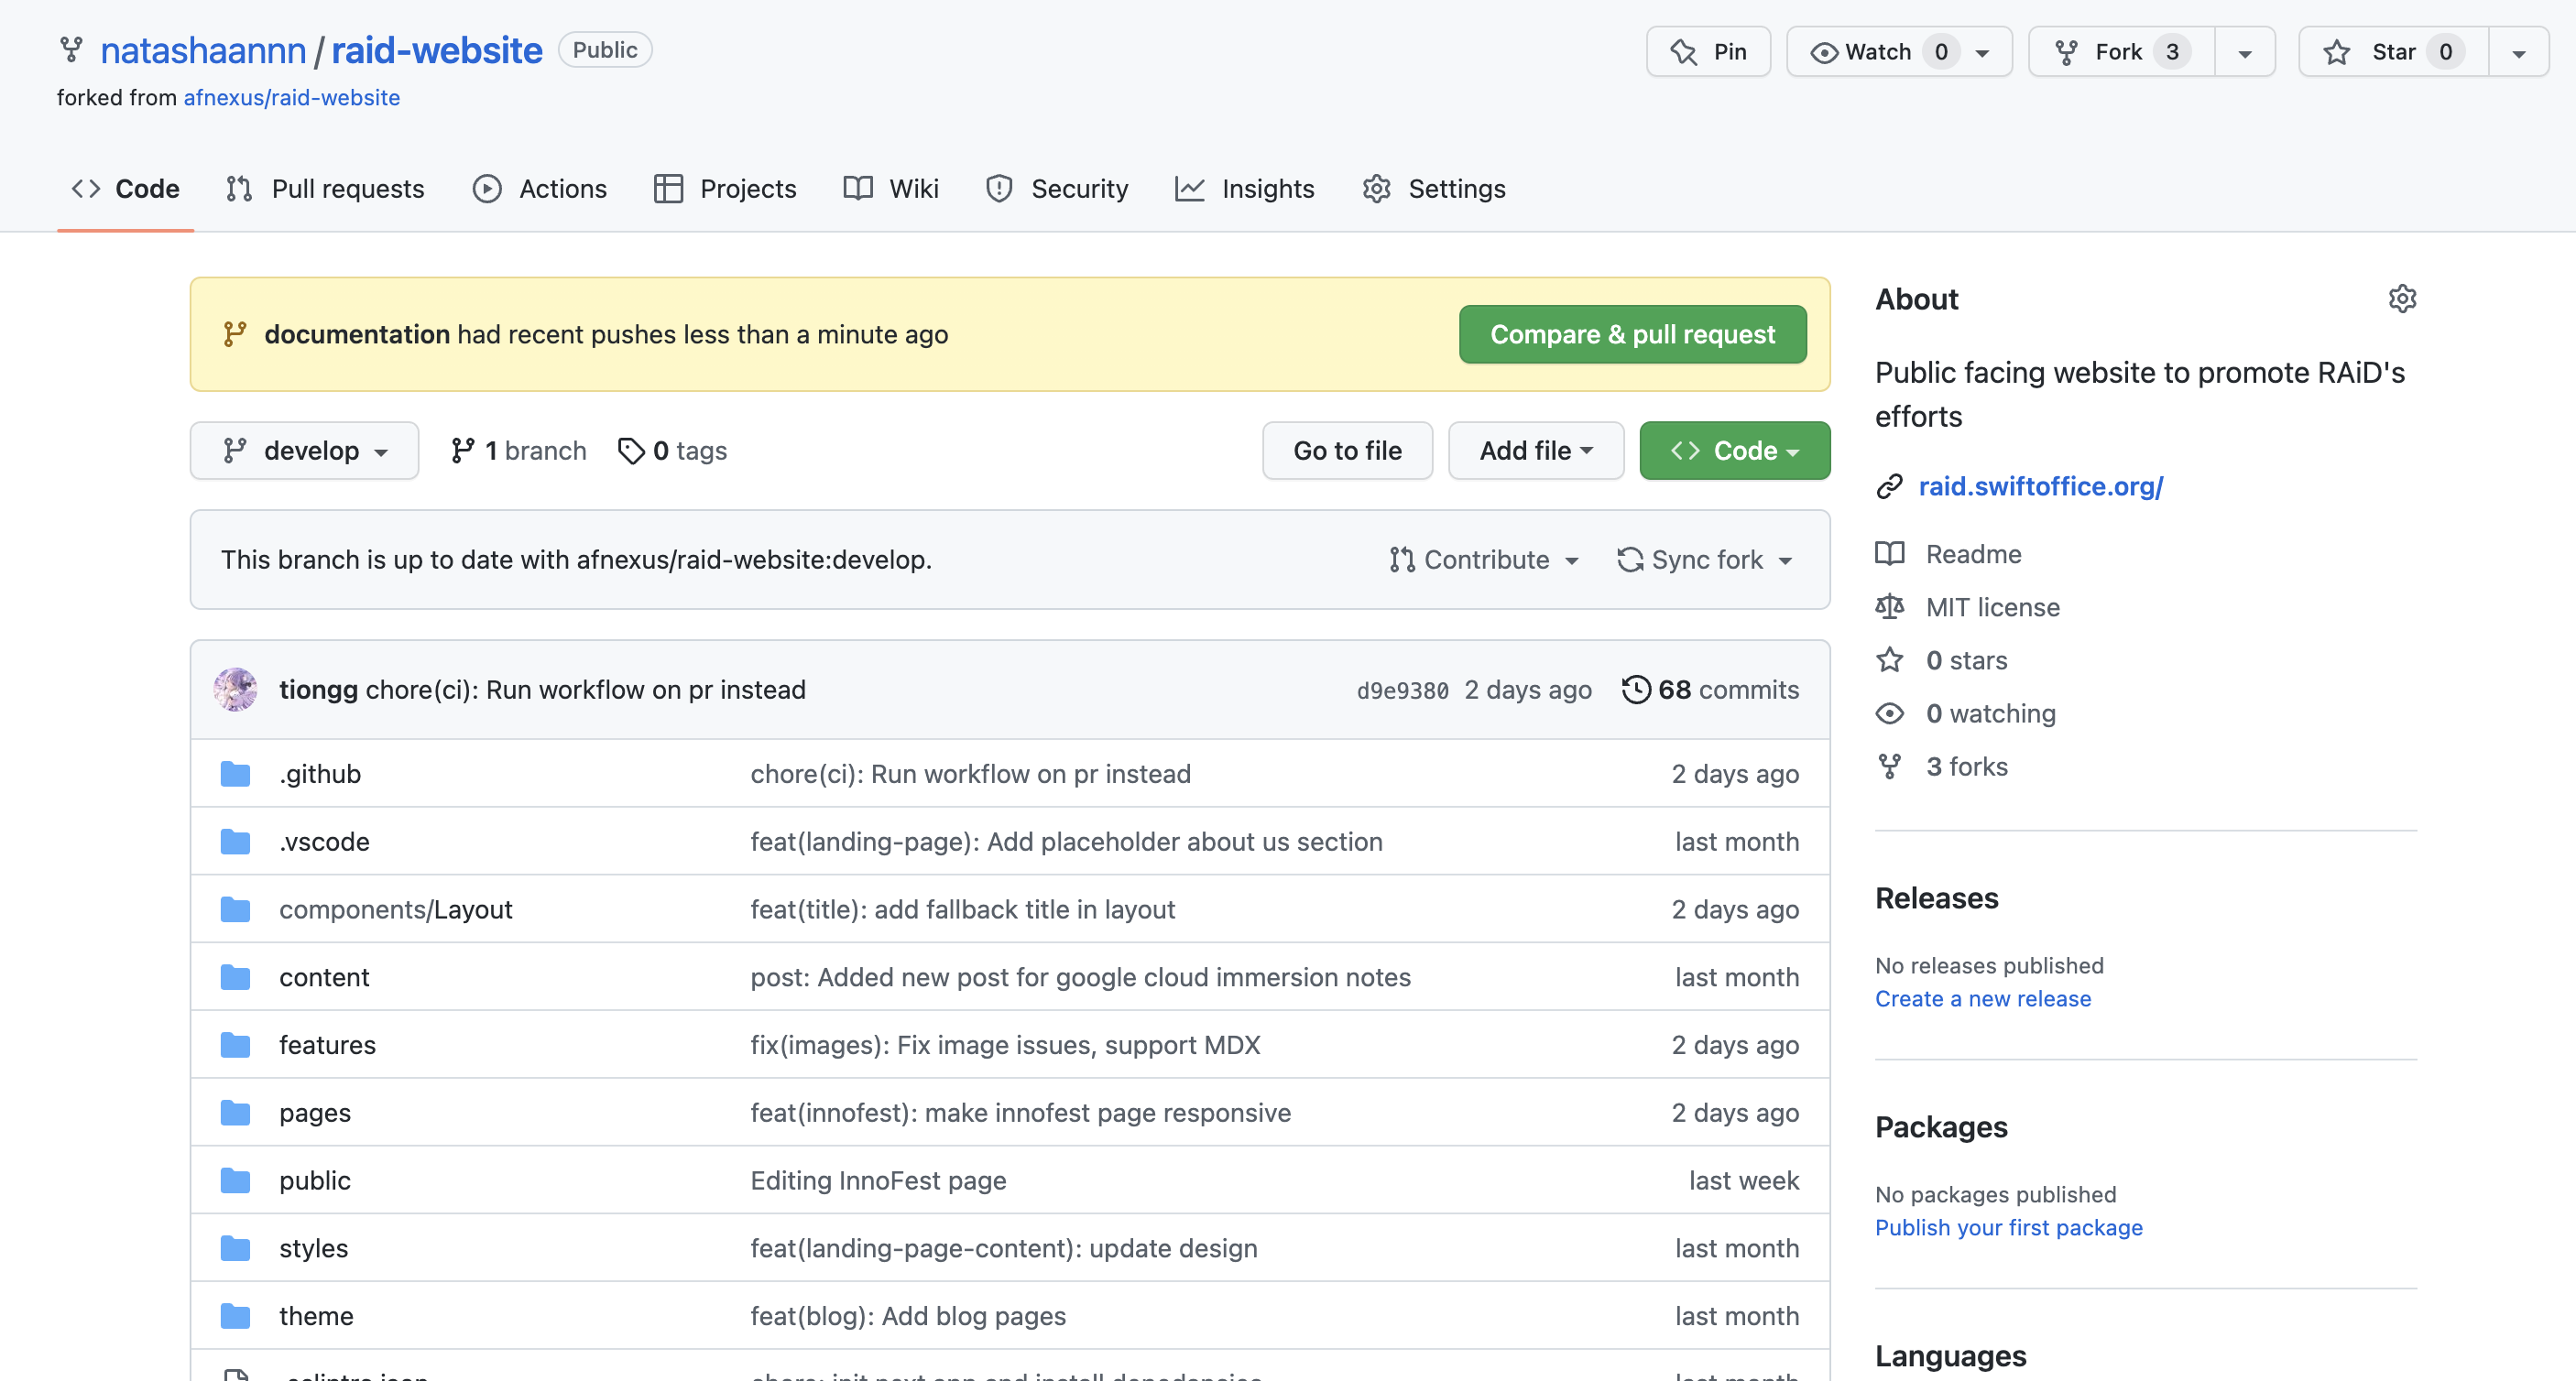
This is the public repository for the RAiD website! We encourage all members of RAiD to try their hand at contributing to the website as an open source contributor, and in so doing, learn what it truly means to contribute to open source.
First, run the development server:
npm run dev
# or
yarn dev
Open http://localhost:3000 with your browser to see the result.
- npm
npm install npm@latest -g
-
Clone the repo
git clone https://github.com/your_username_/raid-website.git
-
If you do not have yarn installed, install yarn
npm install --global yarn- Install NPM packages through yarn
yarn install
The RAiD website is RAiD's first open-source project on Github. Anyone can contribute tothe RAiD website, be it to create a new post in our Blog or Events page, to introduce a new feature enhancement or even to fix bugs on the website.
You may follow the relevant tutorials based on your role as a contributor:
The following tutorial assumes you have no knowledge of Github and coding in general, and follows the process of how to create a simple blog or event post as a content editor.
For contributors who are developers coming in to introduce new features and fix bugs, you may look at the Contributing As A Developer tutorial.
This tutorial covers the following:
- Create a Github Account
- Fork the Project
- Navigating to Your Forked Repository
- Create Your Branch
- Editing Content In Github
- Commit Your Changes
- Push to the Branch
- Open a Pull Request
To contribute to a project, you first have to create a copy of the project in your personal github account. The following instructions takes reference from Github's tutorial of how to fork a repository.
-
On GitHub.com, navigate to the afnexus/raid-website repository.
-
In the top-right corner of the page, click Fork.

-
Select an owner for the forked repository. This is usually your personal github account!
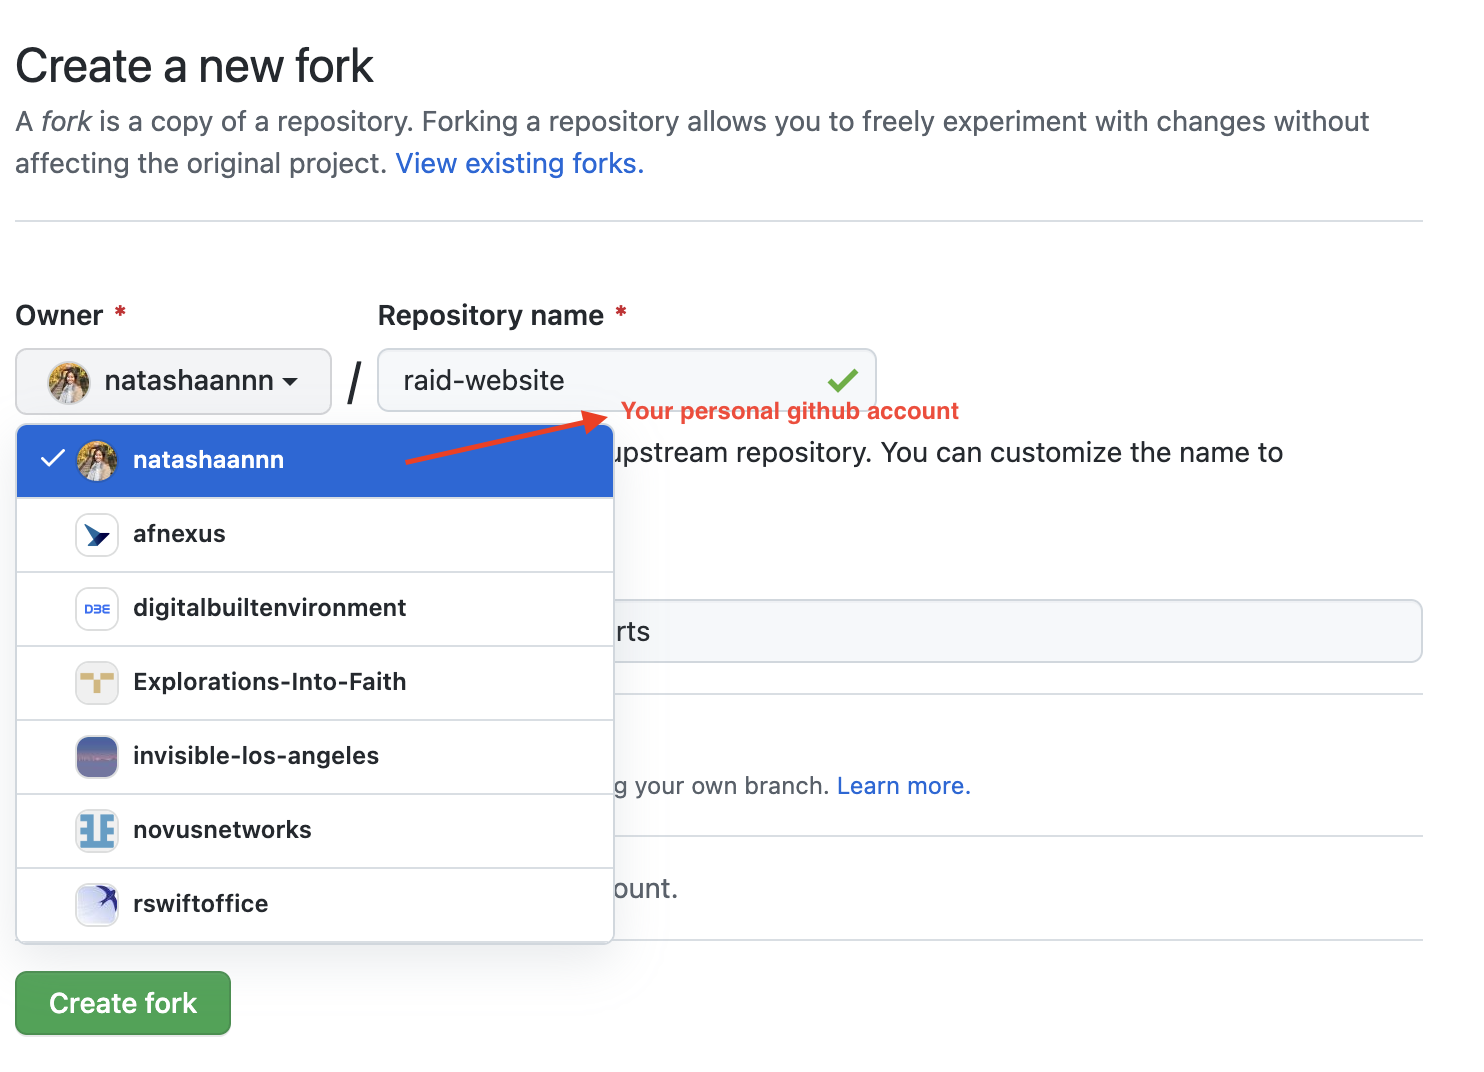
-
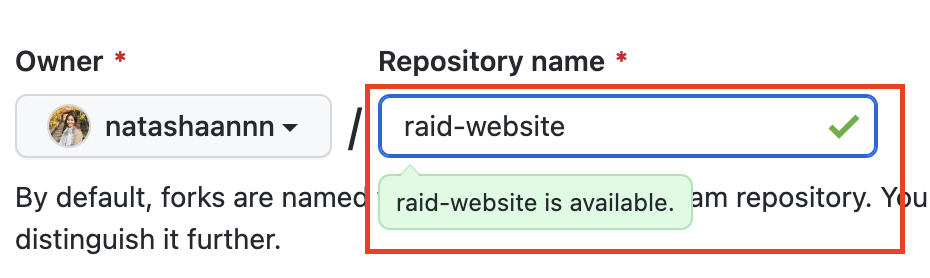
By default, forks are named the same as their upstream repositories. You can change the name of the fork to distinguish it further.
-
Optionally, add a description of your fork in the
descriptionfield. -
Ensure that the checkbox beside Copy the
developbranch only is checked. By default, only thedevelopbranch is copied.
-
Click Create fork.
-
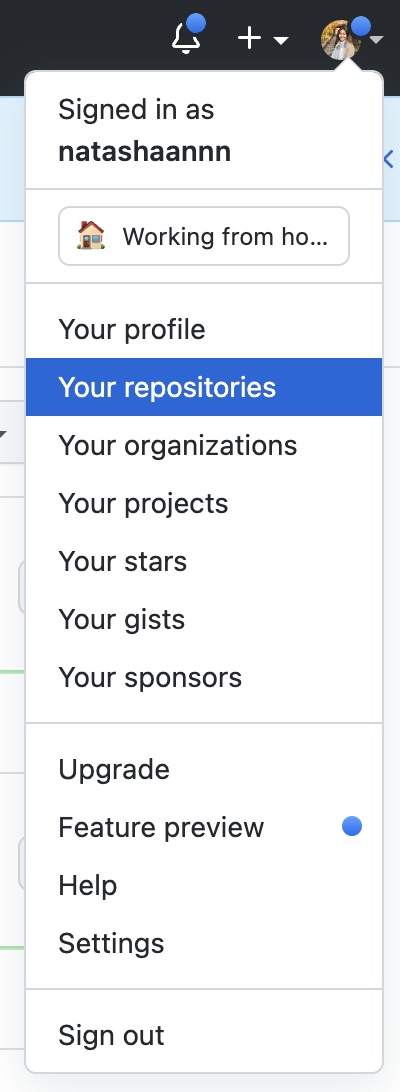
On GitHub.com, click your avatar on the top-right corner of your navigation bar. In the dropdown menu, select your repositories.
-
Navigate to your fork of the
raid-websiterepository.
-
You should now see a list of files attributed to the raid website repository.


-
At the top left hand corner of the repository, click the button labelled
developbranch to switch branches and tags.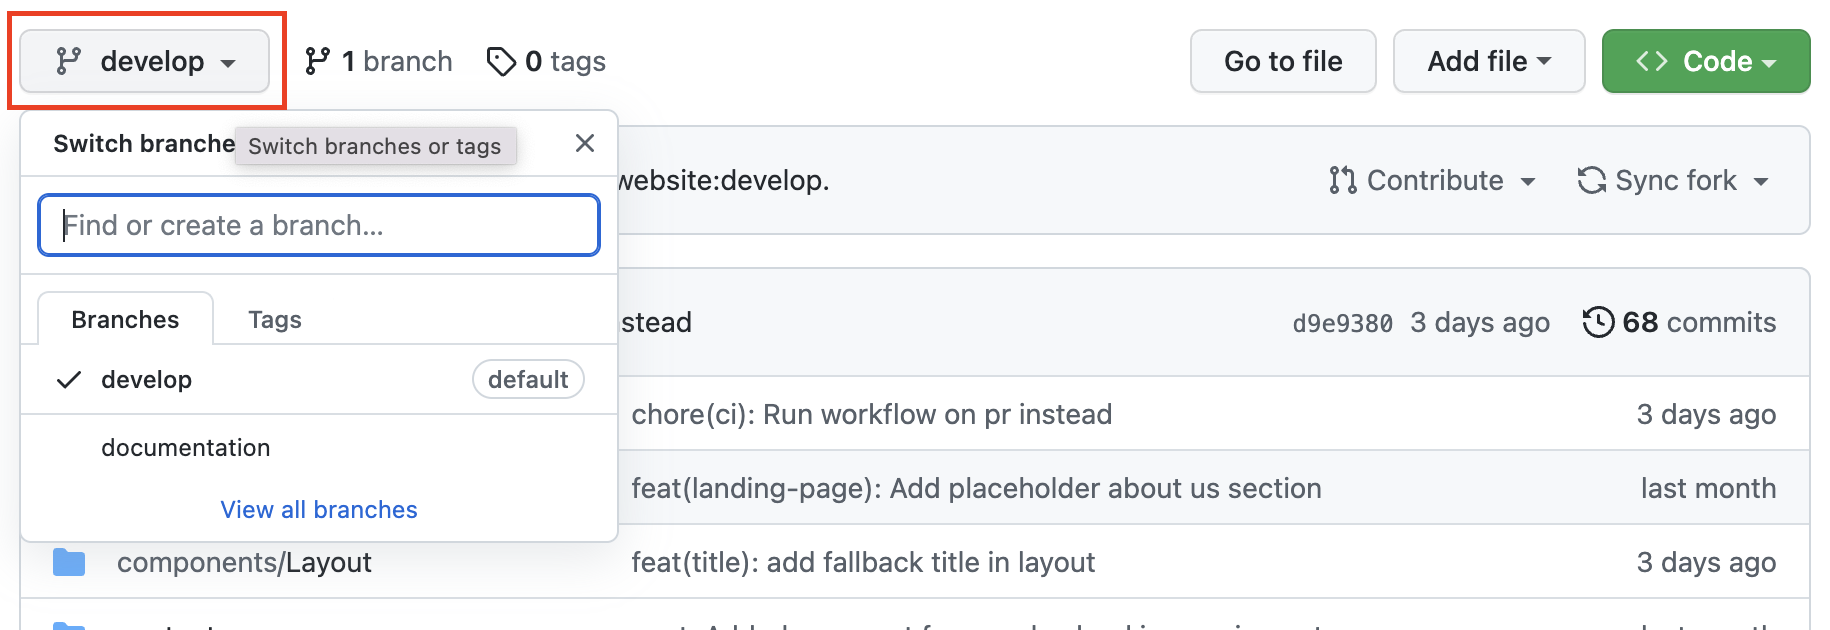
-
To create a new branch, type the name of the new branch in the input field with the default text Find or create a branch....


When naming branches, best practices often recommend prefixing the branch name with the general category of the change you are trying to implement. Categories that our repository uses includes the following:
| Category | Explanation |
|---|---|
| feat | New feature that adds on and expands on the production code |
| bug | Bug fixes |
| docs | Changes to the documentation |
| style | Formatting changes (i.e. missing semi-colons) that do not affect production code |
| refactor | Refactoring production code (i.e. changing a variable name) |
| test | Adding missing tasks or refactoring existing tests that do not affect production code |
| chore | Other tasks to be done that do not affect production code |
| blog | New content on the raid website blog page |
| event | New content on the raid website events page |
This is followed by a concise description of the change that uses hyphens as separators to increase readability.
| Branch Name Example | Explanation |
|---|---|
| docs/contributor-tutorial | Addition of tutorials on how to contribute to RAiD website in README.md file |
| feat/innofest | Addition of Innofest page |
| bug/images-not-loading-in-blog-post | Fixing of bug related to images not being loaded in blog posts |
| blog/contributing-as-a-content-editor | New blog post titled 'Contributing As a Content Editor' |
-
After naming your branch, click on
Create branch: <your-branch-name> from 'develop'to create your branch.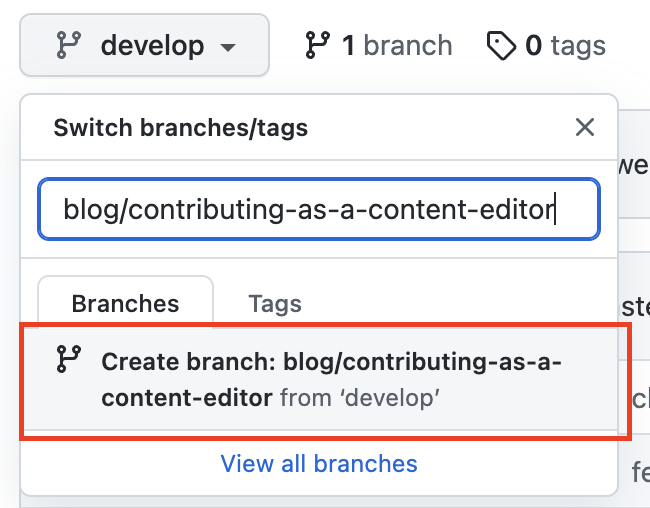
-
You should navigate to your newly created branch immediately after. Check that the branch button now indicates your new branch name to verify you are on your new branch. You can switch branches by clicking on this button and clicking on the destination branch you want to navigate to.


This portion takes reference from Github's article on creating new files.
-
In your new branch, navigate to the
contentdirectory among the list of files within the repository.
-
Depending on which content you want to edit, go to either the
postsoreventsdirectory. This example will follow the example of creating a new blog post.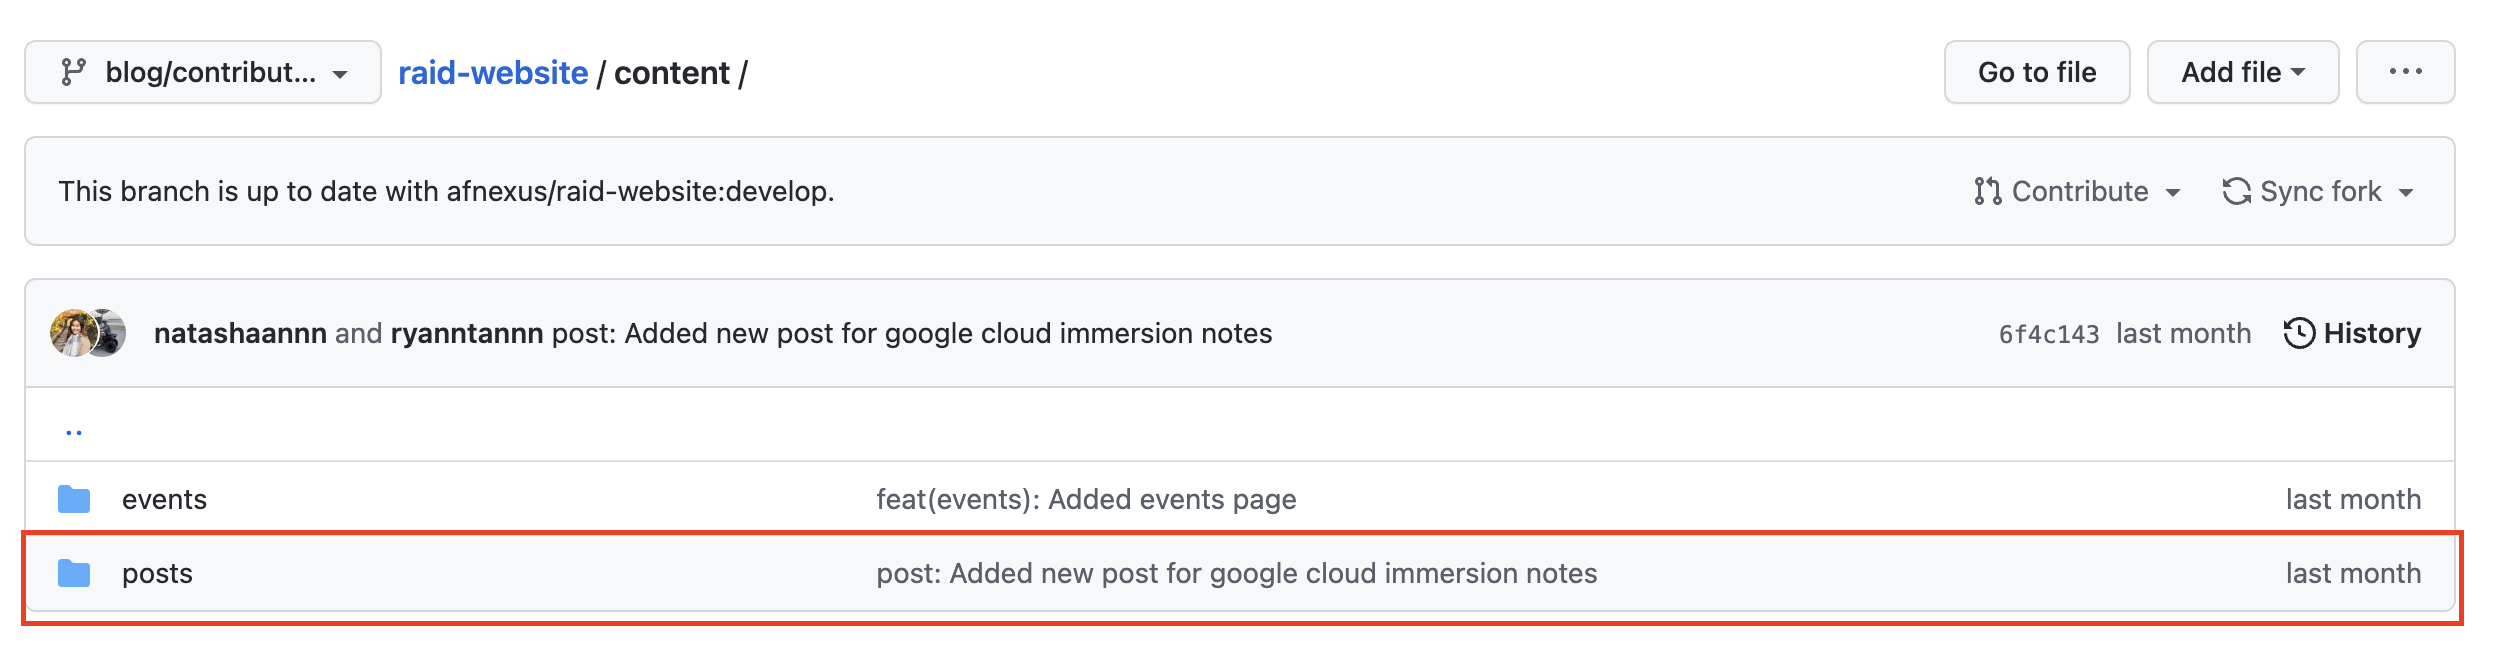
-
Each file in the
postsdirectory represents a blog post, except thetemplate.mdfile. Click on thetemplate.mdfile to open it.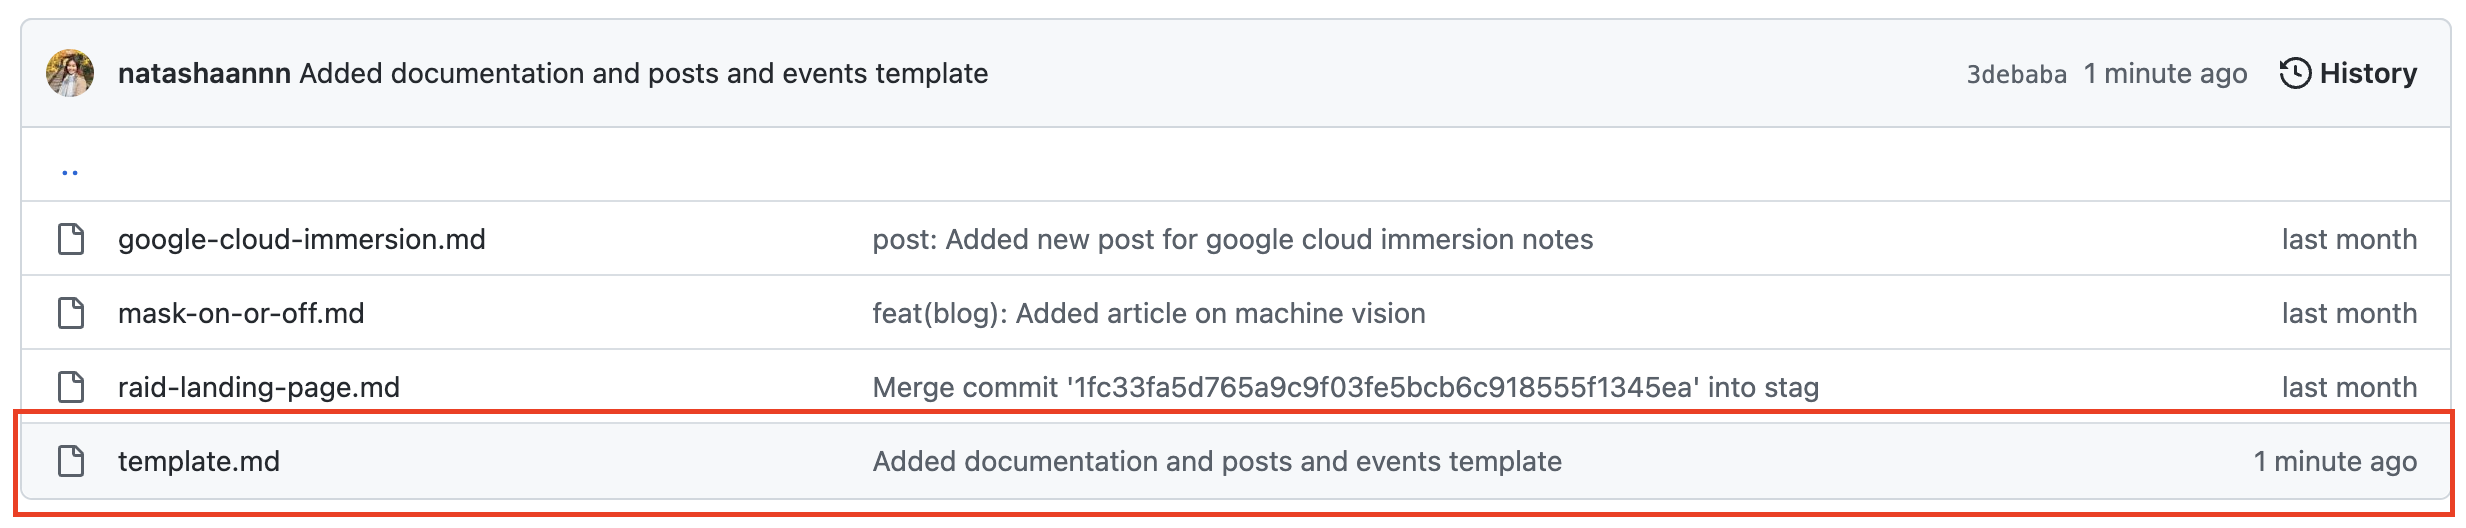
-
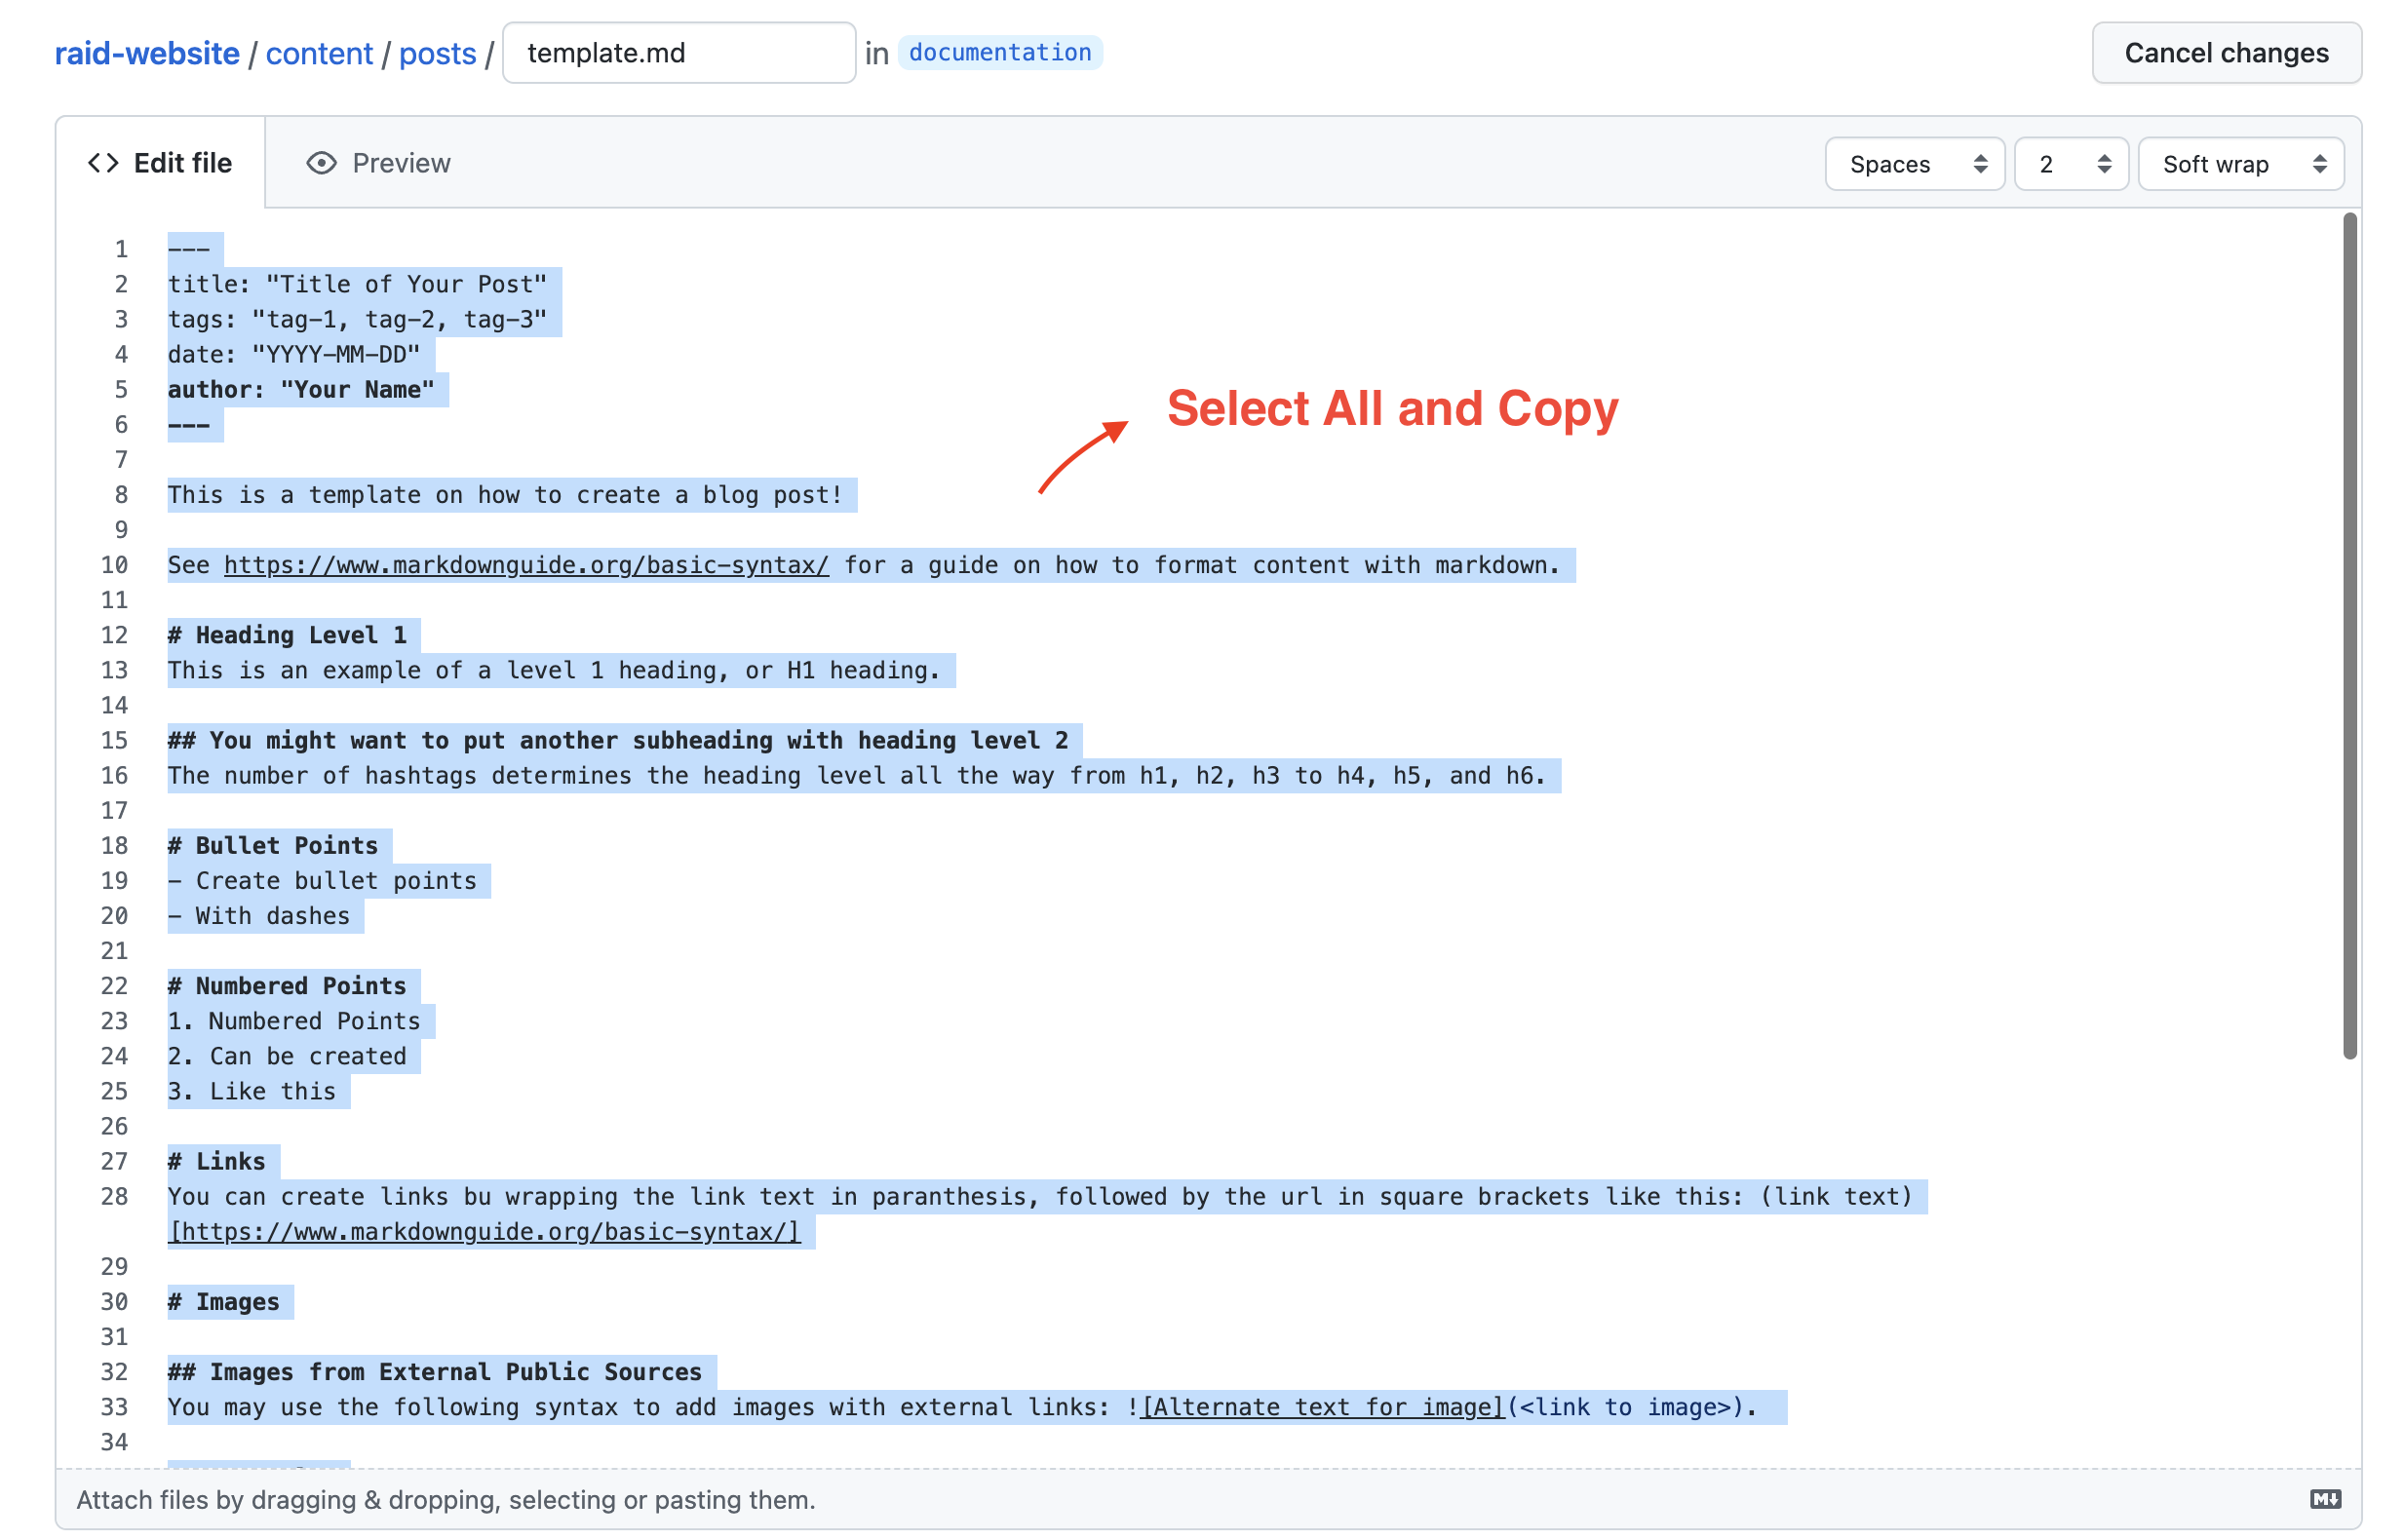
Once in the file, click on the edit pencil icon on the top right corner of the file.

-
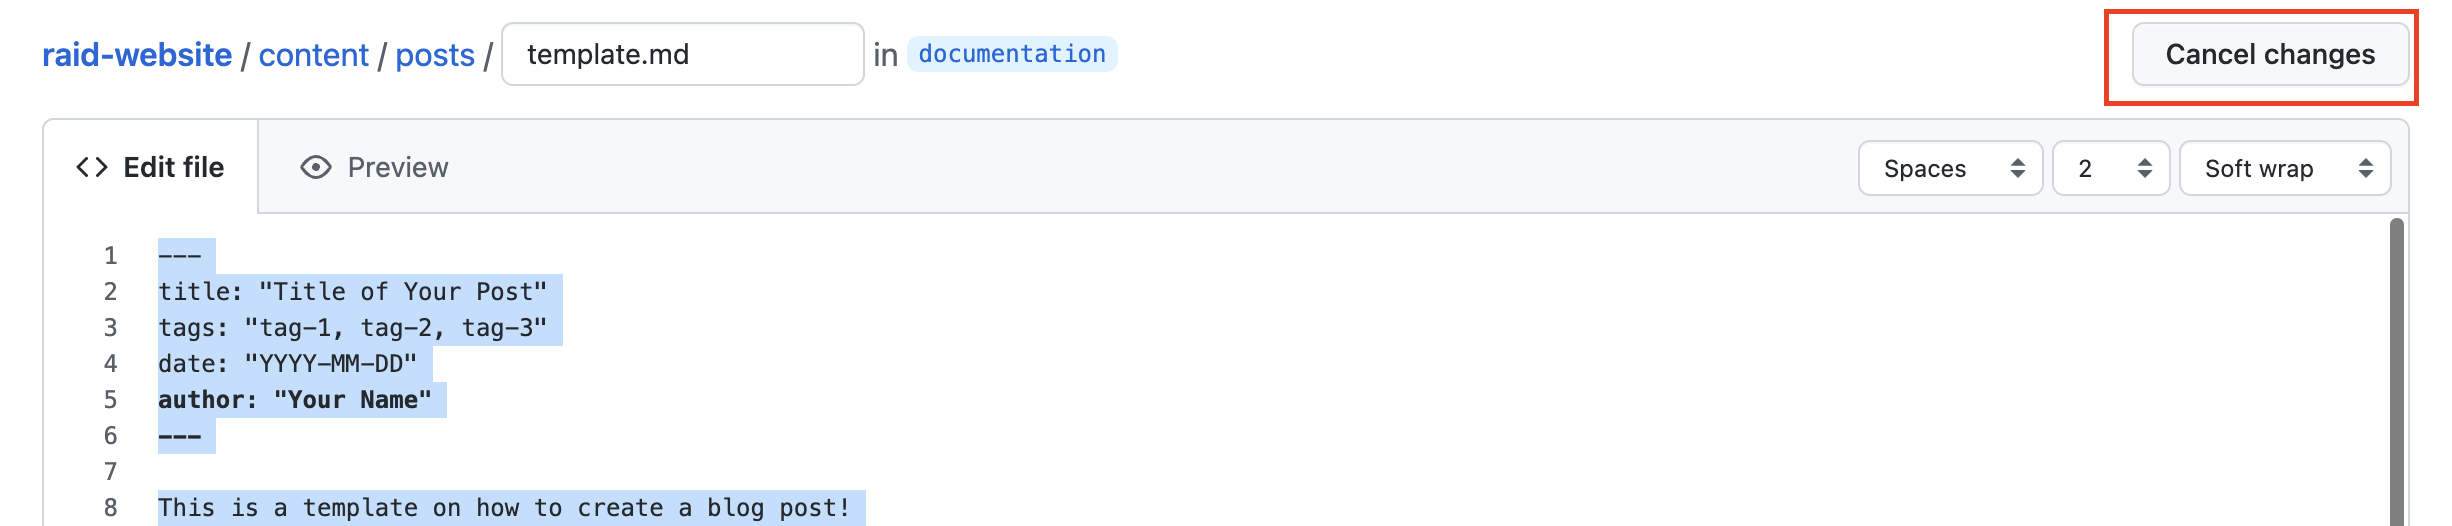
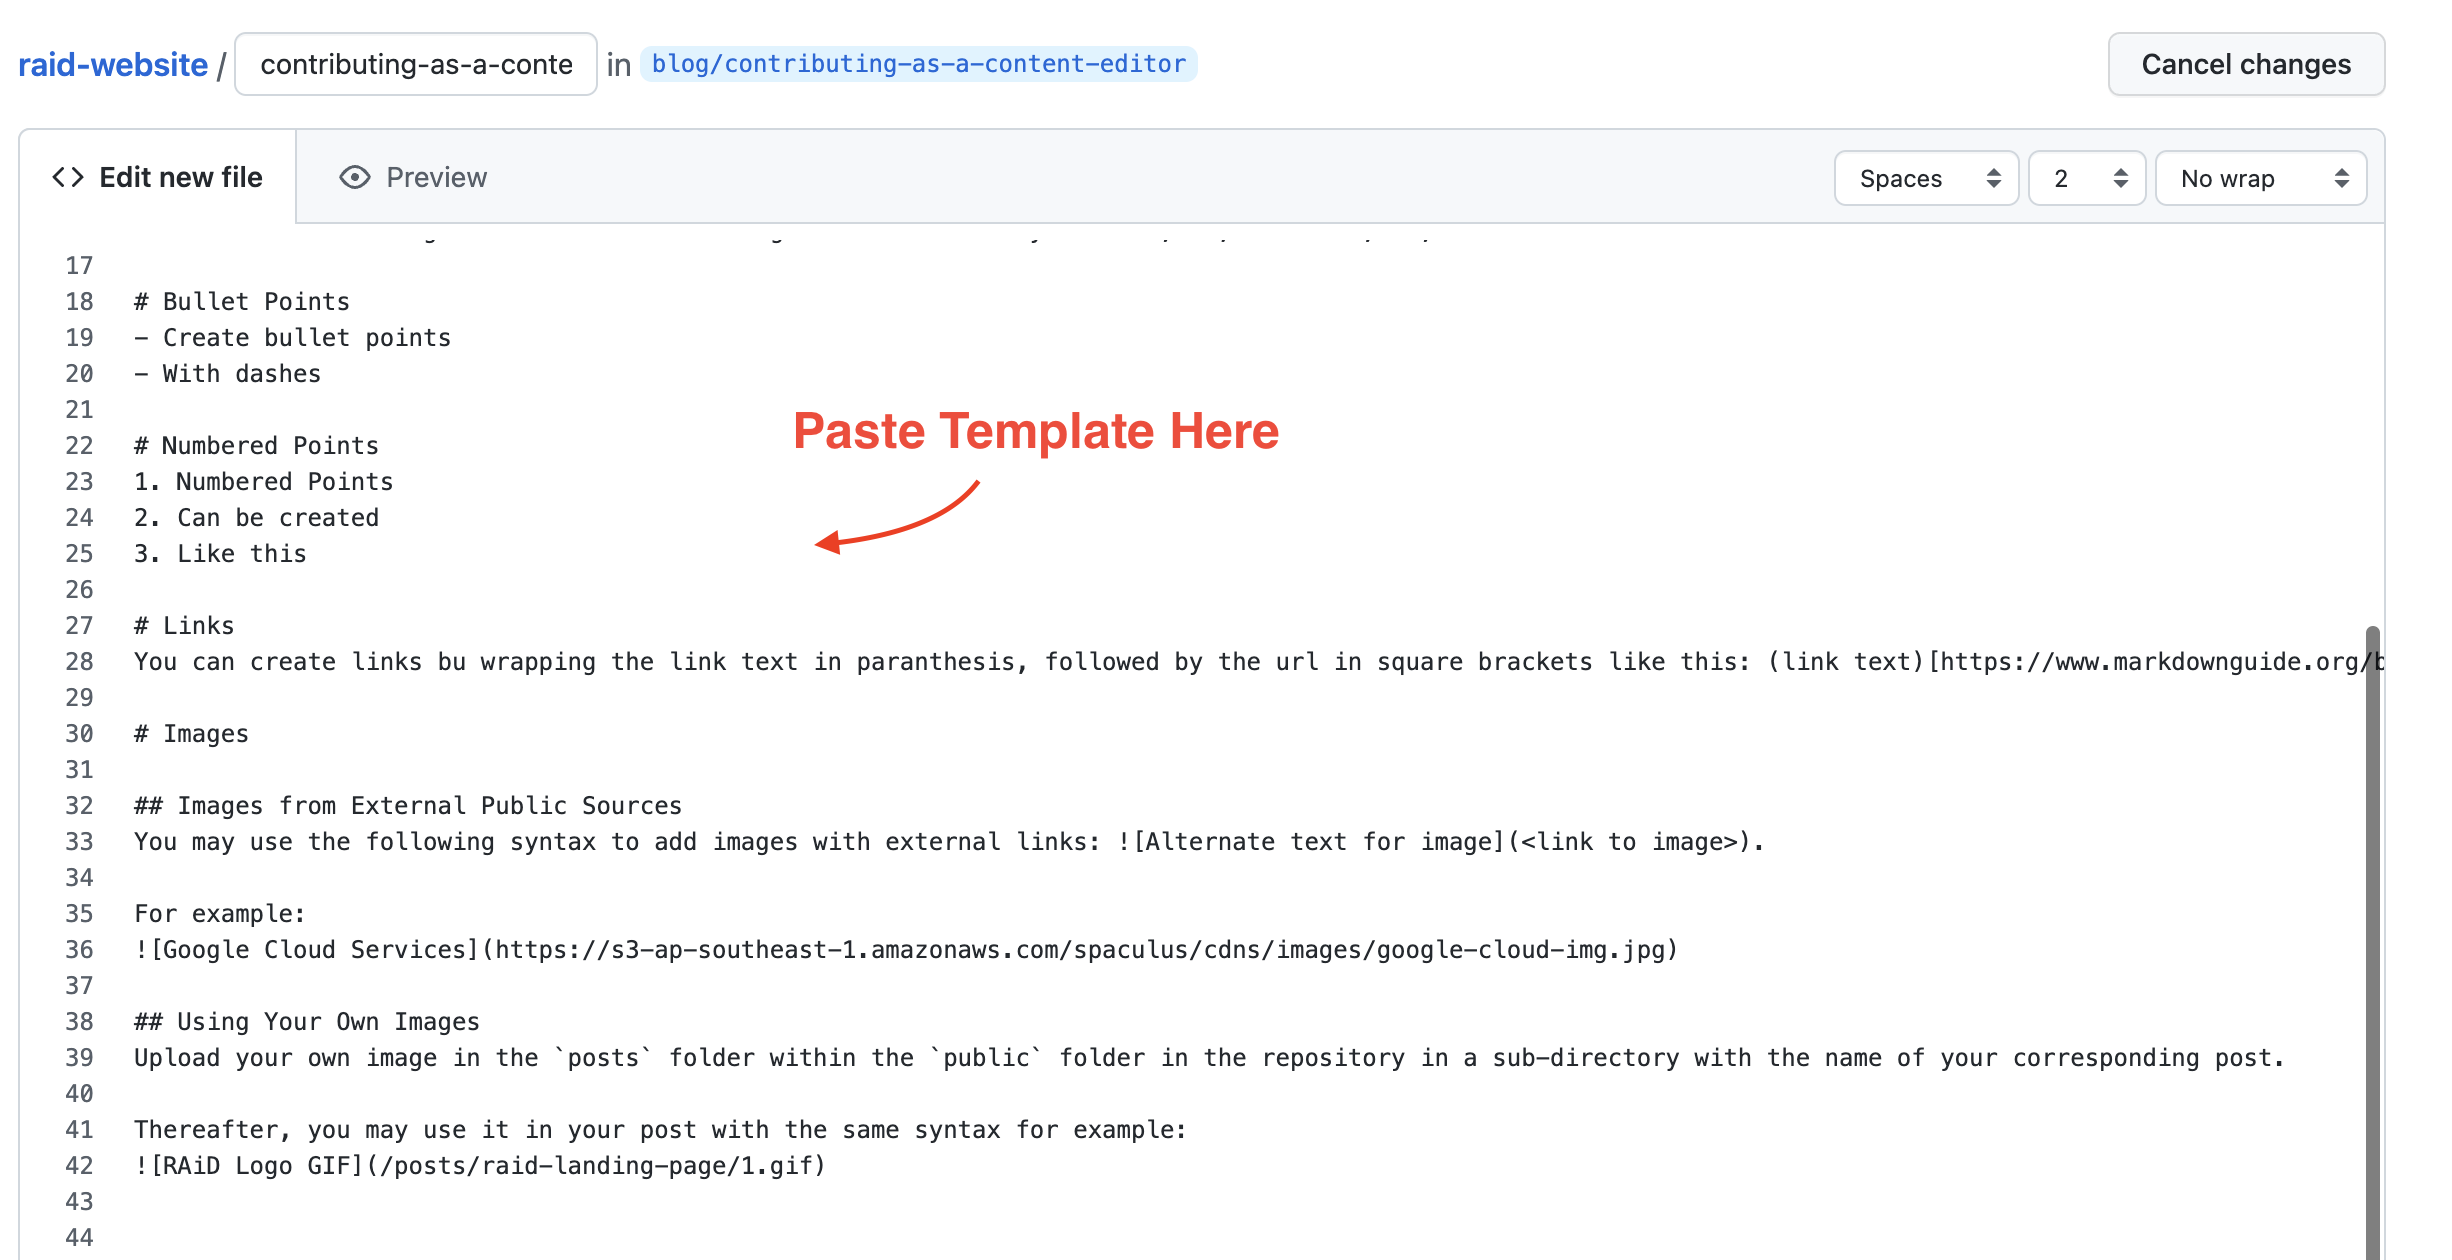
You should be brought to the raw markdown text in the template file. Select all the text and click copy. DO NOT CUT OR CHANGE THE TEXT IN THIS FILE.
-
Click Cancel Changes to exit the file.
-
Now navigate back to the
postsdirectory.
-
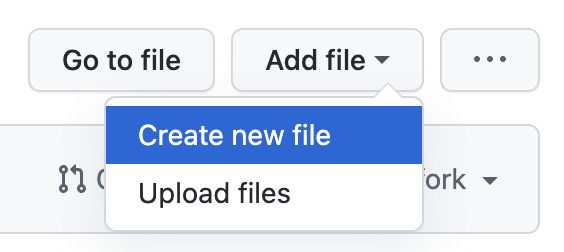
In the posts directory, click on the top right Add File button.

-
Click on Create A New File to create a new file for your blog post.
-
Name the new file after the title of your blog post in small case and using hyphens as separators and attaching the
.mdfile ending to the file. REMEMBER TO ADD THE.mdFILE ENDING
-
Paste the template that you copied in step 5 in the empty file space below Edit new file.
-
Begin filling out the post metadata in the template with details of your blog post within the
---markers.
-
You may now start writing your blog post content under the
---marker using markdown syntax, which is a specific formatting language. You may refer to this markdown syntax article to learn how to do so.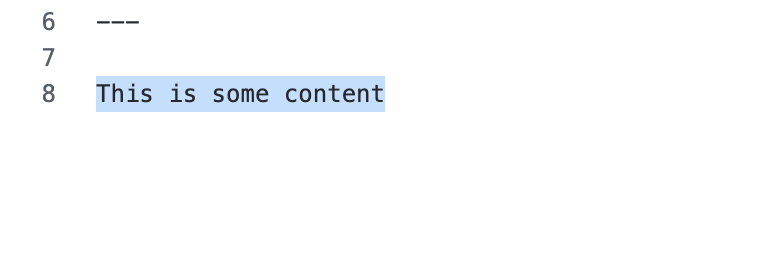
-
Click the Preview tab to view how your blog post will look like! The metadata table will not appear in the blog post once it is merged into the source code, while all content below the metadata table will be content that is rendered in the blog post.


Once you are done with the content, or when you want to save your changes to come back later to edit it further, you can commit your changes.
-
Scroll down to the bottom of the page to see the Commit New File dialogue. Start by providing a concise summary of the commit. Ideally, you want to prefix the commit message with the category, followed by a short summary of the changes you made, much like naming the branch. You can also add more detailed description in the box below.
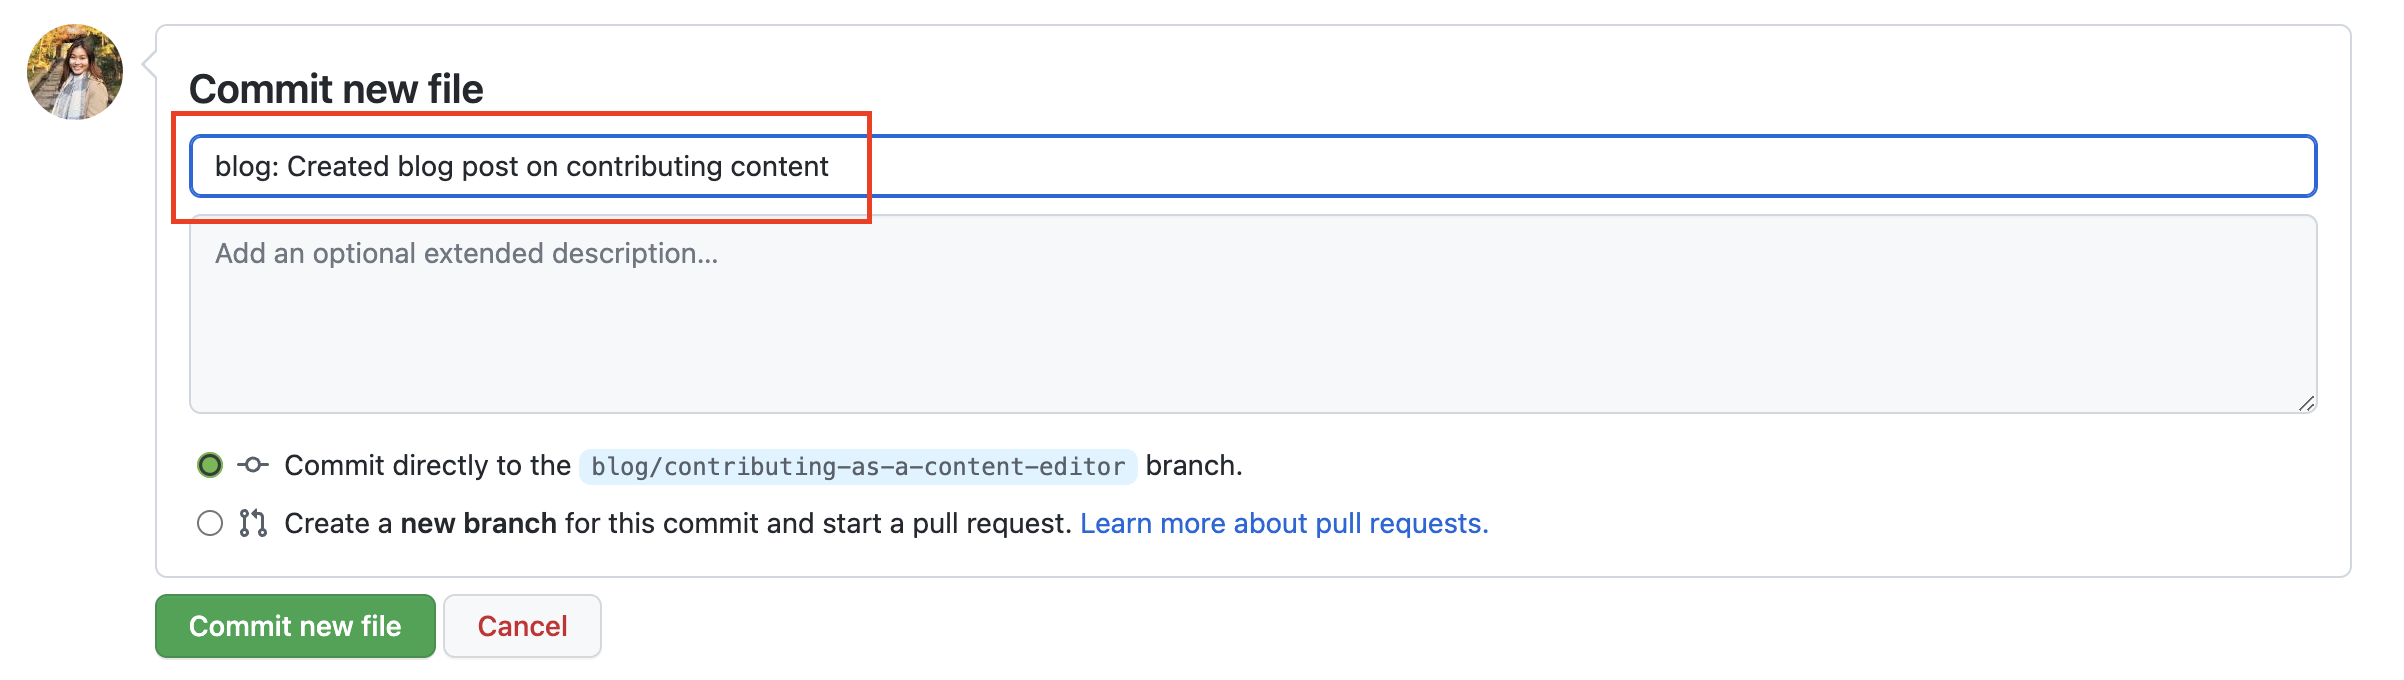
-
Click the green Commit new file button once you are done.


You can repeat this process as many times as you need as you continue editing the file!
Once you are done will all your changes and commits, it is time to create a pull request to merge it into the parent repository!
-
After a commit, you should be brought back to the root repository, where you will see a dialogue box in yellow prompting you to create a pull request. Click on the green Compare & pull request button.

-
You will be brought to a page to fill in details regarding your pull request, with a template to follow.
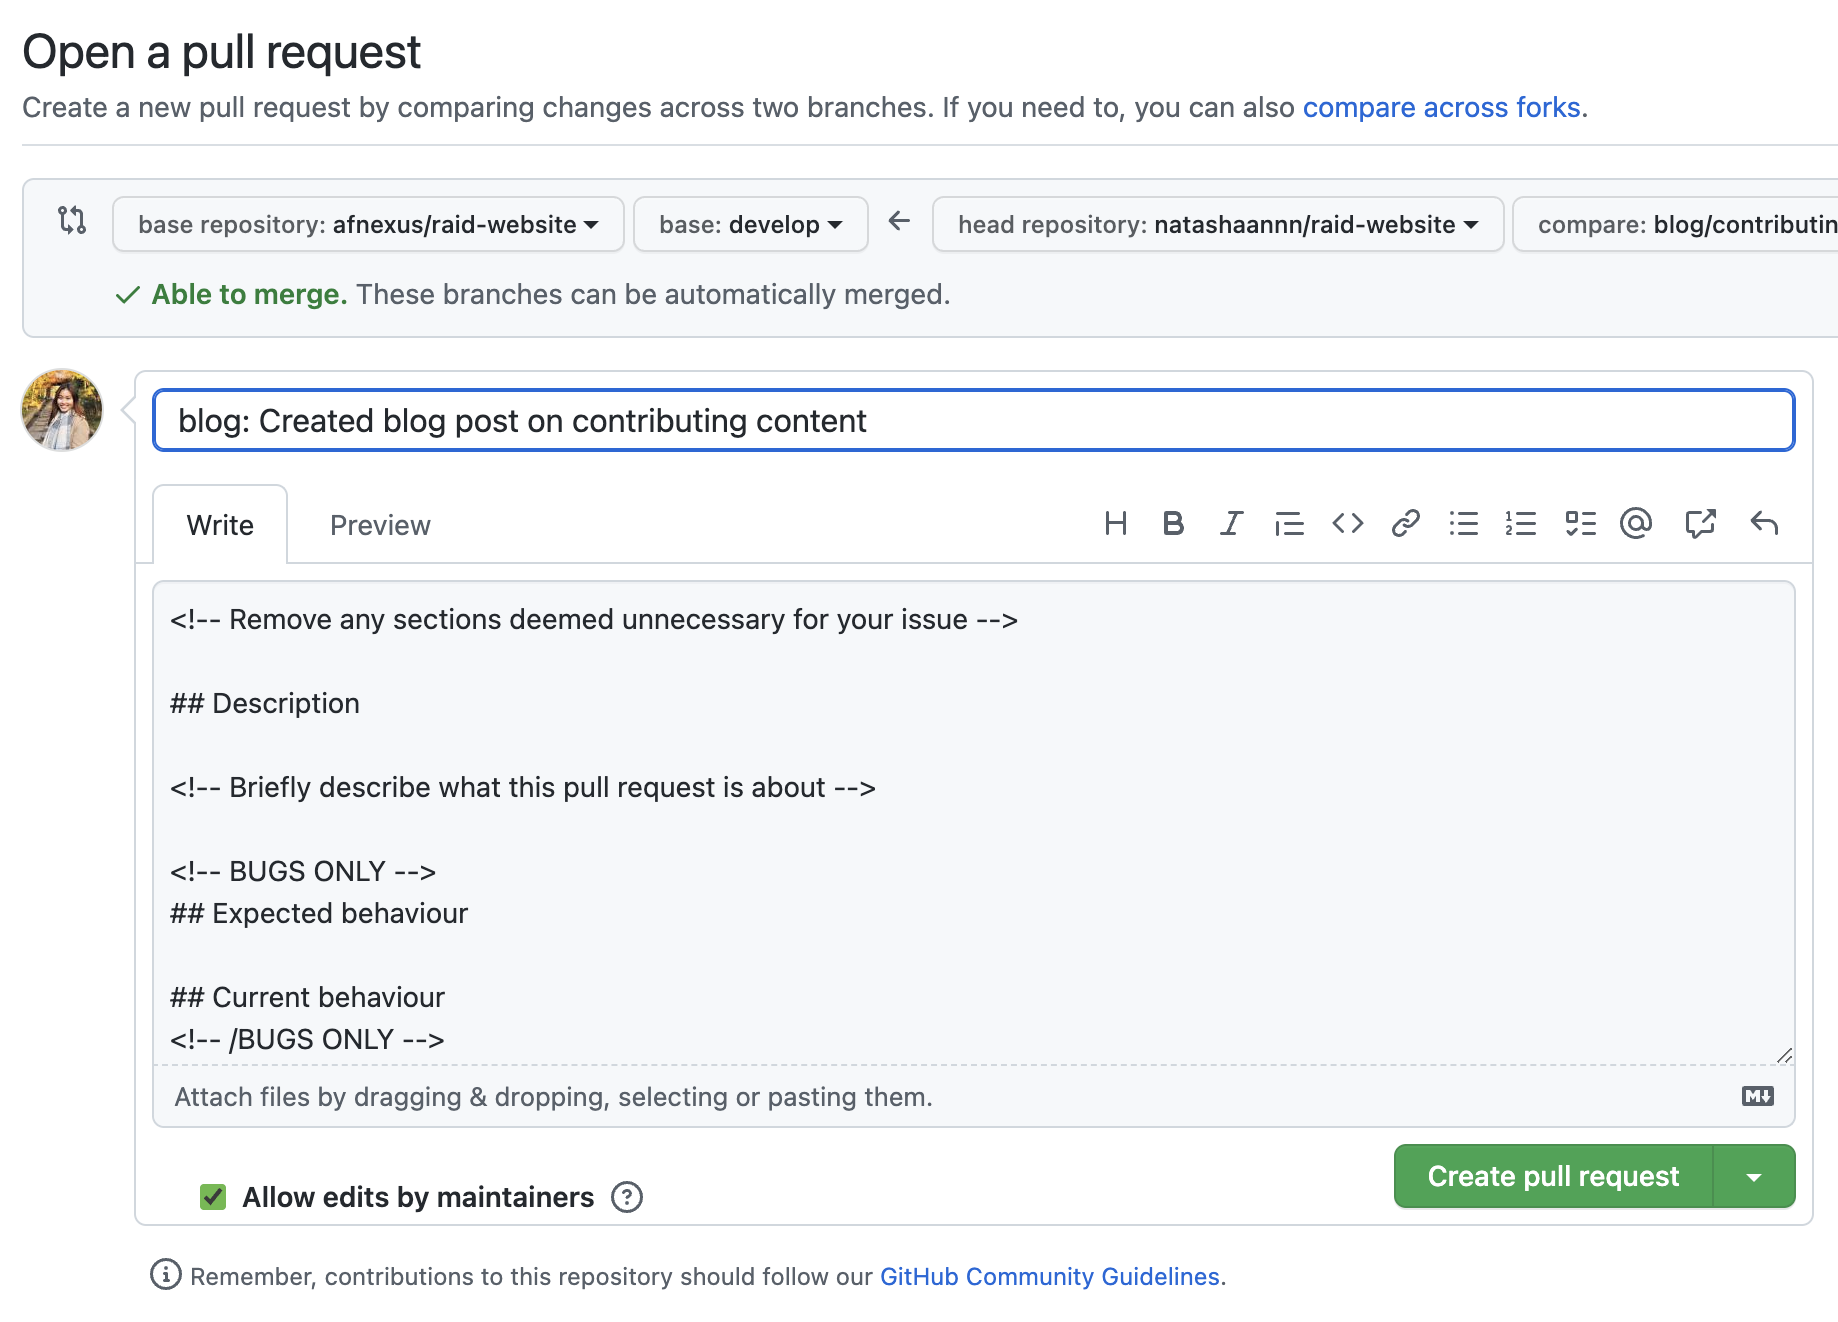
-
For simple content creation, you may go ahead to delete the unnecessary sections except Description. Here, you can write a description of the content you are adding.
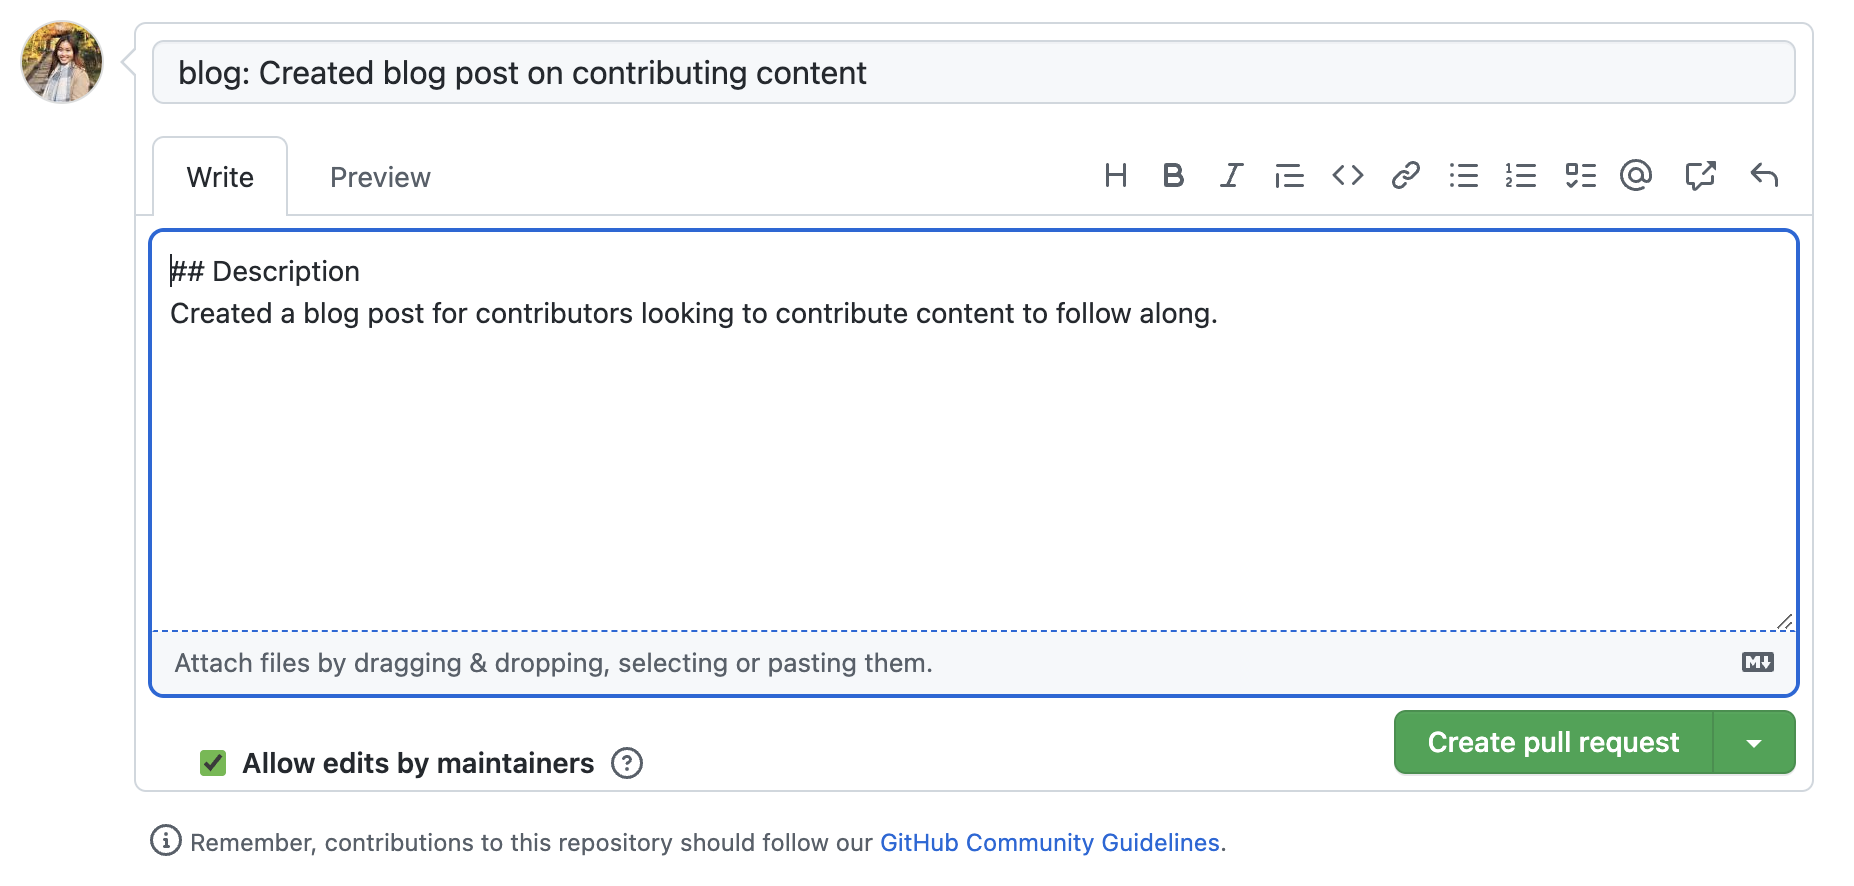
-
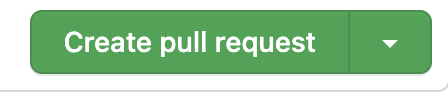
Once done, you can click on the green Create pull request button.


Congratulations, you just created your first pull request! Thereafter, the maintainers of the RAiD website will review your pull request and make sure everything is in the right order.
If there are no changes that need to be made, the maintainer will merge your code changes into the main source code, and your post will be live for everyone to see on the site.
If there are changes to be made, the maintainer will leave comments on your pull request for you to make additional edits.
## Contributing As a DeveloperThis tutorial covers the following additional steps to take for contributors that are looking to make feature changes or bug fixes:
Ensure you have completed the following steps in the tutorial for Contributing As a Content Editor:
- Above the list of files, click Code, then click Open with Github Desktop.


Pending
Pending
Pending
Distributed under the MIT License. See LICENSE.txt for more information.
Use this space to list resources you find helpful and would like to give credit to. I've included a few of my favorites to kick things off!