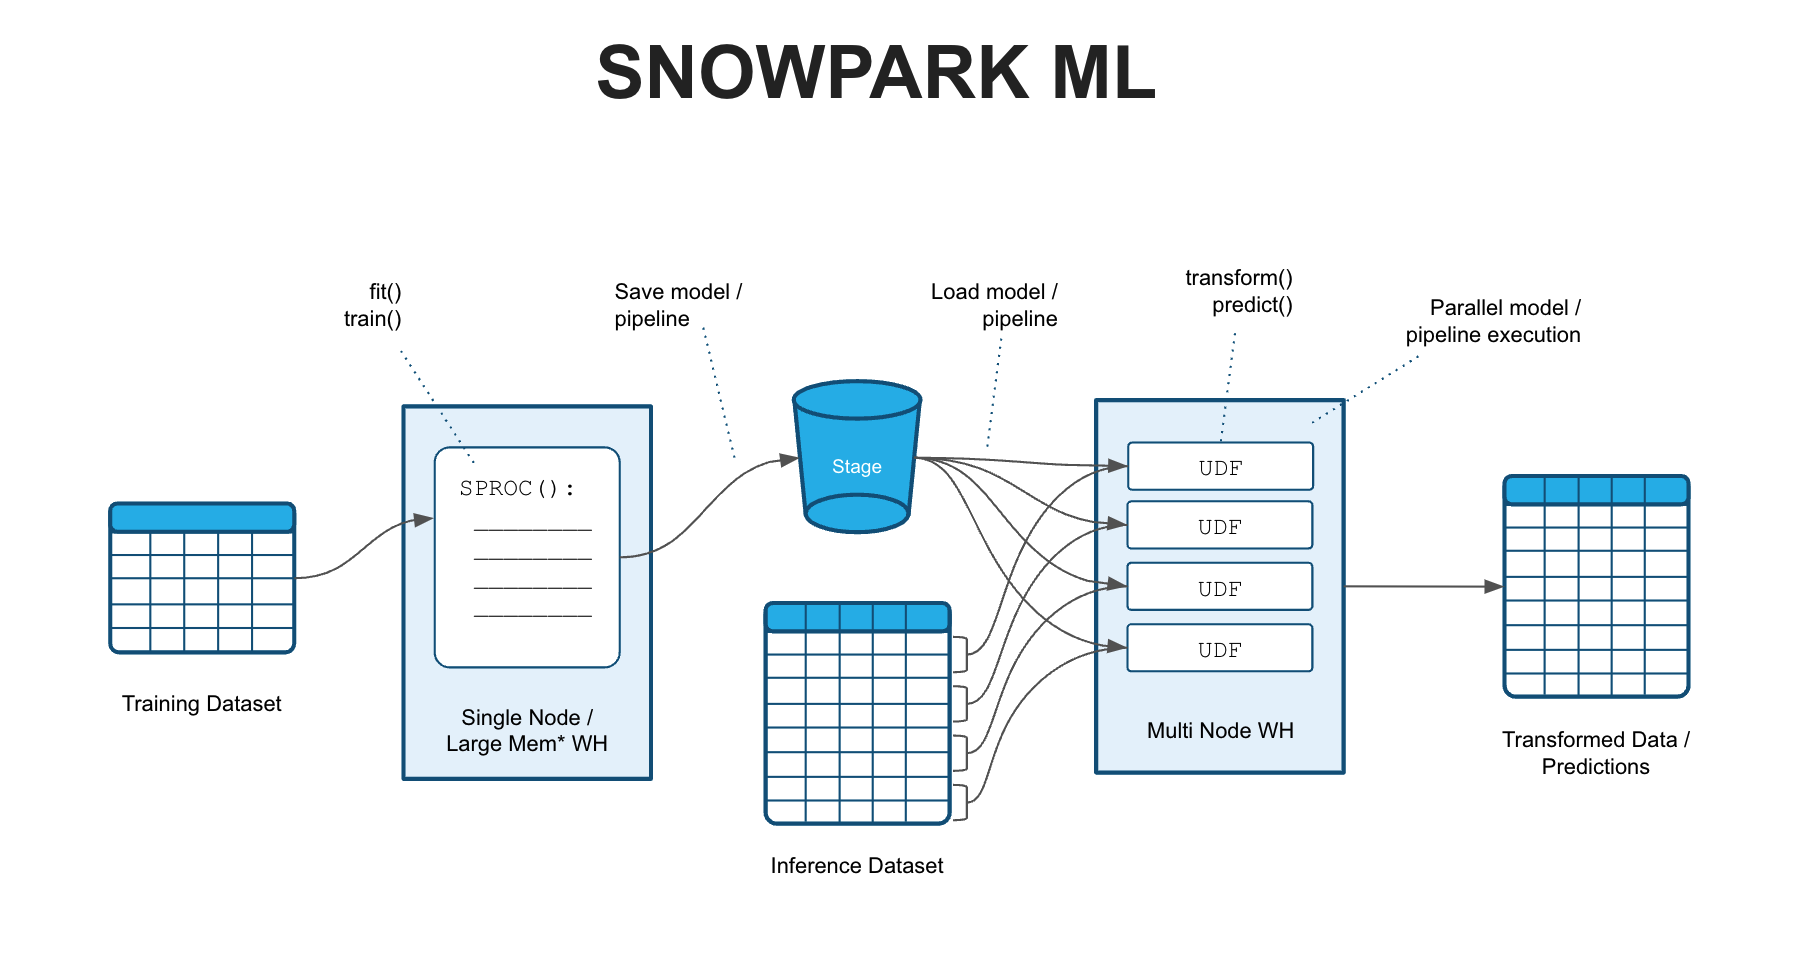
Uses Snowpark Python Stored Procs (SPROCs), User-Defined Functions (UDFs) and data frame operations for end-to-end Machine Learning in Snowflake.
In this notebook we fit/train a Scikit-Learn ML pipeline that includes common feature engineering tasks such as Imputations, Scaling and One-Hot Encoding. The pipeline also includes a RandomForestRegressor model that will predict median house values in California.
We will fit/train the pipeline using a Snowpark Python Stored Procedure (SPROC) and then save the pipeline to a Snowflake stage. This example concludes by showing how a saved model/pipeline can be loaded and run in a scalable fashion on a snowflake warehouse using Snowpark Python User-Defined Functions (UDFs).
1.1 Clone the repository and switch into the directory
1.2 Open environment.yml and paste in the following config:
name: snowpark_ml_test
channels:
  - snowflake
dependencies:
  - python=3.8
  - snowflake-snowpark-python
  - ipykernel
  - pyarrow
  - numpy
  - scikit-learn
  - pandas
  - joblib
  - cachetools
1.3 Create the conda environment
conda env create -f environment.yml
1.4 Activate the conda environment
conda activate snowpark_ml_test
1.5 Download and install VS Code
1.6 Create creds.json file with your Snowflake account and credentials in the following format:
{
   "account": "yoursnowflake-account",
   "user": "snowflake_user",
   "role": "snowflake_role",
   "password": "snowflake_role",
   "database": "snowpark_demo_db",
   "schema": "MEMBERSHIP_MODELING_DEMO",
   "warehouse": "snowpark_demo_wh"
}
Use your own database, schema, warehouse, and role or create the ones used above in your own environment.
1.7 Configure the conda environment in VS Code
In the terminal, run this command and note the path of the newly create conda environment
`conda env list`
Open the notebook named 01_prepare_environment.ipynb in VS Code and in the top right corner click Select Kernel
Paste in the path to the conda env you copied earlier
Run the rest of the cells in 01_prepare_environment.ipynb to generate a modeling dataset.
Open and run 02_snowpark_end_to_end_ml.ipynb notebook.
Perform all feature encoding and scaling using a scikit-learn pipeline. This will not make use of the distributed processing we get from UDFs or the preprocessing module, but simplifies our scoring pipeline.
Open and run 03_deploy_sklearn_pipeline_as_udf.ipynb notebook.

