An Eclipse MicroProfile based authentication implementation based on JWT, Keycloak, PostgresSQL and ReactJS
The keycloak/docker-compose-postgres.yml template creates a volume for PostgreSQL and starts Keycloak connected to a PostgreSQL instance.
Run the example with the following command:
`docker-compose -f ./keycloak/docker-compose-postgres.yml up`
Open http://localhost:8282/auth and login as user 'admin' with password 'admin'.
Note - If you run the example twice without removing the persisted volume there will be a warning 'user with username exists'. You can ignore this warning.
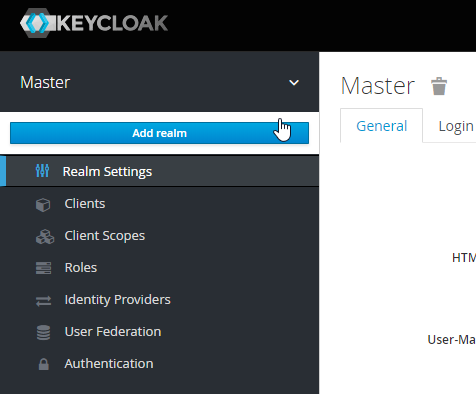
First, we have to set up a new realm, which is a logical container for managing users, credentials, roles, and groups which are then isolated from other realms. At default, only the Master realm exists and to add a new one, you have to create a new in the admin panel at the top left (while hovering over the drop-down indicator):
On the following page add the name shikanga-microprofile and make sure the realm is enabled. Next, go to the Keys tab within the Realm Settings and copy the public key of the rsa-generated key to an editor or clipboard.
We will need this key later on for verifying the JWT signature within our MicroProfile based backend micro-services.
To provide groups for the user, you have to first create some groups. Go to Manage -> Groups -> and click on New to add a group. Enter a group name e.g. ADMIN or USER and press Save. That’s all for adding a group.
As we won’t connect an Active Directory or LDAP, we have to set up at least one user manual. Go to Users (left-side menu) and click Add User. Enter a username and hit save. To add a password, go to the Credentials tab within the user and enter a password of your choice:
Within the user settings, you can switch to the tab Groups and select an available group and hit Join to add this user to the group.
Our frontend will, later on, manage the authentication with Keycloak. Therefore we have to make sure that Keycloak is aware of this application.
Therefore Keycloak offers the concept of a client, which is an entity that can request Keycloak to authenticate a user. A new client can be added in the Clients section (left-side menu) in the admin panel within our realm.
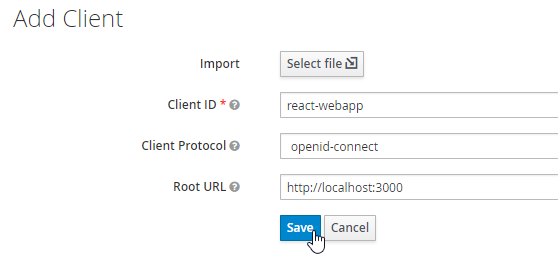
Click on Add Client and enter the client id shikanga-react-auth-webapp. Next, select openid-connect as the protocol and http://localhost:3000 as the root URL:
As Keycloak per default won’t add the users’ group information to the JWT, we have to configure this. Within the client settings for shikanga-react-auth-webapp, go to the tab Mappers and create a new one.
Select Group Membership as Mapper Type, enter group as Name and groups as Token Claim Name. Make sure to disable the Full group path switch. Otherwise we get a slash in front of the group name (e.g. /USER):
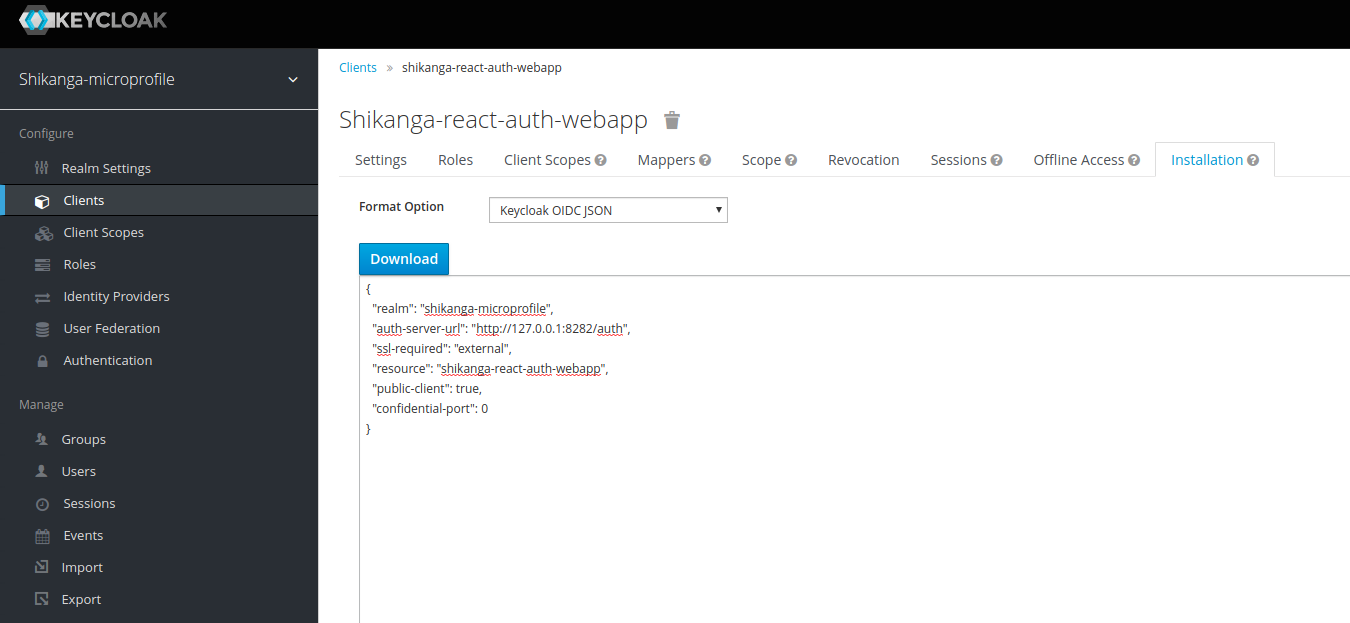
To configure the frontend for the Keycloak authentication we need the Keycloak OIDC JSON. We can obtain this at the tab Installation within our client.
That’s all for the Keycloak configuration. All your configured groups, roles and clients can be exported within the Export menu section.
Run the following commands:
npm --prefix ./frontend/ install

npm --prefix ./frontend/ start
Visit http://localhost:3000 and login with any of your created users
mvn -f ./backend-payara-micro/pom.xml clean package
This will create an executable jar file shikanga-microprofile-auth-keycloak-microbundle.jar within the target maven folder. This can be started by executing the following command
java -jar ./backend-payara-micro/target/shikanga-microprofile-auth-keycloak-microbundle.jar --port 8180
A Quarkus, SmallRye, JWT version of this can be found here:
https://github.com/sirAlexander/shikanga-microprofile-auth-keycloak/tree/quarkus-smallrye-jwt


