To setup AGL on a raspberrypi or any target system, first we need build an AGL image particular to that system/chip. For this we will use Yocto project to build the target AGL image.
- Setup an EC2 machine and build environment
- Download the software
- Build the image
- Copy the AGL image from EC2 instance to your local machine
- Format the SD card
- Copy the AGL image from your local instance to SD card.
- BootUp
- To create an AGL image, we need a linux instance. This instance will be used as a host system.
- Choose an instance that has more cpu power as it will help to create the AGL image faster.
- In my case, i chose g3.8xlarge ec2 instance with ubuntu as operating system. Once the instance is created, login to the instance.
- Use the below command to install the packages
sudo apt-get update
sudo apt-get install curl gawk wget git diffstat unzip texinfo gcc-multilib build-essential chrpath socat cpio python python3 python3-pip python3-pexpect python-dev xz-utils debianutils iputils-ping cpu-checker default-jre parted
- Setup the build environment
export AGL_TOP=$HOME/workspace_agl
mkdir -p $AGL_TOP
- Setup and Prepare Repo Tool
AGL uses **repo** tool for managing repos.

mkdir -p ~/bin
export PATH=~/bin:$PATH
curl https://storage.googleapis.com/git-repo-downloads/repo > ~/bin/repo
chmod a+x ~/bin/repo
- Download the latest AGL source code. Note that raspberrypi4 option is only in this latest version.
cd $AGL_TOP
repo init -u https://gerrit.automotivelinux.org/gerrit/AGL/AGL-repo
repo sync

tree -L 1
-
Here we will build the AGL demo platform for raspberry pi 4.
-
"-m" option sets the machine/architecture/board that we are going to use. In this case, it will be raspberrypi4
-
At the time of writing this, the available machines in the LATEST release are below.
Available machines:
   [meta-agl]
       bbe
       beaglebone
       cubox-i
       cyclone5
       dra7xx-evm
       dragonboard-410c
       dragonboard-820c
       ebisu
       h3-salvator-x
       h3ulcb
       h3ulcb-kf
       h3ulcb-nogfx
       hsdk
       imx6qdlsabreauto
       imx8mqevk
       imx8mqevk-viv
       intel-corei7-64
       m3-salvator-x
       m3ulcb
       m3ulcb-kf
       m3ulcb-nogfx
       nitrogen6x
       qemuarm
       qemuarm64
     * qemux86-64
       raspberrypi3
       raspberrypi4
- Build the image with feature: agl-all-features for machine: raspberrypi4
- This execution will take 45 mins to 1 hour to complete.
source meta-agl/scripts/aglsetup.sh -m raspberrypi4 agl-all-features

bitbake agl-demo-platform
- The image will be stored in the below path under $AGL_TOP directory.
cd build/tmp/deploy/images/raspberrypi4-64/
ls agl-demo-platform-raspberrypi4-64-20200820181620.rootfs.wic.xz
cp agl-demo-platform-raspberrypi4-64-20200820181620.rootfs.wic.xz/tmp/
- On your local machine/mac home directory
cd ~
scp -i ~/work/amazon/xxxxx.pem [email protected]:/tmp/agl-demo-platform-raspberrypi4-64-20200820181620.rootfs.wic.xz .
- Use USB drive reader to connect to your micro SD card to the mac/laptop.
- Open Disk Util app on your mac.

- Notedown the Device
- Click on Erase to delete all the previous contents from the SD card. MAKE SURE YOU SELECTED THE APPROPRIATE DRIVE
- Click on UnMount button as well. IN THE PICTURE, IT SHOWS - MOUNT, BUT YOU WILL SEE THE UNMOUNT BUTTON AFTER ERASING THE OLD CONTENT
- Use the dd command to copy the contents.
cd ~
xzcat agl-demo-platform-raspberrypi4-64-20200820181620.rootfs.wic.xz | sudo dd of=/dev/disk2 bs=4m
- Connect Mouse, Keyboard to the Raspberrypi 4
- Connect to the monitor using micro HDMI to HDMI cable.
- Powerup the Raspberry pi.
- You will see the picture on your monitor as below. By default the screen orientataion horizontally.
- To connect to shell, from the online research i found 2 ways
- 1st One is using the USB Serial Cable. - I did not try this.
- 2nd option which i tried is below.
* Connected an ethernet cable to raspberry pi.
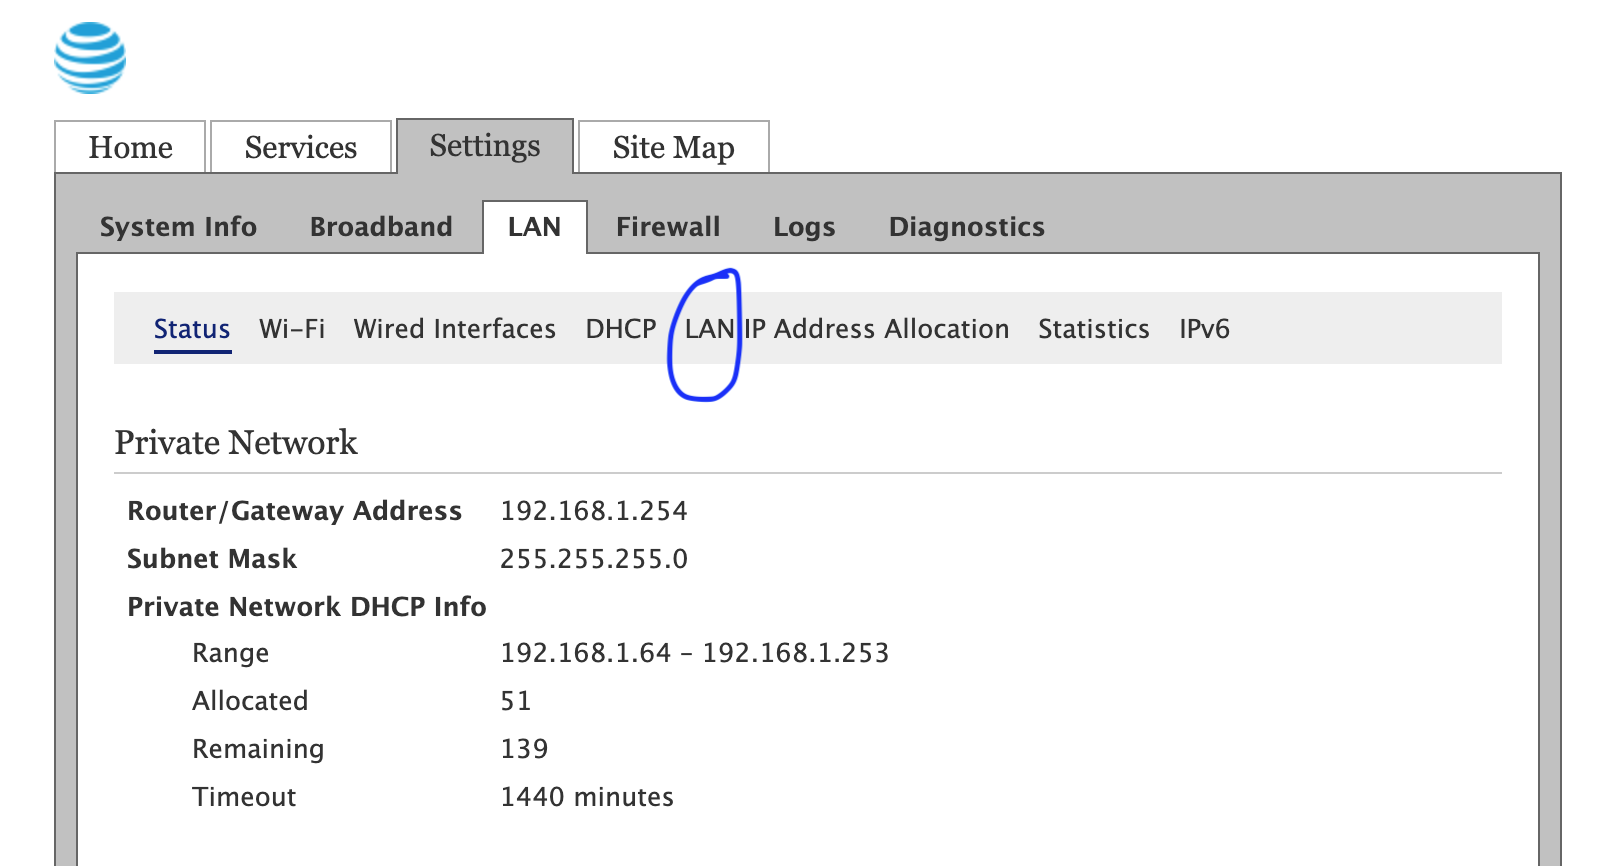
* And manually looked my router UI to find out the raspberry pi IP address. See the picture below.
* In my case, my internet provider is AT&T, and their default IP address to connect to router is:  **http://192.168.1.254/**
* Make sure you are disconnected from your VPN, if you have any.
* Once I login, i followed the below steps.
- In this page, you will see an entry for raspberrypi-4 and you can get the IP address. You can also see the associated name for that.
- Login ssh command is. No password is needed.
ssh root@<IP-Address>
- In my case, By default raspberry pi host is set to raspberrypi4-64. You can also try this machine to connect.
ssh root@raspberrypi4-64


